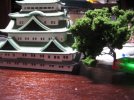
The adversaries face off....

Thank you all for the wonderful comments!!!

I should have the next video up tomorrow, not sure what it will be, still in the camera. But most likely it will be my work on the castle.

Norm, I haven't ever used Mr. Surfacer that way, and I don't know if I want to with this build. The surface is pretty detailed and some of those details are quite small. So this is something I will have to think about. Besides I don't have any lacquer thinner at the moment.

I might be able to give it that gritty look with some creative painting anyway. We will see. I have to get paint for him tomorrow, I bought three different shades of green. Doing research, the suit from the first set of films was charcoal grey, not green.

Here is a preview of the castle......
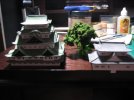
20110521_1.jpg20110521_2.jpg

Sorry for the fuzzy photos. ::)
 
I enjoy watching these builds unfold! In fact, I regularly keep your videos playing so that I can hear the narration while I model. Your interest in these is really shown when you narrate in your videos, and makes everything exciting, and not to mention, informative too! You sir, get two thumbs up, five stars, and a pat on the back, truly an inspiration!

I'll have to try some of this Aves in the soon to come future!

Keep it up, can't wait to see the video update on the castle! ;)
 
G, those castles look awesome! I'm likin' that patina look to the roof. Great stuff. Can't wait for the vid!! ;D
 
Looking great. Seeing the castles with the tree there is awesome- gonna be one sweet dio.
 
You can try to locate some Rattle Cans... Mr. Surfacer 500 is textured like a fine sand paper...
Manual texturing is sometimes even Worse if you Stipple it! Depends what look you are after...

Mr. Surfacer is also available in the 1000 range. And even higher....

But my personal experience is mr. Surfacer 500 and 1000 in Rattle Can, Available in Light gray or white

I also found the Tamiya surface primer to be similar to Mr. Surfacer 1000.....

Not trying to force you! No pressure involved here!


The castles look pretty cool!

Keep working at it!
 
I've stippled on MrS500, before, and it gives you a nice texture that you can even sand down to the smoothness that you want if it looks to rough.

OK, John, you've convinced me to buy some Aves. I've been using MrWhitePutty. It's fairly good but the Aves looks a lot easier to work with. With the WhitePutty, i have to use a little lacquer thinner to smooth it on, but using the Aves with a little water looks like a better alternative.
 
this build is so epic! im glad you're enjoying the aves so much. You would think SMA would be sponsored by Aves by now as much as we talk about it on this forum. Cant wait to see some paint on GOJIIIRRRAAAA!!!
 
First thing I want to say is that I am not trying to sell this Aves stuff. I just find it by far better to work with than my old method of doing putty. Here is why:
  • Water is the thinner, no bad fumes
  • Two hour curing time, which is plenty of time to work with it
  • I can precisely control how much of it I apply to a seam. I could never do that with regular putty
  • It cures just as hard as the plastic around it
  • It doesn't shrink
  • And little to no sanding afterwards.


All of the above make seam work much better, and faster.

Fruit, Mr. Natural, and ScaleModelDisciple: I am really not trying to sell this stuff, promise! I don't get a commission at all, but that video does speak for itself. It is just far to easy to use for seam filling.

Fruit: Thank you for the very kind words, I am glad that you like the videos!

TRM: I am glad you like the roof. I need to get better photos of it, the light washes it out a bit. Video will be up soon

schweinhund227 said:
But my personal experience is mr. Surfacer 500 and 1000 in Rattle Can, Available in Light gray or white

I also found the Tamiya surface primer to be similar to Mr. Surfacer 1000.....

Not trying to force you! No pressure involved here!

I tried to find some Mr. Surfacer in a rattle can today. My local hobby shop can no longer get it. They can get Mr. Surfacer in a jar, but I already have some of that.

I plan on using Tamiya surface primer on the Big G. Hopefully I can get that done tomorrow. I used it on the castle, and it went on pretty well.


Scott, Solander,Eastrock, Quaralane, and Panzerace007: Thank you!

As promised, here is the first part of the basic paint job:

Nagoya Castle part 2: Basic paint....

And the second part:

Nagoya Castle part 3: Basic paint part 2

And for fun, here is a short vid about the Big G:

Bambi vs Godzilla
 
Whoa, i'm busy for little while and your building the Nagoya Castle. :D

This dio's coming along at a nice speed and your doing some nifty work,seams,trees and castle are looking the business.
 
Like I said John (after watching your vid) Great job on that roof!!! Still laughing at the Bambi and G movie!! LOL!! ;D Thanks for sharing bud!!!! 8)
 
Wow wow wow, awesome stuff! Man I can't wait until all the elements begin to come together.

8)
 
:D

You are a very patient man!

All those little rocks, and Windows to boot! LOL

Nice job on the roof!

What is your game plan for painting Gozila?

Later.


Write your reply...

Latest posts

Back
Top