
You are using an out of date browser. It may not display this or other websites correctly.
You should upgrade or use an alternative browser.
You should upgrade or use an alternative browser.
Tamiya 1/48 F-4B (#121)
- Thread starter Edbert
- Start date


Edbert
Well-Known Member
- Joined
- May 16, 2024
- Messages
- 3,159
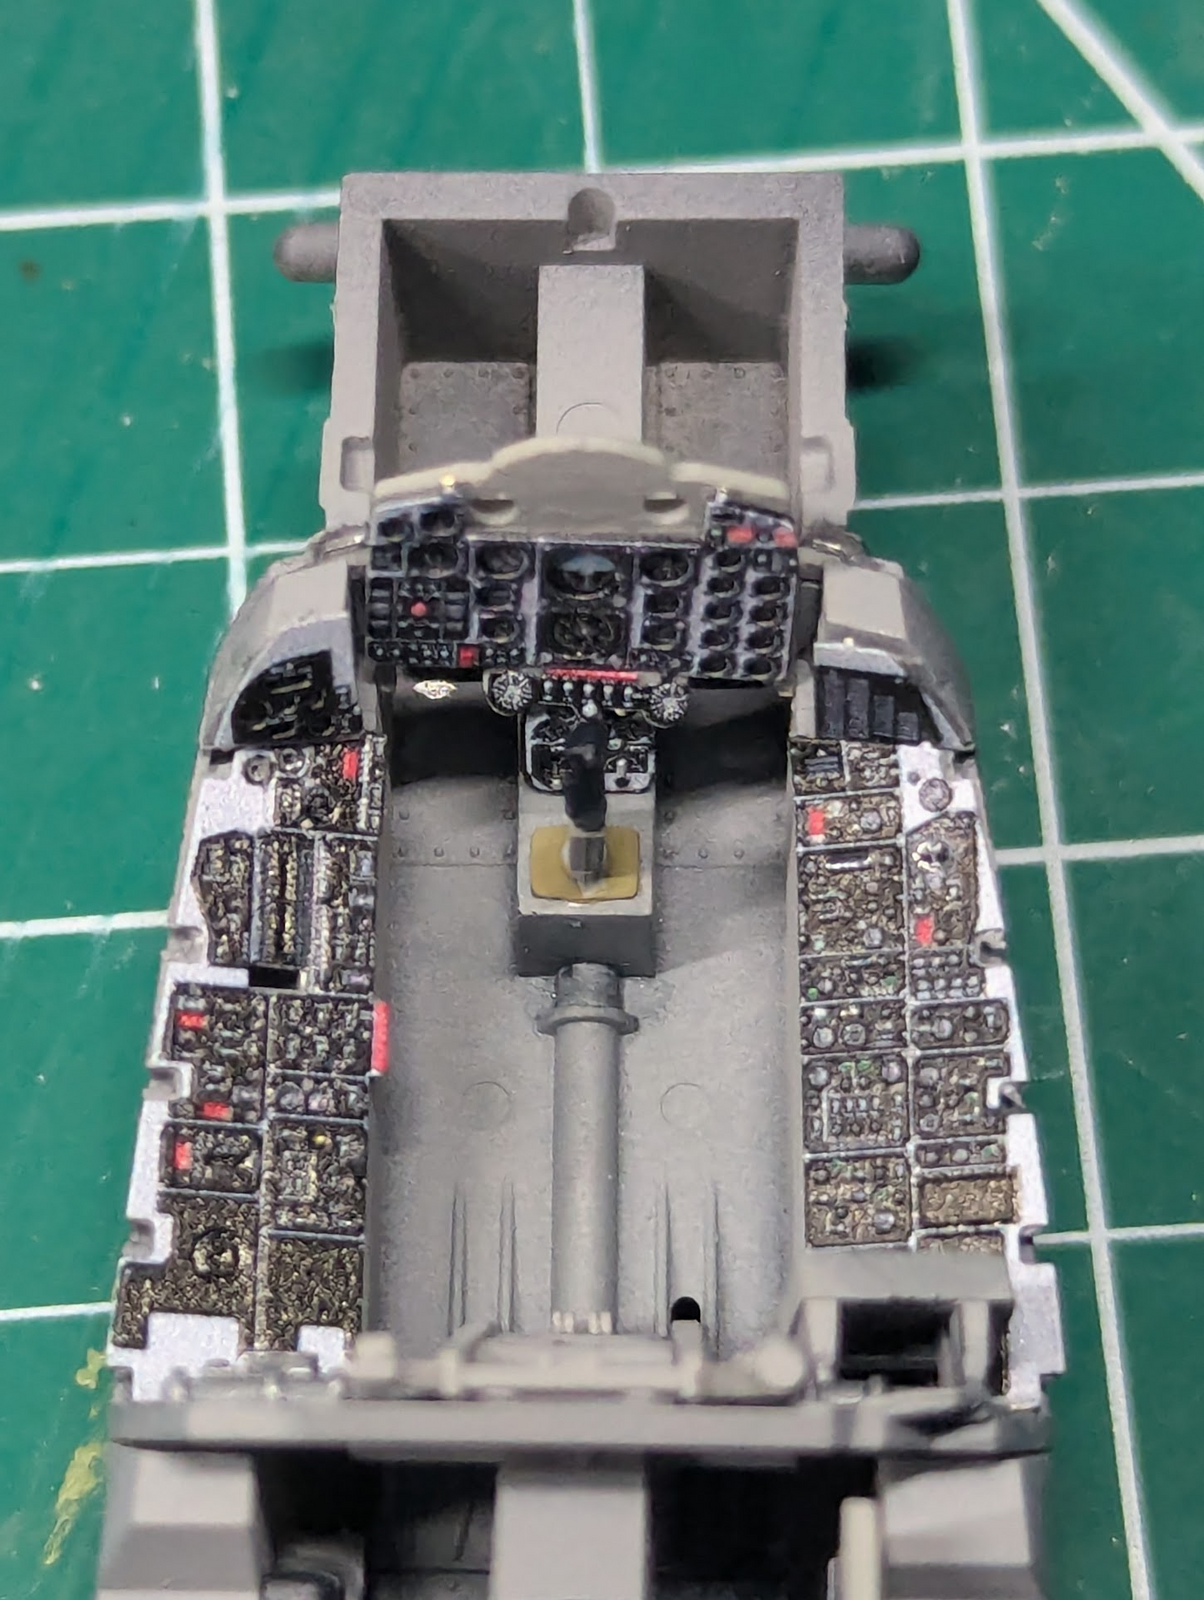
I think I'll dip my brush in some of the darker paint, that Tamiya said to use, and touch up the lighter grey areas that Eduard says are correct. The rear seat dude (REO?) will have to live with the mismatch. I doubt much of this will be visible when finished anyway.

BlackSheepTwoOneFour
Well-Known Member
- Joined
- Jun 9, 2013
- Messages
- 1,026
Or google the real cockpit for reference….
Edbert
Well-Known Member
- Joined
- May 16, 2024
- Messages
- 3,159
OK Einstein, which of these is the "correct" gray?Or google the real cockpit for reference….
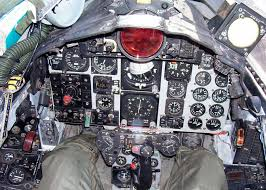
This photo indicates Eduard's PE is closer to correct.
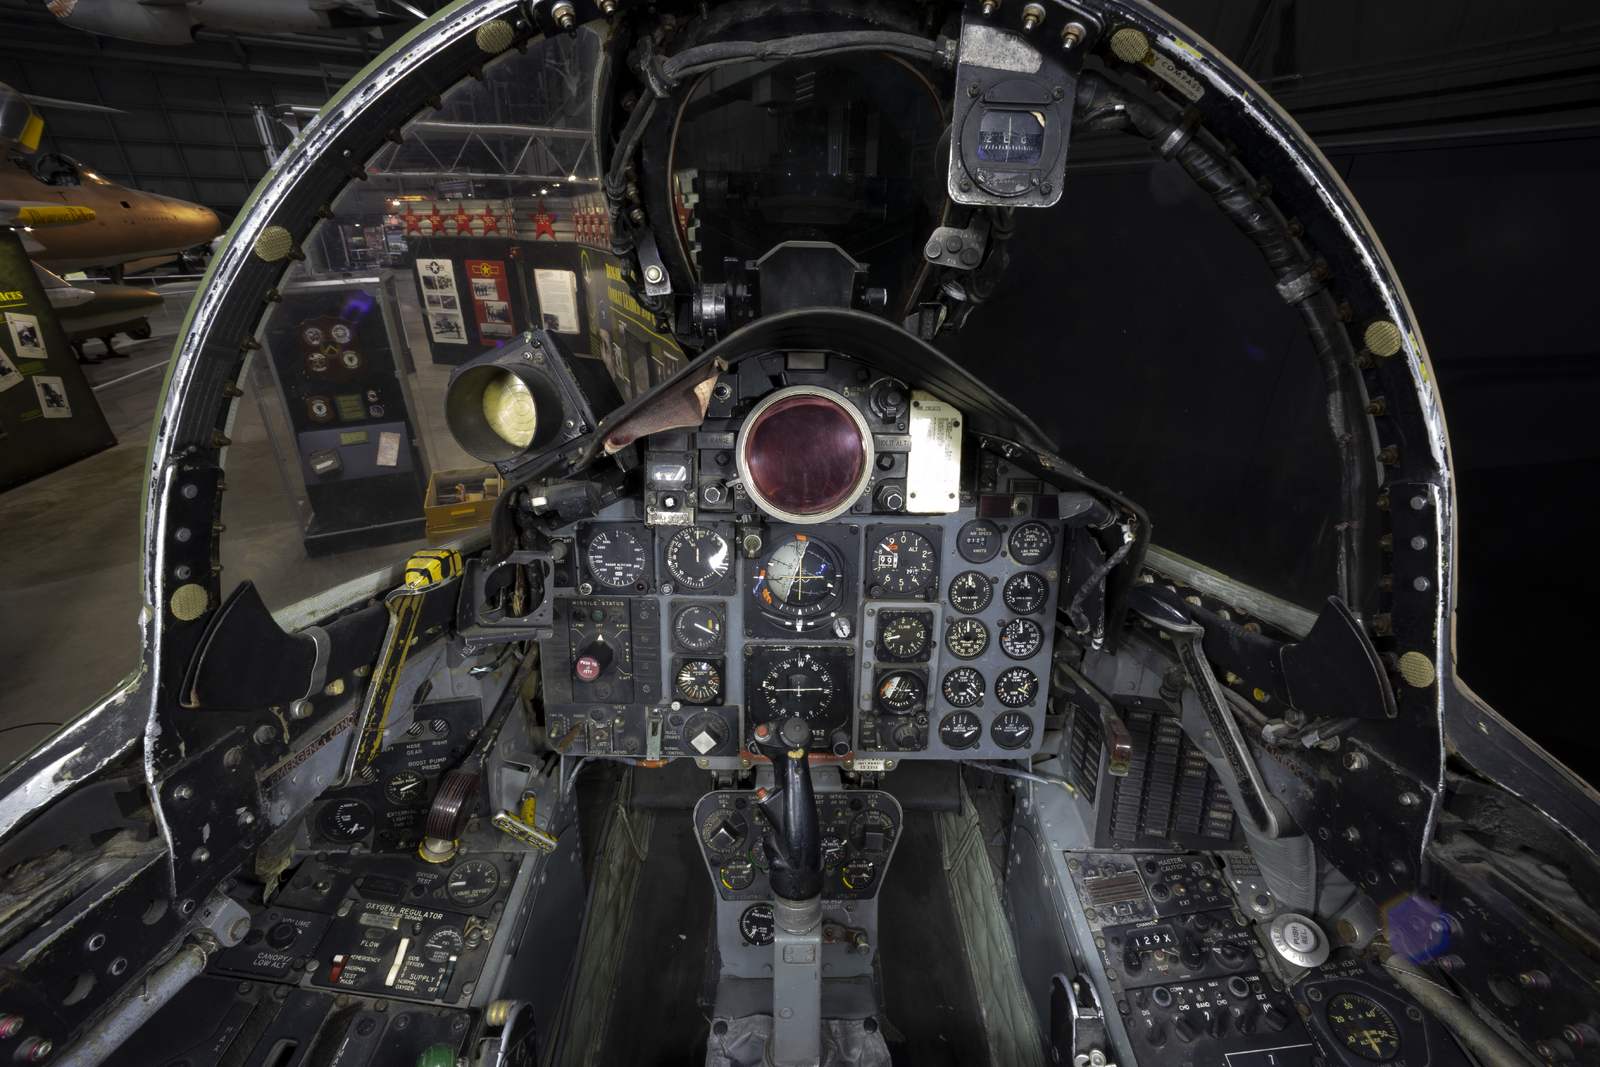
This one suggests Tamiya's code (XF-19) is more accurate.
Last edited:

BlackSheepTwoOneFour
Well-Known Member
- Joined
- Jun 9, 2013
- Messages
- 1,026
OK Einstein, which of these is the "correct" gray?
View attachment 121971
This photo indicates Eduard's PE is closer to correct.
View attachment 121972
This one suggests Tamiya's code (XF-19) is more accurate.
It varies so it doesn't matter which you do. Does it even matter since nobody is gonna see it once it's closed up. I get it the mentality in some folks is "because I know it's there and I painted it as accurately/correct as the real thing.
I know Quinta has fantastic instrument panels so that's an option if money isn't an issue.
Most of my modern jets instrument panels are painted NATO Black. Same for some of my WW2 era aircraft kits. I could care less because I'm not gonna see it once the canopy is closed up.

smokeriderdon
Well-Known Member
Honestly, I would simply match the Eduard colors.
Edbert
Well-Known Member
- Joined
- May 16, 2024
- Messages
- 3,159
Having seen photos of both grays, plus a few others, I've decided to take the path of least resistance.
I touched up the bits of light gray seen on the Eduard PE to match the Tamiya color. Was able to get most of it, but did not even try the front panel with the small round gauges on it. This will suffice for me.
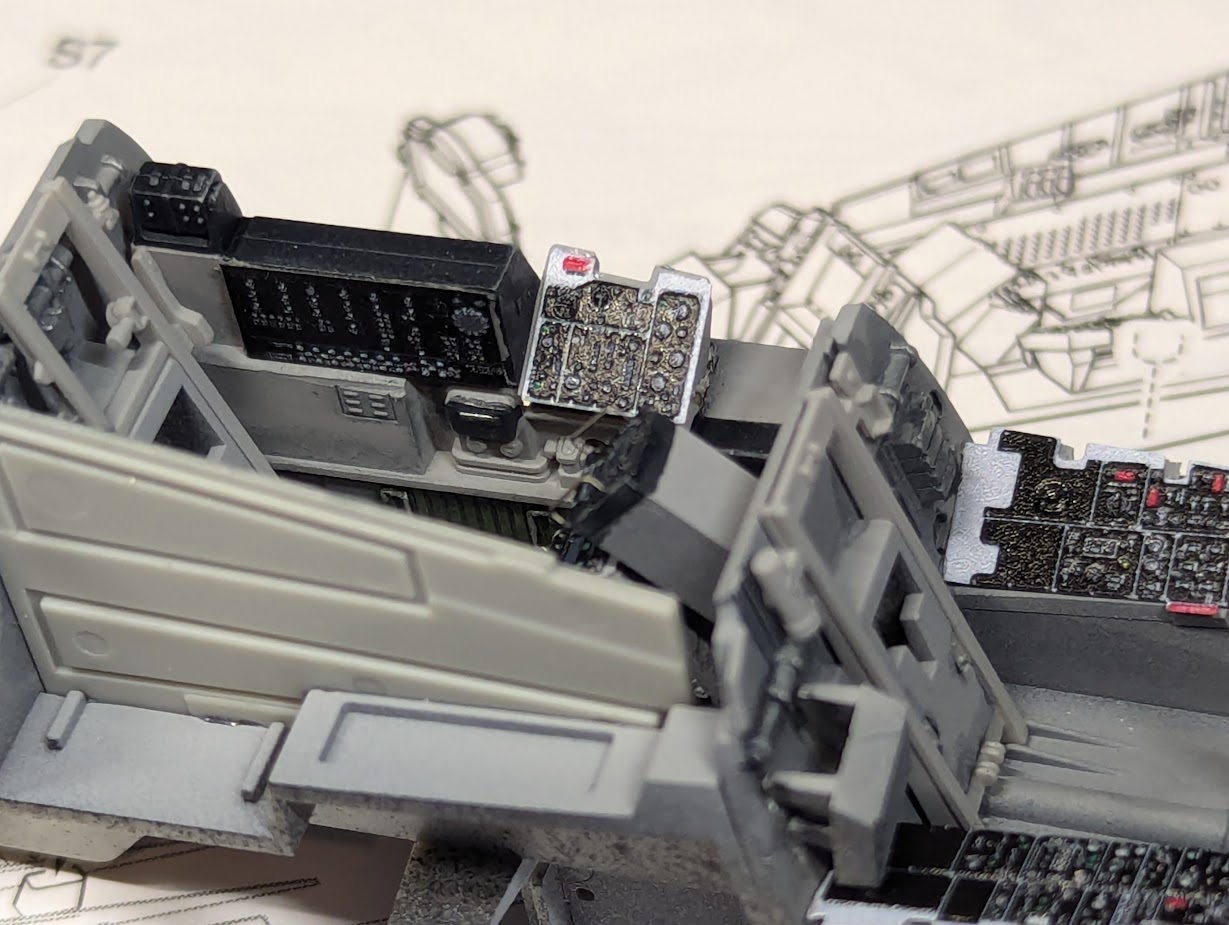
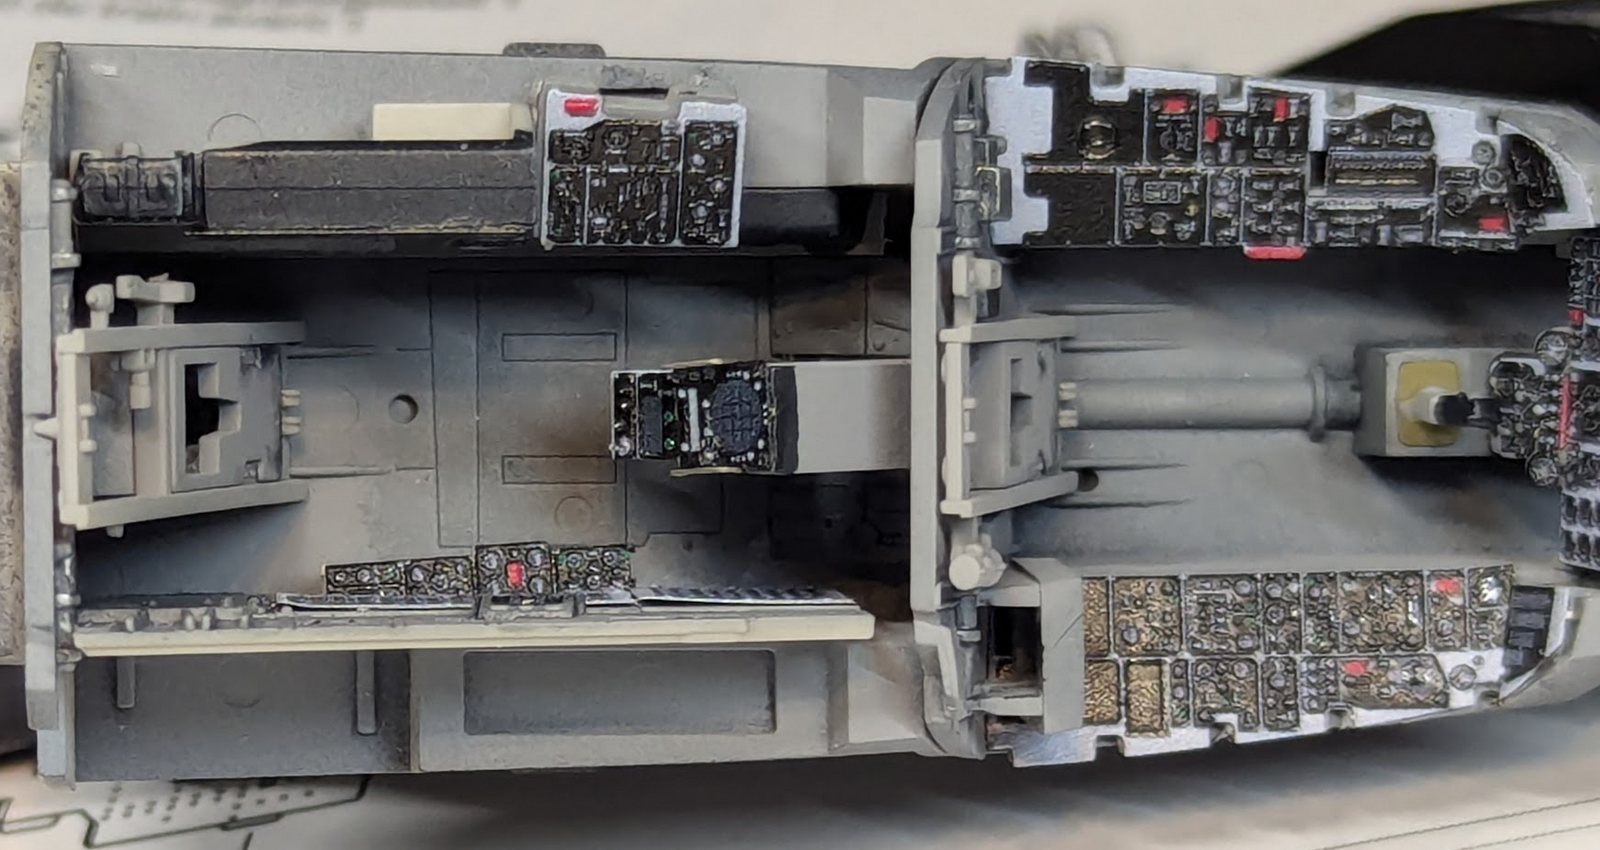
Two "before" shots.
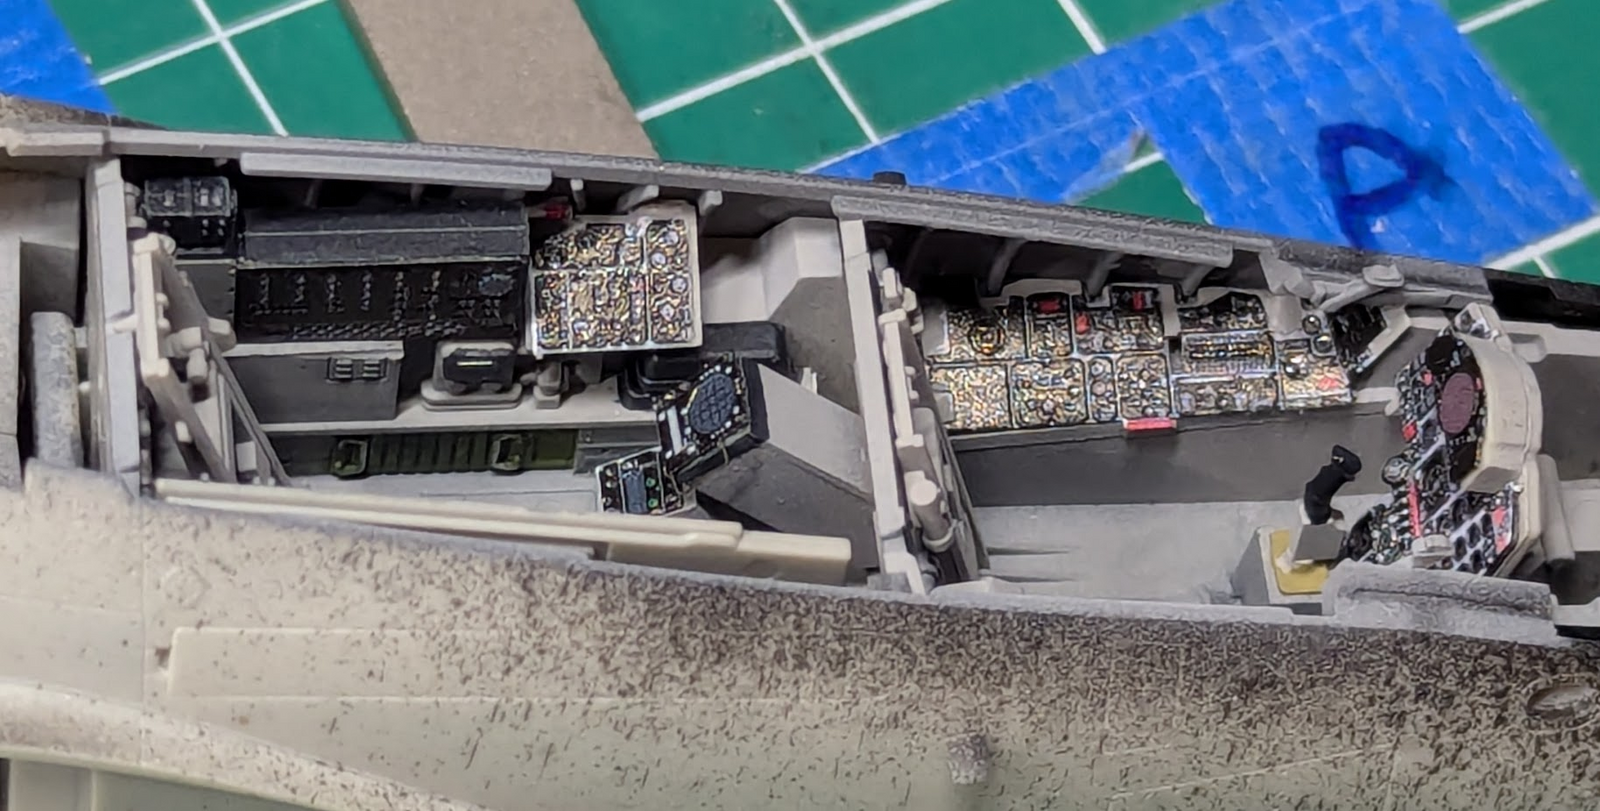
I closed the fuselage before taking an "after" shot. But you can see the darker color.
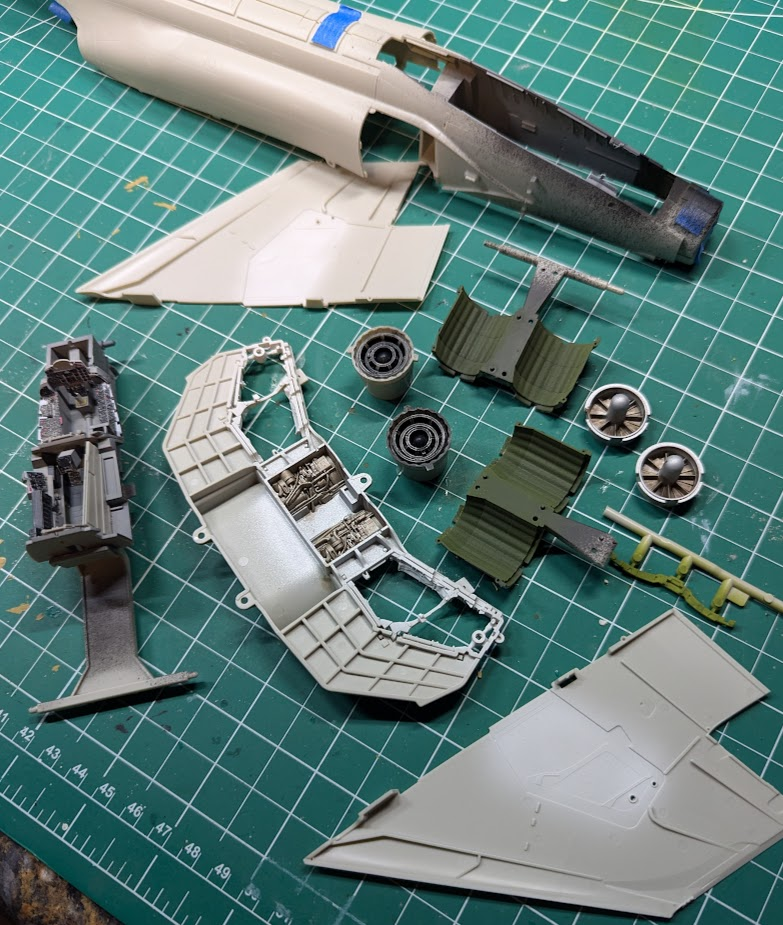
Pre painting some bits before assembly.
I touched up the bits of light gray seen on the Eduard PE to match the Tamiya color. Was able to get most of it, but did not even try the front panel with the small round gauges on it. This will suffice for me.
Two "before" shots.
I closed the fuselage before taking an "after" shot. But you can see the darker color.
Pre painting some bits before assembly.

Looks great! What maker is that? Is it Tamiya, Hasegawa, etc?Having seen photos of both grays, plus a few others, I've decided to take the path of least resistance.
I touched up the bits of light gray seen on the Eduard PE to match the Tamiya color. Was able to get most of it, but did not even try the front panel with the small round gauges on it. This will suffice for me.
View attachment 122711
View attachment 122712
Two "before" shots.
View attachment 122713
I closed the fuselage before taking an "after" shot. But you can see the darker color.
View attachment 122714
Pre painting some bits before assembly.
Edbert
Well-Known Member
- Joined
- May 16, 2024
- Messages
- 3,159
Tamiya F-4B, my first ever Phantom but I've heard great things about it and had to check it out.
https://www.scalemates.com/kits/tamiya-61121-f-4b-phantom-ii--1328414
https://www.scalemates.com/kits/tamiya-61121-f-4b-phantom-ii--1328414
Thanks.Tamiya F-4B, my first ever Phantom but I've heard great things about it and had to check it out.
https://www.scalemates.com/kits/tamiya-61121-f-4b-phantom-ii--1328414
I love Tamiya kits!
My current build is the "C" model.Tamiya F-4B, my first ever Phantom but I've heard great things about it and had to check it out.
https://www.scalemates.com/kits/tamiya-61121-f-4b-phantom-ii--1328414
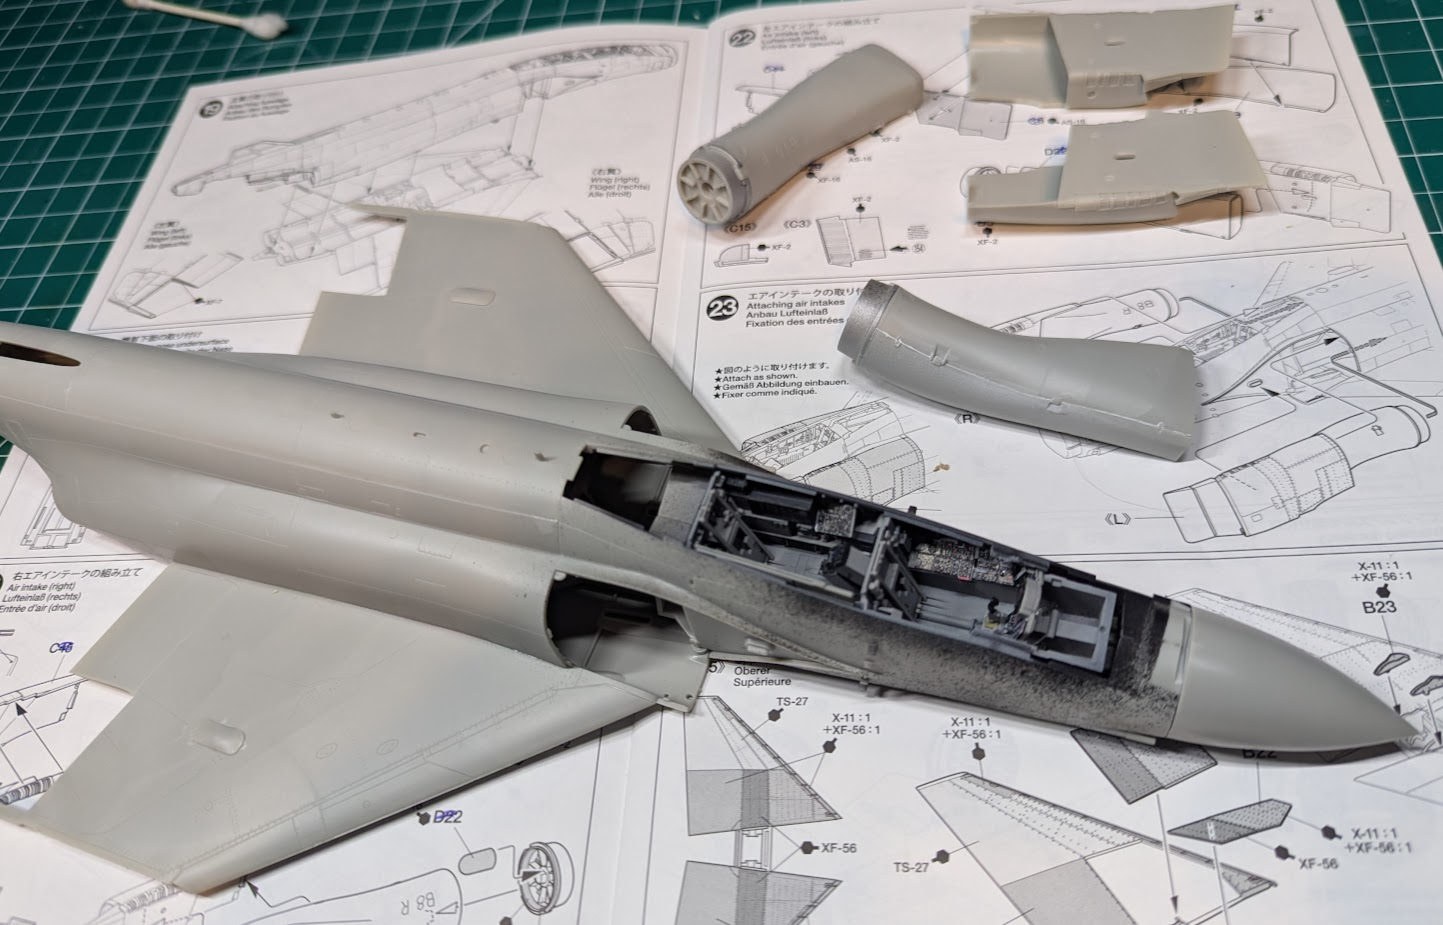
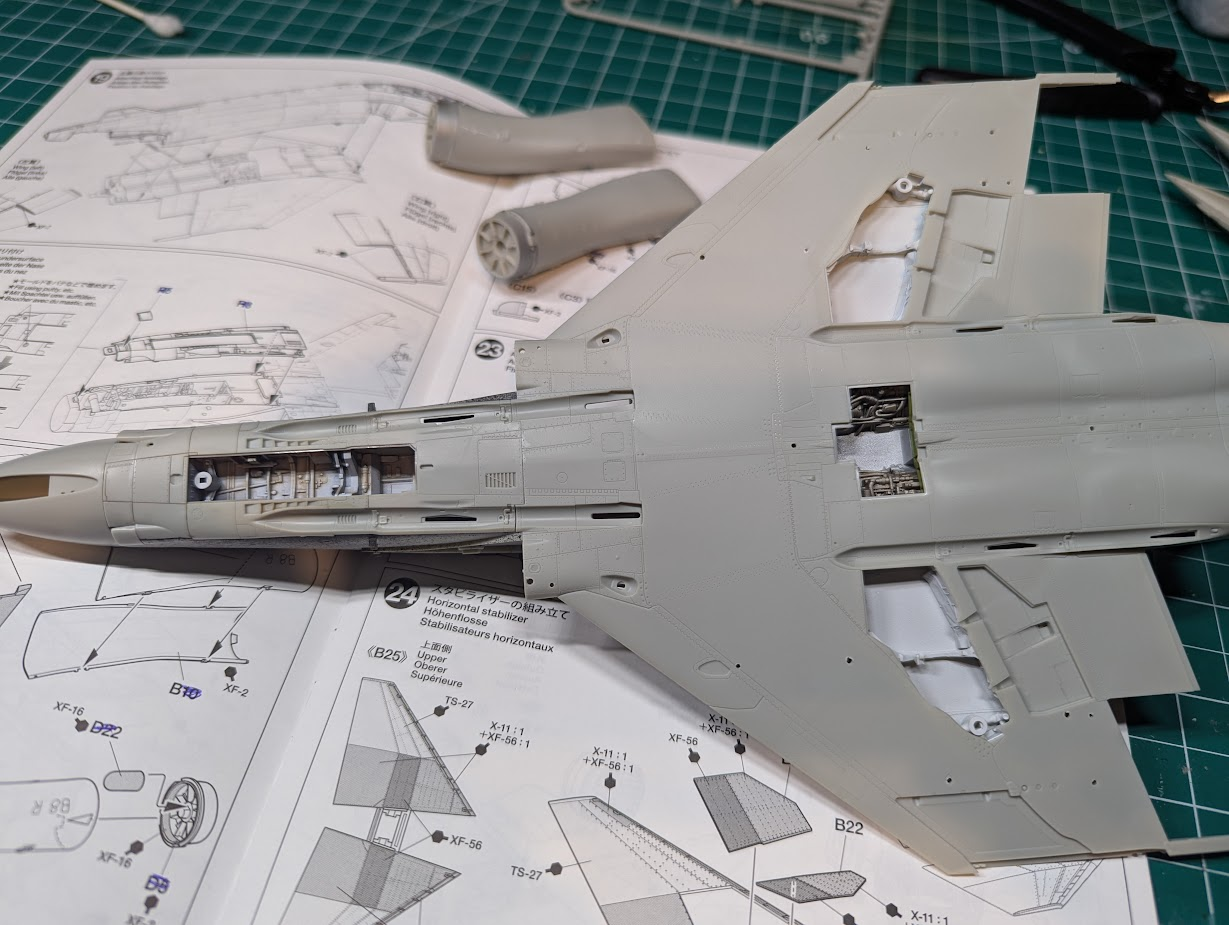
BlackSheepTwoOneFour
Well-Known Member
- Joined
- Jun 9, 2013
- Messages
- 1,026
I typically drill using one size holes. Test fit with whatever goes there to see if it needs to be drilled bigger.
Edbert
Well-Known Member
- Joined
- May 16, 2024
- Messages
- 3,159
She may be over 60 now. But the old girl looks really nice in her little black (1500 surfacer) dress!
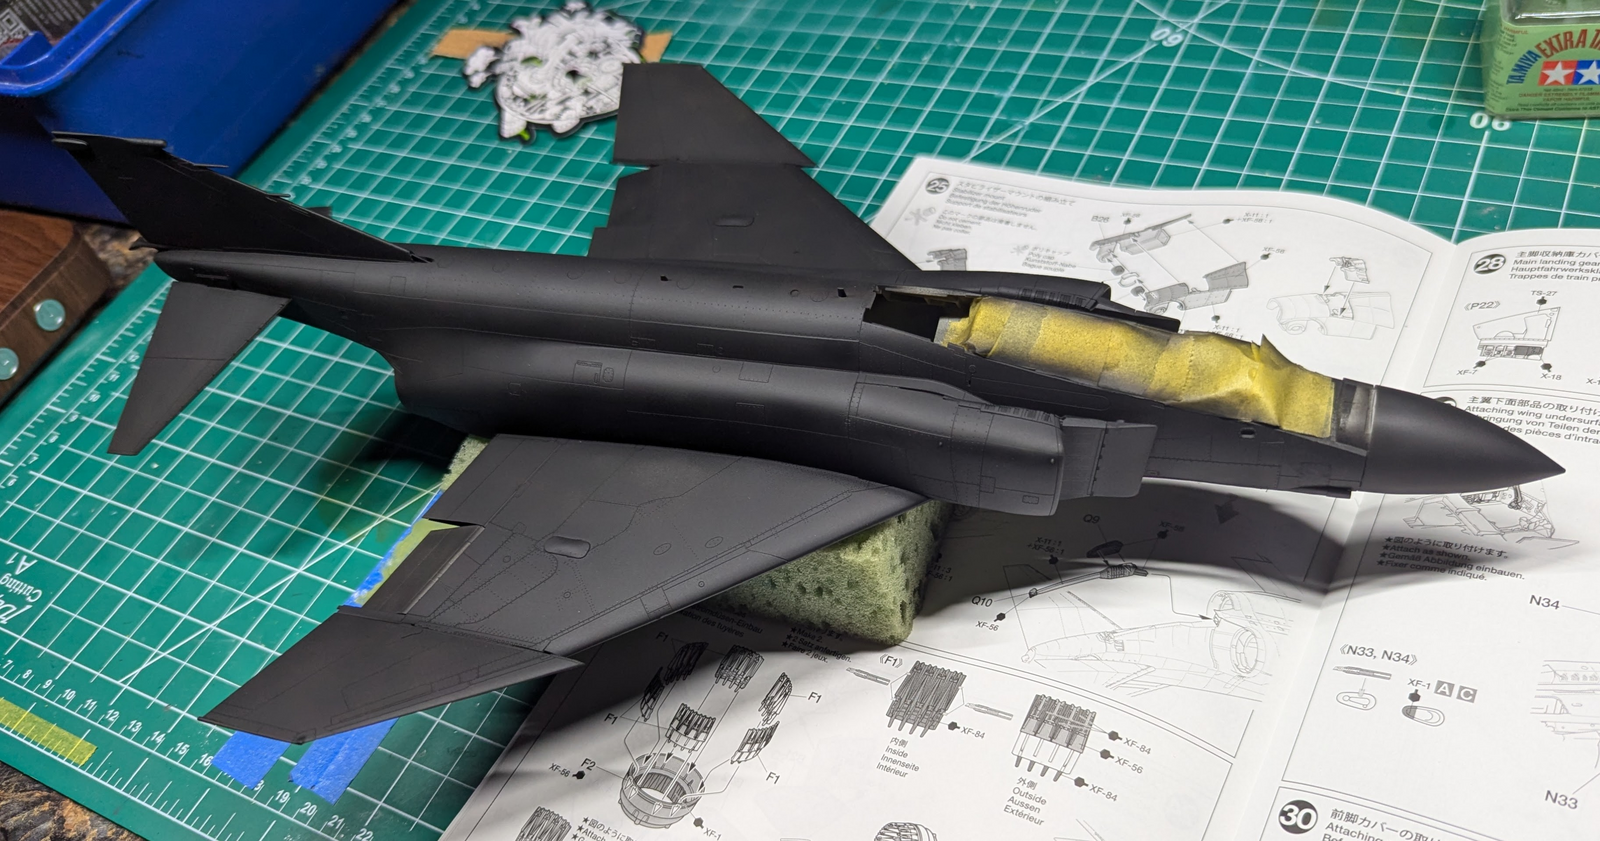
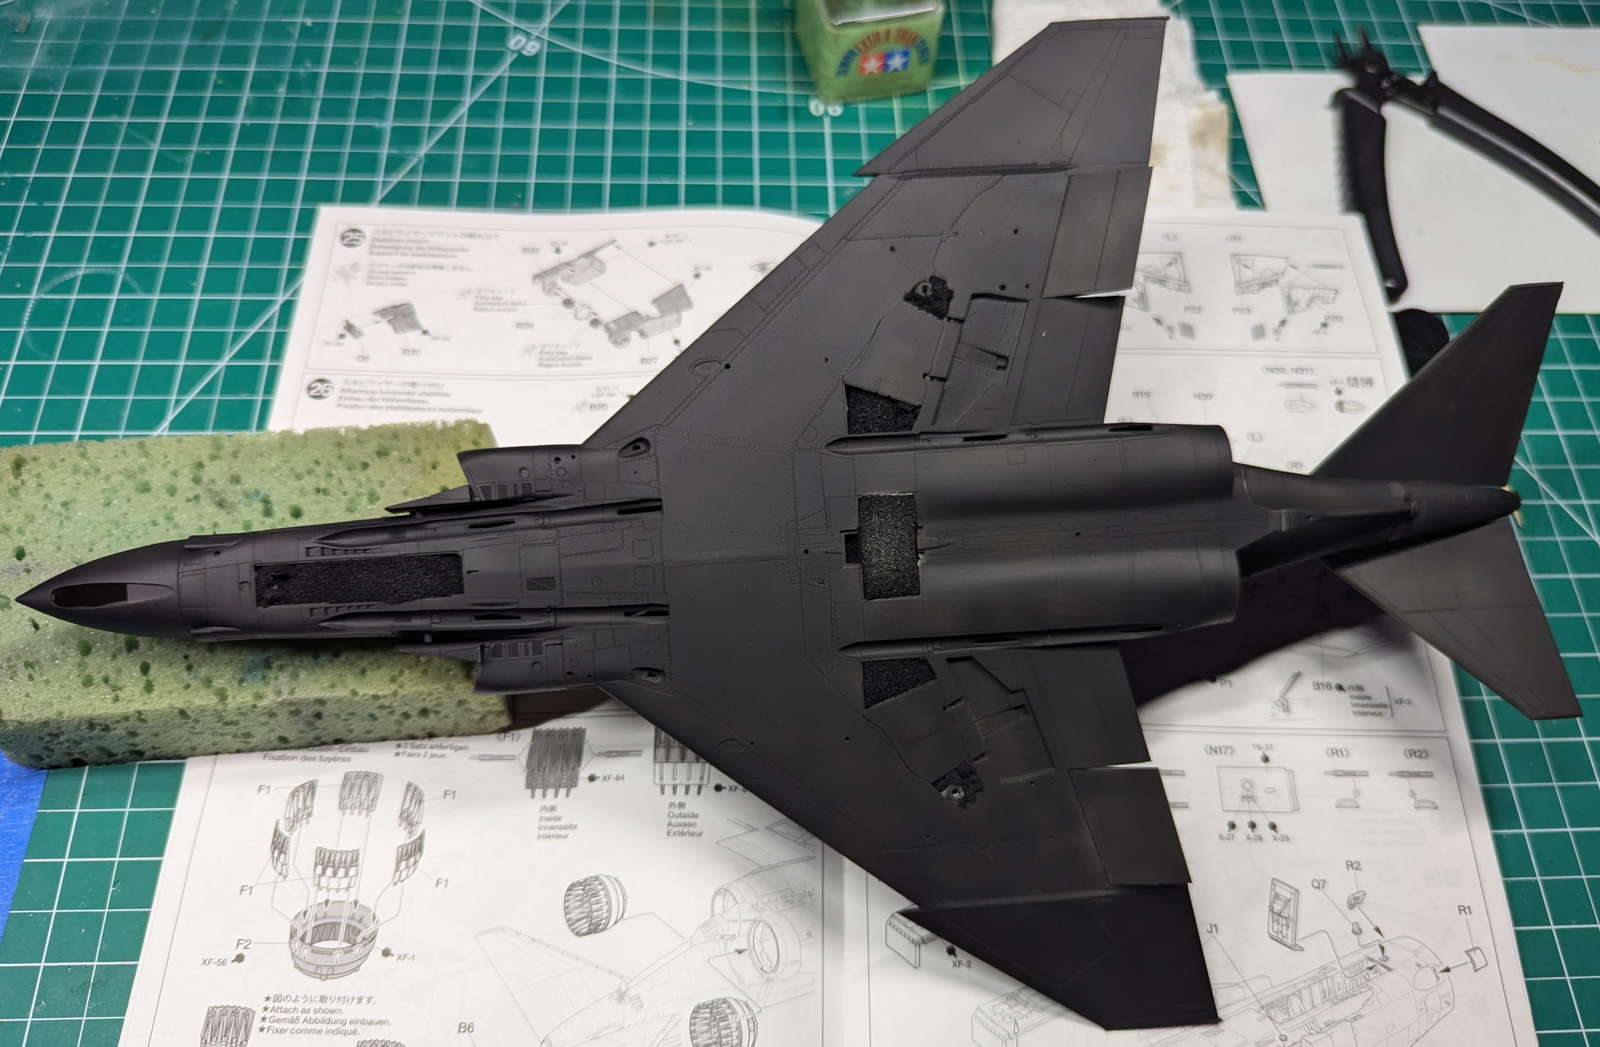
Gear-bay doors held in with white glue, as is the lower half of the tail. I'm taking some liberties from doing exactly as the destructions say.
Gear-bay doors held in with white glue, as is the lower half of the tail. I'm taking some liberties from doing exactly as the destructions say.
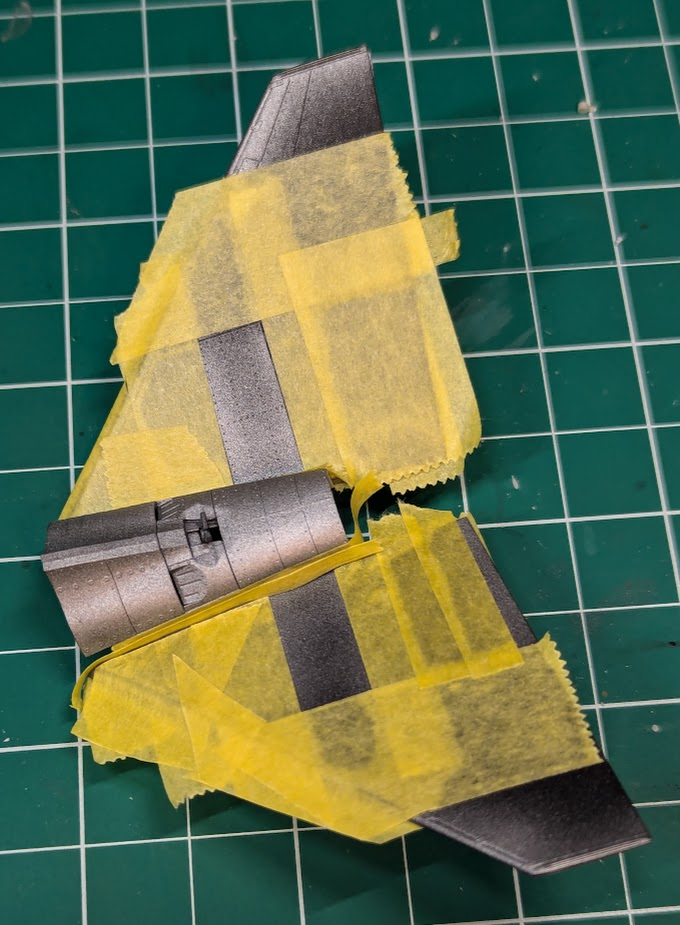
Groovy!Ready for some shots of dark metallic gray, to be adjacent to the medium metallic gray.
View attachment 123315
On mine I use the Tamiya Weathering gunmetal for the darker shade on the stabilizers. I have some touch-up to do.
Your Phantom is waaay gooder than mine.
Yours is looking so awesome!
Very sleekShe may be over 60 now. But the old girl looks really nice in her little black (1500 surfacer) dress!
View attachment 123114
View attachment 123115
Gear-bay doors held in with white glue, as is the lower half of the tail. I'm taking some liberties from doing exactly as the destructions say.
Edbert
Well-Known Member
- Joined
- May 16, 2024
- Messages
- 3,159
Thanks for the kind words Gary! When I see your camo-paint job I'm regretting my choice for a boring Navy plane, you know, a grey on grey with light gray paint job 
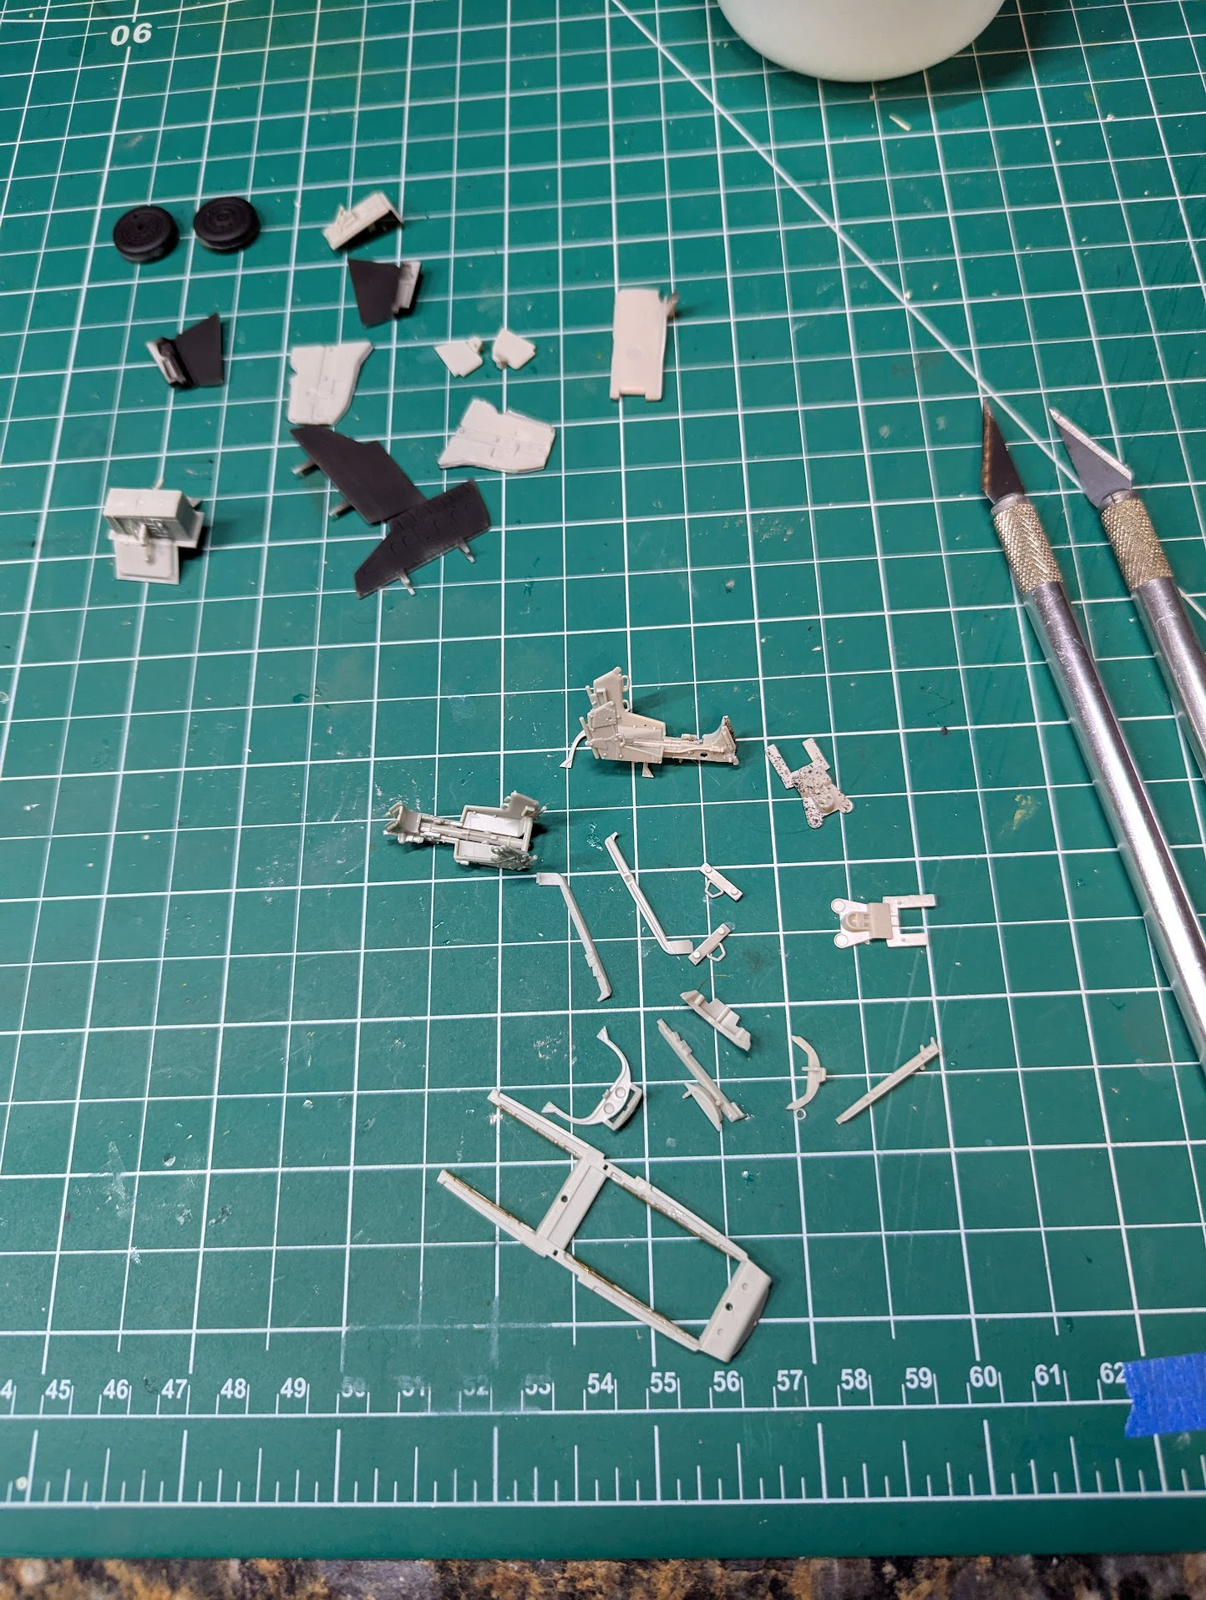
Pile on top needs to be finished with priming (what I do have primed was from pre-assembly of the body) then painted white. The bottom pile is for black, after priming in black I think I'll do an almost black for the color coat. Like white, pure black is REALLY dark, a dark grey will show as black but preserve some detail.
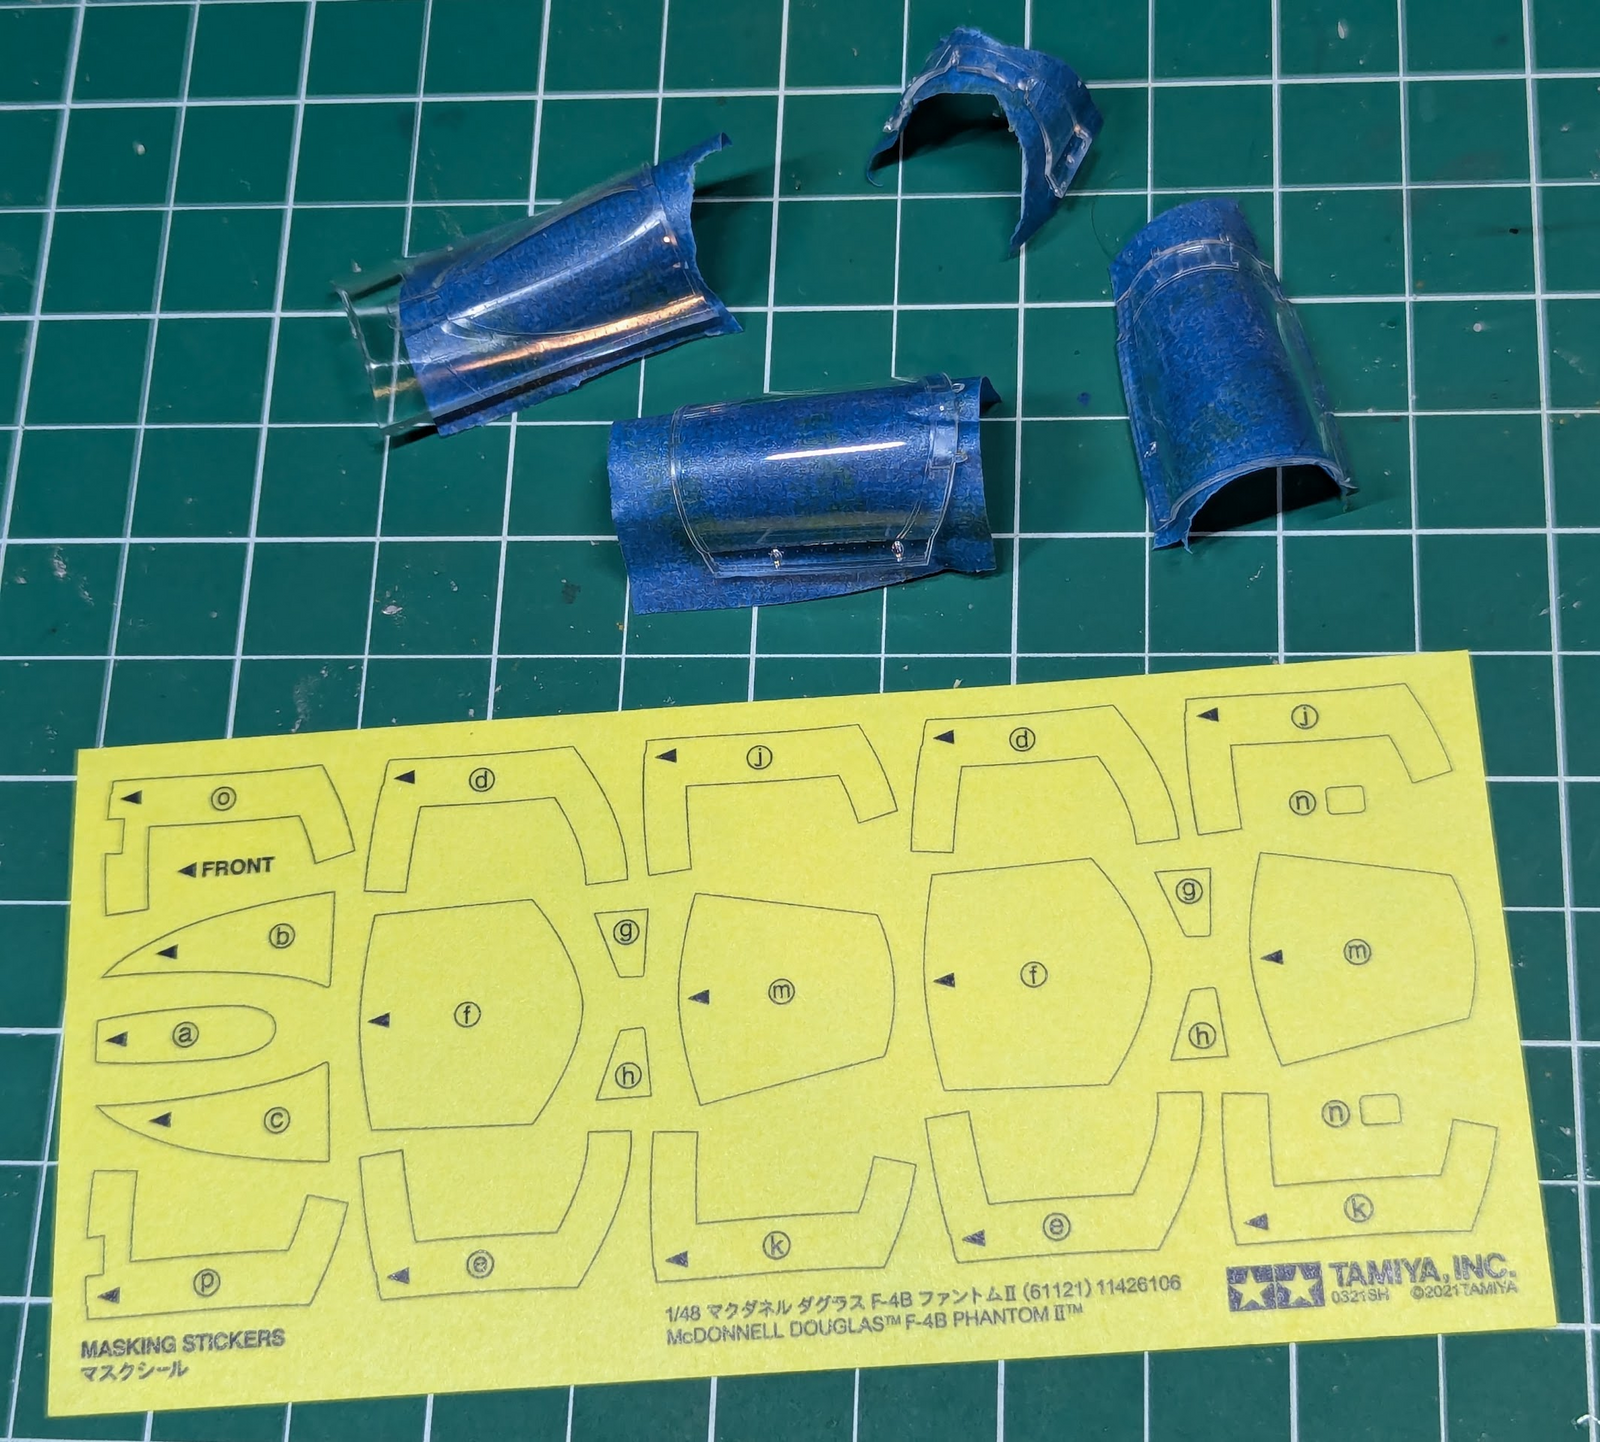
I've masked the inner sides (to protect from overspray) with a 3M painter's tape I like. It is very low tack, so not a good choice when you want a crisp line, but here were residue is a prime concern, perfect. These "masks" are not pre-cut, I think I mentioned it already, but far cheaper kits have CUT masks. I'm debating if this is better than me with tape, and I'm thinking yes it is. I'll dive into this soon. Think I'll do mask cutting while I wait for the black and white paint cure on all those small parts, I learned the hard way that it only "looks like" Tamiya XF paint dries in seconds, I think it takes longer to fully cure or harden.
Pile on top needs to be finished with priming (what I do have primed was from pre-assembly of the body) then painted white. The bottom pile is for black, after priming in black I think I'll do an almost black for the color coat. Like white, pure black is REALLY dark, a dark grey will show as black but preserve some detail.
I've masked the inner sides (to protect from overspray) with a 3M painter's tape I like. It is very low tack, so not a good choice when you want a crisp line, but here were residue is a prime concern, perfect. These "masks" are not pre-cut, I think I mentioned it already, but far cheaper kits have CUT masks. I'm debating if this is better than me with tape, and I'm thinking yes it is. I'll dive into this soon. Think I'll do mask cutting while I wait for the black and white paint cure on all those small parts, I learned the hard way that it only "looks like" Tamiya XF paint dries in seconds, I think it takes longer to fully cure or harden.
Edbert
Well-Known Member
- Joined
- May 16, 2024
- Messages
- 3,159
C'mon Gary, the proper term is "gooderer", get it straight bro!Your Phantom is waaay gooder than mine.
As far as comparing builds overall a pointless exercise, but if I can get the blue and yellow patina on my nozzles that you got, I'll be a happy camper.
No comparison. At this point in my build,C'mon Gary, the proper term is "gooderer", get it straight bro!
As far as comparing builds overall a pointless exercise, but if I can get the blue and yellow patina on my nozzles that you got, I'll be a happy camper.
I'm in the lulling period. In between decals, and finishing accent parts.
Lately I haven't had much mojo to finish this build.

Head down, crack on, then on to the next one........... or chuck it in the to do pile.No comparison. At this point in my build,
I'm in the lulling period. In between decals, and finishing accent parts.
Lately I haven't had much mojo to finish this build.
I'm a great motivational speaker as you can tell.... hehe. Pantherman
Edbert
Well-Known Member
- Joined
- May 16, 2024
- Messages
- 3,159
Everyone is different, but doing that would be a disaster for me. It took me a longer time than it should have but I learned to stop working on something is I feel frustration or boredom. Continuing with either condition is exactly how I end up making something into spru-glue.Head down, crack on, then on to the next one........... or chuck it in the to do pile.
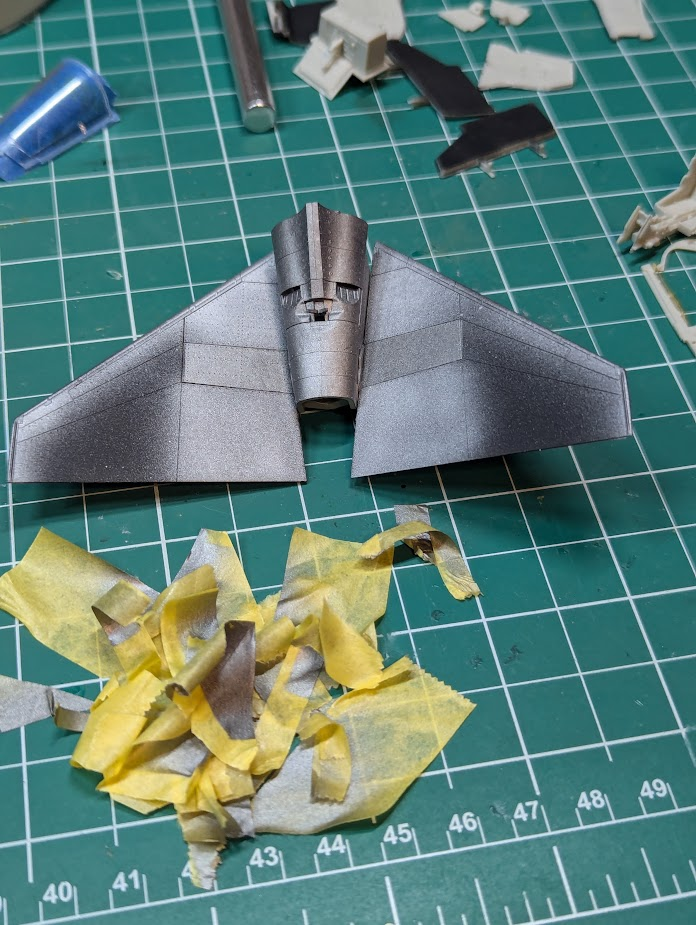
I can see it now, but even when I took this picture I did not realize the lighter silver was missing or thin in areas. Not a disaster, I can always say I meant to do that. When I applied the white to the tips is when I saw it.
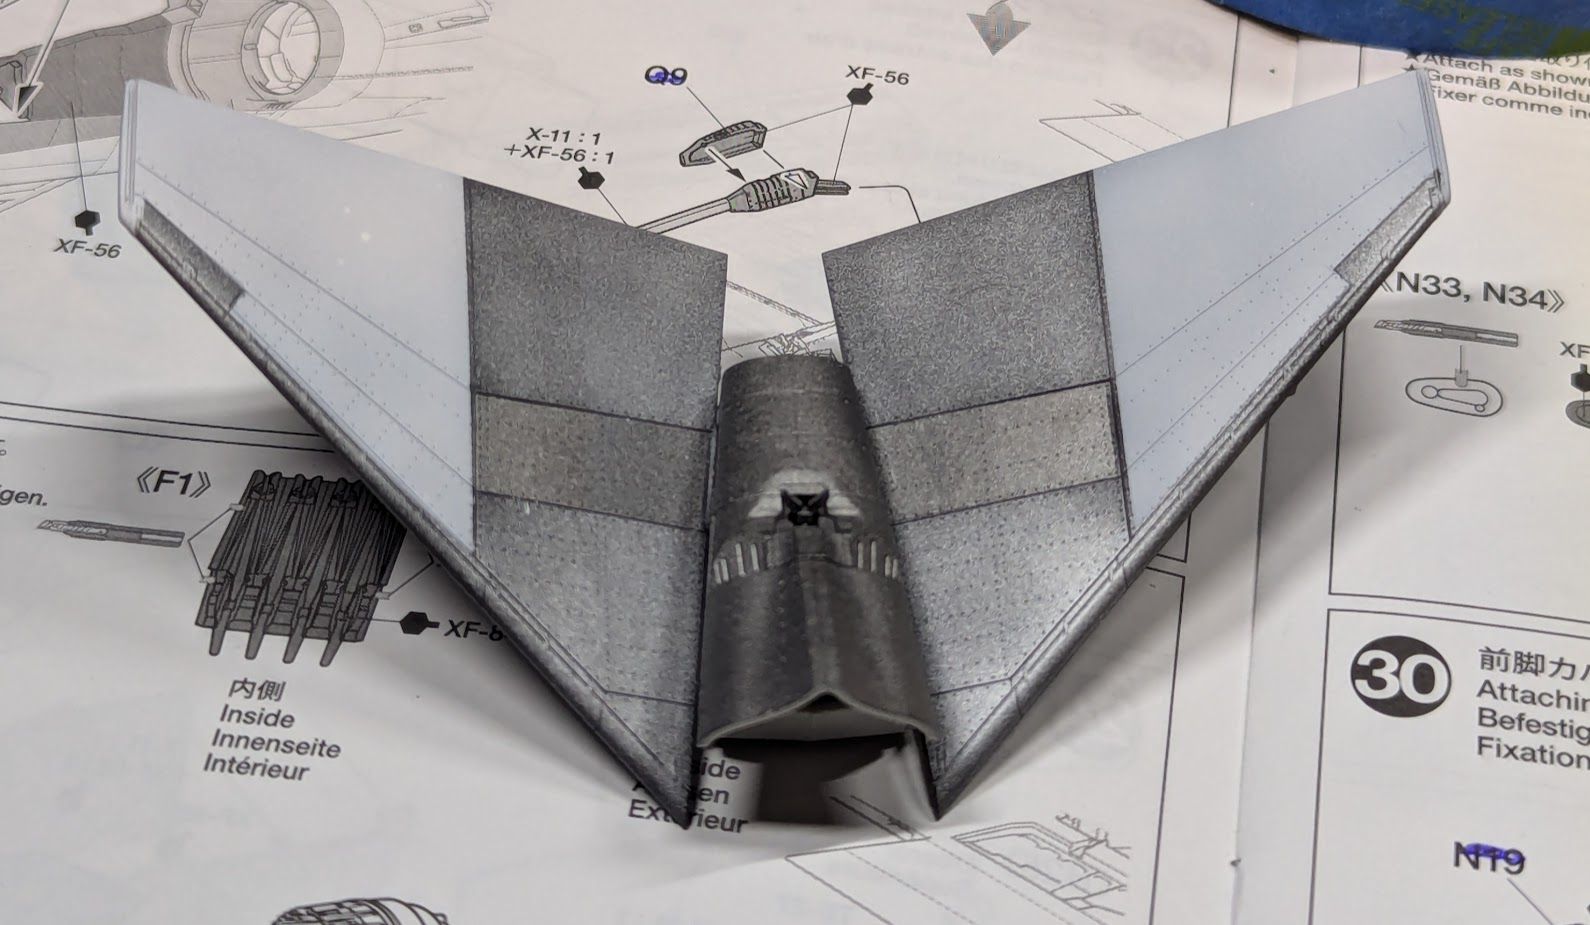
This is what I mean. It took massive skill to produce those thin areas, yeah that's it.
So while I was painting all those little bits white, I figured I might as well load up some more and do the underside.
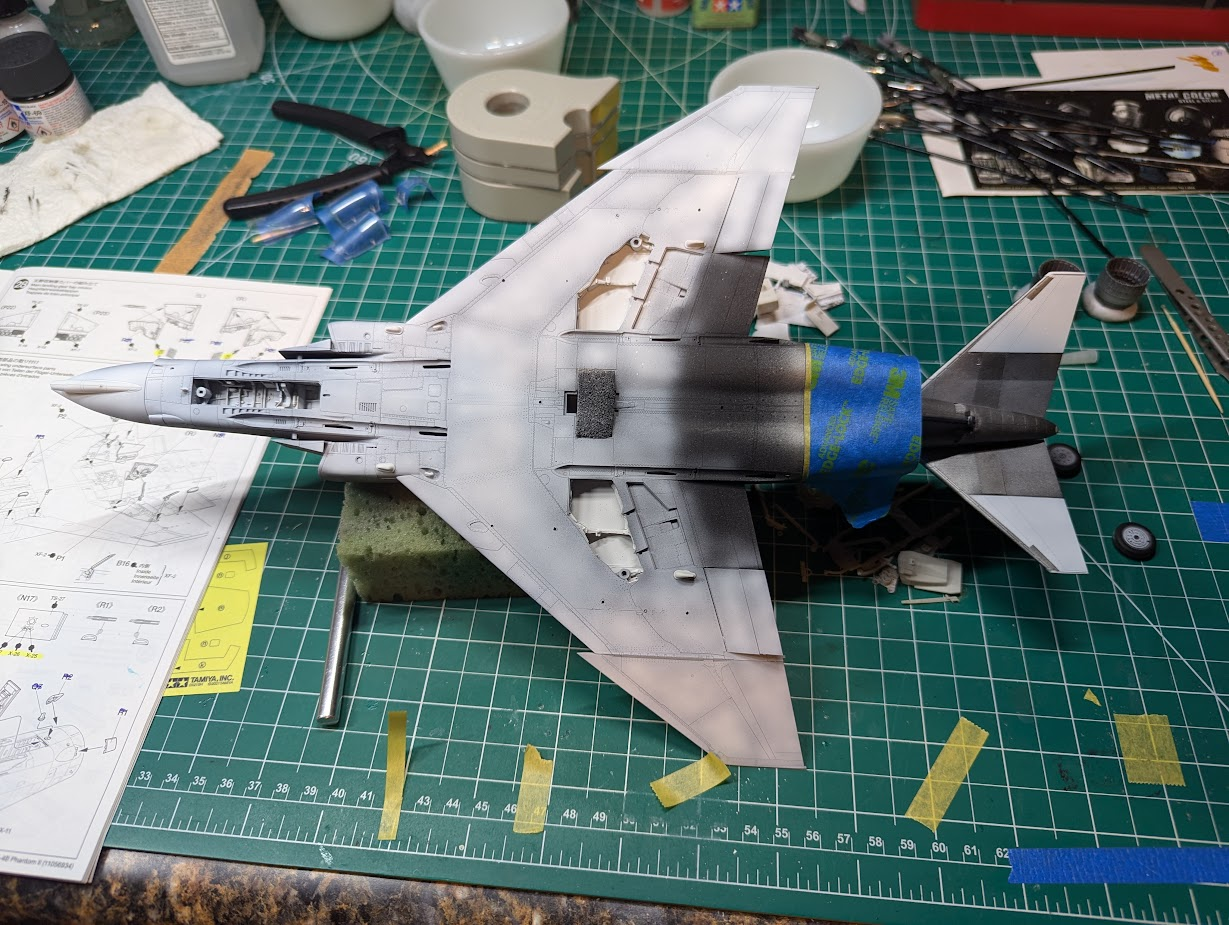
I had to stop here as I had forgotten to mask off the tail section from the white. I think the mottling and panel lines are too strong, needed to adjust that as well.
All that careful masking of the wheel wells was a waste of time. I'm used to WWII aircraft which are seldom the same color on the underside as the wheel wells.
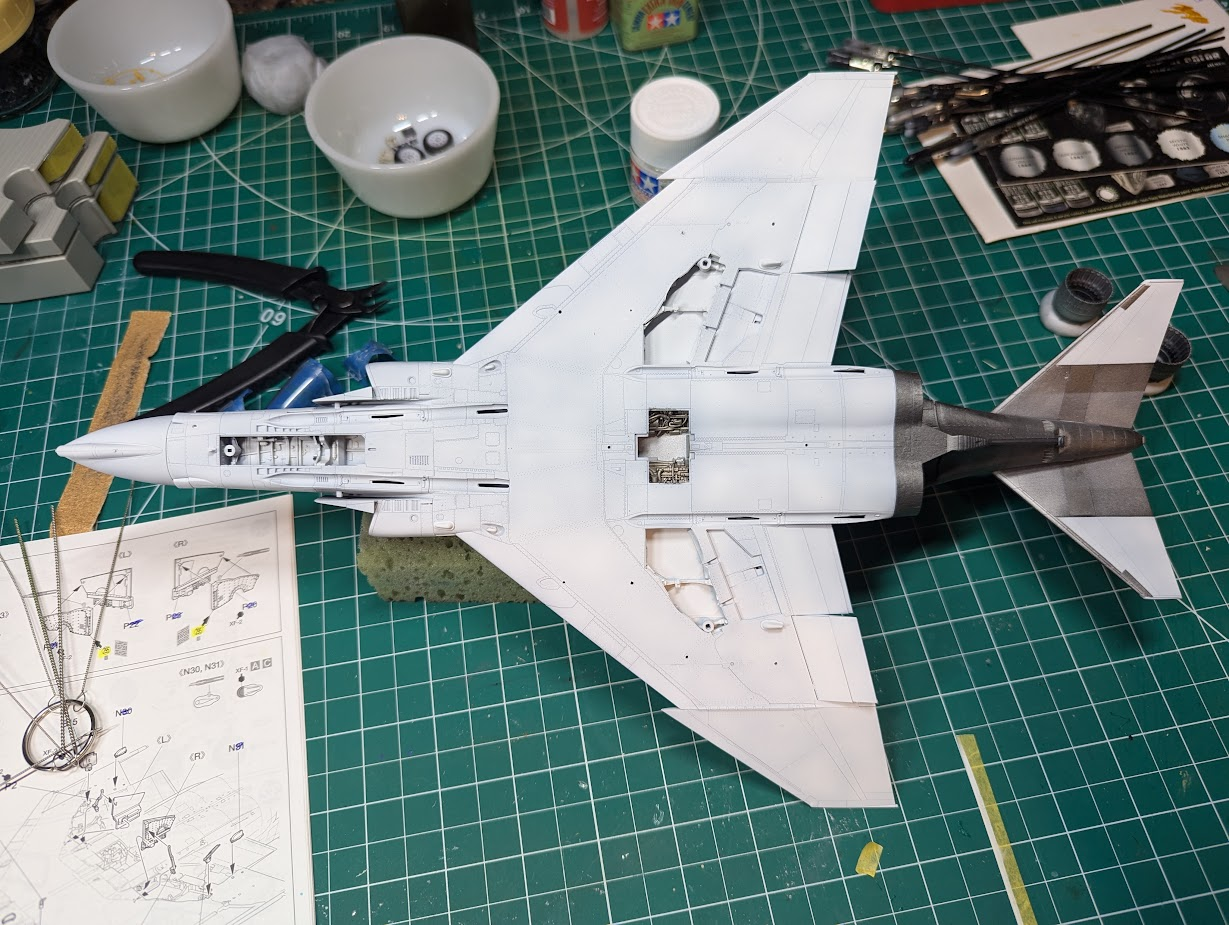
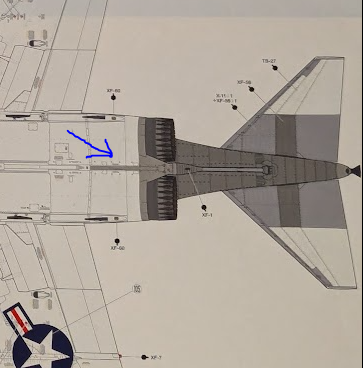
I missed the silver part in between the nacelles, see the blue arrow. Easy to put it in (just a rectangle), so I'll consider if the reward is worth the risk to try and touch up the silver on the elevators when the brush has silver in it.
That said, I just put all the Phantom stuff in a box, and brought out the P-38 I 'm working on. Looked at the kit for about 20 seconds and put the Lightning into the closet too, I wanted to change gears and going from plane to plane was not the shift I needed. I want to work on armor for a while. I stopped working on my AFV Club M5 Stuart weeks ago out of frustration, so I grabbed the Bradley to work on for now.
The bestHead down, crack on, then on to the next one........... or chuck it in the to do pile.
I'm a great motivational speaker as you can tell.... hehe. Pantherman
I like the shading, obviously a master at work to get that light/dark pattern........hehe. seriously though, it's looking great. PMEveryone is different, but doing that would be a disaster for me. It took me a longer time than it should have but I learned to stop working on something is I feel frustration or boredom. Continuing with either condition is exactly how I end up making something into spru-glue.
View attachment 123339
I can see it now, but even when I took this picture I did not realize the lighter silver was missing or thin in areas. Not a disaster, I can always say I meant to do that. When I applied the white to the tips is when I saw it.
View attachment 123340
This is what I mean. It took massive skill to produce those thin areas, yeah that's it.
So while I was painting all those little bits white, I figured I might as well load up some more and do the underside.
View attachment 123341
I had to stop here as I had forgotten to mask off the tail section from the white. I think the mottling and panel lines are too strong, needed to adjust that as well.
All that careful masking of the wheel wells was a waste of time. I'm used to WWII aircraft which are seldom the same color on the underside as the wheel wells.
View attachment 123342
I missed the silver part in between the nacelles, see the blue arrow. Easy to put it in (just a rectangle), so I'll consider if the reward is worth the risk to try and touch up the silver on the elevators when the brush has silver in it.
View attachment 123343
That said, I just put all the Phantom stuff in a box, and brought out the P-38 I 'm working on. Looked at the kit for about 20 seconds and put the Lightning into the closet too, I wanted to change gears and going from plane to plane was not the shift I needed. I want to work on armor for a while. I stopped working on my AFV Club M5 Stuart weeks ago out of frustration, so I grabbed the Bradley to work on for now.
Edbert
Well-Known Member
- Joined
- May 16, 2024
- Messages
- 3,159
I was working on the P-38's canopy when I found a flaw in it that required scraping and polishing of clear bits. I decided it was a good time to go ahead and remove that "line" or ridge that runs down the middle of the large bubble-type canopies like the Phantom has.
After removing the line successfully I went ahead and started masking. As mentioned elsewhere I tend to do some assembly-line stuff when I'm working on multiple kits at the same time.
Anyway, I found a similar flaw in the clear plastic on this one too. C'mon Tamiya!
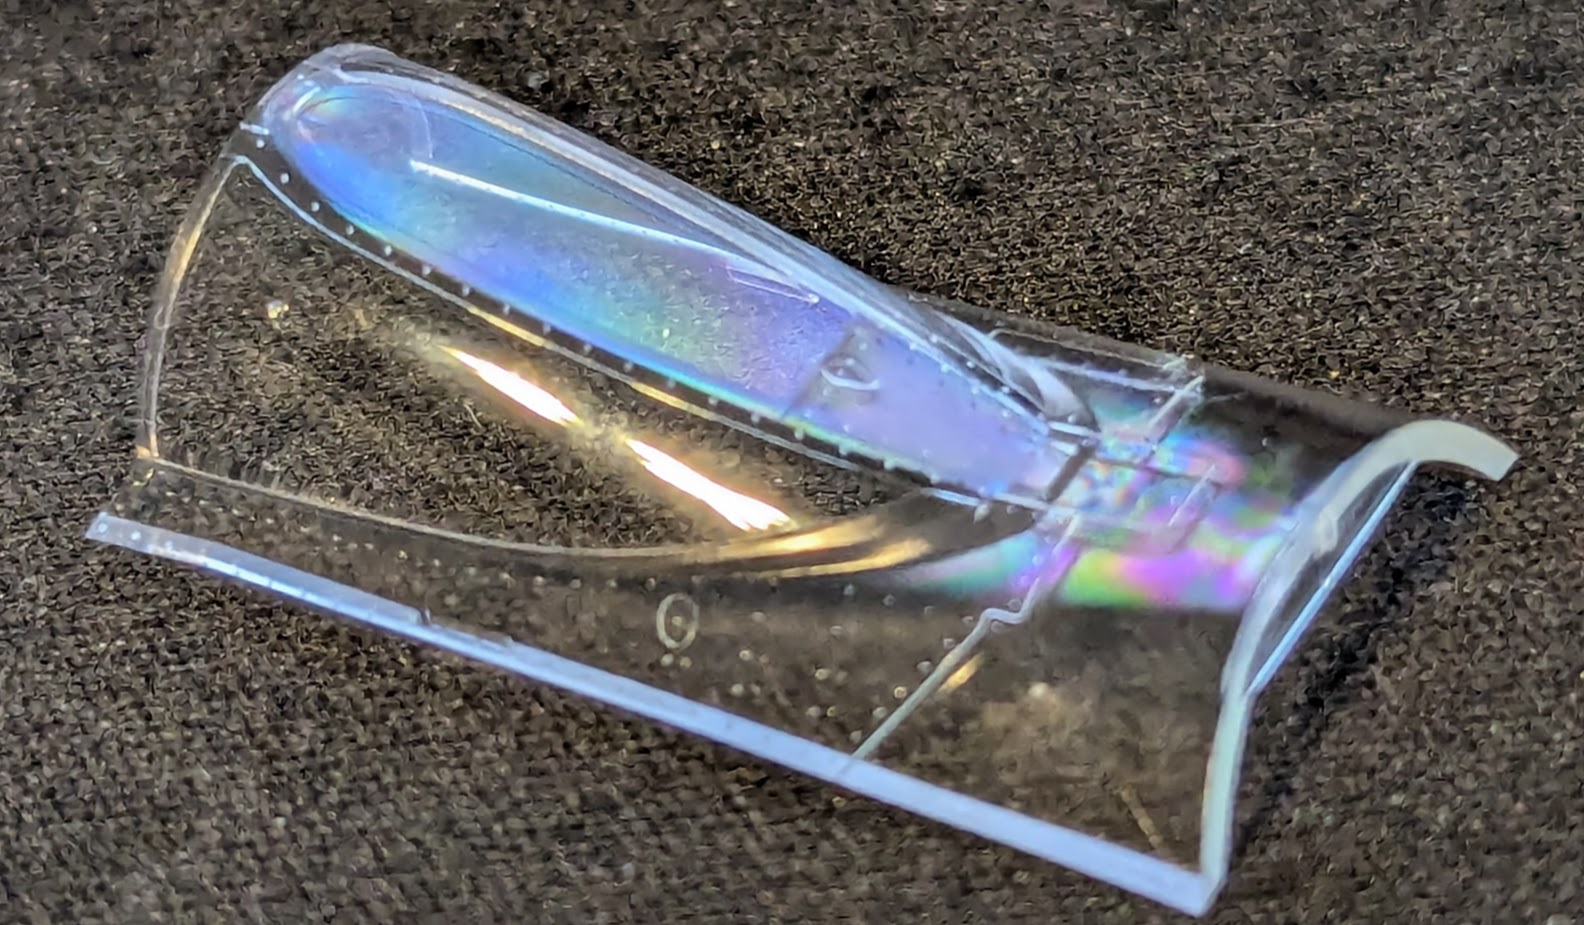
It is kinda hard to see, the blob is just forward of the vertical support, so the pilot would see this at 1:00.
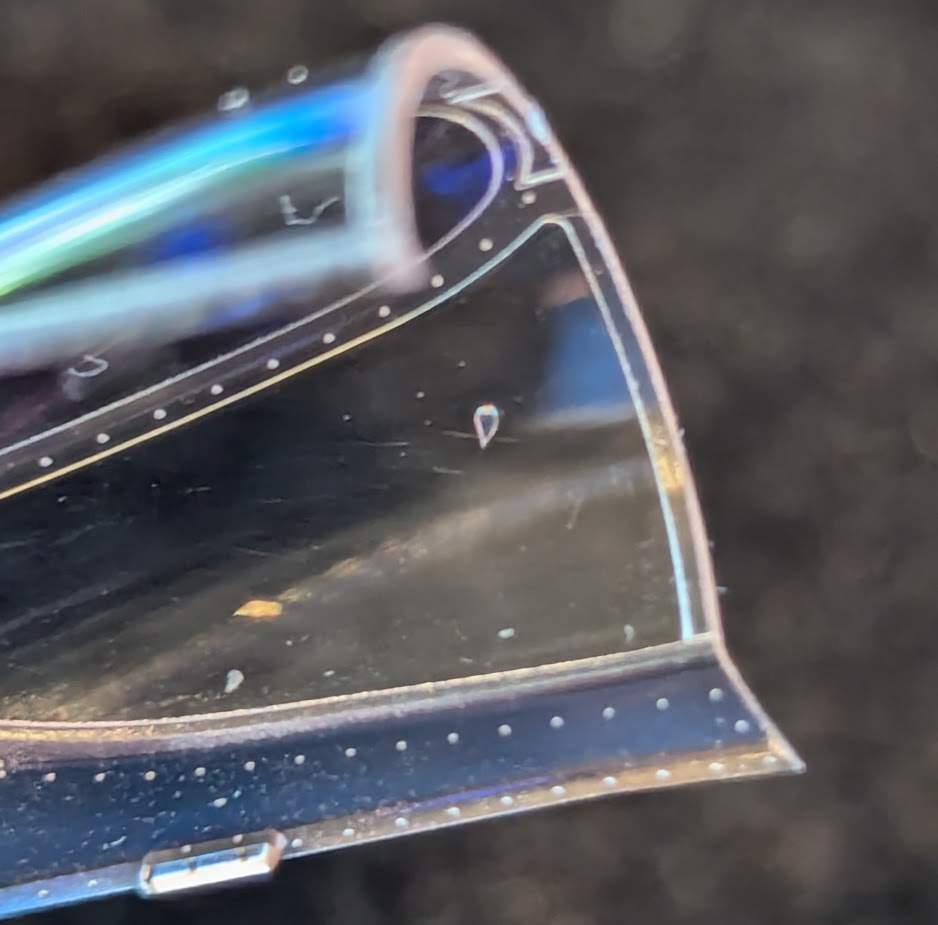
Even more close-up which shows the flaw better, but also picks up dust and reflections. But this bubble or blob is actually inside the plastic, unable to feel it on either side. I think I'm just gonna have to live with this one. Unless that Testors clear "window maker" could be used somehow. I should have some on hand this week.
After removing the line successfully I went ahead and started masking. As mentioned elsewhere I tend to do some assembly-line stuff when I'm working on multiple kits at the same time.
Anyway, I found a similar flaw in the clear plastic on this one too. C'mon Tamiya!
It is kinda hard to see, the blob is just forward of the vertical support, so the pilot would see this at 1:00.
Even more close-up which shows the flaw better, but also picks up dust and reflections. But this bubble or blob is actually inside the plastic, unable to feel it on either side. I think I'm just gonna have to live with this one. Unless that Testors clear "window maker" could be used somehow. I should have some on hand this week.
Edbert
Well-Known Member
- Joined
- May 16, 2024
- Messages
- 3,159
Basecoat is down, I'm not entirely happy with the color. First coat was too dark/tan/brown for my tatste, so I added some lightening, and some more, and a bit more...and I think I overdid it.
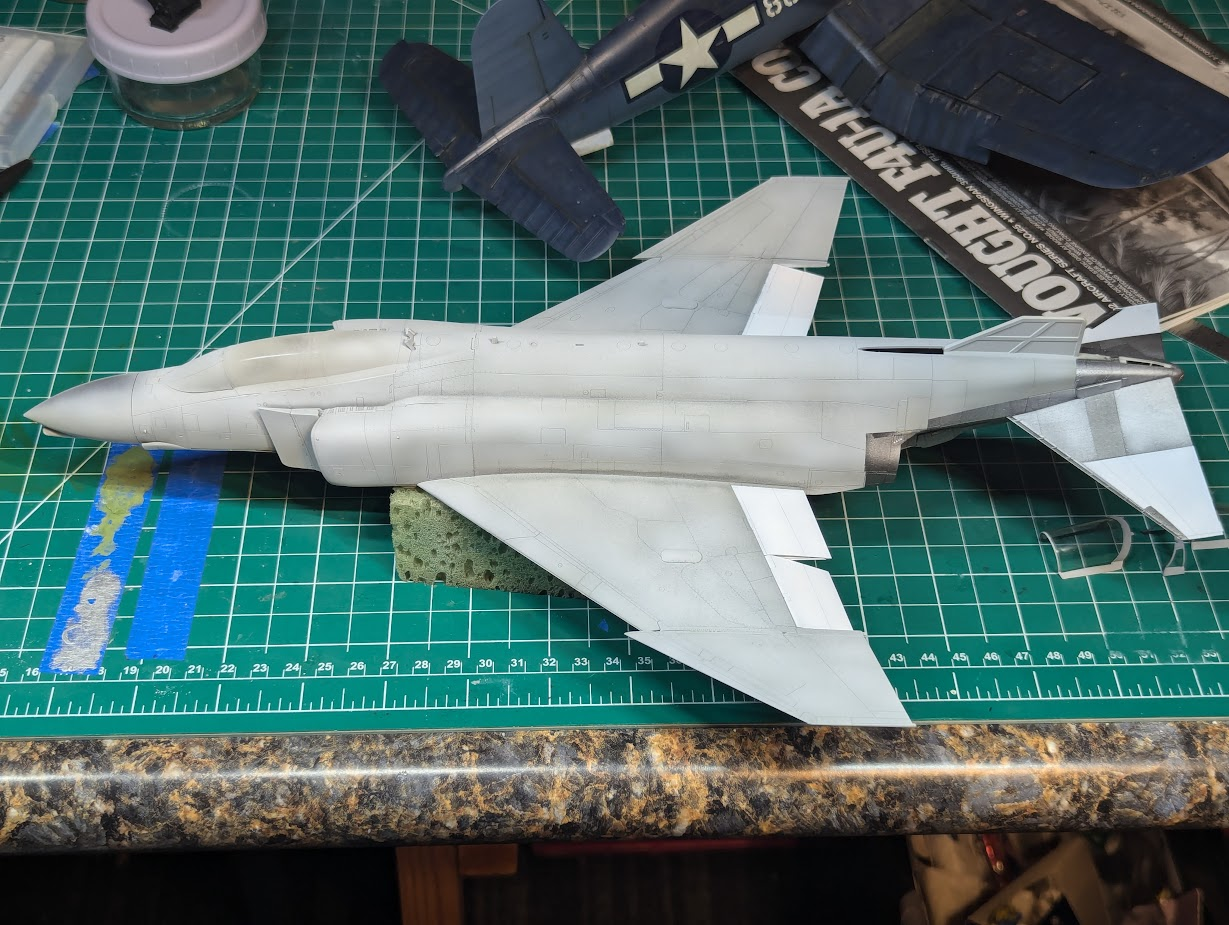
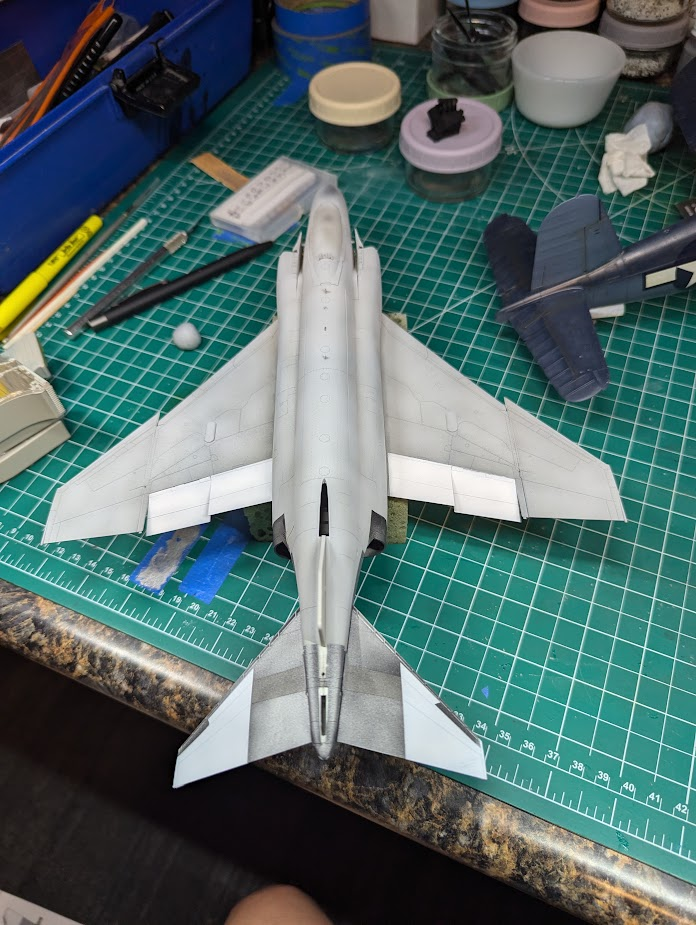
Add to that, I noticed after demasking the canopy that I forgot at least one lightening phase on the canopy. The one mounted on the kit is for closed, I am just using it as a mask. The one I intend to use is "open" and you can see below it is a bit darker/bluer/grayer.
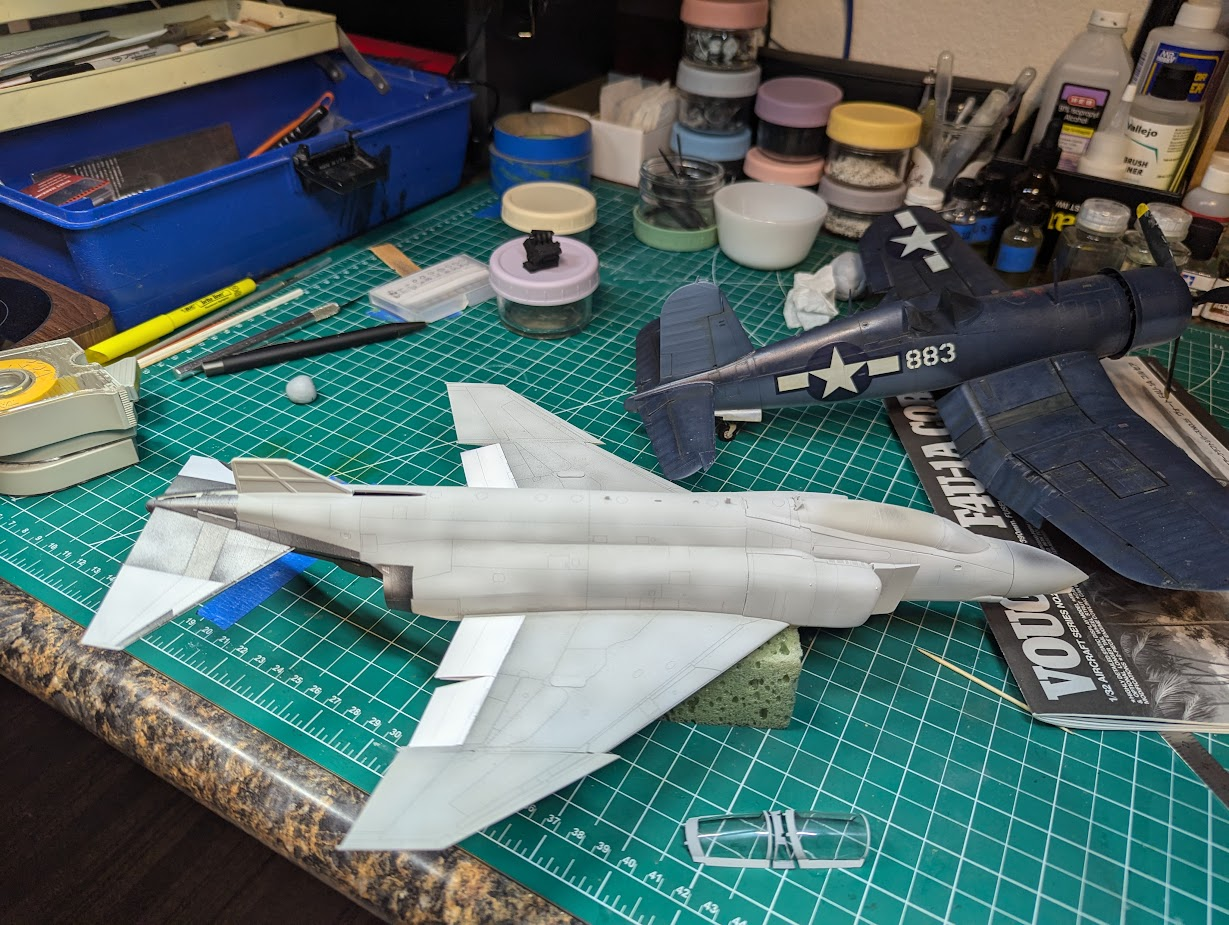
I'm not going to make any decisions or changes today. I've learned to let things sit and stew for a while, it might be just fine. After a few coats of clear and some paneling/weathering I think it should darken some more. Plus having those white control surfaces helps the gray look...gray.
Add to that, I noticed after demasking the canopy that I forgot at least one lightening phase on the canopy. The one mounted on the kit is for closed, I am just using it as a mask. The one I intend to use is "open" and you can see below it is a bit darker/bluer/grayer.
I'm not going to make any decisions or changes today. I've learned to let things sit and stew for a while, it might be just fine. After a few coats of clear and some paneling/weathering I think it should darken some more. Plus having those white control surfaces helps the gray look...gray.
Last edited:
Edbert
Well-Known Member
- Joined
- May 16, 2024
- Messages
- 3,159
I decided to leave the color alone and press on. We can call it "sun bleached" at the end of a tour.
Also, I think the gloss clear I just applied did darken it slightly. I'm gonna leave it alone so the clear can dry, I've had issues with the durability of the varnishes in the past, and maybe giving them over 24 hours to fully harden is the trick.
So while the jet is hardening, I moved on to lots of little bits.
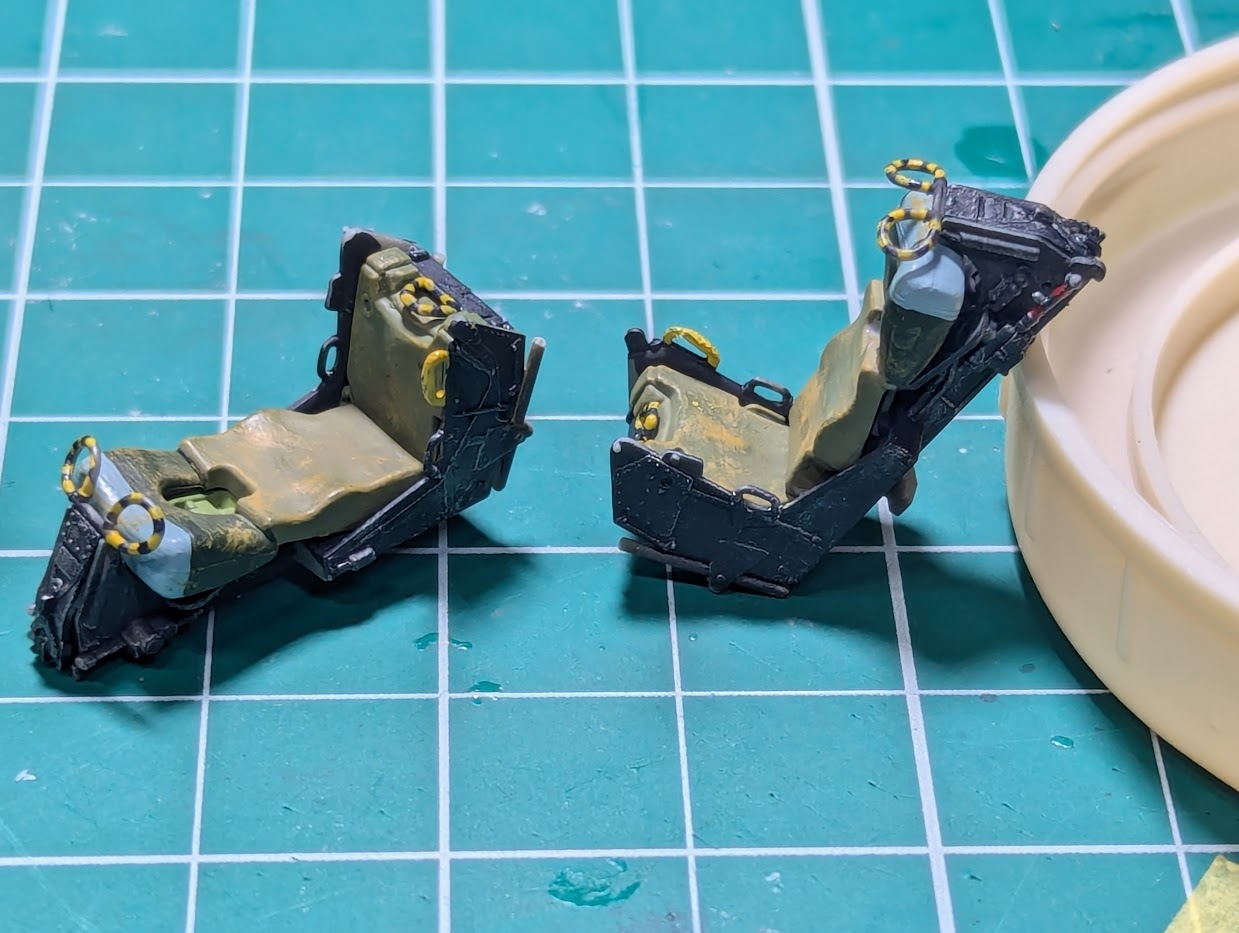
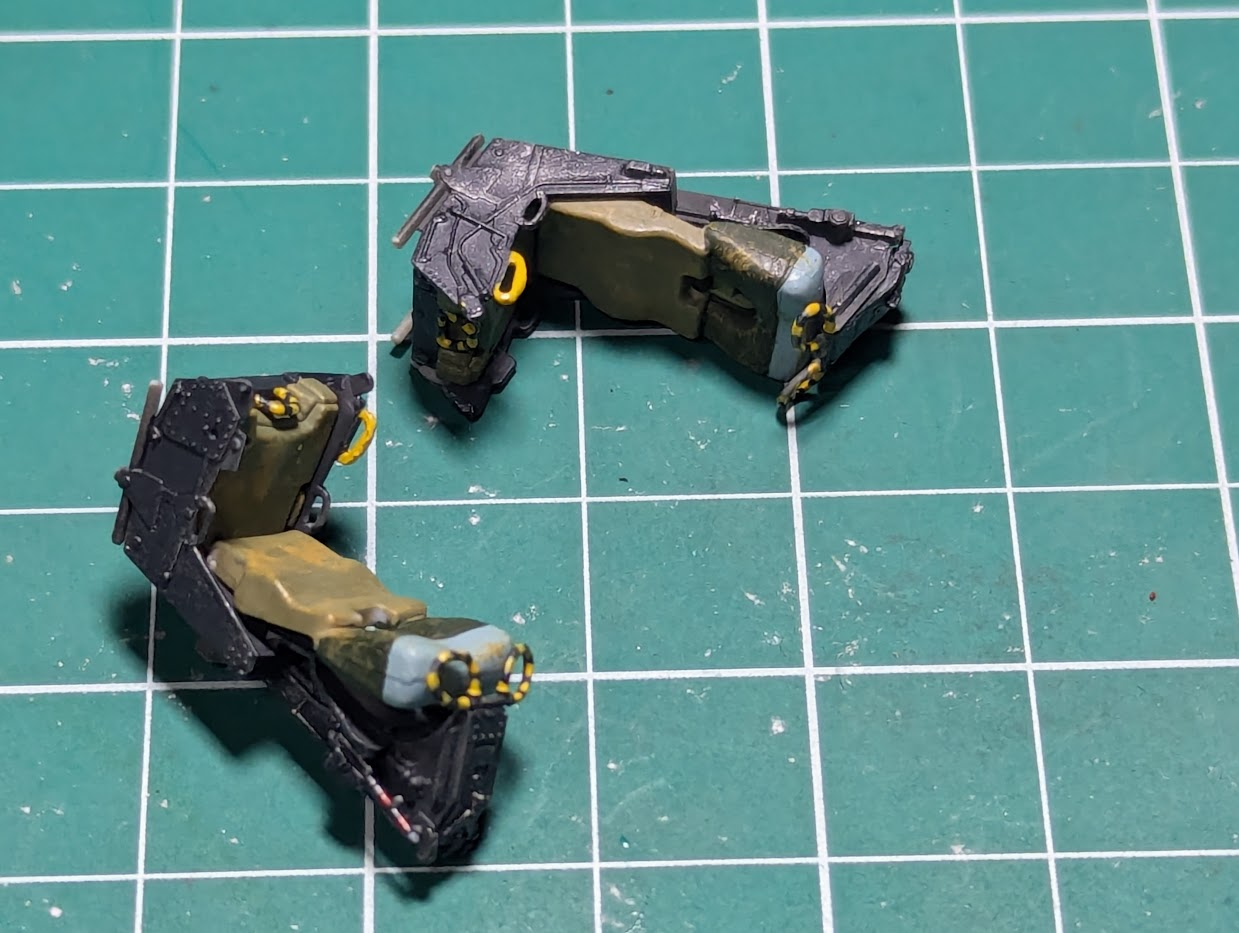
Seats came out okay, kinda wishing I had spent extra for PE, but the way the canopy opens much will be hidden.
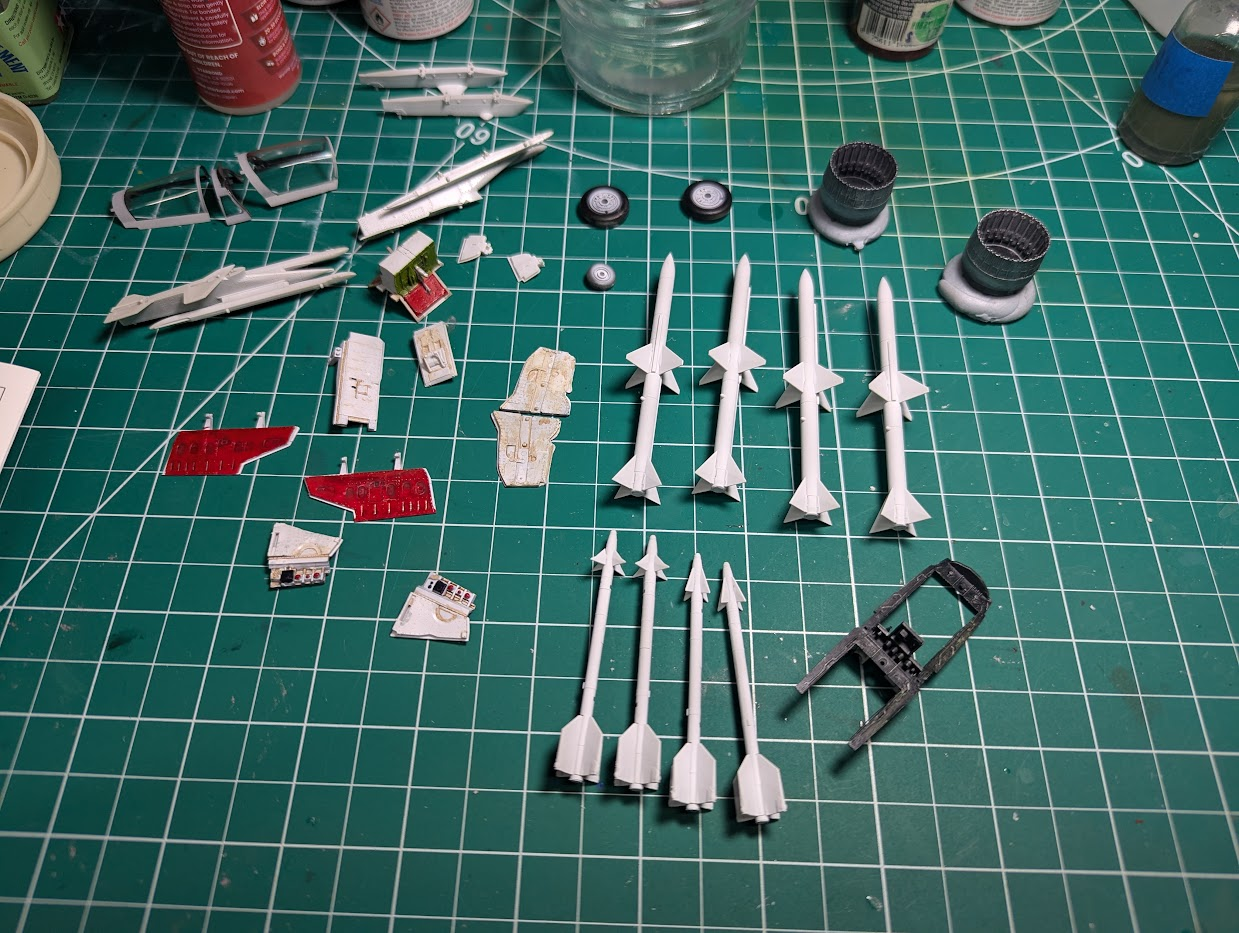
I'm clearly out of my area of expertise with one of these "new" jets (1961 counts as new right?), but maybe someone here knows. What is the deal with the variations in them? Four Sparrows and four Sidewinders, got that. but you can see the front fins on the Sidewinders show two different types, and the longitudinal "bar" on the sparrows is also different, two have one long bar each, two have two shorter ones each.
I thought that was strange and the destructions are no help.
Also, I think the gloss clear I just applied did darken it slightly. I'm gonna leave it alone so the clear can dry, I've had issues with the durability of the varnishes in the past, and maybe giving them over 24 hours to fully harden is the trick.
So while the jet is hardening, I moved on to lots of little bits.
Seats came out okay, kinda wishing I had spent extra for PE, but the way the canopy opens much will be hidden.
I'm clearly out of my area of expertise with one of these "new" jets (1961 counts as new right?), but maybe someone here knows. What is the deal with the variations in them? Four Sparrows and four Sidewinders, got that. but you can see the front fins on the Sidewinders show two different types, and the longitudinal "bar" on the sparrows is also different, two have one long bar each, two have two shorter ones each.
I thought that was strange and the destructions are no help.
When doing armour the different tips are for either high explosive or armour piercing . Just a thought, I'm sure others will correct me. PanthermanI decided to leave the color alone and press on. We can call it "sun bleached" at the end of a tour.
Also, I think the gloss clear I just applied did darken it slightly. I'm gonna leave it alone so the clear can dry, I've had issues with the durability of the varnishes in the past, and maybe giving them over 24 hours to fully harden is the trick.
So while the jet is hardening, I moved on to lots of little bits.
View attachment 124402
View attachment 124403
Seats came out okay, kinda wishing I had spent extra for PE, but the way the canopy opens much will be hidden.
View attachment 124404
I'm clearly out of my area of expertise with one of these "new" jets (1961 counts as new right?), but maybe someone here knows. What is the deal with the variations in them? Four Sparrows and four Sidewinders, got that. but you can see the front fins on the Sidewinders show two different types, and the longitudinal "bar" on the sparrows is also different, two have one long bar each, two have two shorter ones each.
I thought that was strange and the destructions are no help.
Edbert
Well-Known Member
- Joined
- May 16, 2024
- Messages
- 3,159
I found out a lot of things about the armaments, of course I was pretty sure I'd already screwed up with the instructions. Just wanted to share the "answers" here.
#1
The Tamiya F-4B sprue contains 4 Sidewinder bodies but options for 2 different seeker heads, either the earlier G/H or the later L. I think you may have used the wrong seeker heads off the sprue for two of your 'winders. The Sparrows are AIM-7Es so they should all look the same.
#2
The AIM-7 "bars" are actually called tunnel cable cover and it connects the guidance/target detector section to the control section as the warhead seperates the 2 sections. Also note that the tunnel cable cover is attached to the wave guide antenna which is another "bar" that runs right to the back of the rocket motor and has what looks like a white delrin dowel that is about 1/2" long. So the "bar" actually runs from about 4" from behind the radome (which is ceramic and is flat white to a bone white color) to the back of the rocket motor. While I'm at it the wings and fins are unpainted that looks like dark steel and the overall missile is a light gray, not white like the instructions state.
I worked on/maintained/tested both of these missile systems for 7 years so I do have plenty of first hand experience.
#3 (partial response to above)
The grey missile body for air to air missiles is a NATO standard. I believe the standard to change to grey was adopted in late 80's or early 90's. Before that the MIL SPEC required white for missile bodies and rocket launchers. It didn't specify the shade of white but it was mostly gloss or insignia white. The grey is specified and has a FS specific standard number for the colour. Similar to the colours of the brown, yellow and blue bands that are specified. So white for Vietnam era AIM-7E is correct.
#4
I did the same thing on my first one. I went back and read the instructions (God forbidden!) and realized I'd done the same thing you did. Had to remake two of each. All the parts are there.
#5
The sidewinders you have here is AIM-9L (left) and AIM-9D/G (right). I haven't seen those before carried simultaneously and I don't believe I've seen Ls on F-4Bs (they came into service after the vast majority of F-4Bs were retired). It wasn't a rare occurrence to have two of the sidewinder rails empty, so the two D/G model Sidewinders would fit perfectly on your F-4B. Those two were externally similar.
#6
AIM-9D/G would be the safe choice for any Vietnam-era Navy Phantom. Save AIM-9B for Air Force Phantoms in Vietnam, with AIM-9E and AIM-9J showing up on USAF Phantoms in '72. I'm in the process of writing a book about naval phantoms so, if you have further questions please let me know.. I'll be happy to help the best I can.
#1
The Tamiya F-4B sprue contains 4 Sidewinder bodies but options for 2 different seeker heads, either the earlier G/H or the later L. I think you may have used the wrong seeker heads off the sprue for two of your 'winders. The Sparrows are AIM-7Es so they should all look the same.
#2
The AIM-7 "bars" are actually called tunnel cable cover and it connects the guidance/target detector section to the control section as the warhead seperates the 2 sections. Also note that the tunnel cable cover is attached to the wave guide antenna which is another "bar" that runs right to the back of the rocket motor and has what looks like a white delrin dowel that is about 1/2" long. So the "bar" actually runs from about 4" from behind the radome (which is ceramic and is flat white to a bone white color) to the back of the rocket motor. While I'm at it the wings and fins are unpainted that looks like dark steel and the overall missile is a light gray, not white like the instructions state.
I worked on/maintained/tested both of these missile systems for 7 years so I do have plenty of first hand experience.
#3 (partial response to above)
The grey missile body for air to air missiles is a NATO standard. I believe the standard to change to grey was adopted in late 80's or early 90's. Before that the MIL SPEC required white for missile bodies and rocket launchers. It didn't specify the shade of white but it was mostly gloss or insignia white. The grey is specified and has a FS specific standard number for the colour. Similar to the colours of the brown, yellow and blue bands that are specified. So white for Vietnam era AIM-7E is correct.
#4
I did the same thing on my first one. I went back and read the instructions (God forbidden!) and realized I'd done the same thing you did. Had to remake two of each. All the parts are there.
#5
The sidewinders you have here is AIM-9L (left) and AIM-9D/G (right). I haven't seen those before carried simultaneously and I don't believe I've seen Ls on F-4Bs (they came into service after the vast majority of F-4Bs were retired). It wasn't a rare occurrence to have two of the sidewinder rails empty, so the two D/G model Sidewinders would fit perfectly on your F-4B. Those two were externally similar.
#6
AIM-9D/G would be the safe choice for any Vietnam-era Navy Phantom. Save AIM-9B for Air Force Phantoms in Vietnam, with AIM-9E and AIM-9J showing up on USAF Phantoms in '72. I'm in the process of writing a book about naval phantoms so, if you have further questions please let me know.. I'll be happy to help the best I can.


