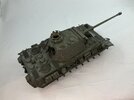
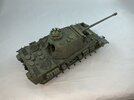
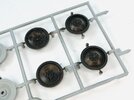
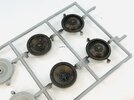
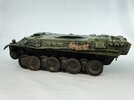
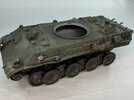
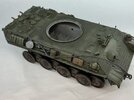
Tamed Panther: “Cuckoo”

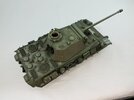
I wouldn't say "nearly" just yet myself :) The next step was to spray lighter patches onto as many surfaces as possible:
IMG_2604.jpeg

I used Mig IDF Green for this on the olive drab parts. On the wheels that were already lighter in colour, I did the same with Vallejo Armour Brown, but after looking at the result, then sprayed them entirely with that, as well as putting it in some areas on the lower hull, before adding lighter bits from the same colour mixed with Field Drab. This way, the wheels are still dark brown, but not as dark as before.
 
I seem to be on a roll with this one :) After the lighter sprayed patches were dry, I put some washes over the model. First Army Painter Strong Tone (a translucent dark grey, like Tamiya Smoke but not glossy) over the olive drab, and before that had dried, their Dark Tone (translucent very dark grey) over the mud. Both of these I thinned roughly 1:1 with water, because they're usually too strong if used straight from the bottle:

IMG_2605.jpeg

It's not really that apparent in the photo, but the whole model is now darker and there is shading around details and inside grooves etc., like all of the Zimmerit. The next step was to highlight it:

IMG_2607.jpeg

All of the OD was drybrushed with Humbrol 86 Olive Green first, followed by a lighter pass with 159 Khaki Drab. The undersides, on the other hand, got a coat of 98 Chocolate first and then very lightly with HB2 Dark Earth. Yes, HB2, not 29 — the 159 is a Super Enamel tin from maybr 25 years ago, all of the others are older still, if not a lot older :)

Here the wheels. I first put on a coat of Army Painter Dark Tone, but unthinned because it proved to be too light when I did a few wheels with the thinned version first:

IMG_2606.jpeg

And then I drybrushed them just like the mud on the hull:

IMG_2608.jpeg
 
Have you seen how Steve Zaloga does his bogies etc?,Layers up various brown tones to depict ground in dirt and dried mud.He calls it a lazy way out.I tried on some Shermans and looks pretty good to me.
 
I think that's more or less what I'm doing here too :) Why paint everything OD and then add so much dirt and stuff over it that nothing of the OD remains visible, is my idea.
 
The Panther is so sexy it does not matter what color you paint it

EDIT:
Oh noes....PM might see this...that is NOT what I meant!
 
Yesterday, I completed the wheels by painting the tyres in a rubber colour with my normal method, though only the running surfaces, not the sides. I first painted them dark grey, then added a black wash (thinned Indian ink, in this case) and drybrushed them with another shade of dark grey. It's kind of hard to see, but they're subtly different in colour than the mud :) I then glued them on:

IMG_2613.jpeg

Having done that, I had the impression that I had installed the suspension arms too low, because the tank appears to be riding high to my eyes, but when I held it against 1:35 scale drawings in Panzerkampfwagen Panther by Bruce Culver and Uwe Feist, they proved to be in the right position after all.

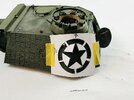
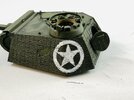
I've also been busy drawing the markings in Illustrator so that I could make them into stencils. Here the star on the left side of the turret:

IMG_2616.jpeg

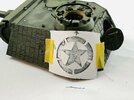
You could spray it like this, but on this surface especially, that doesn't seem like a good plan to me: because of the curve in the armour plate, the stencil fits poorly while the Zimmerit doesn't give a smooth surface underneath — you'd get a lot of overspray. This is why I instead used a brush. White paint on a short-haired, broad brush (a drybrush-brush of about 6 mm diameter) and then dab paint on through the stencil:

IMG_2617.jpeg

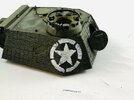
Then just remove the stencil, and:

IMG_2618.jpeg

After that, all I had to do was use a fine brush to fill the gaps and repair minor defects, as well as increase the coverage a bit:

IMG_2619.jpeg

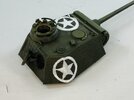
I then did the other side and the roof:

IMG_2620.jpeg

For the star on the roof, I first broke off the lifting eye at the left front, because it was very much in the way of the stencil. After painting on the star, I glued it back and painted it white (except the outboard bit, as can be seen in the photo of the real tank). That there are still brush marks showing is not a problem, chances are they were on the real thing, too.
 
This is why
Thanks for including rationale along with steps and picts. We don't all approach problems in the same way, and it is eye opening to peek into someone else's process.
I'm assuming you intend on reducing the contrast of the bright stars, so how will you proceed?
(I know you have a plan
)
 
I'm not sure they need to be toned down, but maybe I'll add a slightly darker wash over them to shade them better. I'll have to see how they look tomorrow :)
 
After some industrious painting in my attic hobby room:

IMG_2631.jpeg

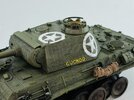
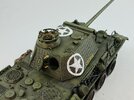
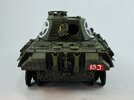
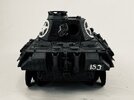
… I finished the markings:

IMG_2627.jpegIMG_2628.jpegIMG_2630.jpeg

I had also made stencils for the name and the diamond on the rear of the turret, but ended up painting them by hand instead. The name is too small to cut out (at least with a hobby knife, though maybe a cutting plotter can do it) and if I had wanted to use a stencil for the diamond, I should have kept the rear hatch unglued.

For the arm-of-service number on the back, I first painted a red background. It's debatable whether Cuckoo had that, or only the number 153 in white, but my thoughts are that red would probably be hard to see in black-and-white film. To illustrate, here's a mock-up of that with the last picture above, but now with the standard silver-tint filter applied in my iPad's camera app:

IMG_2629.jpeg
 
Can confirm ,it is quite an oversimplification but...blue=white & red=black.

This thread makes me wonder if the descendants of Cuckoo's crew know this story. Guess things like that should not concern me, but they do, at least a little bit.
 
Man that attic is hot.!
Not the worst it's ever been, but not exactly great to sit in for very long yesterday, no.

Can confirm ,it is quite an oversimplification but...blue=white & red=black.
You mean in black-and-white photos? It depends on the film used, but in the Second World War, they mostly used film in which red turns dark and blue turns light. Wikipedia has a fairly good article about it.

This thread makes me wonder if the descendants of Cuckoo's crew know this story.
I have no idea … Could be they're totally unaware, but for all we know, they know more about it than we do :)

This is a beauty, Amigo!
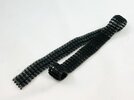
Thanks :) Now to build those bloody tracks …


Write your reply...

Latest posts

Back
Top