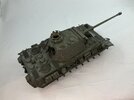
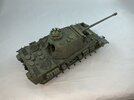
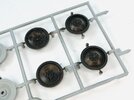
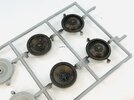
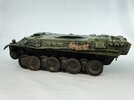
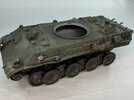
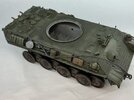
Tamed Panther: “Cuckoo”

I wouldn't say "nearly" just yet myself :) The next step was to spray lighter patches onto as many surfaces as possible:
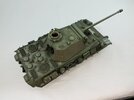
IMG_2604.jpeg

I used Mig IDF Green for this on the olive drab parts. On the wheels that were already lighter in colour, I did the same with Vallejo Armour Brown, but after looking at the result, then sprayed them entirely with that, as well as putting it in some areas on the lower hull, before adding lighter bits from the same colour mixed with Field Drab. This way, the wheels are still dark brown, but not as dark as before.
 
I seem to be on a roll with this one :) After the lighter sprayed patches were dry, I put some washes over the model. First Army Painter Strong Tone (a translucent dark grey, like Tamiya Smoke but not glossy) over the olive drab, and before that had dried, their Dark Tone (translucent very dark grey) over the mud. Both of these I thinned roughly 1:1 with water, because they're usually too strong if used straight from the bottle:

IMG_2605.jpeg

It's not really that apparent in the photo, but the whole model is now darker and there is shading around details and inside grooves etc., like all of the Zimmerit. The next step was to highlight it:

IMG_2607.jpeg

All of the OD was drybrushed with Humbrol 86 Olive Green first, followed by a lighter pass with 159 Khaki Drab. The undersides, on the other hand, got a coat of 98 Chocolate first and then very lightly with HB2 Dark Earth. Yes, HB2, not 29 — the 159 is a Super Enamel tin from maybr 25 years ago, all of the others are older still, if not a lot older :)

Here the wheels. I first put on a coat of Army Painter Dark Tone, but unthinned because it proved to be too light when I did a few wheels with the thinned version first:

IMG_2606.jpeg

And then I drybrushed them just like the mud on the hull:

IMG_2608.jpeg
 
Have you seen how Steve Zaloga does his bogies etc?,Layers up various brown tones to depict ground in dirt and dried mud.He calls it a lazy way out.I tried on some Shermans and looks pretty good to me.
 
I think that's more or less what I'm doing here too :) Why paint everything OD and then add so much dirt and stuff over it that nothing of the OD remains visible, is my idea.
 
Yesterday, I completed the wheels by painting the tyres in a rubber colour with my normal method, though only the running surfaces, not the sides. I first painted them dark grey, then added a black wash (thinned Indian ink, in this case) and drybrushed them with another shade of dark grey. It's kind of hard to see, but they're subtly different in colour than the mud :) I then glued them on:

IMG_2613.jpeg

Having done that, I had the impression that I had installed the suspension arms too low, because the tank appears to be riding high to my eyes, but when I held it against 1:35 scale drawings in Panzerkampfwagen Panther by Bruce Culver and Uwe Feist, they proved to be in the right position after all.

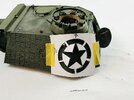
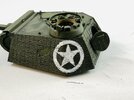
I've also been busy drawing the markings in Illustrator so that I could make them into stencils. Here the star on the left side of the turret:

IMG_2616.jpeg

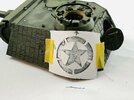
You could spray it like this, but on this surface especially, that doesn't seem like a good plan to me: because of the curve in the armour plate, the stencil fits poorly while the Zimmerit doesn't give a smooth surface underneath — you'd get a lot of overspray. This is why I instead used a brush. White paint on a short-haired, broad brush (a drybrush-brush of about 6 mm diameter) and then dab paint on through the stencil:

IMG_2617.jpeg

Then just remove the stencil, and:

IMG_2618.jpeg

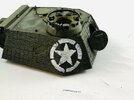
After that, all I had to do was use a fine brush to fill the gaps and repair minor defects, as well as increase the coverage a bit:

IMG_2619.jpeg

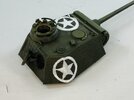
I then did the other side and the roof:

IMG_2620.jpeg

For the star on the roof, I first broke off the lifting eye at the left front, because it was very much in the way of the stencil. After painting on the star, I glued it back and painted it white (except the outboard bit, as can be seen in the photo of the real tank). That there are still brush marks showing is not a problem, chances are they were on the real thing, too.
 
This is why
Thanks for including rationale along with steps and picts. We don't all approach problems in the same way, and it is eye opening to peek into someone else's process.
I'm assuming you intend on reducing the contrast of the bright stars, so how will you proceed?
(I know you have a plan
)
 
I'm not sure they need to be toned down, but maybe I'll add a slightly darker wash over them to shade them better. I'll have to see how they look tomorrow :)
 
After some industrious painting in my attic hobby room:

IMG_2631.jpeg

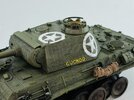
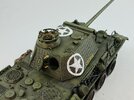
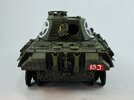
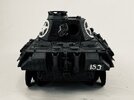
… I finished the markings:

IMG_2627.jpegIMG_2628.jpegIMG_2630.jpeg

I had also made stencils for the name and the diamond on the rear of the turret, but ended up painting them by hand instead. The name is too small to cut out (at least with a hobby knife, though maybe a cutting plotter can do it) and if I had wanted to use a stencil for the diamond, I should have kept the rear hatch unglued.

For the arm-of-service number on the back, I first painted a red background. It's debatable whether Cuckoo had that, or only the number 153 in white, but my thoughts are that red would probably be hard to see in black-and-white film. To illustrate, here's a mock-up of that with the last picture above, but now with the standard silver-tint filter applied in my iPad's camera app:

IMG_2629.jpeg
 
Can confirm ,it is quite an oversimplification but...blue=white & red=black.

This thread makes me wonder if the descendants of Cuckoo's crew know this story. Guess things like that should not concern me, but they do, at least a little bit.
 
Man that attic is hot.!
Not the worst it's ever been, but not exactly great to sit in for very long yesterday, no.

Can confirm ,it is quite an oversimplification but...blue=white & red=black.
You mean in black-and-white photos? It depends on the film used, but in the Second World War, they mostly used film in which red turns dark and blue turns light. Wikipedia has a fairly good article about it.

This thread makes me wonder if the descendants of Cuckoo's crew know this story.
I have no idea … Could be they're totally unaware, but for all we know, they know more about it than we do :)

This is a beauty, Amigo!
Thanks :) Now to build those bloody tracks …
 
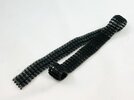
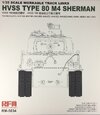
Tonight, I started assembling the QuickTracks … eh … tracks I got yesterday. The difference with the RFM ones is quite noticeable …

IMG_2656.jpeg

This is one track of 86 links, which took me under half an hour to make.

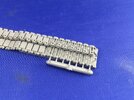
Don't get me wrong, the RFM tracks are pretty good too, but those damned pins started getting to me. You need to very carefully glue them in so that no glue seeps between the links, and I just couldn't do that accurately enough without taking far more care than I wanted to. These by QuickTracks don't need any work except to click them together. One of the links broke when I did that, but you get 200 while you need 86 times two, so no worries.

Everything considered, I should have bought these straight away. The 10 euros or so that they're more expensive than the RFM tracks easily compensates for the cleanup needed on the RFM tracks, and even more so for the care that you have to take to glue in all those little pins.
 
You mean their T80 tracks? :)

582AEE5F-420E-4953-B1EE-3917A08388AB_1_105_c.jpeg

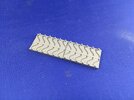
These go together with glue, but they're very laborious. The pins are moulded as sets of two with the end connectors on, but you have to glue the guide tooth to the middle of the pins and then glue two half track blocks together on both sides of the tooth, trapping the pins between them.

4C2DCC0C-BBAA-47AE-8CF0-30F231B6AE63_1_105_c.jpeg

This is a jig I modified by cutting the ends off two of them and sticking them together to make a longer one. This because RFM's recommended assembly method is useless: they would have you make sets of six links, using seven sets of pins, so you end up with short bits of track that you then need to join with single blocks. Far easier to make the track continuous by just extending it.

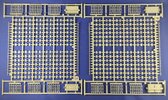
To give an idea of the amount of work these tracks are, though, here are two sprues, to show both sides:

635D31A1-C492-4473-AE01-20359FDBABE0_1_105_c.jpeg

… and you get four of those …

There's also a good amount of stretch in these tracks because of the loose fit of the track pins. A full track stretched to its maximum length is 2 cm longer than when it's pushed together as far as it will go. This is not really an issue for a model, of course: just build it so it's the correct length when stretched, and use the kit's idler wheel to tension the track just like IRL (assuming your kit allows that, of course :) ).
 
You mean their T80 tracks? :)
I am pretty sure that is a yes. I see the Easy Eight listed there, my kit came with those so it was not an add-on.

Definitely laborious, but wondering if they have the glue issue with the pins getting glued or was that the Panther tracks issue only.

I did break-bags and took a look at the links, I like your idea for when I actually begin building it. Still trying to resist for now, too many unfinished and close to finished items in progress already. Then there's the AHQ (1/16th) US Halftrack kit was supposed to ship sometime in May. So I do not need any more WIPs lying around.
 
That kit should have the same tracks as in this separate set. Because these don't have small pins that go only into the sides of the links, they're much easier to glue: put a small amount of glue on the half-block that's in the jig and press the other half on. I used Tamiya extra thin and just applied a drop with the built-in brush, and I didn't gum up any of the links.

I would also advise to first glue the horns to the pins, and completely ignore the second half of the jig that's supposed to go over those horns to squeeze the track together. I found that the track stuck in that half of the jig, and by splicing two lower jig halves together:—

F547C78B-15A6-48C5-8716-B78130432CB8_1_105_c.jpeg

… and pressing the second half of the blocks down by hand, it was easy enough to build the track. If dull :)
 
In addition to building and painting the tracks for this model, I also finished the stowage:

IMG_2677.jpegIMG_2678.jpeg

The coiled rope on the left mudguard, I painted as rope rather than as steel cable (after some discussion about this on the TWENOT forums the other week), while the metal parts of the tools are Humbrol Metal Cote Polished Steel over matt dark grey; the tow cable was painted much the same way. After it dried, I lightly buffed the Polished Steel with a coarse, sturdy paintbrush to bring out the sheen a little. The oil can on the right of the tank is American olive drab to give a slight difference of colour with the British OD of the rest of the tank, and the jack block is SCC 2 brown for the same reason.

The wash basin has a range of shades: I first painted it light grey from Vallejo and then added random splotches in increasingly lighter shades (by mixing ever more white into the paint) using an old, stiff, coarse brush, but in the end it looked like somebody had painted random splotches on it ;) That was easy to correct, though, as I found when I tried something: I took a very pale grey from Tamiya — lighter than the base colour I had used — and painted it all over the basin without stirring it first, so it didn't cover well. Before it dried, I wiped off most of it again, which drew the colours underneath together much more and I think it looks reasonably well like galvanised iron.

After a remark on Missing-Lynx a while ago that the chance is good that the jerrycans etc. were tied on with field telephone wire, I painted the copper wire I had used there, matt black instead of as string.

The spare track link will remain olive drab — I suspect it was already on the tank when it was captured, and simply got sprayed SCC 15 along with it.


Write your reply...
Back
Top