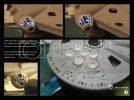
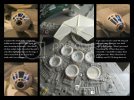
Scratchy's Fine Molds 1/144 Millennium Falcon

I scratched a vent screen, just so that the consistancy is there from screen to screen. I think it's an improvement from the others. I have to make it a point to learn how to make my own photo etch. I also light tested the first clear casts of the cockpit and gunwell. I'm satisfied, but I had to clean them up with some putty due to the air bubbles.
millenniumfalcon11.jpg
 
Scratchy, do you think that would work with PE grills as well? I mean I have made a section which has PE grills and styrene cap much like yours, but I thought it would be too fine to cast. Yours is less than half the size of mine.

Ozzy
 
ozzyguanche said:
Scratchy, do you think that would work with PE grills as well? I mean I have made a section which has PE grills and styrene cap much like yours, but I thought it would be too fine to cast. Yours is less than half the size of mine.

Ozzy

Ozzy,

When something as small and detailed like this is scratched and then has silicone poured over it, it's best to have the item glued to a .005 thin piece of styrene. I do this so that the silicone doesn't flow in-between the detail and the backing. It's also easy to separate the two moulds.

Once the resin has cured, I'll sand down the backside. If you can glue the PE to a piece of styrene then it might work. Have you considered pressing the PE into some post-it putty, then pouring resin on it.

It's an idea. However I think glueing a backer to the detail is best.
 
Quaralane said:
Some teeny tiny parts to cast up there, Scratchy.
Amazing work

Thanks Quaralane!

Here's the latest work. I have the cockpit painted. I still need to touch it up a bit and glue the seats in. All the lights where drilled out and touched with Tamiya clear paint.

millenniumfalcon12.jpg
 
I hope that mine looks that good when I am done with her, and yours is a much smaller scale!
 
The cockpit looks sooo awesome for this scale!
Just like all the rest!
Applause, and my jaw is on the floor once again :eek: ;D
 
Thanks for the kind words everyone. I repainted the cockpit, touched it up, made it look a little better and I drilled out the instrument lights. This time increasing the amount. I also added the four cockpit chairs.

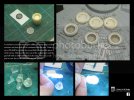
I cut a piece out of a resin TIE wing and inserted it into one of the engine vents. I think I'll have these placed in each until I can learn how to make my own PE then I'll change them out then.

The two parts highlighted yellow and pink will be replaced. The intial 51 part that I scratched is just a bit too big. The engine flap struts that are moulded to the model are too big as well. I poured rubber over my parts and I should have the new struts on the next post.

millenniumfalcon13.jpg

Thanks for following along.

scratchy
 
The parts from the tie wing look good in there. Too bad they are not transparent. They hide all the work you did on the exhaust vents. Great job!
 
I have that part underneath some silicone. When the mould is finished, I'll inject clear resin and see how it turns out.
 
You knock this any further out of the park, and we'll need an orbiter to go get it.
Excellent details, Scratchy
 
merseajohn said:
Lovely job there Scratchy, th vents will look awesome.

Thanks Merseajohn. I have to make it a point to learn how to make my own PE. I have the link to the SSM site, but I'll need a new printer to get it done.

Quaralane said:
You knock this any further out of the park, and we'll need an orbiter to go get it.
Excellent details, Scratchy

Quaralane, you better get that orbiter fuelled and ready for launch, because these engine flap struts look pretty sweet! ;D
 

Latest posts

Back
Top