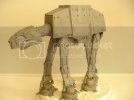
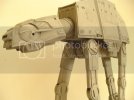
Revell AT-AT

Thundergod

New Member
Joined
Jul 26, 2013
Messages
202
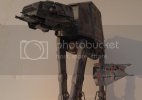
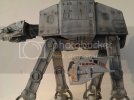
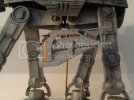
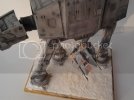
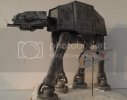
Here's some pics of my Revell AT-AT . The "head" has been heavily re-worked to add detail that isn't present on the kit "out of the box" . Overall though , the kit is a good one , especially for it's relatively inexpensive cost . I'm adding a diorama base and Snowspeeder from the Revell "Pocket Kit" range .
2013-07-12201528_zps1879faf1.jpg

2013-07-12201416_zpsad478223.jpg

2013-07-12201545_zps6c5c1ec2.jpg

2013-07-12201554_zpscb4b9810.jpg

2013-07-12201708_zps5f0b0ce2.jpg
 
Outstanding!
Really makes me want to start working on mine after looking through yours and Scott's projects pics - this big guy is a pretty great-looking piece being properly treated with painting and weathering for sure!
 
A very good painting and weathering work indeed.

Good job !

Some friends of mine did modified the kit a lot (raised details on the hull engraved, entire modification of the head, details on the legs, articulations...), adding more realism on it. Note that the Easy kit pocket Snowspeeder is a perfect match for this AT-AT.

Didn't built mine yet, but have a pack of the old AMT kit, plus the one I built in 1985, I intend to built an "uber detailed" AT-AT with 4 articulated legs (the AMT ERTL kit only have two articulated), the appropriate details and make a Diorama with force perspective of the Hoth Battle in the snow (a fierce quadripode aiming the rebels, another one destroyed, another little one in the distance...). I've done one, in a limited period of time for a local exhibition in Paris, I want to make one more permanent :D
 
Very nice job with this! Really great work with those armour panels on the head. :)
 
Scott Girvan said:
Christrom - wick. ed.

Very cool ! The MPC At-AT is still an excellent kit . While working on the Revell version , I unearthed mine , 20 odd years ( at least ) after first building it . I'm currently tinkering with it to bring it more in line with it's bigger brother . It's lost it's guns , so they'll have to be replaced with some brass and steel rod .

DSC05127_zpse98f5869.jpg

DSC05126_zps19243182.jpg
 
Sweet build......I have one question for ya.....What did you do to cover up that nasty gap by the rear leg assembly? Right where the rear leg assembly mates ( under the body ) to the over hang in the rear? I was thinking of useing some Aves myself before I pulled out the Dremel and shaved the post's under the body so the darn rear assembly mates to the "over hang" in the rear of this kit.

Any tips fromyou would be greatly appreciated..
 
RedDragon62 said:
Sweet build......I have one question for ya.....What did you do to cover up that nasty gap by the rear leg assembly? Right where the rear leg assembly mates ( under the body ) to the over hang in the rear? I was thinking of useing some Aves myself before I pulled out the Dremel and shaved the post's under the body so the darn rear assembly mates to the "over hang" in the rear of this kit.

Any tips fromyou would be greatly appreciated..

To be honest , I haven't actually gotten around to fixing that yet . What I planned on doing was cutting a small slice from a section of plastic tubing and simply filling the gap that way . I've got a suitable bit of tube/pipe , but since I started on the base , I'd more or less forgotten about it !
Now that you've reminded me , I'll have to get it done . ::)
[/quote]

My bad....LOL...Now we both have that eyesore to deal with.
 

Latest posts

Back
Top