Bandai AT-AT

garagebuild

New Member
Joined
Feb 10, 2022
Messages
21
Started putting together the Bandai AT-AT 1/144. Good kit as usual, pieces together nicely. Here's some pics of the progressing build.

First just the basic sub builds. Legs, underbelly, back,
 

Attachments

  • 20220502_122508.jpg
    20220502_122508.jpg
    243.9 KB · Views: 9
  • 20220507_111559.jpg
    20220507_111559.jpg
    225.6 KB · Views: 9
  • 20220507_122453.jpg
    20220507_122453.jpg
    237.4 KB · Views: 9
  • 20220501_111243.jpg
    20220501_111243.jpg
    206.5 KB · Views: 8
Primer painting. Basically a few light coats of Vallejo grey primer. I wanted to try the darker underpainting technique to bring some tonal variation to the mass of grey. The idea being you paint in the shadows before the main block colour layer goes on. I used the Vallejo black primer. The spray was a bit splattery and left quite a bit of spotting. I put the issue down to too thin paint. Id thinned ~ 20% trying to get as thin a mix as possible with one eye on a nice an smooth shading. I reckon I over did it though. At this stage I wasn't too worried about this though and let it stand
 

Attachments

  • 20220521_165454.jpg
    20220521_165454.jpg
    196.1 KB · Views: 10
  • 20220521_165505.jpg
    20220521_165505.jpg
    174.2 KB · Views: 10
  • 20220521_165521.jpg
    20220521_165521.jpg
    136.4 KB · Views: 10
Cockpit painting. Two tiny AT-AT drivers. Thankfully only two colours! Helmet details courtesy of decals. Not much else to do here. Small amount of detailing in greens reds and whites common to SW control panels. A bit of wash on the back wall.

But shouldn't there be an AT-AT commander too?
 

Attachments

  • 20220521_161334.jpg
    20220521_161334.jpg
    202 KB · Views: 10
  • 20220521_161229.jpg
    20220521_161229.jpg
    220.1 KB · Views: 9
  • 20220521_161139.jpg
    20220521_161139.jpg
    196.2 KB · Views: 10
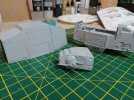
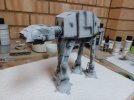
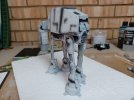
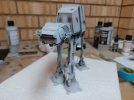
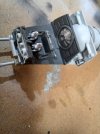
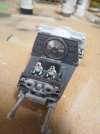
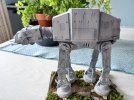
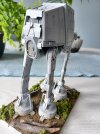
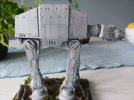
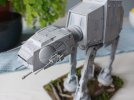
Main painting. Vallejo model air, Flat white (90%) Neutral Grey (10%) - nominally at least, once I had this it seemed a little light so went with a drop or two more grey. Sprayed on in fine light coats about 5/6 passes per coat. Three coats overall. The underpainting worked reasonably well. Wish I'd been a bit more specific in where I put the black underpaint, but oveall there is a bit of variety added into the grey that looks quite natural. Once I get the wash and some weathering in there I believe it will key things together quite well.

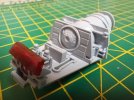
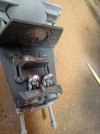
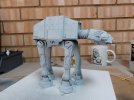
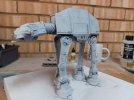
Next step, washes and weathering. This is going to be an Endor AT-AT so looking for rust and tree marks on the legs and rain streaking down the sides.
 

Attachments

  • 20220522_104032.jpg
    20220522_104032.jpg
    214.6 KB · Views: 19
  • 20220522_132850.jpg
    20220522_132850.jpg
    193.3 KB · Views: 18
  • 20220522_132902.jpg
    20220522_132902.jpg
    192 KB · Views: 18
Some delay on weathering on this, but got there. Panel line with a grey wash, decided I didn't want to go the usual black I've done on the ships. Nice and subtle and works well in that sea of grey. Streaking was done with a dab of black oil paint and a flick with a brush with touch of thinner. Looks okay till you look very closely and note the streak doesn't quite come from the point of interest on the body. Light chipping, I like to imagine the grey paint covers a bare shiny metal body so use a chrome on a piece of sponge to chip the feet. A little light rust and rust wash on the legs. Then a touch of mud splash over the feet. Stand treated with Vallejo mud and some sticks. Also did a little dry brushing for highlights and lowlights. Pretty happy
 

Attachments

  • 20220604_090913.jpg
    20220604_090913.jpg
    273.4 KB · Views: 12
  • 20220604_090947.jpg
    20220604_090947.jpg
    252.4 KB · Views: 12
  • 20220604_090932.jpg
    20220604_090932.jpg
    176.8 KB · Views: 11
  • 20220603_181703.jpg
    20220603_181703.jpg
    200.4 KB · Views: 11
  • 20220604_090907.jpg
    20220604_090907.jpg
    149.1 KB · Views: 10

Latest posts

Back
Top