Revell 1:48 F/A-18 Super Hornet build... My noob adventures

That is a great shot, sorry had to steal that from you just now! They are so clean, haha.

For Tamiya light ghost gray I usually lighten up the XF-66 a tiny tiny bit depending on the scale and such. Or just use Testors MM FS colors. They are nearly (or should be anyway) exact FS colors.
 
I just downloaded iModelKit, an iPhone app that has a color library for tons of paints and a closest-match feature for popular paint brands. Handy around the painting booth, IMHO.
 
Carsenault said:
glennonrp said:
Carsenault said:
XF-66 light (ghost) gray, XF-22 dark ghost grey

Speaking of this, is there a place to look this up? I just picked some Vallejo paints... :)

http://www.paint4models.com/

Thanks! I will have to check this out on my desktop. Wish they had a non-flash version. Looks interesting!

NecronautDrummer said:
I just downloaded iModelKit, an iPhone app that has a color library for tons of paints and a closest-match feature for popular paint brands. Handy around the painting booth, IMHO.
I just got the free, ad-supported version, but if I like it, I will pay for it. Thanks for the suggestion! I will be looking at this and see if it helps.
 
NecronautDrummer said:
I just downloaded iModelKit, an iPhone app that has a color library for tons of paints and a closest-match feature for popular paint brands. Handy around the painting booth, IMHO.
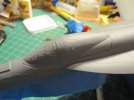
It's looking real good so far! Bummer about the lost parts though. I have two of these in my stash.

I use this iPhone app all the time. ;D It's a great help in finding paints. I use MM Acryl paints and it helps to find them with the FS numbers.

Hope you get the parts you're needing soon. Can't wait to see it finished.
 
There is an Android app called Hobby Color Converter in case you are not rocking IOS.

[Note:] Just played with it and you can disregard this app. It looks incomplete. A good idea and well executed, the only problem is that is only compares Tamiya with Humbrol colors. :(

Might look into building one of these myself.
 
Great news!!! I went out to the garage,where I do my airbrushing, to clear a space so I could drill some holes in my son's pinewood derby car when I saw a small sprue... The missing canopy parts!!!!! I still don't have the landing gear light or the HUD panel, but I can maybe scratch up something to stand in for those. But, now I can finish the build! So, I will be working on the pinewood car and the F-18 when I can. I also bought a P-51 tonight so I might work on that, too. My students will be working on research papers, some of which will be around WWII and it got me in the mood. I'd rather build a bomber, but that's a big project!

I think the imodel color app is pretty good. But, Myke, if you build an app, would it be iOS or Android? I have a few suggestions for features... :)
 
Android..., I'm a Google disciple ;D. I'd turn the code over if someone wanted to convert to IOS though.

What kind of idea you got? I'd love to develop a perfect app for model building
 
Aha, when I looked at the parts on my kit saw that all the parts were on the same sprue, I was wondering if maybe that sprue was missing. And liek I said, you found i when you were not looking. I love when a plan comes together. Looking forward to the rest of the build.
 
Hey Glennonrp,
Any more pics? I'm excited to see how things are progressing. Also, you mentioned that you picked up an A-10 and a P-51? Which A-10 kit did you pick up and have you started it yet?
 
Actually, I got a little work done this weekend. I finished some more panel lines and got the canopy affixed. Next I'm masking off the landing gear wells and will attach the vertical stabilizers so I can start painting the body.

I would have gotten more done but my son needed help with this Pinewood Derby car. We built our first one over the Christmas holiday but it was a disaster because I didn't know what I was doing. We scrapped it and started over. The new car got drilled out for weights, axles polished, wheels polished, and then careful filling and sanding and painting with colors and Future. I put decals on it and painted a last coat of Future yesterday. It's looking much better. And, I weighed it after it dried... With wheels and axles on the scale, plus a little weight it came in at 5 ounces even. :) So, with that almost done, I should have a bit more time for my F18.

Both the P51 and A-10 are Revell kits. I'm working my way though those because they're inexpensive and I'm still making a lot of mistakes. The P51 has raised panel lines, but the A-10 looks pretty good.

I should have more pics soon. :)
 
Hey Glennonrp,

You should start the A-10 ASAP!!!! I'm having a blast with mine, I know you will love yours!!! I've heard very good things about the Revel A-10 Kit, very accurate or so they say. Hurry up and post some pics man. Haha. Congrats on the derby car, sounds like a winner to me.
 
Getting somewhere.

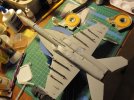
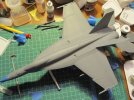
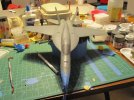
I masked off the nose and painted Dark Ghost Gray on top. Waited a day and reversed the masking so I could paint the bottom with the Light Ghost Gray. I had a small issue with my airbrushes. My Iwata's nozzle broke so I used the Badger. It was pulsating and I realized I had the wrong needle and nozzle combination. Fixed that so I could paint. So, the bottom got painted today. I guess I painted over the preshading on the panel lines completely. Oh well. Will try again sometime. May have to try a light oil wash after I spray Future on it.

Here's some pics:

Photo%25201.jpg

Photo%25202.jpg

Photo%25203.jpg

Photo%25204.jpg

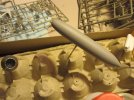
This is the centerline tank.
Photo%25205.jpg

After the paint dries overnight I plan to finish painting the munitions, attach the gear and munitions, see if there are any touch ups needed and then lay down some Future. After that, some decals, another coat of Future, see about some weathering and a matte finish. And, done?

Thanks for checking in and I appreciate any comments or suggestions!
Code:
 
Thanks, Adam. :) you're either being very kind or my pictures are hiding the mistakes. I took the masking off and started working on attaching some gear and gear doors. Scraped the nose of the plane. Sanded and repainted. Didnt look right. Sanded and repainted. Tried again. Still not happy but I think I will make it worse. Painted red on the edges of the doors. Went okay. Touched up here and there.

CA glue is very useful, but a pain in the ass. Got a little too much on the plane when attaching the arresting hook. Trying to apply some to the nose gear to attach the nose gear door I spilled some on the fuselage forward of the intake. I shouldn't have been useing the thin glue. So, after sanding that, I decided to take a break and let some glue and paint cure a bit more. Tonight I will touch up the fuselage where I marred it.

Good news, the canopy looks pretty good. And the paint, overall, looks good, too. So, it's not all bad. With a little luck, I can put Future on it tomorrow.
 
I could use a little advice.

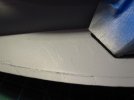
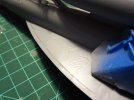
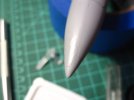
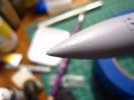
I dripped some CA glue on my model. I thought I could remove it with some acetone. Yeah, no, that didn't work. Well, it kinda did but it took a lot of paint with it. I thought I sanded okay and went ahead and painted. This is how it looks now.

F-18%2520super%2520hornet%2520build%25201.jpg

F-18%2520super%2520hornet%2520build%25202.jpg

Is there anything to be done about this?

Also, this is what the nose looks like now. Same question: is there something that can be done or is it as good as it is going to get?

F-18%2520super%2520hornet%2520build%25203.jpg

F-18%2520super%2520hornet%2520build%25204.jpg

If you have any advice, I would appreciate it. Thank you!
 
Hey Gleenornp,

I got a bit of CA glue on the A-10 I'm working on now. Ultimately I had to spend a TON of time on the one area. I went from a rough grit (I think 400 or so) all the way to around a 4000 Grit. I also used Squadrens sanding sticks. They work very well for me and I would suggest looking into them. I basically had to remove all the CA and then buff and polish the area. Then I had to rescribe the details. It took a long time to fix but in the end it came out pretty ok.
I think you could have the same luck with the wings and nose cone. But I would be careful when your sanding the nose, don't flatten out the curves. (There was a nice video on SMA about how to create a tool that you could use to sand rounded surfaces.)
Also, one lesson I learned the hard way about CA glue is that a little goes a very very long way. If I am going to use CA, I put a very small blob on a spare piece of cardboard or something that I keep very far away from the model itself. Then I use a toothpick to apply it to the model. Just some things I have learned, I am still new to the whole process so if anybody else can add something here please tell me if I am wrong.
 
I have the Squdron sticks and the Flexifile strips that sand curves. I thought I would end up making it worse. Hmmm... Maybe I will try again, though.

I hear you on the CA glue. I was careless and trying to skip a step. Every time I try to hurry I end up making a mistake. I usually put some on a little plastic lid I have but I thought I would skip that and use the tip of the glue bottle. And, then that happened.

How do I deal with the paint, though? The edge of the painted areas where I sand is raised. Wherever I stop sanding is a little lip. Is that because I'm sanding before the paint is fully cured?


Write your reply...

Latest posts

Back
Top