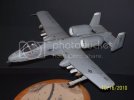
Revell 1/48 A-10

smokeriderdon that cockpit is sick. Love the air hoses you've added. Your work on the gear bays is equally awesome too.
billb those are some great references. A-10's kick butt. I just love these airframes.
 
bill, thanks again dude!

glorfindel, thank you. But I haven't posted any work on the gear bays yet. That was bill on his A-10. LOL
 
OK, so life did not give me as much time as I thought it was going to, so getting time to work on this model has not been easy. But I HAVE made some progress of late.

Let me say right now that I built this exact kit back when it was first released. Now, I know that was a while ago, and I know my memory isn't what it was, but I do NOT remember the fit being this bad.

Now, the resin tub is much bigger than the one in the kit. AND there are no real attachment points on it. So I had to use a large amount of miliput to stick the tub to the inside of the fuselage. You can see the yellow in the pic. Given the tub was significantly bigger I had to cut the landing gear bay piece horizontally then dremel the two pieces down to size, tack them in and when I got it right, super glue the snot out of them. Oh, and during this I filled the nose with miliput and a fishing weight. Between that and the resin cockpit I am hoping that will keep it from tail sitting.

frontgear1_zps7607ea1b.jpg


After that I did a pastel wash for weathering...

frontgear2_zps91729308.jpg


I also had to dremel the landing gear attachment to fit after the mods I made on the bay. Hopefully the gear is at the correct length. Then I added the large bay door. That covered up the stuff inside the fuselage nicely. But you can see all the fit issues here.

frontgear3_zps330f21f7.jpg


I painted engine parts (not a whole lot there) and while they dried worked on the wings. Then I assembled the engines. Yeah, I am gonna have to spend time on these seams...

engine2_zps568f1cf6.jpg


engine1_zps48cbee23.jpg


enginerear_zpsf460b5fb.jpg


enginefront_zps73ea666b.jpg


Oh, and the cockpit in place...

cockpit4_zpsb0beef03.jpg


So thats it so far. All the pics I have seen of the landing gears shows everything pretty much painted white, so I did not do a lot with the cables and the like.
 
geeze, that kit is fighting you every step of the way.
Looks like you're well and truly beating it into submission though :) Looking good!
 
bill, I have NEVER sanded so much just trying to fit the initial steps together. Thank God I have a dremel and have plenty of experience with it prepping fossils. I think I may have chucked this thing back when I did everything by hand. LOL
 
OK, got a little bit done with the engines. More dremel and sanding got everything looking even and like it should. Paint is still wet and the camera kept focusing past the piece, but you get the idea...


So then I dry fit them to the fuselage...


Looks cool, right? Nope...


I did the wings too, but no pics. Those have gaps as well. *sigh*

I WILL work on it tonight, I swear I will.
 
I really like your cockpit detailing. I took a break from sci-fi modeling to do a few planes. The A-10 is my favorite. This is the one I built a few years ago. Looking forward to seeing more of your build!

583-1.jpg
 
OK, this build is just becoming more of a pain every time I sit down. But damn it, I will finish this and it WILL look good!

So, I fiddled and fussed as much as I could and got the wings attached. Horrible fit...

Gap on top


Gap on bottom


Engine gaps


OK, so I get to do more sanding. Such is life I guess. Prior to putting the fuselage together, I filled the nose with Miliput and a 1/4 ounce fishing weight. Not to mention the added weight of the resin tub and the miliput I used to attach it. And yet...


Yep, she is still tail sitting. See that lovely tilt back? No clue how I am going to alleviate it now. Any suggestions?
 
You're beating it into submission putty line by putty line! Really starting to get that unique big Hog shape now :)
Very nice :)

Is there a usable door for the ladder well in the Revell kit? If so maybe you could just fill that well up with lead (drill the back or front wall out if you need more space) & then just glue the door on?
 
Well, as you can see, it has been a bit over a year since I last posted. A lot went on that prevented me from completing this build.

The good news is I am back at it! Bad news, I do not have the facility to use my air brush. So all painting is going to be with good old cans. And done outside. This should be fun! LOL

I should have made enough progress in the next week to post some pics.
 
OK, so here we go. Unfortunately I do not have sexy toons to guide folks along, so you just have to deal with boring descriptions from me. ;)

I knew this was an older kit, and would likely have fit issues, but sheesh. So, as a point of reference, I really don't like building my planes open cockpit for one main reason. DUST. You can NOT get it out of there effectively without wrecking it. So I do my models closed. One problem. This kit was designed to be done OPEN ONLY. This means I have to do some adjusting.

First, I had to saw off the tab on the rear that fit into a notch in the fuselage...


I then took that tab and glued into the notch. It did not fit well on its own, but thats what putty is for...


So, I then tried mating the internal frame with the windscreen. Great, it wont fit closed with the internal frame no matter how much trimming I do. &*^% it, into the trash it goes. Nothing for it. After almost an entire hour of fiddling, this was the best outcome I could get...


Yes, I was banging my head on the table. It was at this point that I decided I would simply not worry about this model being perfect. It just is NOT going to happen.

So, I moved on to the cannon. The molded part looks horrible. After a fruitless search, nicholassagen gave me a link to a brass after market part. Thank you sir. :D

Here is the molded part sawed off and hollowed out for the brass part...


You can also see some of the putty work on the canopy. Here is the brass cannon assembled...


And installed...


In this process I sprayed it with light gray for primer...


And some of the missiles drying...


So thats where I am for now. A bit more sanding and filling those gaps on the nose you can see and time to work on painting. As I dont have the air brush I am going to not highlight the panel lines and rely simply on a wash.
 
So I have been plowing on here and there. got metal landing gear (cant do the front for all the modifying I did) and resin wheels. I am done messing with seems and decided to just move on to painting.

There really isnt an official desert pattern for the Hog, so I am doing my version. The base is Tamiya USAF Tan and the second color is Tamiya NATO Brown. I am debating a third color. Once I get the baqck half of the plane done, I will decide for sure.

Masked and sprayed...


The results...


I think that I will be able to cover up a lot of the issues with painting and weathering.
 
So here is the rear portion masked and sprayed. That double tail and engines do make that a challenge...


And overall...


Sooooo, anyone care to give me their opinion on if I should throw a third color on? I am leaning towards it, but figured I would seek input.
 
Got your hands full with this one... Looking good so far, go for the third color I reckon.
 
Yeah, this one has been a joy to work with. ::)

Third color it is then. I will do that in the net few days.

thanks for the input guys. :)
 
Nice progress and congratulations for sticking with it and overcoming the hurdles!
 

Latest posts

Back
Top