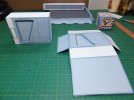
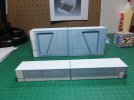
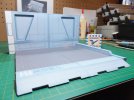
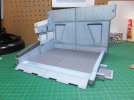
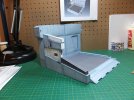
Patlabor Maintenance Facility

Papermodder

Modeller in both Plastic and Paper Card
Joined
Jan 2, 2013
Messages
1,224
Hello.
This will be a two part build.
The first part will be the construction of a Patlabor maintenance station.
The second part will be the construction of a Police Labor.
I have not decided yet whether it will be a type: 1, 2 or 3 labor.
I am using the designs of Julius Perdana.
You may have noticed I use a lot of his designs. I like his work, and his more complex stuff, require thought and imagination, as his instructions are usually very basic. It's up to you to figure out his puzzle.

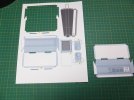
This is the kit for the maintenance station.
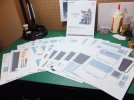
Start_zps7e868a13.jpg

I hope there is interest and you will follow along.

Jim
 
Exodusinside, more to come.

Big game nerd, thank you.
The template for this kit is a free download from paper-replika.com.

Jim
 
Good evening all.
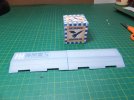
Since this is the first build update for this project, I thought I would include here the assembly procedure for a sub assembly for those unfamiliar with card modeling. Our first section is the up-ramp to the maintenance platform.

The first thing one does is scribe all the fold lines on the parts required. This will allow one to have straight fold lines in the correct position.
Then cut out any sections that have to be removed. In this case it is the instep areas between the feet of the up- ramp.
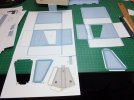
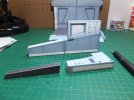
Now cut out the parts required for this part of the assembly, namely the ramp and the instep inserts.

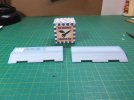
Ramp1_zpsf0355d7e.jpg

Next fold all creases, tabs and sides in the desired directions.

Ramp2_zpsfc26b9dc.jpg

Then dry fit all sides and tabs to make sure they fit. Trimming as required.
Now one can glue, one side or contact point at a time. Wait for the glue to partially dry before moving to the next point to glue. Continue like this till this part is whole.
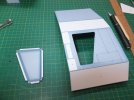
Next one can glue in the filler pieces, the inserts for the insteps.

Ramp3_zpsd9e31af2.jpg

Repeat with the rest of the sub assemblies for this section.

Ramp4_zpsc939ce98.jpg

Next with all the sub assemblies complete for this section, one glues the sub assemblies together.

Ramp5_zps33e8d92e.jpg

One now has a complete up-ramp. Set this aside to dry.
You could now move on to the next sub assembly, which in this case is the maintenance floor.
That is all for tonight. Thank you for following.

Questions and comments are always welcome.

Jim
 
Hi, I thought I would show you something.
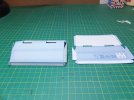
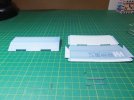
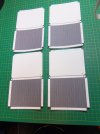
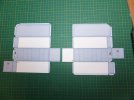
Here are the four panels that make up the floor. They are suppose to be identical, do you notice anything different about them?

Floor1_zps83d957b0.jpg

Have a look at the bottom two compared to the top two.

If you have not already noticed, the bottom two are missing the glue tabs on the bottom flap.

There are two ways to handle this situation. One, add glue strips behind where the two sides come together. Two, edge glue the joint.

I have decided for the second option. Why one might ask?
If I were to use glue strips, it may affect how straight the finished side comes out, affecting the fit to the up-ramp. So to avoid this problem I have decided to edge glue. There will be enough support from the surrounding walls that joint strength will not be an issue.

I thought this would be a good lesson for those that may want to build a paper model in the future, in how to handle a problem.

Thank you for following.

Jim
 
Hello.
Tonight's update.
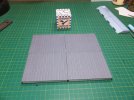
The 4 floor panels were assembled then left to dry. after they were dry the 4 panels were glued together.
I put books on the panels to make sure they were kept flat as the glue cured.

Floor2_zpsbf7ad1cb.jpg

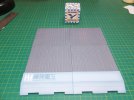
Next glued the up-ramp to the floor panels. Again books were placed on top to keep flate as the up-ramp was glued on an allowed to cure.

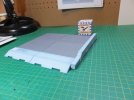
This is the completed floor.

Floor3_zpse70adec9.jpg

Thank you for following.

Jim
 
wow, very cool! Never saw this papercraft before, or a WIP for any papercraft
will follow this!
 
Hello.
Now that the floor is done, it's time to start on some walls.
The first wall constructed was a short wall on the right side. This is mostly a straight box construction with a small down step on the front. When dry it was glued to the side of the floor.

Wall1_zpsfed192d5.jpg

Then started on the back wall.
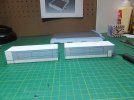
First up were the bottom sections. These were simple cube structures.

Wall2_zps30590617.jpg

These were glued together end to end to make a solid section, then put aside to dry.
While this was happening, started on the next section of the back wall. Again these are basically cubes, except that they have a 3D feature. So there is the inset panel that has to be assembled and a cutout on the face of the section.

Wall3_zpsc1f21fba.jpg

Wall4_zps7c8bfb6c.jpg

This view shows a completed cube and one ready for assembly with the inset installed.

Wall5_zpse3ef9e94.jpg

Again these were glued together end to end.
Here we see the 2 sections ready to be glued together.

Wall6_zps7634fef9.jpg

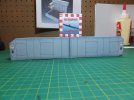
Once dried, they are ready to attach to the back of the floor.

Wall8_zps18fb981c.jpg

There are still more sections to this wall. It is going to be a fair sized model when finished.
That is all for the moment. Back to wall building.

Questions and comments are always welcome.
Thanks for watching.

Jim
 
Tonight built another section of the back wall.

Wall9_zps82e569c8.jpg

Wall10_zpsdaaa5659.jpg

With this added to the back wall we are already at 7" tall and we are only half way.
Also started on the left side wall, first two sections.

Wall11_zps288bc5fc.jpg

I know this part of the build, other than size, does not look like much. Once we get through this section more detail will come. We have to start somewhere.

Have a good evening and thank you for watching.

Jim
 
Thank you ExodusInside, Biskup and Grendels.

At the moment I'm tending toward the Type: 1.

Jim
 
Hello all.
Today did more work on the lower maintenance bay.
I have most of the left wall now assembled.

Wall12_zpsf1653897.jpg

Wall13_zps30ce854e.jpg

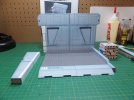
This was then attached to the left side floor and back wall.
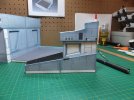
As well another detail was added to this wall and the step for the service platform was added to the right side.

Wall14_zps18e9e4d7.jpg

Wall15_zps673fe98d.jpg

Almost finished the first section of the maintenance bay's construction.

Thank you for watching.
Questions and comments are always welcome.

Jim
 

Latest posts

Back
Top