Bear43
Well-Known Member
- Joined
- May 19, 2023
- Messages
- 503
I agree the Takom kits are nice with fiddley parts.I better get hauling too...lol.... I really like this Takom kit. It's complex but easy to assemble.
View attachment 113557
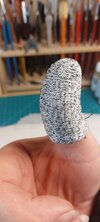
I tend to wear an armored thumb guard when drilling and cutting. Got a whole pack really cheap on amazon. PanthermanOUCH! Casualty of war. LOL
I was drilling the gun barrels out with a .30mm bit. It slipped off. In looking at the bit, it appears it went in the full length.
View attachment 113559
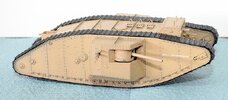
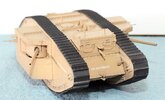
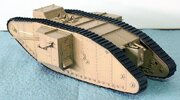
Looking good, the scuff is just battle damage. PanthermanI need some of those thumb guards. Been there more times than I care to admit. Off to Amazon!
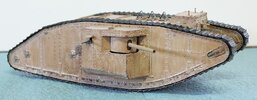
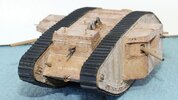
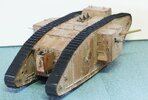
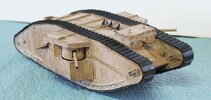
I did get my brown paint and decals on last night. One of the coolest things about living in the desert southwest is paint dries in a flash. Airbrushed paint in about 15 minutes and gloss and dull coat from a rattle can in about 10 minutes. I let the Vallejo paint dry for about an hour and a half while I was eating dinner before doing the decals. I also gave the gloss coat about 30 minutes just to be safe.
I managed to scuff the lower portion of the guard on the main gun. Figure it just adds some character.
View attachment 113563
View attachment 113564
You can see the slight color variation in this photo. Like usual it looks better in person, it's hard to get a photo of a subtle effect like that at night.
View attachment 113565
Hope I can get my tracks to look half as good as GEG64's do.
Cool. Is that Kevlar? I might look into those, if they are "poke" proof. lolI tend to wear an armored thumb guard when drilling and cutting. Got a whole pack really cheap on amazon. Pantherman
View attachment 113561
You are more than welcome to join in and future builds as well.I'm enjoying seeing everyone's progress here!
Real tempted too!You are more than welcome to join in and future builds as well.
I'm not sure what our next build will be. A few time we have built out of our normal kit and ventured into a couple of car-type vehicles (Adam 12, and a desert pink panther).Real tempted too!
I love the detail on your kit. I think this is the same model of tank used in an Indiana Jones movie. A formidable beast!I need some of those thumb guards. Been there more times than I care to admit. Off to Amazon!
I did get my brown paint and decals on last night. One of the coolest things about living in the desert southwest is paint dries in a flash. Airbrushed paint in about 15 minutes and gloss and dull coat from a rattle can in about 10 minutes. I let the Vallejo paint dry for about an hour and a half while I was eating dinner before doing the decals. I also gave the gloss coat about 30 minutes just to be safe.
I managed to scuff the lower portion of the guard on the main gun. Figure it just adds some character.
View attachment 113563
View attachment 113564
You can see the slight color variation in this photo. Like usual it looks better in person, it's hard to get a photo of a subtle effect like that at night.
View attachment 113565
Hope I can get my tracks to look half as good as GEG64's do.
I'm in! Something is just really appealing about building the first tank. I was able to find one pretty reasonably priced. Seemed like only eBay had them for about $70 with shipping but Andy's Hobby Headquarters has one for about $55 with shipping. Excited to join the build!You are more than welcome to join in and future builds as well.
Come on in and join the madness. It's great fun. PanthermanI'm in! Something is just really appealing about building the first tank. I was able to find one pretty reasonably priced. Seemed like only eBay had them for about $70 with shipping but Andy's Hobby Headquarters has one for about $55 with shipping. Excited to join the build!
Glad to have you aboard!I'm in! Something is just really appealing about building the first tank. I was able to find one pretty reasonably priced. Seemed like only eBay had them for about $70 with shipping but Andy's Hobby Headquarters has one for about $55 with shipping. Excited to join the build!
Thanks! Can't wait to see this thing come together. Question for you - why did you make the textured surface on your build (looks good!)? I have been trying to research how it was manufactured and I haven't come up with much.Glad to have you aboard!
Textured skin. I was watching a build on YouTube. The builder replicated what the skin might have looked like. I thought it looked realistic, so I attempted to do it as well.Thanks! Can't wait to see this thing come together. Question for you - why did you make the textured surface on your build (looks good!)? I have been trying to research how it was manufactured and I haven't come up with much.
