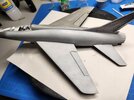
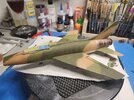
Next up....Vintage Revell F-4E circa 1975

I had considered touching this up but you gotta believe some paint chips in this area.....I have evolved from my 12 year old self where I thought these aircraft were prestine but in reality up close one would think "maybe I won't go flying in this today"

20250507_113436.jpg
 
kit fatigue
... the more insidious symptom of kit fatigue for me is becoming hyper-critical.
That's when I start to think of working on something else (even yard work) for a while... open a window.
Coming back later, I often think: "what was the fuss?" - or I have a fresh idea of how to proceed.
 
i dont see "daughter stepped on it" , i see "maintenance crewman dropped a spanner on it in the hangar"... ;)
That sounds way better, but should go with dad kinda knew it was there and forgot it was there....Plenty of family members walked through that same area but daughter was up to the challenge
 
As expected, I build the vintage models but you also have believe the decals are too old.....so had to order up a new set of decals
 
I had an F-4 Blue Angels Revell kit back around '69. I wonder if this may be the same kit.
 
You are an inspiration. I have the exact same kit, built it as a teenager, was dissatisfied with it in college and started to retro it... but never finished the project. Fast forward, I'm nearing retirement. Rather than spend hundreds on new kits, I've started out by rehabbing old builds, long since boxed up and recovered from my folks' place after they passed away. The last year of do-overs has provided a lot of practice, bringing skills back up to somewhat average after 40 years away from the hobby - and introducing some new ones (e.g. air brushing, PE, resin parts, etc.). Your project has given me a lot of motivation for which I'm grateful. Thank you for sharing!
View attachment 146592
Hey, how have your rehab jobs gone?
 
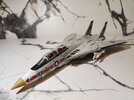
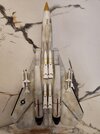
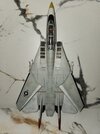
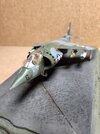
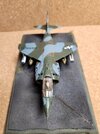
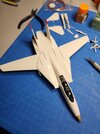
Thanks for checking back in! I've got a few in the books, several on deck, WIP, lol I finished (well, refinished) a 1979-80 Airfix F14A Tomcat in 1/72. Also refinished an 80's AMT AV-8A Harrier, also in 1/72. Lots of seam filling and sanding (ugh). I used a Hasegawa weapons kit to make some changes to their load-out. Instead of six AIM-54 Phoenix missiles on the F-14A, I modified the outboard wing pylons and added Sparrows and Sidewinders instead. I kept seeing that in reference photos and it seemed like a more practical load out. One of the rocket launchers was missing from the Harrier, so I used a pair LAU-10 Zuni rocket launchers.

Surprisingly, the 45 year-old decals for the Tomcat went on flawlessly. They were in a Ziploc bag all that time, so maybe that helped. The decals for the Harrier were missing so I found some period-correct markings on eBay. I made a small, crude base for the Harrier, mostly because I lost count of how many times I broke the nose pitot tube off handling it… maddening, lol

The landing gear on the F-14 was too badly broken to repair reliably, so I closed up the wheel bays. I'm trying to figure out an easy way to display it in flight. I'm leaning towards a weighted wood base and clear plastic rods inserted into the tailpipes. The pics are taken on some leftover tile, which sorta looked like storm clouds to me, so I figured why not?

I've got the old Revell JU-87 Stuka (1/32) primed, and lots of aftermarket parts in hand, ready to add. That was probably a mistake though, because when I added up all the parts, I could have bought a brand new kit instead… doh! I'm also repairing a Monogram TBF Avenger with folding wings from the 1980's. That one is primed, and a new set of decals from Caracal arrived a few weeks ago.

The real labor of love has been rehabilitating a Lindberg F100 Super Saber in 1/48, from 1974. I picked up wing tanks from a Ukrainian company, and then a new brass pitot tube and brass refueling probe. Another Hasegawa armaments kit will provide the load out. This one has been more trouble than its worth, but I had a blast experimenting with the metallic paints for the scorching on the tail. I ran out of Tamiya gloss clear or I'd have put decals on by now and started weathering. The challenge will be the canopy. I had to buy a vacuum formed replacement from Squadron to replace the smashed original. It is not a perfect fit, and I've never worked with vacuum formed before. It's going to take some finesse. I'm just elated the landing gear is still in one piece!

20240429_204431.jpg20250826_220203.jpg1000010364.jpg1000010366.jpg1000010327.jpg20240608_214128.jpg1000009857.jpg

1000010325.jpg


Write your reply...

Latest posts

Back
Top