My PIG!!

nimrod77

New Member
Joined
May 6, 2009
Messages
87
For the uninitiated "Pig" is what the F-111 is lovingly called in Australia.
Here's where I am at...
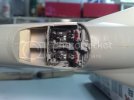
The cockpit is in and the fuselage sides are closed.
28032009267.jpg

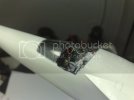
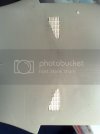
I have reworked the spike vents too to more accurately depict them, not 100% but good enough.
28032009269.jpg

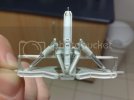
Rebuilt the main and nose gear and wheel wells....
13042009285.jpg
21032009253.jpg
IMG_2413.jpg

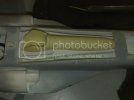
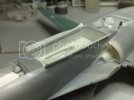
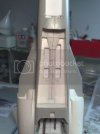
I also built a weapons bay for her as she didn't come with one...
28032009272.jpg

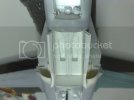
And here is how it looks now after attaching the wings and closing the lid...
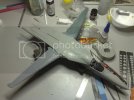
12052009342.jpg

I hopefully will have this finished in the next few weeks but no promises :D
Thanks for looking guys!
Nimrod
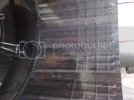
 
Hi there! How did you do those spike vents? Is there some sort of plastic grid readily available? Or did you construct it out of thin PS stripes? :eek:
 
Hey mate,nice to have ya here as well!!!!
Great build...but I already knew it LOL LOL!!!

Cheers and welcome!
 
Thanks for all the comments guys, glad you like her.
elend said:
Hi there! How did you do those spike vents? Is there some sort of plastic grid readily available? Or did you construct it out of thin PS stripes? :eek:
elend, those spike vents are made from lots of little tiny pieces of thin plasticard..... sent me cross-eyed! Brass would have been better but I couldn't find any to suit at the time, so plastic it was :)
 
Wow. I fiddled around with thin PS stripes as well on my Banshee. That gave me quite a hard time and they even weren't as small as yours. Incredible work! :eek:
 
I say Aussie pilots are the most lucky in the world because only they get to fly the Vark (Pig). Is that the AMT kit you are bashing with another kit?
 
airrex said:
Is that the AMT kit you are bashing with another kit?
Hey Airrex, she is the Academy kit with a lot of aftermarket and scratch building. Of course once I have finished this the Hobbyboss kit will be out and not need all the corrections I have made to this kit :) (TIC). I could only hope the hobby boss kit is better than the Academy kit anyway.
I have never actualy seen the AMT kit. Was it any good??
 
I misunderstood. The AMT (Italieri) kit is 1/72. Yours of course is 1/48th. Yes it is a good kit. Not a Hasegawa but a good kit. Keep posting your progress, it's looking great.
 
Another update for you guys here at the nerd heard...

A little more progress.....

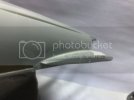
I have scratch built a brass pitot probe by turning it on a dremel and using a rounded blade to cut like a lathe. I used needle files to finish it off. I think that it came out pretty well considering that it was my first attempt.
28062009482.jpg

Here's what I'm trying to achieve...

PitotF111C.jpg

I have re-profiled the sides of the speed bumps to make them rounded as there supposed to be. Academy has them moulded as being square where they meet the side of the fuselage.
28062009483.jpg

Just to show what I'm trying to do ...
09062009436.jpg

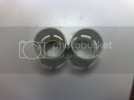
I've also detailed inside the tail feathers of the engines.

Rear view..
28062009485.jpg

Front View..
28062009486.jpg

Here's the real thing..

15062009464.jpg

I will finish off the fwd side of the tail feathers and add some panel lines to it.

More to come as I get it done :)
Cheers guys!
 
Well here's a first for me, two posts in rapid succession!!
I have had a bit of extra time to model this week so here's what I have done...
The finished windscreen has been attached....

02072009497.jpg

I have finished off the tail feathers, here they are temp fitted to the exhaust nozzles...

02072009499.jpg

I tried using the Scaledown side seals, but they didn't fit over the scaledown wing roots, so I built my own...

02072009496.jpg

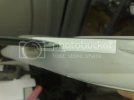
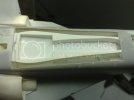
AND I have readied the pavetack cradle, here it is test fitted....

02072009494.jpg

Here it is again with the pod temp fitted...

02072009491.jpg

Now on to the weapons bay doors... I've been putting them off for long enough :)

Cheers guys!
 
Quick update,
I have built the weapons bay doors that I was dreading :) Here's how they came out...
15072009544.jpg

15072009545.jpg
15072009546.jpg

May need a little massaging but look pretty good I think, just don't look too close! Now on to the other little bit a scratching before final assembly... the strike camera...
Cheers guys!
 
Ferris828 said:
Awesome work dude!
How did you get that detail done on the inside of the exhaust/feathers?

Thanks Ferris,
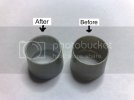
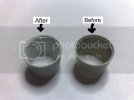
I worked out the inner circumference of the kit part and measured that out onto a piece of thin card stock. Then I rolled it up and slid it inside the kit part to mark out the petal divisions, then scribed and riveted the part rolled out flat on my bench. Once all the details were on, i placed it back inside the kit part and glued it into place.

The front part of the feathers was made with milliput and sanded to shape.
I hope that clearer than mud for you :)
Cheers and thanks for the interest everyone!
 

Latest posts

Back
Top