Elm City Hobbies
Active Member
- Joined
- May 7, 2009
- Messages
- 3,239
OK, now that my SMA build is done and submitted, I have decided that no more new kits being started until I get a least 2-3 partial builds finished. That and I need something I can finish quickly for another show coming up in mid July.
I started this kit probably at least 8 yrs ago. Interior, chassis, engine, etc, are all finished, but I screwed up the paint job on the body badly, lots of runs. Should have known better than to use a spray can auto paint from our local Canadian Tire (for those in the US and the rest of the world, Canadian Tire is sort of a cross between a dept. store, sporting goods store, hardware store and automotive parts/repair store).
So into a Tupperware container with some Castrol SuperClean it went.......8yrs ago. 2 moves later, and a few years gone by, the CSC has long since evaporated out of the container, so I figured the paint that was still left on the body was rock hard and going to be hard to come off. Take it out of the container, run my nail across the paint (which feels clammy to start with), and it easily peels off. So grab an old toothbrush and head to the sink, and proceed to easily scrub off the old paint and primer, and was left with this:
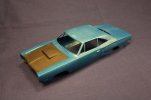
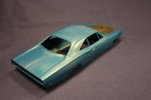
I didn't strip the hood as it didn't really need it. As you can see the body came out pretty clean, there were some weird swirl marks on the roof, and some patches of paint that didn't come off in the sink, so I went at it with some 600grit paper, and smoothed everything up, and ready for primer and paint again!
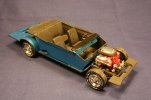
Here is the chassis and engine area:
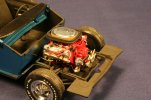
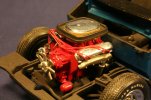
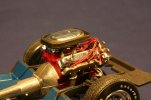
Close up of the driver's side of the engine showing the scratchbuilt throttle return spring.
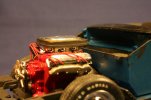
And close up of the passenger side of the engine showing the scratchbuilt fuel blocks and lines going to the carbs, fuel line coming off of the fuel pump and going back to the gas tank, spark plug wires, and if you look closely, you will even notice an oil dipstick! Crazy part is, I don't remember doing those mods! LOL
And the candidates to paint the car.
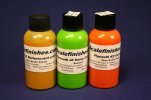
I really wanted to paint it the Sassy Grass Green, however it was a Plymouth color (and this is a Dodge) however through some research I found that Dodge Green Go, was actually the same color, just the Dodge version of it. Only problem being is that the color was never offered until 1970, and this is a 1969.
So on to a couple of other colors I have, Plymouth Vitamin C, again a Plymouth color, but Dodge Go Mango is the same color, and was available in '69, the other color is Dodge Butterscotch (which would be the same as Plymouth Bahama Yellow) which was also available in '69.
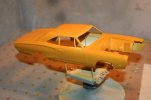
Personally I am leaning more towards the the Butterscotch, with the Superbee stripes on the trunk, kinda like this:

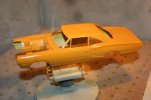
The Vitamin C/Go Mango would look something like this:
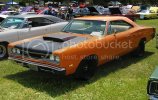
While the orange would stand out, I am digging the Butterscotch.
I started this kit probably at least 8 yrs ago. Interior, chassis, engine, etc, are all finished, but I screwed up the paint job on the body badly, lots of runs. Should have known better than to use a spray can auto paint from our local Canadian Tire (for those in the US and the rest of the world, Canadian Tire is sort of a cross between a dept. store, sporting goods store, hardware store and automotive parts/repair store).
So into a Tupperware container with some Castrol SuperClean it went.......8yrs ago. 2 moves later, and a few years gone by, the CSC has long since evaporated out of the container, so I figured the paint that was still left on the body was rock hard and going to be hard to come off. Take it out of the container, run my nail across the paint (which feels clammy to start with), and it easily peels off. So grab an old toothbrush and head to the sink, and proceed to easily scrub off the old paint and primer, and was left with this:


I didn't strip the hood as it didn't really need it. As you can see the body came out pretty clean, there were some weird swirl marks on the roof, and some patches of paint that didn't come off in the sink, so I went at it with some 600grit paper, and smoothed everything up, and ready for primer and paint again!
Here is the chassis and engine area:


Close up of the driver's side of the engine showing the scratchbuilt throttle return spring.

And close up of the passenger side of the engine showing the scratchbuilt fuel blocks and lines going to the carbs, fuel line coming off of the fuel pump and going back to the gas tank, spark plug wires, and if you look closely, you will even notice an oil dipstick! Crazy part is, I don't remember doing those mods! LOL

And the candidates to paint the car.

I really wanted to paint it the Sassy Grass Green, however it was a Plymouth color (and this is a Dodge) however through some research I found that Dodge Green Go, was actually the same color, just the Dodge version of it. Only problem being is that the color was never offered until 1970, and this is a 1969.
So on to a couple of other colors I have, Plymouth Vitamin C, again a Plymouth color, but Dodge Go Mango is the same color, and was available in '69, the other color is Dodge Butterscotch (which would be the same as Plymouth Bahama Yellow) which was also available in '69.
Personally I am leaning more towards the the Butterscotch, with the Superbee stripes on the trunk, kinda like this:

The Vitamin C/Go Mango would look something like this:

While the orange would stand out, I am digging the Butterscotch.

