Glorfindel
Active Member
- Joined
- May 2, 2011
- Messages
- 1,504
So I've been kicking this around for a while simply because I like the airframe. Minicrafts 1/48 scale P-38J Lightning. Two booms, short fuselage, sort of a retro WWII Y wing fighter.
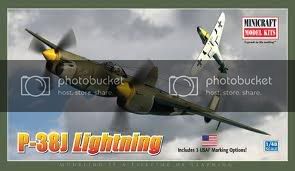
The kit comes with three markings options for which I'm still undecided on. Not a whole lot of parts on this and the details are a bit soft. Panel lines appear a touch rounded over and don't have that definition that you look for. I'm going to try my hand at re-scribing most if not all of these panels lines with some Dymo and a flexible straight edge like a Hasagawa tool. I didn't take any tree pics...sort of went straight to working on the landing gear bays. They looked kind of blah so I spruced them up a bit with some added styrene strips and brass wire for cables.

After.

Assembled the booms and installed the wheel bays. Also painted them Interior Green. These I'll detail paint and weather later. I'm liking the way they came out. The booms on the other hand took a bit of work. Each one had noticeable seam lines that I still need to attend to and clean up some more. Most is done but I'm getting finicky with the seams. Guess that's a good thing.

Also banged out the cockpit and dry fitted it. Really not much to this cockpit. I built it OOB and added seat belts fashioned from masking tape and turned LED leads for the buckles. I then touched them with a bit of Tamiya Buff for a cloth-like appearance.


Then it was on to some fun with a dry fitting of the cockpit tub into the fuselage. So far it looks like a good fit. Also the instructions call out for a decal with gauges and dials to be placed on the dash but there is no supplied decal in the box. I therefore made my own and placed that on instead. Went through all that trouble and it can't even be seen in the fuselage. At least I know it's there.


That's it for tonight. Thanks for checking her out.
The kit comes with three markings options for which I'm still undecided on. Not a whole lot of parts on this and the details are a bit soft. Panel lines appear a touch rounded over and don't have that definition that you look for. I'm going to try my hand at re-scribing most if not all of these panels lines with some Dymo and a flexible straight edge like a Hasagawa tool. I didn't take any tree pics...sort of went straight to working on the landing gear bays. They looked kind of blah so I spruced them up a bit with some added styrene strips and brass wire for cables.
After.
Assembled the booms and installed the wheel bays. Also painted them Interior Green. These I'll detail paint and weather later. I'm liking the way they came out. The booms on the other hand took a bit of work. Each one had noticeable seam lines that I still need to attend to and clean up some more. Most is done but I'm getting finicky with the seams. Guess that's a good thing.
Also banged out the cockpit and dry fitted it. Really not much to this cockpit. I built it OOB and added seat belts fashioned from masking tape and turned LED leads for the buckles. I then touched them with a bit of Tamiya Buff for a cloth-like appearance.
Then it was on to some fun with a dry fitting of the cockpit tub into the fuselage. So far it looks like a good fit. Also the instructions call out for a decal with gauges and dials to be placed on the dash but there is no supplied decal in the box. I therefore made my own and placed that on instead. Went through all that trouble and it can't even be seen in the fuselage. At least I know it's there.
That's it for tonight. Thanks for checking her out.
") Looking forward to this one coming together .
Looking forward to this one coming together .


