You are using an out of date browser. It may not display this or other websites correctly.
You should upgrade or use an alternative browser.
You should upgrade or use an alternative browser.
Merkava Mk.3 BAZ 1/35 by Meng
- Thread starter Jaitea
- Start date
Jaitea
Active Member
- Joined
- Nov 15, 2011
- Messages
- 1,139
Thanks guys,.....I'd be right in saying if I build this on a desert base it would be a dio?
J
J
JohnSimmons
For Spud: I was once Merseajohn
- Joined
- Jan 4, 2011
- Messages
- 5,645
Should be fine with a simple base and no figs mate.
Junkie
Active Member
- Joined
- Apr 24, 2009
- Messages
- 8,830
What Simmons said.
Jaitea
Active Member
- Joined
- Nov 15, 2011
- Messages
- 1,139
Thanks John & Scott,....just thinking of some upturned dirt by the mine roller
J
J
Junkie
Active Member
- Joined
- Apr 24, 2009
- Messages
- 8,830
That's fine. If you add a figure (or a dinosaur) then we dump it into dio.
JohnSimmons
For Spud: I was once Merseajohn
- Joined
- Jan 4, 2011
- Messages
- 5,645
Yeah no Diosaurus ;D
Jaitea
Active Member
- Joined
- Nov 15, 2011
- Messages
- 1,139
Klaus not Santa
Member
- Joined
- May 15, 2013
- Messages
- 281
Looks great!
Sorry to hear of the trouble with the warped hull and the engine covers - but you've mastered it perfectly
Sorry to hear of the trouble with the warped hull and the engine covers - but you've mastered it perfectly
JohnSimmons
For Spud: I was once Merseajohn
- Joined
- Jan 4, 2011
- Messages
- 5,645
Yup looks great dude 8)
Junkie
Active Member
- Joined
- Apr 24, 2009
- Messages
- 8,830
it does look good - I don't see any issues at all.
Jaitea
Active Member
- Joined
- Nov 15, 2011
- Messages
- 1,139
Thanks guys,....the hull straightened out ok,....the vent part on one side doesn't look completely right to me though
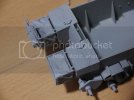
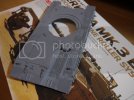
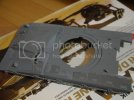
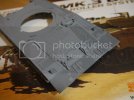
Primed top:
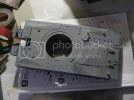
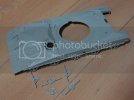
Everything proceeding ok,......until I try to create the non-slip surface on the top hull,.....like in these reference pics (one image is of a Mk2):
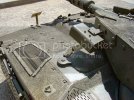
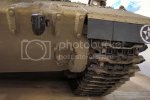
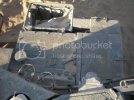
So I did a bit of research,......Chinchilla powder/sand:
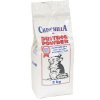
Its meant to be a very fine sand,...ideal for replicating the non-slip surface,.....so a bit of masking:
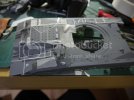
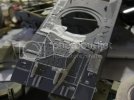
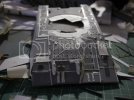
Then I sprayed it with hairspray,.....and dusted it with chinchilla powder
Then FAIL
I ruined it
The powder just looked too big in scale & a complete mess
I had to wash, scrub, sand & toothbrush all the sand off it
No photos of my panic,....sorry
Straight build again,....I'd decided that I'll try and replicate the effect with paint
Next day I had a brainwave,.....what if I applied really fine sandpaper with pva glue?
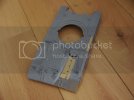
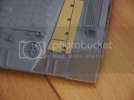
.....if this doesn't work out right,...I know all I have to do is put a scalpel blade under the paper and peel it off,....then revert back to using a paint effect
Thanks for looking
John
Primed top:

Everything proceeding ok,......until I try to create the non-slip surface on the top hull,.....like in these reference pics (one image is of a Mk2):


So I did a bit of research,......Chinchilla powder/sand:

Its meant to be a very fine sand,...ideal for replicating the non-slip surface,.....so a bit of masking:


Then I sprayed it with hairspray,.....and dusted it with chinchilla powder
Then FAIL
I ruined it
The powder just looked too big in scale & a complete mess
I had to wash, scrub, sand & toothbrush all the sand off it
No photos of my panic,....sorry
Straight build again,....I'd decided that I'll try and replicate the effect with paint
Next day I had a brainwave,.....what if I applied really fine sandpaper with pva glue?


.....if this doesn't work out right,...I know all I have to do is put a scalpel blade under the paper and peel it off,....then revert back to using a paint effect
Thanks for looking
John
Jaitea
Active Member
- Joined
- Nov 15, 2011
- Messages
- 1,139
Scrach
Member
- Joined
- Aug 16, 2013
- Messages
- 335
Nice work with the sandpaper, that probably went a lot quicker than the route I took with my Mk.I.


Jaitea
Active Member
- Joined
- Nov 15, 2011
- Messages
- 1,139
Ah brilliant Scrach,.....I thought I was going mad!!......brilliant job,....how did it turn out?
Why doesn't these kits come with this texture?
How did you do yours? What did you use for the texture?
J
Why doesn't these kits come with this texture?
How did you do yours? What did you use for the texture?
J
Scrach
Member
- Joined
- Aug 16, 2013
- Messages
- 335
I sifted a fine aquarium sand to get the finest of the fine and 'glued' it with Mr. Surfacer 500.
I'm fairly satisfied with the results. Keep your eyes open toward the end of the BSC.
I'm fairly satisfied with the results. Keep your eyes open toward the end of the BSC.
Jaitea
Active Member
- Joined
- Nov 15, 2011
- Messages
- 1,139
Brilliant.....I don't mind the suspence ;D
J
J
Cash
Member
- Joined
- Feb 10, 2013
- Messages
- 508
Looks like sandpaper did epic job. Very well done in my opinion. Also nice update. Good job man. 
Chris S
Its a bit like being handcuffed to a lunatic !
- Joined
- Feb 14, 2011
- Messages
- 4,573
Looks good from where Im standing dude ;D ,seriously tho ,nice work John . I do like these Meng kits ,couldnt praise them enough !!
Cant wait to see where you go with this one
Chris.
Cant wait to see where you go with this one
Chris.
Jaitea
Active Member
- Joined
- Nov 15, 2011
- Messages
- 1,139
Thanks very much Cash....I wasn't so sure at first, but I think it adds to the look of the kit
Thanks Chris,.....I'm sure you're shocked that I've eventually got round to building this!
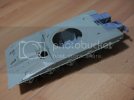
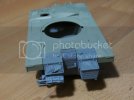
I've still got some more sandpaper to add to the main hull but I took some time off to do the turret (which will also need sandpaper : )
)
The cannon needed a bit of filling to get rid of the seam-line,....I also had to remove some of the locator pins because they were forcing a step down the barrel
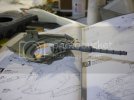
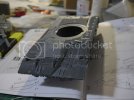
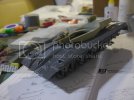
Thanks for looking
John
Thanks Chris,.....I'm sure you're shocked that I've eventually got round to building this!
I've still got some more sandpaper to add to the main hull but I took some time off to do the turret (which will also need sandpaper :
The cannon needed a bit of filling to get rid of the seam-line,....I also had to remove some of the locator pins because they were forcing a step down the barrel


Thanks for looking
John
Similar threads
- Replies
- 38
- Views
- 6K
Latest posts
-
-
Do I need to thin my Tamiya X-22 clear coat?
- Latest: BlackSheepTwoOneFour
-
-
-
-
-
-

