MENG King Tiger with Interior and workable tracks

martin9428

Member
Joined
Sep 7, 2021
Messages
50
I am a cold weather modeler, and since the weather is getting colder, time to break out a kit that I hope will last throughout the cold months here in Virginia. I bought this kit at a model show in the Spring and ordered the upscaled tracks and reference book by David Parker, Super King- Building Trumpeters 1:16 scale King Tiger.
 

Attachments

  • IMG_20221212_134613045.jpg
    IMG_20221212_134613045.jpg
    266.8 KB · Views: 6
  • IMG_20221201_154756671.jpg
    IMG_20221201_154756671.jpg
    299.4 KB · Views: 6
This is quite an undertaking by me, since this will be, only my third model since starting back up two years ago. Before that, it had been 30+ years. The road wheels and drive sprocket are not permanently mounted, so they can be removed for painting. I'm also starting the brake drums. I'm still new to photo-etch so, trial and error for me, and the first one completed.
 

Attachments

  • Brake drum pieces.jpg
    Brake drum pieces.jpg
    80.3 KB · Views: 6
  • Brake drum.jpg
    Brake drum.jpg
    62.5 KB · Views: 6
  • Road wheels.jpg
    Road wheels.jpg
    123.6 KB · Views: 7
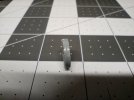
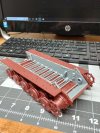
One of the unpleasant symptoms of (my) PTSD, I parenthesized my, because not everyone with PTSD, has the same symptoms, is my impatience. I do well for the first 2, 3 or even 4 steps, the impatience starts to set in. I start getting ahead of myself, out of step, I miss something. Even more so, when you have two sets of instructions which you have to compare as you go. In this case, II have already made two, one I've managed to save, the other is where I'm at now. For those of you who have made this or similar models, may have already picked up on the second one and I haven't figured out the best way to correct it. Also, as a side note... the torsion bars are cemented in place. Along the floor, there are two-torsion support beams (for lack of a better term) one on either side and running front to back, in which the torsion bars run through and supports where the thin part of the bar, meets the thicker part.
img_20221216_131020734_hdr-jpg.jpg
I am running a few solutions in my head but, need to study the instructions further. Firstly, maybe I didn't need them. There are two versions of instructions, one for no interior, and one for installing the interior. It is possible, that those parts are omitted if you build it with the interior. Further study is needed. Secondly, and I cringe, to think about it, cut through the torsion bars, install missing pieces and try and glue the torsion bars back together. Not beyond my skills, but who wants to do that? Orrrr, I might be able to cut out a slot where each bar would go through, and just slide it down over the bars. I like this option best. When I have time, I will further study each manual and make an education decision and will let you know and show you in pictures. In the mean-time, enjoy these pictures of my workspace.
img_20221216_213404844_hdr-jpg.jpg
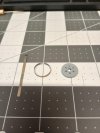
While installing the torsion bars, I ran into a fitment issue. I could not get the torsion bar to line up with the hole on the opposite side, because the driver's side shock was in the way. I cut and removed the shock and installed the torsion bar and put the shock back into place and just chucked it up to a fitment issue, turns out, I have the shock facing the wrong direction. I am leaving it for now and hoping it doesn't affect anything in the future.
 
This is one of the two supports that should have been installed before I foolishly cemented in the torsion bars img_20221216_130608867_hdr-jpg.jpg
and these are the other two options for the side walls. The red is for the non-interior version and the gray, I guess if you weren't making the workable tracks. These two really threw me off until I further studied the instructions.
img_20221216_130831002_hdr-jpg.jpg
img_20221216_122559612-jpg.jpg
 
Here are some pictures of my workspace. I also love to hunt and fish and here are a few of my fishing trophies.
model-room-4-jpg.jpg
Work desk
model-room-3-jpg.jpg
model-room-2-jpg.jpg
Some of my recent concert memorabilia and Harley Davidson collectables and my 52" US Gato Class sub by Revell, which was started last winter and then put away in the Spring. I believe I may have a thread started on that
model-room-1-jpg.jpg
 
Here are some pictures of my workspace. I also love to hunt and fish and here are a few of my fishing trophies.
View attachment 95884
Work desk
View attachment 95885
View attachment 95886
Some of my recent concert memorabilia and Harley Davidson collectables and my 52" US Gato Class sub by Revell, which was started last winter and then put away in the Spring. I believe I may have a thread started on that
View attachment 95887
The build is looking good can't wait for the next installment. I am looking to build this next year so following your every move.
I'm liking the work space, very neat and tidy, just how I like to work. Us neat freaks must stick together!!
Pantherman
 
The build is looking good can't wait for the next installment. I am looking to build this next year so following your every move.
I'm liking the work space, very neat and tidy, just how I like to work. Us neat freaks must stick together!!
Pantherman
I am OCD and have PTSD, which developed while in Iraq. It's been since 2009 and fight every day, so keeping it at least straight helps. It is also the reason for my impatience. Hence the two mistakes. One other thing that I fight with is getting bored with a kit or it gets difficult so, I put it away. I have a mustang that is about 15 years old and in various stages of completion. So constant inner turmoil trying to keep my interest up. I think if I take my time and only build when I am able to go slow, I'll be alright. Thank you for following
 
I can really relate to some of your frustrations! I find model-making a very rewarding, but very challenging, hobby. And you have chosen a monster to build this time! So far, you are doing great. As you already mentioned, you need to allow yourself to take your time with this beauty. I take so much longer now to build even a simple model, it’s ridiculous. But then I realize it’s supposed to be fun, and there is no deadline, so who cares if it takes months to finish? Another thing I got from a friend was to work on more than one model at a time, and that helps when I get tired of “Kit A.” But from the pictures, what you’ve done so far is impressive. I don’t have much patience for very tedious, detailed work anymore, so I admire your attention to detail. I look forward to seeing your progress! PS: I would decide on what version you want to make, and follow one set of instructions. Working off two sets of instructions would put me over the edge!
 
I can really relate to some of your frustrations! I find model-making a very rewarding, but very challenging, hobby. And you have chosen a monster to build this time! So far, you are doing great. As you already mentioned, you need to allow yourself to take your time with this beauty. I take so much longer now to build even a simple model, it’s ridiculous. But then I realize it’s supposed to be fun, and there is no deadline, so who cares if it takes months to finish? Another thing I got from a friend was to work on more than one model at a time, and that helps when I get tired of “Kit A.” But from the pictures, what you’ve done so far is impressive. I don’t have much patience for very tedious, detailed work anymore, so I admire your attention to detail. I look forward to seeing your progress! PS: I would decide on what version you want to make, and follow one set of instructions. Working off two sets of instructions would put me over the edge!
One set of instructions is for the interior and one set for the kit without doing the interior, then comparing to see which parts are omitted and which parts are going to be used instead. It's fairly clear, if I take the time to slow down and study's a few steps in advance. I am a problem solver, mostly out of necessity, because I create my own problems with my impatience. Thank you for the king words and hope you will enjoy following along
 
One set of instructions is for the interior and one set for the kit without doing the interior, then comparing to see which parts are omitted and which parts are going to be used instead. It's fairly clear, if I take the time to slow down and study's a few steps in advance. I am a problem solver, mostly out of necessity, because I create my own problems with my impatience. Thank you for the king words and hope you will enjoy following along
Martin, maybe highlight the bit's that need to be omitted on the main build instructions will help?
Pantherman
 
Make the most of it, there very rare !!!
Pantherman
At least they do happen. Me,,,,never....
Happy Pumped Up GIF by AT&T
 

Latest posts

Back
Top