Mars Attacks Martian Warrior

MrNatural

my head is falling off my head
Joined
May 27, 2009
Messages
983
Let the games begin...
002_zps14d66c87.jpg

Being a huge fan of the Mars Attacks trading cards, I was pretty stoked when I saw moebius was releasing this kit. I'll be throwing this one in the diorama category. The kit is really nice with a lot of great detail. The sculpt of the Martian head is really the selling point for me, they really captured the look quite perfectly. I do want to throw some lights in this thing, definitely the lamp post and maybe the ray gun will get lit up.

I spent the evening trimming and cleaning up all the parts and basically going over everything to get a game plan as far as lighting. Challenges will definitely be seam work especially on the arms and legs with them having that rippled space suit effect. Here's a look at all the parts.

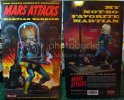
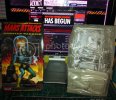
Better look at the awesome box art
001_zps356568a2.jpg

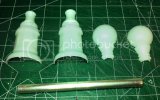
The kit comes with a metal tube for the lamp post.
13_zps20b80cde.jpg

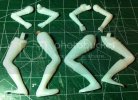
Arms and legs.
14_zpsbb16ce43.jpg

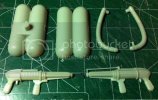
Tanks, ray gun, hoses..
15_zps52bd5b4c.jpg

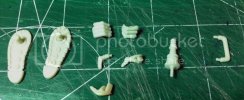
Small parts, hands, ray gun muzzle..
16_zps05e9d8e2.jpg

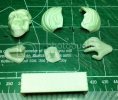
Victim's head
17_zpsd2d5e3b0.jpg

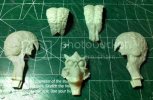
Martian head. Amazing detail, gnarly seams...
18_zps9b94cd22.jpg

Torso
11_zps456efee6.jpg

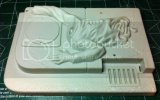
The base has some really nice texture on it I'll probably bulk it up a little bit and extend the base to allow room for a power source and a switch. I'm sure you could make it work with just the provided base, but that's just a little too crowded for me.
12_zps42569435.jpg

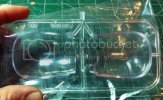
Really the only thing that bugs me about this kit is the dome. Its in two halves so a seam is pretty much unavoidable. There is a gentlemen over on Hobbytalk that is currently working on some vac formed domes for this kit. Hopefully i'll be able to snag one of those before the contest is over.
19_zps034afe2c.jpg

That's all for now. Thanks for checking it out and good luck to everyone.
 
That's a great looking kit and I just finished reading Amazing Figure Modeler in which there was an article about it :)
 
Alright, thanks everyone for checking out the build. Making progress over here. Nothing too crazy just been gluing and sanding what I can for now. I'm waiting on a package from the fiber optics store. Mainly just worked on the two heads, of which there is a lot of work to do, and the tanks.

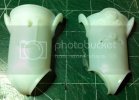
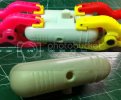
Glued the two tank halves together, this seam wasn't to bad to deal with, hardly needed any filler, the plastic seems to melt together really easily, much better than other kits I've worked on. Here's a before and after.
001_zpsdf51aafe.jpg

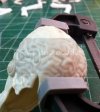
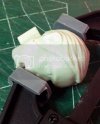
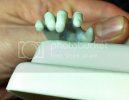
While dealing with the heads, I'm trying to use as little filler as possible to avoid a lot of sanding. I really dont want to have to try to re-sculpt any detail. So im just using a lot of plastic cement, gluing, clamping, re-gluing, and re-clamping..
003_zps4a529730.jpg
004_zps42224255.jpg

This is working out pretty good, now I can just scrape away most of the seam, shouldn't need a whole lot of filling and sanding, but we'll see when we get there this thing needs to dry for a while.
009_zps1251efb2.jpg

Cool. Well that's it for today my friends. Thanks again for taking the time to check out my build. I really appreciate every view and comment.
 
Army Vet said:
Man this is awesome !! I love the movie it's one of my favorites!

Thanks for checking it out my friend. Yeah the movie is pretty awesome.

Tailor said:

Thank you for the positivity man!

Grendels said:
Nice detail on that head!

Yeah man the head sculpt on this is really cool its a nice size too. I think its 1/8 scale.

Quaralane said:
Martian head definitely looks good

Thanks bud!

Moving along on this guy. Its all about sanding seams right now. Been focusing on the victim head and the base of the lamp post.

Been using tamiya putty and mr surfacer 1000 on the victim head. Its starting to get pretty sanitary.
15_zpsd1a59865.jpg

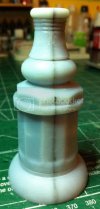
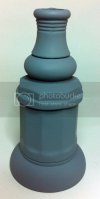
The seam on the lamp post is pretty gnarly it still needs another pass or two with putty, but its getting there..
13_zpseb1fe75c.jpg

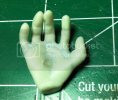
This is how the victim's hand looks on the base. I really dont like how you can see the nub that keys into the base. Im going to go ahead and cut that off and sculpt the bottom of the hand back.
14_zps58ff827f.jpg

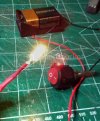
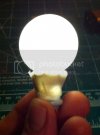
Wired up my first LED. Its a 5mm white LED for the lamp.
11_zps76e6480a.jpg

Its looking pretty good.
12_zps11ae1bf2.jpg

Cool. Thats all I got for now. Still waiting for my fiber optics to show up. Im pondering starting another build for the contest....Later dudes!
 
Sweet!

I have this kit of the shelf, just waiting for the bench opening. Glad to see someone building it. Moebius has really stepped up with this one. I picked up the Munsters and the 1/6 B9 Robot at the same time.

Beautiful work so far, looking forward to more.
 
JohnSimmons said:
Nice work man 8)

Thanks John! means a lot my friend.

ausf said:
Sweet!

I have this kit of the shelf, just waiting for the bench opening. Glad to see someone building it. Moebius has really stepped up with this one. I picked up the Munsters and the 1/6 B9 Robot at the same time.

Beautiful work so far, looking forward to more.

Thanks for checking out the build, it really is a sweet kit, im having a lot of fun with this one. I definitely want to scoop up one of those 1/6 B-9's too.

Dark Kyp said:
Nice beggining!

I need to buy one of these kits! 8)
Dark Kyp said:
Nice beggining!

I need to buy one of these kits! 8)

Thanks bud! You should get one. It's an awesome kit.

Making good time over hear. Still pretty much just tinkering away at the seams until my lights show up. Did some work on the base as well.

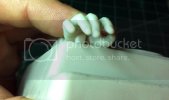
I cut the huge nub off the victim's hand and sculpted it back to shape and got the seams puttied up.
13_zpsb13e38e1.jpg

Attached the hand to the base. Looks a lot better. I just used some brass rod to help guide it into place.
14_zpse307abb7.jpg

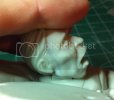
I have the same issue with the way the victims head attaches to the base. There is a huge gap and it just too squared off doesn't really look like a neck. You will barely be able to see this part when its all done but I just can live it.
12_zps9ef4d30c.jpg

Went in with some Aves and tried my best to give it some more shape and fill the gap.
15_zps300593b7.jpg

The base of the lamp post is looking really nice. I need to touch up a few places but im really happy with it so far.
16_zps90509442.jpg

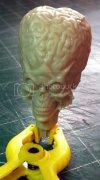
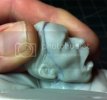
I'm pretty stoked on the Martian head. Its coming out way better than I thought. I took care of most of the seam just by scraping it away with a chisel and then I used MR. Surfacer 1000 to take care of the rest of the gaps. There is one tiny spot that needs a little more attention but its almost ready for paint.
11_zps725ed806.jpg

Pretty much at a stand still until my lights get here. Im still contemplating starting another kit :p Thanks for checking it out fellas. Later on.
 
very cool indeed good call on the hand it looks way better without the little nub on it, this one is gonna look cool
 

Latest posts

Back
Top