Mars Attacks Martian Warrior
- Thread starter MrNatural
- Start date
THE NEW ONE
follow me on twitter @SpaceSavy
- Joined
- Oct 4, 2011
- Messages
- 346
beauty
MrNatural
my head is falling off my head
- Joined
- May 27, 2009
- Messages
- 983
Thanks everyone for all the great support. Been squeezing in as much time as possible to work on this thing. Just trying to get a quick update up before I head off to work 
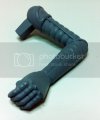
Putty, sand, and repeat. Got the left arm together and seamed out. This is after a couple coats of primer. The seams weren't too bad to deal with. Sorry about the grainy photo.
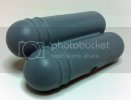
Got the tanks lookin pretty good and ready for paint.
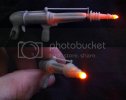
Got the ray gun wired up with a 3mm orange LED and some fiber optic. This was definitely a challenge and what I've spent most of my time dealing with so far. I ended drilling the hole on the wrong side of the handle for the wiring and didn't realize it until After I'd closed and seamed everything, so I had to do some careful surgery and cut it open, and in doing so, I had to scratch a new trigger and the rod that runs between the top of the gun and the sight. Got some light leak near the top of the gun hopefully a couple coats and primer and paint will take care of that.
Got the lamp all assembled and ready for paint. I havn't permanently attached the bulb yet. I ended up replacing the bulb included in the kit with a ping pong ball. The ping pong ball is much thinner plastic so it has a better effect and the seam is not nearly as bad easily sanded it out.

Well thats it for now, getting closer and closer to the final assembly stage and then paint! Catch yall later!
Putty, sand, and repeat. Got the left arm together and seamed out. This is after a couple coats of primer. The seams weren't too bad to deal with. Sorry about the grainy photo.

Got the tanks lookin pretty good and ready for paint.

Got the ray gun wired up with a 3mm orange LED and some fiber optic. This was definitely a challenge and what I've spent most of my time dealing with so far. I ended drilling the hole on the wrong side of the handle for the wiring and didn't realize it until After I'd closed and seamed everything, so I had to do some careful surgery and cut it open, and in doing so, I had to scratch a new trigger and the rod that runs between the top of the gun and the sight. Got some light leak near the top of the gun hopefully a couple coats and primer and paint will take care of that.

Got the lamp all assembled and ready for paint. I havn't permanently attached the bulb yet. I ended up replacing the bulb included in the kit with a ping pong ball. The ping pong ball is much thinner plastic so it has a better effect and the seam is not nearly as bad easily sanded it out.

Well thats it for now, getting closer and closer to the final assembly stage and then paint! Catch yall later!
Cave_Dweller
New Member
- Joined
- Mar 18, 2011
- Messages
- 812
That ping pong ball lightbulb looks great! Also the blaster looks cool
MrNatural
my head is falling off my head
- Joined
- May 27, 2009
- Messages
- 983
Cool. Once again thank you everyone for the kind words. Keeps me motivated for sure.
So this build is really starting to take shape. Over the last week I've been trying to finalize the construction of the Martian and I've been working on the base. I cant wait to start painting this thing, its just so cool.
Been adding some more texture to the base by stippling on some MR. Surfacer 1000. The nice road texture just seems to stop near the bottom.
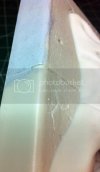
Got the aves out and sculpted in some more guts coming out of the victim. I also dremeled out a couple more cracks in the side walk. Just trying to add as much detail as possible without going overboard.
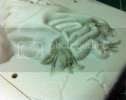
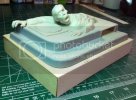
Started ripping up some wood to make a sturdy base which will serve as a place to hide my battery and switch, I also want to put a cool Mars Attacks logo on it.
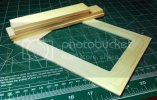
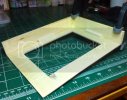
I faced one side with some thin sheet styrene. What I hope to do is make a Mars Attacks mask and then back lite it so it glows.
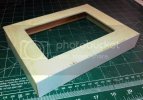
Im pretty happy so far. Since this is just cheap bass wood, I dont really care about showing off the grain so I'm going to sand it down and then bondo the whole thing so it takes the wood grain out and hides the seams. I want it to look like its part of the kit.
Got the Martian all closed up, ran my wires through the arm, down the torso and out through the foot.
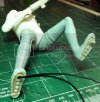
The leg joints needed some filling. Gotta love aves!
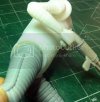
Well folks, thats all I have to share for today. Might be a little while before my next update as im waiting for some paint to come in the mail. Catch ya'll on the flip. Over and out.
So this build is really starting to take shape. Over the last week I've been trying to finalize the construction of the Martian and I've been working on the base. I cant wait to start painting this thing, its just so cool.
Been adding some more texture to the base by stippling on some MR. Surfacer 1000. The nice road texture just seems to stop near the bottom.

Got the aves out and sculpted in some more guts coming out of the victim. I also dremeled out a couple more cracks in the side walk. Just trying to add as much detail as possible without going overboard.

Started ripping up some wood to make a sturdy base which will serve as a place to hide my battery and switch, I also want to put a cool Mars Attacks logo on it.


I faced one side with some thin sheet styrene. What I hope to do is make a Mars Attacks mask and then back lite it so it glows.

Im pretty happy so far. Since this is just cheap bass wood, I dont really care about showing off the grain so I'm going to sand it down and then bondo the whole thing so it takes the wood grain out and hides the seams. I want it to look like its part of the kit.

Got the Martian all closed up, ran my wires through the arm, down the torso and out through the foot.

The leg joints needed some filling. Gotta love aves!

Well folks, thats all I have to share for today. Might be a little while before my next update as im waiting for some paint to come in the mail. Catch ya'll on the flip. Over and out.
cargoman5126
Anything in scale I'm into it...
- Joined
- Nov 7, 2012
- Messages
- 829
Very very cool subject, luv'n the work so far. Luv the base... 
warped_one
New Member
- Joined
- Apr 19, 2013
- Messages
- 236
very nice looking model
MrNatural
my head is falling off my head
- Joined
- May 27, 2009
- Messages
- 983
Thanks fellas! Ok. Finally got some more to share with you guys. Progress has been slowed down due to working overtime and waiting on stuff in the mail. Been working mainly on the base.
I was having trouble figuring out how to mask off the Mars Attacks logo onto the base. So I ordered some printable sticker paper off ebay. I printed out my Mars Attacks logo, then cut out each letter and placed them on the base.
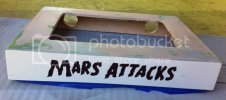
I then applied a couple coats of primer and then airbrushed some black acrylic paint over it.
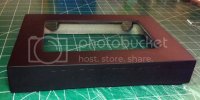
After carefully removing the masks you can now see the exposed plastic. Really happy how this turned out.
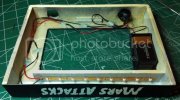
Wired up a strip of LED tape to back light the Mars Attacks Logo

After fiddling with it all day I got the lights installed in the base. Here's a look at my pro wiring job.
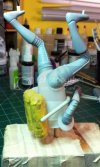
Got the body of the Martian mounted up ready for some primer.
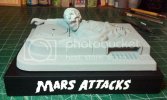
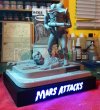
Here's a little teaser shot of the still headless martian primered up on the base. I am very happy with how my little base experiment turned out. I still need to spend some time preening up the martian body, the primered revealed a few areas that need some much needed attention.
Cool, well thats it my friends. A few more hours working on the Martian body and I can finally start painting him up. I'll probably start painting the base and the Martian head this week. Later dudes!
I was having trouble figuring out how to mask off the Mars Attacks logo onto the base. So I ordered some printable sticker paper off ebay. I printed out my Mars Attacks logo, then cut out each letter and placed them on the base.

I then applied a couple coats of primer and then airbrushed some black acrylic paint over it.

After carefully removing the masks you can now see the exposed plastic. Really happy how this turned out.

Wired up a strip of LED tape to back light the Mars Attacks Logo

After fiddling with it all day I got the lights installed in the base. Here's a look at my pro wiring job.

Got the body of the Martian mounted up ready for some primer.

Here's a little teaser shot of the still headless martian primered up on the base. I am very happy with how my little base experiment turned out. I still need to spend some time preening up the martian body, the primered revealed a few areas that need some much needed attention.

Cool, well thats it my friends. A few more hours working on the Martian body and I can finally start painting him up. I'll probably start painting the base and the Martian head this week. Later dudes!
MrNatural
my head is falling off my head
- Joined
- May 27, 2009
- Messages
- 983
Leighbo said:Wicked, I'm loving this build!
Cool, thanks so much man, I really appreciate you checking it out!
MrNatural
my head is falling off my head
- Joined
- May 27, 2009
- Messages
- 983
Well, tragedy has struck this build today. After checking my lights today I have discovered that the LED I installed in the raygun is no longer working :'( Not sure what happened, the only thing I can think of is that my soldered join was not strong enough and I somehow jarred the connection. I am so bummed out about this. It took a lot of work to get that LED in that tiny gun. It would be impossible to fix in time for the contest deadline. I still have the street light and the base lights, but that raygun being lit sure would have been cool. Oh well, no use in dwelling on it. Just time to learn from my mistake and move on.
Similar threads
- Replies
- 0
- Views
- 2K
- Replies
- 38
- Views
- 7K
