Ma.K Camel
- Thread starter MrNatural
- Start date
The Nylon Gag
New Member
- Joined
- Nov 14, 2011
- Messages
- 829
Just catching up with this one MrN

Buddy, wow, what a great start, lights look fantastic
As a scratchbuilder those first sprue shots gave me greebly envy, and i saw about.....well, i could of used all of it. ;D
Any ideas on colouring yet?
Gag
ps. bookmarked
Buddy, wow, what a great start, lights look fantastic
As a scratchbuilder those first sprue shots gave me greebly envy, and i saw about.....well, i could of used all of it. ;D
Any ideas on colouring yet?
Gag
ps. bookmarked
JohnSimmons
For Spud: I was once Merseajohn
- Joined
- Jan 4, 2011
- Messages
- 5,645
Dont you dare tear up a Ma.K Camel Gag! Lol. Awesome work on this man.
the Baron
Ich bin ja, Herr, in Deiner Macht
- Joined
- May 12, 2009
- Messages
- 2,265
Excellent build, MrNatural! I've missed following this, so I got caught now.
Great solution for lighting the thruster! Have you though about lights in the cockpit, too? Apologies if you mentioned it and I missed it. I can see some fiber options or some wheat grain lamps in there.
Also, a heads-up, but from other Camel builds going on at Krueger's Maschinen Krieger forum (www.maschinenkrueger.com/forum), getting the pilot into the seat might require shaving his bum a little.
This is such a wonderful kit, and I look forward to seeing your build.
PS-I agree about the kit hoses. I like using solid copper wire, with or without an insulated coating, wrapped with a piece of fine wire. No seams, you can shape it however you want, and you can coat it, too, to help tie everything together.
CheesyGrin
New Member
- Joined
- Sep 1, 2012
- Messages
- 152
Inspiring work! I think I need one too now.
Grendels
Active Member
- Joined
- Nov 24, 2009
- Messages
- 9,092
CheesyGrin said:Inspiring work! I think I need one too now.
They are getting hard to find, I have one on back order.....
CheesyGrin
New Member
- Joined
- Sep 1, 2012
- Messages
- 152
Baron and Grendels - I frequent the StarshipModeler Store almost daily : They have 7 in stock: http://starshipmodeler.biz/shop/index.cfm/product/2569/120-lum-168-camel.cfm
I'm very tempted. The cockpit looks terribly fun to build.
Thanks to MrNatural for posting his build and allowing to live vicariously through his!
I'm very tempted. The cockpit looks terribly fun to build.
Thanks to MrNatural for posting his build and allowing to live vicariously through his!
MrNatural
my head is falling off my head
- Joined
- May 27, 2009
- Messages
- 983
Scott Girvan said:wow...WOW. Some serious great progress on this build. Paint looks super man.
Thanks so much Scott! Very encouraging words.
Grendels said:Nicely done!
Thank you my friend!
The Nylon Gag said:Just catching up with this one MrN
Buddy, wow, what a great start, lights look fantastic
As a scratchbuilder those first sprue shots gave me greebly envy, and i saw about.....well, i could of used all of it. ;D
Any ideas on colouring yet?
Gag
ps. bookmarked
Thank you for the kind words Mr. Gag! You're right there are tons of cool parts in this kit that would be great for scratch building starship details. As far as the main paint job I have been doing some tests with different camo patterns and colors. I want to do something a little different than my usual deep green scheems. Im thinking maybe a grey/blue and grey/green camo pattern. Still working it out ;D
JohnSimmons said:Dont you dare tear up a Ma.K Camel Gag! Lol. Awesome work on this man.
Thanks so much John, Im a big fan of your work so its quite encouraging to hear.
the Baron said:Excellent build, MrNatural! I've missed following this, so I got caught now.
Great solution for lighting the thruster! Have you though about lights in the cockpit, too? Apologies if you mentioned it and I missed it. I can see some fiber options or some wheat grain lamps in there.
Also, a heads-up, but from other Camel builds going on at Krueger's Maschinen Krieger forum (www.maschinenkrueger.com/forum), getting the pilot into the seat might require shaving his bum a little.
This is such a wonderful kit, and I look forward to seeing your build.
PS-I agree about the kit hoses. I like using solid copper wire, with or without an insulated coating, wrapped with a piece of fine wire. No seams, you can shape it however you want, and you can coat it, too, to help tie everything together.
Thanks man, so glad you're enjoying the build! I thought long and hard about lighting the cockpit but I decided against it this time around since this is my first lighting project and having a deadline I didn't want to jinx myself and not be able to get it done because it would be rather complicated (for me anyway) to light the cockpit. I want to purchase another kit and spend a good 6 months lighting it up and detailing it out more.
I did indeed end up having to cut away some of the pilots butt to get his feet to touch the pedals is what im calling them.
java said:Fire it up!. 8)
Will do sir!
CheesyGrin said:Inspiring work! I think I need one too now.
Thanks my friend!
Grendels said:CheesyGrin said:Inspiring work! I think I need one too now.
They are getting hard to find, I have one on back order.....
I think I waited for this kit to come out for over a year, I even set the money aside for it so right when it came out I could snag one up.
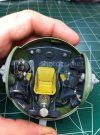
OK, so got another little update here. Got the seat painted up and started wheathering it up with some washes and AK stuff, still need to blend my fuels stains a little better. I painted the actual seat with Citadel Bubonic brown, its such a gnarly color, thought it would add some character to the interior.
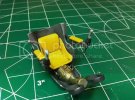
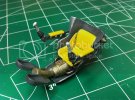
Just wanted to get a look at the cockpit painted up, everything is just placed in, no glue yet.
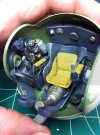
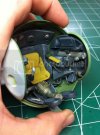
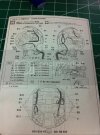
Here is a look at the layout for all the piping in the cockpit, I will use the rubber hose supplied with the kit, but for the bad power cables they give you with the horrible seam, Im going to use something else.
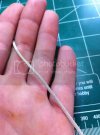
This is braided fiberglass sleeves. Im going to use this for my power cables. Unfortunately I dont have the right size, so I've ordered some from China. So that's going to put things on hold for a little while.
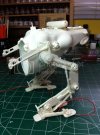
Been putting on all the outer detail parts and leg suspension parts.
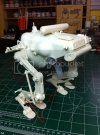
Thats all for now my friends, I gotta go to work
ModelMakerMike
"It's Slobberin' time""
- Joined
- May 28, 2011
- Messages
- 1,838
WOW.. That is schnazzy!
All the work you have done on the cockpit, is great!!!! ;D
All the work you have done on the cockpit, is great!!!! ;D
Cave_Dweller
New Member
- Joined
- Mar 18, 2011
- Messages
- 812
This looks really cool, also a lot bigger than I thought. Shaping up nicely although that cockpit doesn't look very comfortable for long lunar missions...
the Baron
Ich bin ja, Herr, in Deiner Macht
- Joined
- May 12, 2009
- Messages
- 2,265
Nice detailing in the cockpit, CG! I like your idea for replacing the power hoses, but something just came to mind--I have shoelaces that have the same texture I bet they could be used, maybe soaked with some thinned white glue to stiffen them
MrNatural
my head is falling off my head
- Joined
- May 27, 2009
- Messages
- 983
Ravhin said:I've not commented often but I've been following closely, as I wait for my own camel to arrive ;D. That office looks simply stunning.
Thanks man, I understand, I have trouble finding the time to comment as much as I would like to. Thanks for checking it out!
ModelMakerMike said:WOW.. That is schnazzy!
All the work you have done on the cockpit, is great!!!! ;D
Thanks buddy!
steezy said:This has been a very interesting build so far!
Thanks for checking it out man, I do appreciate it.
Cave_Dweller said:This looks really cool, also a lot bigger than I thought. Shaping up nicely although that cockpit doesn't look very comfortable for long lunar missions...
Thanks man, yeah, its bigger than I thought it would be. And yeah, that cockpit is a bit claustrophobic!
Solander said:Great work on the cockpit!
Like the colors!
Thanks man!!
java said:Cockpit rocks!.
Thanks dude!
the Baron said:Nice detailing in the cockpit, CG! I like your idea for replacing the power hoses, but something just came to mind--I have shoelaces that have the same texture I bet they could be used, maybe soaked with some thinned white glue to stiffen them
Thanks man, shoelaces is not a bad idea at all, might be slightly troublesome to work with, I got 25 feet of this fiberglass tubing for something like $5 to my door.
Ok fellas, sorry for the lack of posts. Its been a busy spring season over here in my neck of the woods, just trying to squeeze in a few minutes here, an hour there, to get this thing done.
Got everything masked off that needed to be and went to primering with some Vallejo black primer.
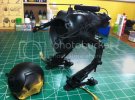
Planned on doing some chipping effects, wanted to the exposed color to be metal so I gave the whole model a few coats of Vallejo aluminum.
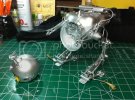
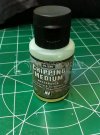
After I sealed the aluminum in I let that cure for a couple days, then sprayed on the Vallejo chipping fluid.
This stuff works a lot better than the AK chipping fluid or hairspray when working with Vallejo paints.
Then sprayed on some Vallejo blue grey as a base color for my camo pattern.
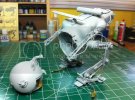
Decided to go with the blue grey, grey green, and duck egg green then just free handed to camo pattern with the airbrush.
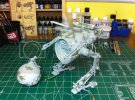
Then started doing some detail painting and chipping
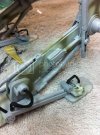
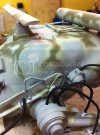
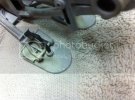
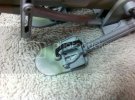
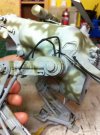
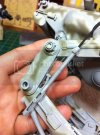
Got my pilot all painted up, I basically just used slight variations of the colors called out in the instructions.
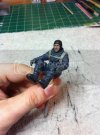
Still a lot of detail painting to do and touch up work before I can get the decals on. I'm really shooting to get to that point by this weekend. Decals and weathering would make for a great weekend ;D
Thanks again for checking it out my friends!
Similar threads
- Replies
- 0
- Views
- 1K
