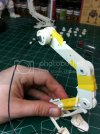
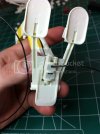
Ma.K Camel
- Thread starter MrNatural
- Start date
MrNatural
my head is falling off my head
- Joined
- May 27, 2009
- Messages
- 983
Tanker52 said:Off to a good start MrNatural. Details of this kit look sharp. Can't wait to see this one finished.
Thanks buddy! It really is a nice kit.
Grendels said:Thanks for the nice look at the kit. Off to a good start!
No problem bud, anytime, and thanks!
Just a quick one before I go to work. I got a general mock up of both legs without the hoses and joint covers of course. Now I feel more comfortable with what I'll have to do to run wire through the legs, and have decided to move forward with that option. I can also start to see just how huge this thing is going to be when all said and done.
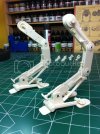
All for now my friends. Later on
JohnSimmons
For Spud: I was once Merseajohn
- Joined
- Jan 4, 2011
- Messages
- 5,645
Nice pins! 
MrNatural
my head is falling off my head
- Joined
- May 27, 2009
- Messages
- 983
MrNatural
my head is falling off my head
- Joined
- May 27, 2009
- Messages
- 983
java said:Nice work!.
Java! Good to hear from you! Thank you so much sir. Your compliment is well received my friend.
Scott Girvan said:Nice work man. Gotta love robotic bipeds...I know I do.
I was wondering what it was about this kit that made me appreciate the design so much, and now that you mention robotic bipeds, it dawned on me how much the camel reminds me of a certain Lucas-esque model
Cool. Conquered the first major hurdle with this build and got wire running through both legs. The second leg didn't really prove to be any easier to deal with
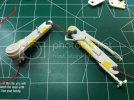
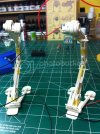
Thanks for looking my friends! so glad the weekend is finally here...
JohnSimmons
For Spud: I was once Merseajohn
- Joined
- Jan 4, 2011
- Messages
- 5,645
Really nice work mate.
MrNatural
my head is falling off my head
- Joined
- May 27, 2009
- Messages
- 983
JohnSimmons said:Really nice work mate.
Thanks John, much appreciated my friend!
Tailor said:Great! These look sooo cool!
I am very much looking forward to the progress!
Thanks buddy, glad you dig it my friend!
Ok, so been working pretty hard on figuring out how to light the main rear thruster. I sure did pick a heck of a model for my first lighting project
The main thruster is designed to have some articulation, and its pretty genius how it works but in order to light it up I had to gut all that out and have the thruster in a fixed position, this really doesn't bother me because I dont play with my models once they are done, they stay in that position. If I had a year to work on this kit I could have probably figured out a way to light it and maintain the articulation but, c'est la vie...
The housing for the thruster needed a lot of modification for lighting.
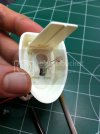
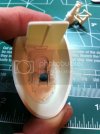
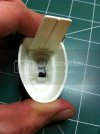
Had to connect a flat piece of styrene to the back of the assembly to help block light and give me some "meat" to glue the rest of the thruster parts on to.
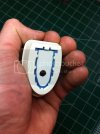
View with the thruster which is just held in place with blue tac right now
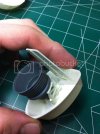
Im still experimenting with diffusion and different lighting effects for the thruster. Im getting closer and closer to what im looking for. For now I have a clear piece of styrene as a filter which I've tinted with Tamiya clear red. I really like the effect this is giving, a little more tweaking and It'll be just right
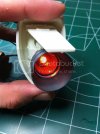
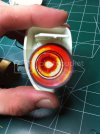
Thanks for looking dudes! I appreciate it so much! Tell me what you think as I am totally new to lighting. Later on.
ModelMakerMike
"It's Slobberin' time""
- Joined
- May 28, 2011
- Messages
- 1,838
Yes.... this is going to be awesome!!!
I really love the Ma.K stuff!
This will be one to watch!
;D
I really love the Ma.K stuff!
This will be one to watch!
;D
MrNatural
my head is falling off my head
- Joined
- May 27, 2009
- Messages
- 983
ModelMakerMike said:Yes.... this is going to be awesome!!!
I really love the Ma.K stuff!
This will be one to watch!
;D
Thanks you so mcuh I really appreciate that my friend ;D
Tailor said:Very inspiring!
Wow! Thanks man, glad you're diggin it!
Grendels said:Nice got the wires all sorted out. Looking forward to the next update.
Yeah, running the wire through those legs was one of my greater concerns with this build, glad thats out of the way.
Its been tough trying to divide my time between this and my other entry, job, life...when I'm not at the bench, all I can think about is the next time I get to do some building. Anyway, been working on the head of the camel, cleaning up parts, test fitting, and scratching my head a lot. Should be able to get a look at the lights in the model by my next update.
Started with taking care of the seam
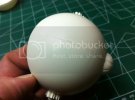
putty is your friend
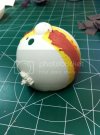
No more seam
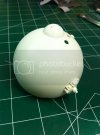
Added some bolts from Wave's option parts
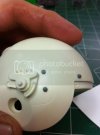
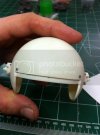
Still working on the back portion of the head, had trouble getting the detail parts to blend into the surface, so Im doing some Aves work..
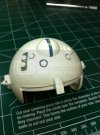
Test fitting some cockpit parts
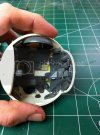
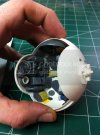
Primered up cock pit parts
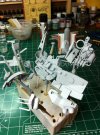
Test fitting main hull
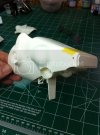
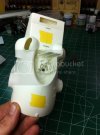
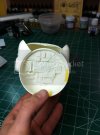
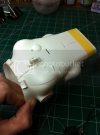
Outer detail parts cleaned up awaiting further notice
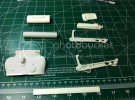
Other cleaned up parts and greeblie bits organized by sub assembly. I like to keep these little 1 oz portion cups on hand for purposes like this, mixing paint, and epoxy.
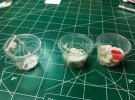
Here is the display screen for the cockpit. The directions tell you to just paint he screen semi-gloss black. I want to do something different.
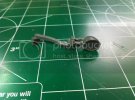
So I just cut out the screen and filled it up with epoxy, to give it more of a bubbly glass screen look which I'll tint with some clear paint.
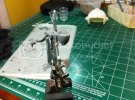
Well thats all for now my friends, hopefully by next weekend I'll have some paint down on the cockpit at least, and some light to show you guys. Thanks for looking. Later on!
JohnSimmons
For Spud: I was once Merseajohn
- Joined
- Jan 4, 2011
- Messages
- 5,645
Very cool!
MrNatural
my head is falling off my head
- Joined
- May 27, 2009
- Messages
- 983
Grendels, TRM, and John, thanks so much for the kind words!
OK, so been out of the loop with my posts for the last couple of weeks so Im just going to jump right into it.
A good solid hour of clean up work to get the figure up to speed.
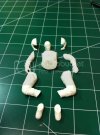
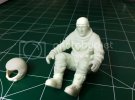
Got him all glued together. He's definitely going to need some Aves work. Decided to leave the helmet removable.
Base coated all of the cockpit parts with Vallejo German Grey
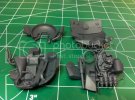
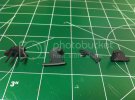
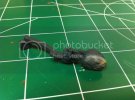
Then did some detail painting and dry brushing. I used Tamiya acrylic bronze and gold leaf, Vallejo metallic steel and aluminum, Model Master acrylic aircraft interior black, a color I really like to use when instructions call for flat black as its more a dark grey which gives more of a sense of scale. Then dry brushed with Model Master enamel steel. I'll weather these parts a little further once they're dry and installed in the head.
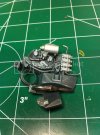
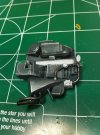
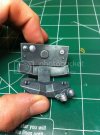
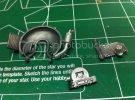
Been wiring up my lights, I did a practice run before I fixed everything in permanently.
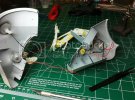
One last look at the wiring before I do the final seal on the hull and legs.
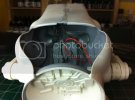
Definitely the most nerve racking part of the build so far was closing up the hull and legs and doing all the seam work with the electronics inside, I couldn't help but feel like I was going to knock something loose so I kept checking my lights periodically. But I got through it and now Im very happy ;D Still some rescribing to do, but that is small potatoes compared to sanding around all these complex curves.
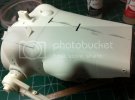
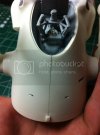
This section was particularly challenging to smooth out
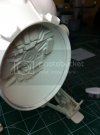
And we are all closed up, seamed, and light blocked, and good news, my lights still work. Hurray!
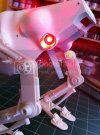
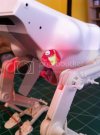
Still need to paint this thruster, it's not glued on yet
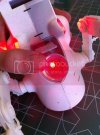
He's a pretty big boy
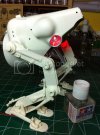
Alrighty boys, makin that home stretch towards painting. Thanks so much for checking it out! Later on my friends!
OK, so been out of the loop with my posts for the last couple of weeks so Im just going to jump right into it.
A good solid hour of clean up work to get the figure up to speed.

Got him all glued together. He's definitely going to need some Aves work. Decided to leave the helmet removable.

Base coated all of the cockpit parts with Vallejo German Grey


Then did some detail painting and dry brushing. I used Tamiya acrylic bronze and gold leaf, Vallejo metallic steel and aluminum, Model Master acrylic aircraft interior black, a color I really like to use when instructions call for flat black as its more a dark grey which gives more of a sense of scale. Then dry brushed with Model Master enamel steel. I'll weather these parts a little further once they're dry and installed in the head.


Been wiring up my lights, I did a practice run before I fixed everything in permanently.

One last look at the wiring before I do the final seal on the hull and legs.

Definitely the most nerve racking part of the build so far was closing up the hull and legs and doing all the seam work with the electronics inside, I couldn't help but feel like I was going to knock something loose so I kept checking my lights periodically. But I got through it and now Im very happy ;D Still some rescribing to do, but that is small potatoes compared to sanding around all these complex curves.


This section was particularly challenging to smooth out

And we are all closed up, seamed, and light blocked, and good news, my lights still work. Hurray!


Still need to paint this thruster, it's not glued on yet

He's a pretty big boy

Alrighty boys, makin that home stretch towards painting. Thanks so much for checking it out! Later on my friends!
Similar threads
- Replies
- 0
- Views
- 1K

