Indy 500...

plummerfan16

New Member
Joined
Dec 8, 2012
Messages
31
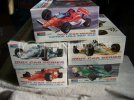
I've decided to put my F-15 project on hold. Don't really have the time (or all of the resources) to effectively tackle that. So, I've decided to start another project of mine. Being a Hoosier, I've always loved the Speedway. I'd like to start building Indy Car models. I've decided to build Monogram's Indy Car series (cars from '88 500), which has 5 different cars. The first one I will work on, is Teo Fabi's #8 Quaker State Porsche. Once I have build all 5, I might try and make a Speedway diorama with them. Work will start either Saturday or Sunday.
T2eC16Jw0E9szNcJBQ12-2gVfQ60_12_zps49bdc37d.jpg
 
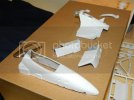
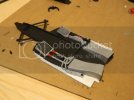
Finally got some work done today. Doesn't look as good as I hoped, but I'm not too disappointed because everything is hand painted. I don't have an air brush, and couldn't find any spray cans at the hobby shop that were the right color. Here's what I got so far...

I've got about 2 coats of gloss white on the main body sections.
DSCN9382_zps30706c95.jpg

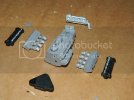
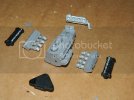
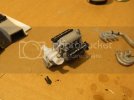
I got the engine most of the way painted. I tried to paint the small raised "PORSCHE" letters white, and it came out a little messy.
DSCN9379_zps75c81c06.jpg

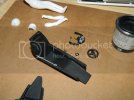
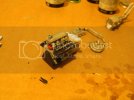
Other than that, I just got the seat painted and started on the gauges.
DSCN9381_zps2875841c.jpg
 
plummerfan16 said:
I got the engine most of the way painted. I tried to paint the small raised "PORSCHE" letters white, and it came out a little messy.
DSCN9379_zps75c81c06.jpg

If you have to personally mount the Turbo on this engine which by the looks of things so far you wont but IF you do be sure to get it pin point perfect because its critical for when you set the engine top on. Fit is critical. Also when you put the triangular part of the engine block it will appear crooked but its supposed to be. It doesnt fit directly square as you would expect it too.

Ive put one or two of the AMT indy cars together and they build differently but are alot of fun to put together.
 
hooterville75: Thanks for the advice. I had noticed during a "test fit" of some of the pieces that the triangle sits a little crooked. Also, it's not in that picture, but the turbo head will have to be mounted personally (you can see the hole where it mounts into at the top/rear of the engine block). Thanks again!
 
Good start :) ,nice work .

A tip for doing lettering the easy way . Paint your white on first ,then thin out the black and apply it around the lettering like a wash ,the paint will flow in round the letters nicely , just use a cotton bud to remove any excess from the top of the letters .:)

Chris.
 
Chris S said:
Good start :) ,nice work .

A tip for doing lettering the easy way . Paint your white on first ,then thin out the black and apply it around the lettering like a wash ,the paint will flow in round the letters nicely , just use a cotton bud to remove any excess from the top of the letters .:)

Chris.

Thanks a ton for this bit tip. This will benefit me greatly with the race cars I build. Thanks again Chris.
 
plummerfan16 said:
hooterville75: Thanks for the advice. I had noticed during a "test fit" of some of the pieces that the triangle sits a little crooked. Also, it's not in that picture, but the turbo head will have to be mounted personally (you can see the hole where it mounts into at the top/rear of the engine block). Thanks again!

The triangle part isnt as critical as the turbo. The triangle is forgiving a bit but the turbo if not PERFECT, the top/rear engine cover will not fit which creates havoc near completion. So test fit the cover before you permanentely mount the turbo. Anxious to watch the build for these kits and your dio. Thanks for the builds my friend.
 
After about a month of being way too busy at work, I finally was able to spend a lot of time last night/this morning working on the car.

Finished painting the chasis, and mounted the tubing, radiator, etc. to it.
DSCN9383_zps2c724828.jpg

The engine is almost completely together. The plenum (thing mounted on the top of the engine) didn't quite fit right. One of the heads needs to be a little lower for it to sit about right, so the engine is a little lop-sided, but not too bad.
DSCN9384_zps9c077208.jpg

Hooterville75: You weren't kidding about the turbo. When I set it on there to make sure that it lined up, there is zero margin of error for it. Thankfully it only took a couple tries to get it right. Thanks again for the heads up on that. Here's the tight fit.
DSCN9385_zps86dc4031.jpg

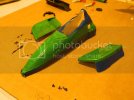
Other than that, I got the first layer of green paint on the body. Doesn't look that great right now. Hopefully after a couple coats it'll even out a little bit.
DSCN9387_zpsaea4359c.jpg
 
Those turbos are way different then the AMT kits. Wait till you put a AMT kit together ha ha. Its all chrome, and in three pieces that you have to assemble first before you mount. Its like a three legged eency weency spider getting washed out the spouting lol. Good job so far brotha. Keep up the good work.
 
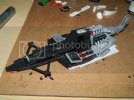
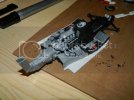
Got little more work done over the past couple days. Got most of the chasis together today. The shifter came off again, so it's just sitting in the seat until I get the driver finished.
DSCN9415_zps1cf97ab6.jpg
DSCN9416_zps97261df5.jpg

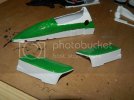
Finally took the tape off of the main body parts. The side fairings came out pretty well, although they need a little touching up. The front/nose bled through the tape a lot, and will need a lot of touching up. I'm a little disappointed in how it looks, but being hand painted instead of sprayed I'm not too upset.
DSCN9419_zps6ed09e30.jpg

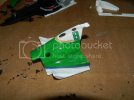
Finally got the first decal on. Had to have it so I knew where to start with the green paint under it. Pretty happy with the back cover so far. It will need a little touching up, but not too bad.
DSCN9421_zps66544597.jpg
 

Latest posts

Back
Top