Haha, that's the glue, man!brain freeze
Secret is safe with me. Looks great, and that's good enough, in my books!

Haha, that's the glue, man!brain freeze
Me either until I started the Hasegawa Growler. My question is how do you know when a decal needs to be trimmed? The clear perimeter of decal on that build was ridiculousYou know? This might seem kind of funny but all the time I hear you guys talk about trimming decals. I've never trimmed a decal in my life. Not once. Never occurred to me. Just saying. I'm not saying your way is needless or anything just that I've never done that. Hmm
Looks awesome!It's getting there, boys. It's coming along nicely a lot still to do but it's taking shape
Thank youLooks awesome!
Sharp! What is that insignia?Finished the little KP 1/72 Avia B.534. Too small for me to rig this one!
View attachment 198535
View attachment 198536
View attachment 198537
View attachment 198538
View attachment 198539
Often especially on the older ones, you can hold them to light just right and see the excess film around the individual decals. I had one old kit where I didn't trim close to the decal, just kinda around it. When I soaked it there was a massive amount of clear film around it. Turned out the whole sheet was clear film and you absolutely had to trim each one close. Trial and error sometimes.Me either until I started the Hasegawa Growler. My question is how do you know when a decal needs to be trimmed? The clear perimeter of decal on that build was ridiculous
Slovak National Uprising 1944.Sharp! What is that insignia?
I'll have to do that moving forward. I didn't know until I was trying to place canopy decals and it was too late at that point. I suppose uncle have just let them dry out, trimmed and then started th process over.Often especially on the older ones, you can hold them to light just right and see the excess film around the individual decals. I had one old kit where I didn't trim close to the decal, just kinda around it. When I soaked it there was a massive amount of clear film around it. Turned out the whole sheet was clear film and you absolutely had to trim each one close. Trial and error sometimes.
Wow! Deja vu. That's exactly the thoughts that went through my head when I was building mine. You'll find that PE might be more of a struggle than it's worth. Unless you're going for historically accurate. Me? It's my first attempt at rigging. I'm not going to go for a gold medal. I'll settle for looking halfway decent.Gloster Sea Gladiator
So about to start priming, looking ahead to rigging.
Inspired by youz guys accomplishments!
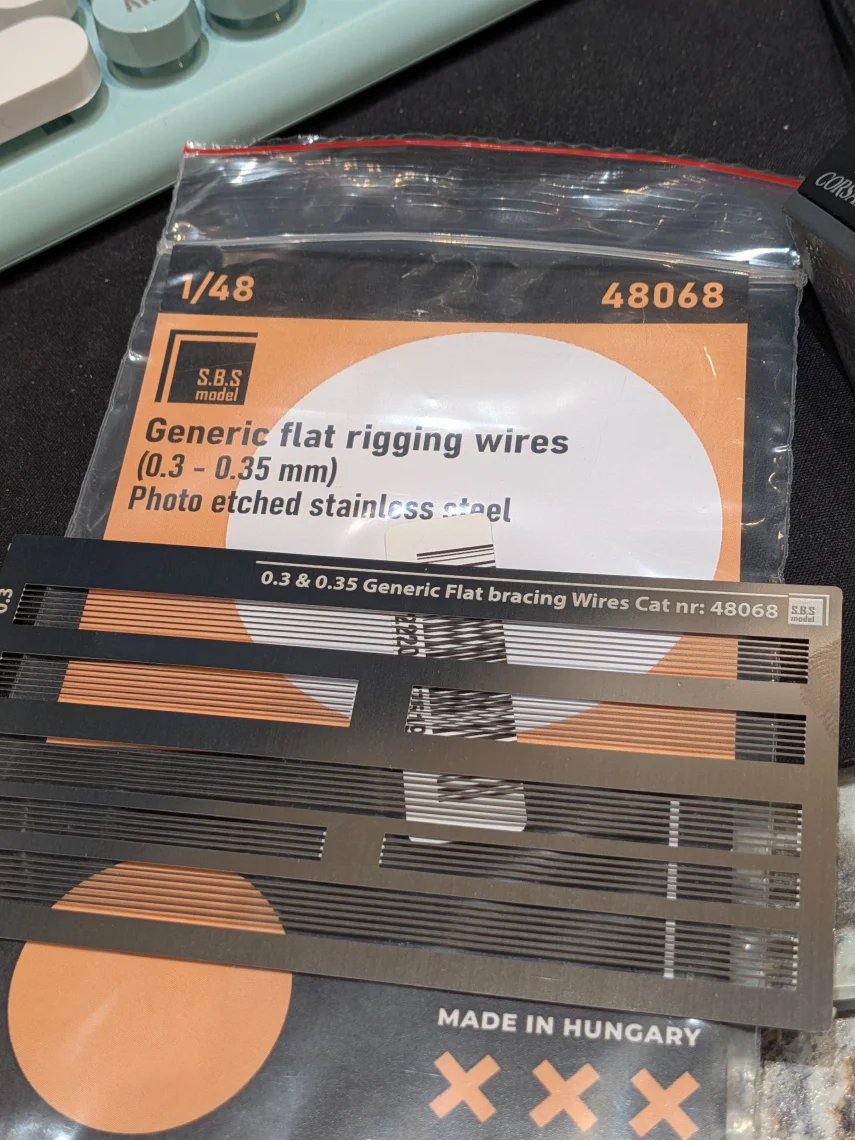
My thought at the top of this GB, was that I'd be using brass rod, with elastic rigging as a backup. Then, while accessorizing a future Walrus build, I came across these 'generic' flat PE wires, which I'd posted earlier.
View attachment 198565
In searching for photos of the Sea Gladiator, I've also learned a few things about how it was rigged.
For starters, by the time it was designed in the '30s, aerodynamics and drag were better understood. This resulted in flat bracing wires oriented to slice through the wind, and locating hardware inside the wing, so no turnbuckles or tensioning/attachments visible.
So... Going the flat rigging route might be more mechanically accurate, but it poses installation problems of its own.
For example:
Gonna hafta think a bit on this through the painting phase!
- I could drill anchor points, resulting in round holes, when the actual ones were rectangular.
- the metal can't be stretched to fit under tension...
- my PE is in a generic set which means it all has to be cut, exactly, to size.
You could Drill smaller holes and square them up with your exacto.Gloster Sea Gladiator
So about to start priming, looking ahead to rigging.
Inspired by youz guys accomplishments!
My thought at the top of this GB, was that I'd be using brass rod, with elastic rigging as a backup. Then, while accessorizing a future Walrus build, I came across these 'generic' flat PE wires, which I'd posted earlier.
View attachment 198565
In searching for photos of the Sea Gladiator, I've also learned a few things about how it was rigged.
For starters, by the time it was designed in the '30s, aerodynamics and drag were better understood. This resulted in flat bracing wires oriented to slice through the wind, and locating hardware inside the wing, so no turnbuckles or tensioning/attachments visible.
So... Going the flat rigging route might be more mechanically accurate, but it poses installation problems of its own.
For example:
Gonna hafta think a bit on this through the painting phase!
- I could drill anchor points, resulting in round holes, when the actual ones were rectangular.
- the metal can't be stretched to fit under tension...
- my PE is in a generic set which means it all has to be cut, exactly, to size.


Looks like you're making it work outSlowly getting the landing gear cleaned up and assembled (Roden!?!?)
Still have to figure the last couple decals (Roden?!?!)

Looking very sharp! A red dress does turn heads!A ways to go yet.

Eduard seems to have a pretty solid rep... And your build was pretty solid too!The Eduard 1/48 Fokker D.VII OAW was hassle free for this rookie aircraft builder.
I've heard complaints about Roden before. The reason I picked their kit was because of the subject.Looks like you're making it work out
When I first started looking for a model for this group build, I had my eye on a Roden. Before pulling the trigger on purchasing I saw a u tube video and the guy was badmouthing Roden left and right.
I have never built a Roden before so I decided to shop around some more and picked an Eduard. I had never built an Eduard before this GB either, but now I'm certainly thinking I made the right choice. The Eduard 1/48 Fokker D.VII OAW was hassle free for this rookie aircraft builder.
I picked a pretty simple build.I just went back and read all 24 pages of this thread.......alot of good stuff going on here. It's motivating me to build more aircraft.
Oh, and congratulations to Ron2 for being the first to complete your build.......winner, winner. Since BarleyBop initiated this GB, see him for your chicken dinner.
So did I........just getting my feet wet on aircraft builds.I picked a pretty simple build.
"Simple is as simple does"I picked a pretty simple build.