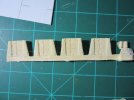
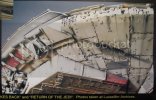
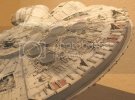
Grendel's Falcon

Also using a vice and you're correct, it helps so much!
I think I'm at the point of no return, I am making the plates at the front basically the same thickness as the rest so I will at least do the other side using the same method and maybe change for the lower half.
I've stopped for today as it's too cold in the man cave.
 
Investigate heavy gauge solid electrical wire also. It will bend easier.
 
Ziz said:
Investigate heavy gauge solid electrical wire also. It will bend easier.

Ziz and Grendals, I was experimenting today with 14 gauge wire. The ground wire was close to the size of the piping on my MPC MF. I was able to bend easily with needle nose pliers that are smooth on the inside. If you do not have smooth needle nose pliers, then just wrap electrical tape around ends to prevent any nicks in the wire. Also, the insulation around the wire can be used for tubing or hoses. Getting ready to start building my MF.
 
I will be using copper wire as well. I am an Electrician so I have access to a lot of scrap. Unfortunately its only mains SDI cable that I can get reasonable gauge wire from now days as its all stranded not solid in everything from 1mm to 10mm TPS. Its very easy to manipulate as well, which means not a lot of force to shape it and no marking. Not sure if there is any comparisment between the gauges in Australia and were you guys are though. I will be using strands from 16mm2 SDI mains cable. and 6mm2 solid if I can find my old scrap.

Ozzy
 
I took some measurements with the micrometer and I found that the pipes on the kit are usually one of three sizes:

0.5 mm Which corresponds to 25 gauge wire using the AWG spec.
1.0 mm Which is about 19 gauge
1.25mm which is close to 18 gauge, and
1.5mm which is 16 gauge

There are a few at 2mm as well which is about 14 gauge. I took my measurements on the hull, and not were the pipes leave the hull, they change size there.

To be honest, just use what you think is close to correct.

Solid core copper or aluminum wire would be much easier to work with than brass or music wire. The reason I am not doing so is that I don't want to take the trouble to straighten it out. I want to start with a perfectly straight piece and put the bends in where I want them. If one of you knows how to straighten out wire, please post it!

One other thing to think about, craft stores. Many people make their own jewelry, and you can get wire, both aluminum and copper there for pretty cheap. A bonus is that there is no insulation on this wire, and it is softer than brass. I got 30 yds of 26 gauge copper for around $4 us. Far cheaper than brass. Since I know the gauges now, I might revisit the craft store.....

I also got a vice today, I need to wrap the jaws in electrical tape before I use it.

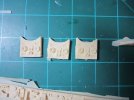
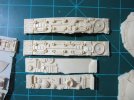
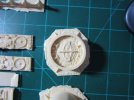
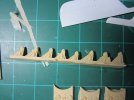
Here is the photos of the blue moon upgrade kit:
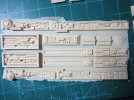
20120121_2.jpg20120121_3.jpg20120121_4.jpg20120121_5.jpg20120121_6.jpg20120121_7.jpg

I did make a video review, but it will be almost a week before I can post it.

Speaking of which, my build rate will slow a bit, I am going to start alternating between the MF and the A-wings. I have now spent about equal time on the two of them and I need to get working on those A-wings.....
 
Grendels said:
I took some measurements with the micrometer and I found that the pipes on the kit are usually one of three sizes:

0.5 mm Which corresponds to 25 gauge wire using the AWG spec.
1.0 mm Which is about 19 gauge
1.25mm which is close to 18 gauge, and
1.5mm which is 16 gauge

There are a few at 2mm as well which is about 14 gauge. I took my measurements on the hull, and not were the pipes leave the hull, they change size there.

To be honest, just use what you think is close to correct.

But also cross reference that with pics of the FX models because there's no guarantee that AMT did them in the right sizes in the first place. Look at how much else is screwed up or cheated - you think they decided to get anal about the piping sizes?
 
Thanks Java and Merseajohn!

Ziz: I don't know if it is possible to even find the original size of the pipes. If so, I wouldn't mind using the proper size. I do have the fine molds kit, so I could pull those and see what size they are. That is probably the best reference I will have. And I don't mind doing the scale conversions.

The piping on this kit doesn't look bad but:

I have no doubt that the pipes on this kit are NOT to scale. Nothing else really is.
 
“If one of you knows how to straighten out wire, please post it!”

Grendals, how I straighten out copper wire or any small wire, is to bend it as best to straight as I can by hand. Then I have a wooden plate and ruler, place the wire between and roll back in forth until the wire is straight. Sometimes it takes a second or two to get the wire rolling. Instead of using a ruler, I have also use a 1 inch by 1inch by 6 inch long piece of wood to add more pressure. I never used this technique on brass wire but with enough pressure should straighten out.

The resin kit is a nice upgrade and detail sharp.

Also, in my previous post I said I had the MPC kit MF, correction I have the AMT/Ertl cut away MF.
 
Grendels said:
Thanks Java and Merseajohn!

Ziz: I don't know if it is possible to even find the original size of the pipes. If so, I wouldn't mind using the proper size. I do have the fine molds kit, so I could pull those and see what size they are. That is probably the best reference I will have. And I don't mind doing the scale conversions.

The piping on this kit doesn't look bad but:

I have no doubt that the pipes on this kit are NOT to scale. Nothing else really is.

Oh yeah, I don't mean literally hunt down numbers and dimensions...that would take forever. What you could do though is take all the pics of the FX models that are out there and scale them to the kit to see how close things work out.
 
Thanks Tanker! I will give it a try, copper wire would be much easier to work with than the brass, and if I can get it straight, then I can use it. I have plenty on hand!

Ziz: I took a look at my reference photos of both the 5 ft and the 32 inch model. The MPC kit is nothing like either one of them.

The pipes don't run correctly at all, they are out of scale, and there is surface detail on the model that doesn't exist in either studio models. In addition, there is plenty of detail in the studio models that just doesn't exist on the MPC kit.

I am not going to try and build this thing up cannon, it would just be madness and I have the fine molds kit in a closet. So having said that, I am going to leave the small surface detail pipes alone and only work on the larger ones.

The very large pipes look pretty close to what I see on the studio models, the medium sized ones that go in and out of the cut outs however are too large, so I am going to reduce them down a bit. I will probably just use 1mm for everything that I replace.

I also saw a lot of areas where pipes connect the upper and lower hull to the sidewalls. This is completely absent on the MPC model. I will add some of that in.

Since the model parts don't always follow the studio model, I am just going to have fun with it and bend some brass. If it follows what is there, great, if not, no worries this kit isn't accurate anyhow.
 
I agree G, making that old stinker into a replica of either the 32" or 5ft would take so long. Although it has been done and that mpc kit can and in your case will shine, I don't think it could be done by the deadline lol. Still looking forward to see what you do with the plumbing though!
 
Grendels said:
I have no doubt that the pipes on this kit are NOT to scale. Nothing else really is.

Well actualy, apart from the side wall height it is very close to correct scale. But I agree, just use what looks right. No one knows exactly what gauge was used, I only know of one guy that has actualy finished building a 5 foot falcon, and I am not sure he was sure.

Thanks for posting pics of the upgrade parts.

Ozzy
 
Thanks Merseajohn!

Ozzy: A lot of it did look right in scale, but the medium sized pipes didn't. Those are the ones that run in and out of the cutouts and the ones I plan on replacing.

You are welcome for the photos, the video review will be up in a week or two.
 
Nice job G! Dont worry about the 'top' of the bottom plate. As you can see from the 32" falcon there is no 'flutes' just a strip of plasticard anyway:
Sulptgalaxbackbottom32inch.jpg
IMG_0478.jpg
109_0923.jpg
Last pic isnt mine its available at http://www.halstensen.com/
Hope this helps, keep up the good work! ;)
 
Thanks! My reference photos are not as good as the ones you posted. Definitely a help! The photos show exactly what I was going to do, so my plan is good to go.
 
I tired several time today to watch your last video Grendel... Didn't succeded... :(
Tried other links and it works... VEry strange (I want to watch your MF report ! :) ).
 

Latest posts

Back
Top