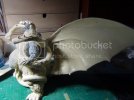
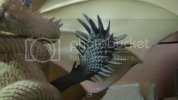
Godzilla vs. King Ghidorah Resin Statue

Your technique is working really well to recreate the scale patterns on Ghidorah. I think the seams and areas you had to fill will disappear entirely under a coat of paint. Looking really good!
 
That looks like it's going great! Very interesting to see you fix all those nasty seams. Keep it Norm! :)
 
schweinhund227 said:
Thanks guys... !

I am presently working on Fixing ( affixing ) the Left Wing !!!

The (locking) plug is totally gone and what ever is left is just a mere shadow of its former self and basically useless ! I did come up with a way to mate and secure this Wing... (its only an Idea right now)

The "overhang" itself will be a huge stress-er! on the join ! So I decided to FILL the HOLE with AveS Apoxie Putty but the Hole will be Buttered with Vaseline in order for let me Take that Imprint and transfer it to the Wing ! This way I will recuperate the missing locking plug on the wing and insure a Good bond between the two pieces... Once I am satisfied with the Fit I will use Brass Pins to Lock this PLUG to the Wing as it should have in the first Place...

I will most likely make a small YouTube Movie about this Technique to help people understand the reasons I am doing it that way !!!

Since I can only Glue this Wing LAST !!! After its painted and king Ghidorah and Godzilla are painted... it is in my best interest to make this Piece FIT as tight and as nicely as I can !!! to minimize repairs after all the GOLD paint has been applied !!!
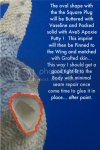
DSC00206-1-1.jpg

Later guys !

Norm

OUT !
 
Coming along great...... very cool.

Thanks for sharing, I'm watching with interest.
 
;D

Well, Thanks !!!

I have done it ! Guys !!! This morning I was pretty excited, I had to see what would come out of my AveS ""Locator Plug replacement"" experiment I had done the night before... LOL

Took the tape that was holding the wing steady... off and Nothing.... The wing would not budge... so OK that's a Plus... a nice tight fit all around.... No seams .... and then I tried to UNPLUG it !!! Nothing!!!

IMPOSSIBLE I said ! way too much Vaseline for it to Stick !!! I was facing.... a lot of work if that wing had stuck to the model.... this was Turning Sour fast !!!

So I gently rocked the wing... just enough to feel that I was exerting pressure on the join and

Pop ! a perfectly match Locator Plug and mating surface came out....

WOW ! I am so pumped right now... I might grind off the Other Wing surface and start over... and try to get the same results on the other wing.... I think it would be worth it in the long run !!!

I took pictures... but will be uploading them later... tonight !

I had to rush to work... so !!!

Stay tuned !!!
 
Ok !

Here are the Pictures....

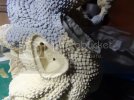
Here is the Plug (hole) I needed to reproduce on the Wing ! in order to help it support it and lock it in place ! The 2 holes where there to Keep the wing in position while the AveS Putty cured ! They are still gonna be used to help spread the stress on the join after assembly !

DSC00211.jpg

You can see the Vaseline coating I put in the hole before filling it FULL of AveS Apoxie putty !

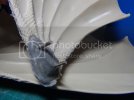
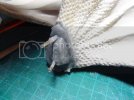
When I pulled the Wing Off this morning.... SUCCESS ! The Plug and surrounding area had Stuck to the wing and now I can snap it in place knowing it will hold night and tight !

DSC00212.jpg

DSC00213.jpg

When I put it back in place the join is perfect... all I need to do now is to add some Skin to match what's around... minimal clean up is necessary here and there... what's important is the fact that I am one step closer from getting this Statue repaired !

DSC00214.jpg

I will most likely remove the repair I have done on the other wing.... and do a similar "Plug Imprint" and get a better fit out of it.... !!!

DSC00215.jpg


Keep posted !
 
Thanks people!

I want to apologize for those of you that follows my YouTube Video blog on this.... My video editor has trimmed my movie to 15 min. Versus it's full 17... It might not be much but the story isn't complete

So I'll be uploading a new one... Via the YouTube uploader instead of my Corel video studio option.

I want to thanks all those that commented and are following this WiP!

Take care.
 
Thank you Chas!

Learning new tricks as I go! And sharing those that (seams) to work! LOL. Punt intended!

Keep posted!


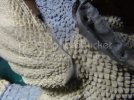
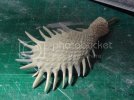
I spent a good 4 hrs cleaning this Tail section.... My god ! micro bubbles.... everywhere....

I had to replace (make) 7 Spikes... out of Aves... hard AveS that I cut with a razor saw and sanded to shape !

I had 5 breaks... hard times with the diamond files.... pretty tight in there....

But since it is a Very... predominant fixture of that statue... I had no choice but get her Right !!!

DSC00217.jpg

More stuff later...

I made my choices for the contest.... what a Day !!! few !
 
man i would not like a slap off that. i fell might spring a leak ;D

nice job on the repairs.
 
Nothing Stellar..... Just a few spikes.... Looks almost like a PineApple !

DSC00226.jpg

I am glad it is almost done..... It was a lot more fragile than people think! A few more coats of Mr. surfacer To plug all those micro voids and I can move to other things....

The second wing has a new locator plug. And the fit is a lot tighter.... Another thing to strike off the list

Later people!

Norm.
 
This is looking wicked, Norm! A very impressive dio, along with a top notch build as it is. Great progress!
 
That tail looks good. Too bad about the micro bubbles. I am working on some of those with my build tomorrow.
 

Latest posts

Back
Top