Godzilla vs. King Ghidorah Resin Statue

schweinhund227

New Member
Joined
Jun 24, 2009
Messages
2,511
;D Hi people !

After Seeing what Grendel did with his Japanese Styrene models.... I "gave in" and purchased a Resin Figure of Godzilla Vs. King Ghidorah that I had spotted on Ebay for quite some time !!!

Y817-bi-GODZILLA-VS-KING-GHIDORAH.jpg


After doing a Video Review on this kit; I started to clean up and dry fitted some of the parts in order to get a feel for the kind of work I had ahead of me.... I tried to find ways to get the parts to fit and limit the amount of Sculpting or Fixing I had to do in order to get this Statue together in a reasonable amount of time... I am under no time-line so... that to Helps ! But I don't want this to take for ever either....

Well it's not going to be easy ! being a reproduction! I have to face the fact !!! and the way the Caster chose to divide the original Statue was... lets say... Barbaric at best !

I am assuming they used a Copping Saw or hacksaw ! The Original Statue is a Snap Fit style figure which had Large square Locator Pins that were locking in the body ! Probably assembled in Factory and shipped that way...? but I can't be sure... Those Locator Pins are all but gone !! Cut off by the Caster during the partition surgery....

I am working on "Pinning" the model as we speak! For those that are not familiar with Resin kits... Pinning is a must with larger kits to insure a good Weigh distribution and spare the Joints undue stress...

C.A. glues although "strong" are subject to failure if "shocked" !!! sudden blows can lead to failure... so pinning the joints will help... The Sheer weight of the Necks and tails and Wings forces me to use that technique in order to insure the parts are well supported !

On a positive note ! I received my Oyumaru Moulding compound ! Same stuff Grendel was using to make his Skin Moulds.... I will use Resin in lieu of AveS putty to form my Replacement skin ! just a preference! and also I am more at ease with this medium than thinned AveS....

I will fill the voids in between the parts.... with AveS putty to strengthen the joints for sure ! and I have looked at ways to stamp the Dragon scales directly on the AveS if able to do so !!!

Anyway.... I'll post some picture... when I get a min...

Keep posted !

here is the link to my OOBR of that kit !!! for those interested in listening to my rambling....
Godzilla vs King Ghidorah 1/350 Statue OOBR
 
Cool looking kit. Tons of action.

Now that's what I can pulling a Grendels! :)
 
Scott Girvan said:
Cool looking kit. Tons of action.

Now that's what I can pulling a Grendels! :)

LOL!

Norm: I will be following this build and watching with interest how you solve the monster skin problem....
 
John and Scott.... this thing promise to be..... Monstrous ! LOL

here are some pictures....

DSC00098.jpg

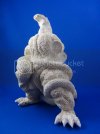
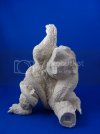
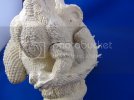
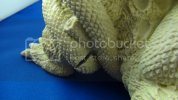
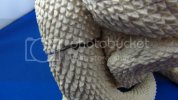
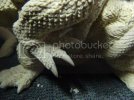
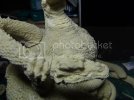
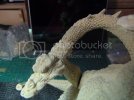
Along came a monster !!!! ONE piece King Ghidorah wrapped around Godzilla.... weighs in a few pounds... there are plenty of SEAMS to worry about !!!

DSC00099.jpg

DSC00103.jpg

DSC00102.jpg

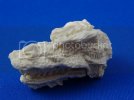
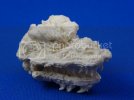
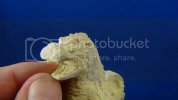
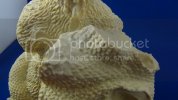
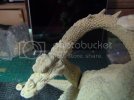
The King Ghidorah's Heads are well formed but needs a lot of clean up around the teeth... and eyes !
They each have 10 Spikes to go on.... that forms a Collar ! they will need to be added at the END to prevent breakage !

DSC00104.jpg

DSC00105.jpg

DSC00106.jpg

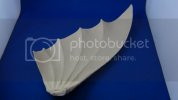
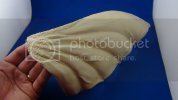
The Wings are gorgeous ! Smooth and straight ! I am afraid of sanding them as they are very Thin in some areas !!!! Hooks or Claws are to be added at Each extremities .... once again... much later in the build !

DSC00107.jpg

Still haven't found Godzilla Tongue !!! so many little parts... maybe its in there....

DSC00114.jpg

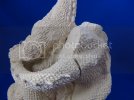
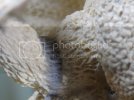
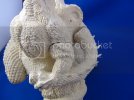
Godzilla's Left arm will need 2 pins in order to Hold King G. Neck... firmly ! while the seam on Godzilla isn't bad at all.... King G. Neck will need a lot of Putty and a Ring of Skin to cover that area !!!

DSC00115.jpg

I was only able to Match the Lower area of the neck and the remainder will need to be copied !!!

Thanks to a Bad CUT !!! from the Caster !!!

DSC00113.jpg

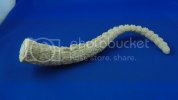
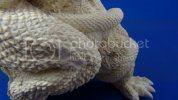
Godzilla's Tail is the best part of the kit.... It matches pretty good to the body and this Seam will be easy to blend in compared to the rest of the statue !!!

DSC00112.jpg

DSC00111.jpg

DSC00110.jpg

DSC00109.jpg

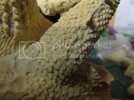
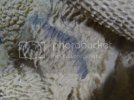
On King Ghidorah's Shoulder... you see what seems to be a lack of details but in reality its the MOULD that was Torn apart... having no details there, More Resin took its place ! That means... Grinding all that away... below the Skin level surrounding it, in order for me to lay down new Skin and blend it in !!!

DSC00108.jpg

Same story with the Right Tight ! this one will be more tricky as they have simulated some muscles...

DSC00121.jpg

DSC00116.jpg

DSC00117.jpg

DSC00118.jpg

King Ghidorah Right Neck isn't bad.... the Rear matches the body pretty well... the Throat area will need work !!! the head attaches to Godzilla Right arm.... which will need work at the Elbow !

So all in all... A very Cool looking Statue.... with Tons of work ahead of me to fix it !!!

I have come up with a TOOL for the skin... but first I must try it ! then show it off !!!

Thanks for stopping by and looking at this....


Norm

OUT !

Video to follow on PINNING Resin kits...


later !
 
I see a LOT of Aves work in your future with that.
Should look really impressive when it's done, though
 
Ur on full throttle Buds!!! The Jet now with King G!!

will be also following this one up!!!
 
That was a great review detailing every little bit of the kit. Now to decide if I want to pull a Grendels

LOL
 
Grendels said:
That was a great review detailing every little bit of the kit. Now to decide if I want to pull a Grendels

LOL

Did some experimenting with the Oyumaru ! Fun stuff.... got varied results on Skin duplication !

Very nice stuff as it takes superb Imprints of what ever you touch it with .... I haven't broken out the Resin yet.... but should be doing more test during the week end !

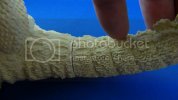
I spotted 4 kinds of scales on King Ghidorah !!! not all the same... of course when you look at him.... they all look Dragon like scales but some looks like Checkering !!! like seen on Rifles stocks, and special tools are used for that alone !!! and they are not Cheap !!! I'll pass on that...

I also experimented with Square brass tubing... squeezed into a Lozenge shape... and had mixed results in Clay !!! Very close but no Cigar ! I might try a variation of that... it was so close, I can't renounce on it yet ! I spotted Dragon scale and fish scales sculpting tools on the net but I won't buy them... but might try to duplicate some for my own usage !

Next will be Thin Resin skin made from Oyumaru copies and do some layering ... to see if I get somewhere with that ???

Keep posted !
 
I tried the sculpting tool route at the beginning of my build. I could never quite get it right. So I tried to duplicate the actual pattern. I ended up making quite a few molds. I would press the area next to the seam into the oyumaru and make a mold for each and every seam. It was the only way to get the look right.
 
Ok.... I quickly edited the First Work in progress movie I had made a little while ago...

Showing some of the Pinning I have been doing to secure some of the LIMBS !!!

Pinning is important on Large Resin models with Overhanging parts ! either a monster or a Space Ship !
no difference ! the pinning will enable you to Distribute the Stress over and Help those joints survive longer !

C.A. is good but with the help of some judiciously placed pins you can extend the life of you model !
this way... if one of the joints cracks ! you might be able to save it while if NO pins are in place... the part could very well fall to the ground and shatter !

Remember.... when you work with Resin Kits... wear a mask when sanding and grinding and safety eye-wear ! nuff said !

here is my PART 1, I apologize in advance, for it is almost 15 min long...

Godzilla vs King Ghidorah Part 1

Since this video I have PINNED and GLUED all the Limbs excepted the Spiky Tail, the Wings and King G's Heads...
I packed the Deep Gaps with AVES Apoxie Putty and will be experimenting with Skin duplication soon !

Take care !

Norm.
 
Like I said over on your channel:
Looks like some wicked seamage there, Norm.
But, it also looks like this should be an impressive build when it's done
 
Thanks Pat.

Yeah, lots of work ahead.... But like you've said.... Should look pretty cool once completed

I will post pictures of the two joints I have fix so far and it looks promising.

Take care.

Norm.


DSC00163.jpg

Right arm (elbow) area repaired !

Same joint before Repair !!!

DSC00117.jpg

AND

DSC00165.jpg

Left Arm joint Repaired....

Same Joint before Repair !

DSC00114.jpg

Take care all !
 
Thanks Pat !


Ok ! earlier today I posted a video on Youtube... but I pushed the wrong button on my
Editor program and uploaded a 3D video instead of the normal 16:9 format !

I apologize if some of you had to cope thru that !!!

I have deleted that version and uploaded a new one... Regular 16:9 format in lieu of the 3D !

Godzilla vs King Ghidorah Part 2

This is basically the Video version of the previous post ! showing some of the Seam work I have done so far....

If you have any questions about AveS Apoxie Putty feel free to ask !
especially the Vaseline part ! if you don't quite understand how it works...

Take care and see you later !
 
You are going to town with this one. Looks good with the joint repair on the Big G. Can't wait to see what you do with the bad spot where the mold tore....
 
Grendels said:
You are going to town with this one. Looks good with the joint repair on the Big G. Can't wait to see what you do with the bad spot where the mould tore....

yeah John ! that feels good to get somewhere.... of course Godzilla is easier to fix !!! His skin is like an
Old dried out prune !

I will be digging King Ghidorah's Shoulder tonight.... about 2 or 3 millimetres to get a better understanding on what to do next to fix it !

Skin graft is the only solution here... a good base is key to this Fix If I want it to come out just right...

That will be my Baptisms by fire !
 
I found Godzilla much easier to fix for my contest build, but you knew that already. It will be interesting to see your approach.
 
John & Jim !!! yeah.... its ok sometimes to have a project that will
Take all my Magic to pull a trick !!! I can only grow from the experience !

Well if not ? I'll Crash n Burn !!! LOL

I'll do some Oyumaru Skin Casting tonight.... It will take a few hours for a mixture this thin to CURE
so...

Like I explained in my Monster skin repair video.... Resin being Exothermic the More you have the quicker it sets... so the lesser I will have flatten on my Skin Stamp..... the longer it will take to fully cure !

but once cured ! I should be able to Shape it to what ever form I need using HOT water... like the Oyumaru !!! I would even risk using a Hot Gun !!! on low setting or a Good Hair dryer to help form the skin to its NEW intended place !!!

But all this is speculation until proven otherwise.... !!!

Keep posted !

Norm

OUT !
 

Latest posts

Back
Top