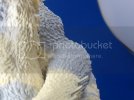
Godzilla vs. King Ghidorah Resin Statue

WOW! Norm, that is some great work so far on this kit! Your skin texture matches the model's perfectly. I'm looking forward to more progress pics.
 
the Baron said:
WOW! Norm, that is some great work so far on this kit! Your skin texture matches the model's perfectly. I'm looking forward to more progress pics.


Yeah! You think so? Nice to hear it!

You should see it with some Mr. Surfacer on ! Looks good! I hope I can do the same for King Ghidirah Scales?

Take care!

Norm.
 
A little bit of NEWS

in the last few weeks... with the Heat wave and all... I didn't touch the Models.... much !

SO... Today was different..... I had imagined many different scenarios on HOW to make my skin...

I had to prove the concept !

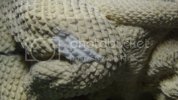
So!!! I did some OYUMARU Skin imprints....
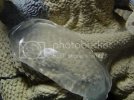
DSC00186.jpg

and while mixing a very small amount of Smooth On Resin ! I started forming my New Skin !!! badly needed on many Seams on King Ghidorah Necks and Tails !
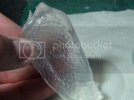
DSC00187.jpg

Here you see the Oyumaru Mould and I only Used Baby Powder (talcum Powder) as a Mould Release slash Surface Tension diffuser !
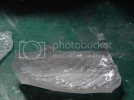
DSC00190.jpg

I have brushed on the resin... a very tinny amount which I smeared to a paper thin thickness to enable me to cut more easily!

The Resin being so thin... The Cure time took much longer than listed.. I pulled it out of the Mould before it had fully Harden, so that I could lay it down FLAT.
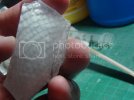
DSC00192.jpg

You can see the skin forming.... . thru the Oyumaru .... this Compound is just Wicked !!! perfect for jobs like that....

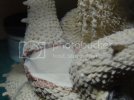
I have prepared the THIGH area which had a bad Spot !!! A tear in the mould was responsible for this Ugly Lump of resin !!!

the only prep I did is to Grind down a few millimeters to enable me to position the New skin and Glue the New Graph in place.... If I had left the old skin slash damaged Mould imprint... it would have looked like a HUMP !!! this way !!! the new skin could lay at the same level as the Model skin !!!
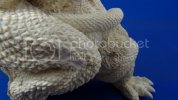
DSC00108.jpg

Same Area before Repair !!!

DSC00199.jpg

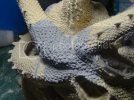
Same Leg with the NEW skin.... I think this is a Winner !!!! I am very satisfied with those preliminary results.... I can't wait to apply this technique to the rest of King's Ghidorah troubled seams...

I have prepared the SHOULDERS and Hope to apply new Skin tomorrow !!!
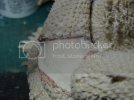
DSC00183.jpg

later guys !!!

Norm

OUT !
 
Thanks guys! I am literally PUMPED about this!
If the Shoulder repair works as good! I'll be trilled and will be able to move long....

John! Not sure if this could have worked on the styrene model? But on this Resin kit! Seems to be the way to go!

Both methods are Sound!

Thanks for showing me all about Oyumaru! It's the Key!

Norm

Out!
 
A great project, well done taking up the challenges it offers. Keep the updates coming, I will be following with interest.
 
thanks for the Hopes up !!!

I have tackled the Shoulder area.... with all those compounded curves... it is taking a lot of time to cut and mix the skin patches.... I knew from the start that it was a bad spot ... but at the same time I have to remember that it will be covered by the LEFT Wing ! so... If I don't quite get it.... it will be covered somewhat !

The Field of vision will be from the FRONT !!! again... mostly !

That doesn't mean that I am working on this Area... with less enthusiasm but I can't put all my "Time" on that area alone... while the whole statue is in need of TLC !!! I keep spotting areas after areas that will need attention before I can spray her.... miniscule air bubbles and Micro Voids.... like John told us !

but all in due time !

I am happy with those progress.... I might be able to save the statue after-all !
I can tell you know that I had very bad feeling about my Abilities to FIX those Horrid Seams...


Shoulder Area before Repair attempt No1

DSC00176.jpg

And Same area.... with 75% done with Resin Skin castings.... there is about 4 small sheets that are intertwined in this area alone... with a few Single Scales add on here and there, to help blend it all in !!!

DSC00201.jpg

I am casting more resin later on.... so I can move on !!!

See you later !
 
Excellent work there Norm!! Even with the zoom of the still photos, it looks almost flawless. In "real" size it must look absolutely perfect. Great job. By the way, I'll be stealing this technique from you!
 
omg. ild have chucked it in the bin :p you sir a mad man for taking this on. saying that you seem to be coping very well. ;D im loving the "skin" grafts you are doing looking forward to seeing this all painted up.
 
Thanks All! I feel a whole lot better now that I have started fixing King G. Those scales were
My Achilles heel.... Maybe the hardest is behind me?
 
Thanks Pat.

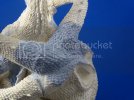
I have redone the Right Side of the shoulder area and finished the Repair....

Since this won't be seen much... cuz the WING covers it .... the only Angle you guys could see
is from the FRONT !!!

DSC00206.jpg


From this Angle... things look quite Normal now....
compared to before...!!!

DSC00209.jpg

Take care guys !

Norm

OUT !

Moving to other trouble areas... meaning more Oyumaru Moulds and more Castings....
 
;D

Thanks John!

It's not 100%. But it's a lot better than before! I think!

Beauty is in eye of the beholder! LOL

I will revisit this site later on.... And smoother some spots after I get better with the technique.

It should be named Frankenstein Ghidorah....

Later !
 
schweinhund227 said:
;D

Thanks John!

It's not 100%. But it's a lot better than before! I think!

Beauty is in eye of the beholder! LOL

I will revisit this site later on.... And smoother some spots after I get better with the technique.

It should be named Frankenstein Ghidorah....

Later !

Frankenstein Gidorah!! Good call. Now if you are looking at this with the naked eye, I bet you don't see anything wrong with it. Keep us posted!!
 

Latest posts

Back
Top