Fine Mold's Y-Wing Fighter

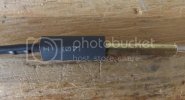
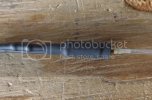
I agree with Paper... a torch would probably distribute the heat a bit more and allow the solder to flow more freely. He's right about the flux... you don't need it with the resin core solder... but you do need to clean the tubing more before soldering. A wide tip will help but I think you'll do fine with the torch. Most plumbers use a torch instead of a soldering iron to solder two tubes together because it heats the tubing more evenly and allows the solder to flow freely. A little practice and I'm sure you'll get the hang of it.
 
LrdSatyr8 - Sweet video. It helped tremendously to watch someone do it. My hat's off to you and Papermodder for the excellent advice!

Third time's a charm: ;D
WeldTest_zps73fd665f.jpg
 
Greetings SMA's!

I was able to rough in the base today. I like to get a base completed early in a build. This is especially true when I'm lighting the model. For the Y-Wing, I have a slightly more complicated power distribution than normal. So, the base needed resolution. Here's some pics:

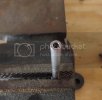
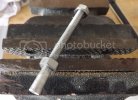
I started with a piece of 1/4" aluminum round stock. I need to bore a hole straight through the center, cut threads along 75% of it's length, and drill a single hole around the middle. All this to allow my power wires to pass thru:
YWing_22_zps97e0d054.jpg

I bore the hole first:
YWing_23_zps20fdc7e3.jpg

Next came the threading:
YWing_25_zps47caa78d.jpg

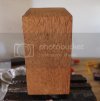
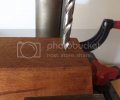
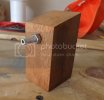
I'm also using a solid piece of walnut (I think it's walnut). The aluminum rod will pass through the center. Here I'm using the a drill press to drill the whole nice and clean:
YWing_26_zps654b80d9.jpg

YWing_27_zpsf32142c2.jpg

The aluminum rod is secured by two bolts:
YWing_28_zpsccf1725a.jpg

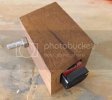
A 9v battery is the power source. I created a hole in the wood for the battery to slide right in!
YWing_29_zpsba9d557d.jpg

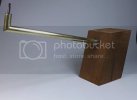
And here's the base, roughed in for test fits:
YWing_30_zpsfd95151f.jpg

Now, I can wire and solder the connections, sand and oil the wood, and make a quick aluminum plate to cover the battery. The base is ready to go!
 
LrdSatyr8, joeym, JohnSimmons, & Solander - Thanks so much!

The model should be lightweight when completed. My hope is that I can maintain the base's cantilever effect. I'll try to post another update before the weekends ends.

Thanks for reading.
 
Nice idea on the base.

My own bases wind up being last for some reason, and I run into the "okay, what will hold this?" problem
 
Quaralane said:
Nice idea on the base.

My own bases wind up being last for some reason, and I run into the "okay, what will hold this?" problem

I think I suffer from the same affliction my friend. My bases are either last minute, in the kit or lots of Aves putty to hold it on there good (if that don't work, there's always 5-minute epoxy) LOL
 
Grendels & Unreality - Thanks!

Nice idea on the base.

My own bases wind up being last for some reason, and I run into the "okay, what will hold this?" problem

Thanks Quaralane! If there's no lighting, I do the same. :-\ ;)
--

Fiber optic update - This may seem over the top for a few fiber strands but stick with me. Hopefully my narration will make sense.

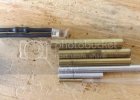
I have a small fiber bundle - maybe 10-12 strands. This is just for a few buttons and lights in the cockpit. I tucked the bundle in a small section of brass tubing. This keeps everything together at the end of the LED:
YWing_42_zps6fa5018f.jpg

YWing_43_zps50ee3de1.jpg

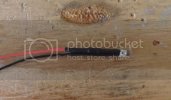
Here's the LED for the fibers. The resistor is soldered in-line with the positive lead and both leads are protected with heat shrink:
YWing_31_zps5f377a93.jpg

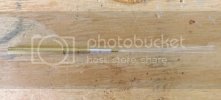
Here's where it may seem a little over the top. The fiber bundle must sit on the center of the LED bulb. The center is where the light is brightest and produces the most intense light at the 'point' end of the fiber. So, I will keep the fiber bundle in the dead center by way of a small telescoping package of brass tubes:
YWing_32_zpsd0c73164.jpg

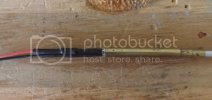
The largest tube fits perfectly over the LED and will keep light from escaping:
YWing_33_zpsf8760c81.jpg

Marked and ready to cut:
YWing_34_zps398f99ed.jpg

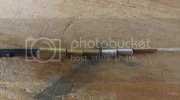
After cutting, the edges need a light sanding. Otherwise, they wont fit cleanly into the next section of tube:
YWing_35_zpsba9ce0be.jpg

YWing_36_zps8275888c.jpg

Here's the assembly ready for gluing. Notice the telescoping bulges at the end. This is the tubing conforming to the shape of the LED - and keeping the fiber bundle perfectly centered! I use a 5 minute epoxy to attach and seal everything:
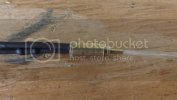
YWing_37_zps045cdc79.jpg

YWing_38_zps7b511bf0.jpg

Finally, I add another piece of heat shrink. This will keep any light from escaping except for where I want it to escape. The large brass tube is a temporary protective barrier for the fibers, which are plastic. The heat to shrink the heat shrink would also deform the fibers and ruin all this work. I pull the tube out after the heat shrink is shrunk :D:
YWing_39_zps5b3a76c1.jpg

YWing_40_zpsc989cd77.jpg

Here's the lighting test. It's ready for installation. Pretty sweet!
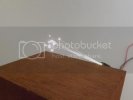
YWing_41_zps075837ae.jpg
 
I usually use brass for my fiber bundles, but never like that... You can center them almost as well with tape.
 
Lighting the model

Great build log on lighting your model CheesyGrin. Thanks for sharing all the diagrams and how to images. I have not tried this yet but after being in the hobby for a number of years I do want to give it a try.
By the way who is Adam Wilder?
 

Latest posts

Back
Top