Fine Mold's Y-Wing Fighter

CheesyGrin

New Member
Joined
Sep 1, 2012
Messages
152
Fellow Scale Model Addicts,

I've been inspired by the fabulous builds in this years BSC. I've decided my next build will be the Y-Wing Fighter by Fine Molds. I've had this kit since it was first issued years ago. I know numerous WIP threads are already collecting binary dust in internet-land. Even so, I still think it's a stellar kit of a stellar design. Plus, it's Star Wars! How can I go wrong?

Here are my ambitions:

1. Lighting. Must have lighting. Zealousness dictates a combination of fiber optics in the cockpit alongside LEDs in the thrusters.
2. Custom base. Elegant but functional design. It may need to house the power for ambition #1.
3. Painted markings. Despite Fine Mold's honorable attempt to provide cool decals, I want to paint the markings. And the paint chips.
4. Adam Wilder-esque weathering. Adam Wilder is an AFV weathering stud who applied his magic to a FM Y-Wing in an issue of Tamiya Model Magazine a few years ago. It was lovely. It's this build's muse.

I welcome your thoughts and ideas. This will be the kit that precedes the purported granddaddy of Star Wars kits - Fine Molds 1/72 Millennium Falcon.

And we're off!
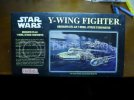
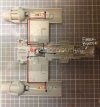
FM_YWing_1_zpsdd110029.jpg
 
That is a tasty kit. It puts itself together. I should get another one sometime. Ken is painting the one I built up.

Really nice, clean kit to build.
 
Hmm. I'm thinking I may need to start on mine soon. I have several ideas, just haven't jumped in.

I'll definitely follow.
 
;D
All right ,, I like the enthusiastic intro with the subject ---- I'm watching
Uru
 
Thanks for following along, guys! I'll try to keep regular updates coming.

To Scott's point, I see first-hand how this kit nearly puts itself together. It's a great piece of engineering. With that, I decided to tackle the lighting first. I wanted to get the LED circuit worked out before digging deep into the build. So, I found a bread board from my old college days. I used this to build and test my circuit. I also found a handy website that takes your LED count and produces a circuit schematic:

http://led.linear1.org/led.wiz

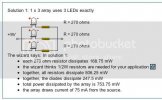
Simply enter a few design parameters and 'poof!'... out comes a circuit. The Y-Wing will need 3 LEDs - (1) for the fiber optic bundle to the cockpit and (2) for the thrusters. Here's what the website produced for my configuration:

YWing_14_zps46ef62cf.jpg

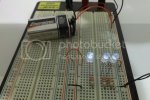
Here's the circuit wired up on the bread board:
YWing_13_zps27328bfc.jpg

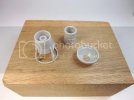
I do believe Fine Molds anticipated folks like me adding lights to this model. They conveniently placed channels and holes in all the right spots! Here are the thruster pieces. Notice the hole in the concave insert. It's even molded to reflect light, much like a car's front headlight or a flashlight. Very cool:

YWing_6_zps0464118c.jpg

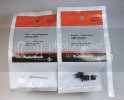
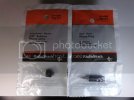
Before I get into the thruster stuff, I wanted to share the lighting parts I'm using. The LEDs are nothing special. Just 5mm bright white LEDs. While browsing around Radio Shack, though, I noticed a package of LED holders. They're black plastic and looked about the size of the hole Fine Molds graciously placed in the reflector. A package of 5 was $1.99. What the heck:

YWing_3_zps0fcb4e6a.jpg

YWing_5_zpsd7de3a09.jpg

I was pleasantly surprised by how everything fit without any modification to the kit part:

YWing_7_zpsb79a32ef.jpg

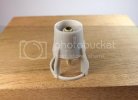
One thing I noticed was that the thruster nozzle was solid in its center. I wanted the light shine through this center section. So I drilled a hole and found some brass tubing. I'll demonstrate the modification with pictures:

Hole drilled and tubing test fitted:
YWing_8_zpse8d75ec9.jpg

I thinned the tubing walls:
YWing_9_zps5866f023.jpg

After cutting to length, the tubing was glued in:
YWing_10_zps1b6ef78e.jpg

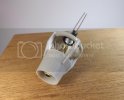
With the LED and reflector in place, the tubing nearly meets the LEDs tip. My hope is that light will bounce around the inside of the brass tube and produce a slight glow out of the thruster's business end:
YWing_11_zpsfd1fc037.jpg

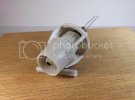
The tubing is covered by the enginer insert. So no unsightly-ness here:
YWing_12_zps0f2cc825.jpg

That's all for tonight. My goal this weekend is to solder the LED circuit and metallize (paint) the thruster reflectors. I'll post an update before the weekend ends. Hopefully.

C&C always welcomed! :)
 
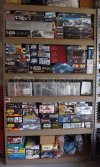
Thanks guys! Unfortunately I didn't get any time this weekend to work on the kit. Too many chores and the weather was terribly rainy. I did, however, get my model stash organized. This is what happens after 20+ years of selective purchasing. I promise I had only the truest intentions of building them (and still do):

Stash1_zpsd286ac62.jpg

::)
 
Oh that is going to look so cool... I'll be following this one my friend... I've been wanting to try out a Fine Molds kit for awhile now.
 
Oh that is going to look so cool... I'll be following this one my friend... I've been wanting to try out a Fine Molds kit for awhile now.
Thanks LrdSatyr8. Don't hesitate any longer, sir! The FM Y-Wing has been a joy to work with. You're only delaying your inevitable modeling satisfaction. :D

Brief update. I have a wiring configuration worked out. I think this will do it:

Wiring_1_zps7db3eccb.jpg

I'll share the plans for the connection to a base on the next update...
 
It is interesting to see someone else do a lighting project. That way I can see how others approach something I would do.

I too have wondered about the fine molds kits, have many in the stash, so I think I need to break one out soon....

Keep posting!
 
It is interesting to see someone else do a lighting project. That way I can see how others approach something I would do.
Awesome Grendels. I'm glad you find the info helpful. Let me know if you'd like to see pics of something specific.

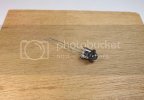
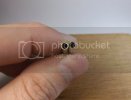
For this update I'm switching gears a bit. The Y-Wing is 1/72 scale - relatively small. So there's not much room for a power source inside the model. This requires the base to be multi-purpose. I'll not go into gory detail about the base design...yet. But I will need a connection point into the model (for power) and a wire way from that point to the 9V power source. My choice of connection device will be a 3/32" submini headphone jack assembly:

YWing_19_zpscc856116.jpg

Routing wire for the connection will require soldering pieces of brass tubing in a 90 degree configuration. ???

I've never soldered brass tubing. But I like to add new challenges to each build. So, here goes my practice attempt:

YWing_15_zps33f22082.jpg

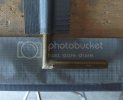
I needed a means for steadying the tubing while soldering. Here I'm using duct tape w/ the sticky side facing upwards:
YWing_16_zpsfa8437d3.jpg

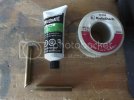
With soldering flux added:
YWing_17_zps3ecf5d98.jpg

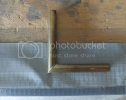
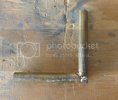
The rather ugly result:
YWing_18_zpsf20511b1.jpg

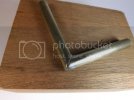
But the somewhat cleaner final result!:
YWing_21_zpsdb98565c.jpg

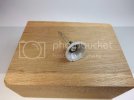
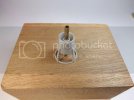
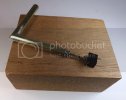
And here's an idea of how the sub-mini jack will fit:
YWing_20_zps4366e9db.jpg

I apologize now to anyone who solders brass for a living. My apparent desecration of the art is very unintentional. I hope to get a little better before soldering the actual brass tubing for the base :-[

If anyone has brass soldering advice, let it rip!
 
I think you did a pretty good job. The only thing I can suggest it heat the brass a bit more before adding the solder to allow it to flow better and sand the sides. But you're not going to be seeing the solder job so I wouldn't really worry too much about how it looks. I think you're doing a great job so far!
 
Hi Cheezey, For one thing you do not need the external flux, if you are using rosin core solder as it has the flux in it already. Second you need a good hot iron with a wide hot tip, and I don't mean a soldering gun either, those things are terrible and do not put out enough heat long enough.
Hold the iron to the joint and apply the solder to the tubing, not the iron, and it should nicely flow around the joint. Do clean the brass around the joint before you solder, or the solder will not adhere.

Jim
 
LrdSatyr8 and Papermodder - great advice. Thanks so much. I used a Weller iron but with a sharp tip. Unfortunately I don't have a wide tip. I do have a pen torch, though. Do you think a pen torch would bring too much heat and permenetly discolor the brass?
 
A micro torch is fine as long as you are careful not to over heat the tubing. Some discolouring can be cleaned up with brass polish like "Brasso". It would be a good investment to get a wider tip for your iron. I know weller has them. It will be handy when you are soldering larger dia. wire or bundles.

Jim
 

Latest posts

Back
Top