Face painting with oils 'How to'

I shall try again !!...just got this all done and had a crash :mad: Oh well here we go again !

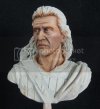
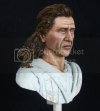
Now the face is dry ,we can move onto the'Wet on dry ' stage :D , you can see the difference in the colours now too .
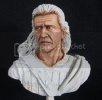
DSCF3121.jpg

The next step is to add the final highlights (if needed ) As I mentioned at the start ,this fella is going to be pale skinned ,with a bit of red and blue about the face , Like myself he would be naturally a purplish Blue /White colour as we dont have the dark skin pigment that some one from ...say South Africa would ;)
So first up ,I put on the White highlights ,you can see where these need to go in the pic below ...
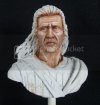
DSCF3122.jpg

This is blended in the same way as 'wet on wet ', by stippling the paint with a dry brush until the edges are feathered in . As I want a tired and battle weary look to the face ,I mixed up some Prussian Blue and Crimson ,This I added around the bottom of the eyes .Using a fine brush and wiping most of the paint off ,I carefully pull the brush down from the inside corner of the eye and along the bottom of the bag below the eye,Then work this in a bit with a clean brush . At the same time I've also put more Crimson on the upper cheek ,This is the start of the cold look .
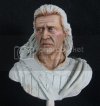
DSCF3123.jpg

Now with the cheeks all blended ,I added some tiny flecks of Prussian Blue around the cheeks ,Once stippled or blended with the Crimson this will make the cheeks look cold .
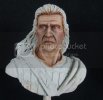
DSCF3124.jpg
DSCF3126.jpg

The last thing I've done for this stage was to add a wash of Raw umber to the hair,This will create my shadows ,and also show up the colours on the face better :),The hair is still wet in the following pics thats why it appears shiney
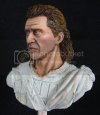
DSCF3129.jpg
DSCF3130.jpg

And I've put this next pic in just to show the difference from the start of this stage .....
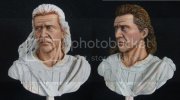
DSCF3129-1.jpg


So ...we're nearly done with the face now ,when its dry I'll sort out the eyebrows and re check for any flaws,Following that I will move onto the hair ;D


Thanks for looking ...Questions & comments most welcome.

Chris.
 
Awesome Chris! Missed the update last night. Looking incredible here, thanks for all this!!! ;) big help!!
 
Yeah i missed the update as well mate so just catching up................bloody marveloooose matey, he looks dam fine to me............!!!!

`Boots`
 
Amazing! I was always amazed at figures and how much detail can be brought out of them. I would always look at them at shows and say "How do they do that??!". Well now I know!
Thanks mate :D
 
Thanks for the comments fella's ... I'll have more up on this at the end of the week ,just got a few other things going on at the mo :-\

Mr Crowley .....A Belfast man ? ....I was born there myself ;D, probably looked like that a few times myself too ::)...lol

Chris.
 
CHRIS,

I'm lookin forward to seein more on this figure. ....

Question - How are you lighting your figure ?

I would post some critiques about My figures but .. I can't seem to get th lighting right. They look too washed out. Is it better to back light - i.e. have th light source actually above & behind the figure ?

Here are some shots of My figures -

WaffenSSGrenadier3.jpg

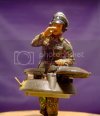
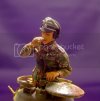
UltracastTigerTankCommander.jpg

DSC07940.jpg

DSC07947.jpg
Now .. with this Tank Commander , I didn't realize it at th time, but have corrected it now, the Oil paint had beeen rubbed off of his hands somewhat. Other than that .... Critique away .... ;D
 
Hi Erik ,Sorry about the delay buddy .I will be continuing with this from tomorrow ,just had a lot of other stuff on ::)
Anyhoo ....Lighting , To be honest I try to use daylight as much as possible .I simply set up an area opposite a window with plenty of sunlight (not that there is much sun here :( ) The natural light seems to work well for me . But if using lights I would suggest setting them up one to the left and another to the right ..FRONT of the piece and if you have a third ,place it above ,but not too close . The problem with back lighting is it creates a dark area on the front of the figure ,and in your first pic the light seems to be too close or to strong and is creating a glare from the top .
There is daylight bulbs available too ,which are quite good ,but I would try to use natural light as much as possible .

Now your figures :) I think the figures look great buddy ,you certainly got the uniforms and equipment nailed . The only thing I would say is you need to 'push' the shadows and highlights a bit more on the faces ,in other words creating a bigger contrast so the skin doesnt look so monotone .Dont be scared to experiment a little ,a mistake can easily be removed with a damp brush .Try using the pallette I layed out ,I use the same pallette every time and just darken or lighten a bit if needed ,or in the case of the Indian a little more reddish . But its the shadows and highlights that bring a face to life and will make a big difference to your figures .
If you want to practice on a spare head or figure I'd be happy to talk you though it ,once you get the first one right ,it becomes very easy ,its just knowing where to place the shadows and where the light hits on the high spots .

Thanks for the questions Erik,any time fella ;)

Chris.
 
CHRIS,

Take your time brother ! Add stuff when you get th chance , We'll be here !

Thanx for th advice on the lighting. I'm using a day light build. albeit it's a 100w ! Yeah ... for figures, I think it's too much. I've got a couple of light cannons that take 15w daylight bulbs. I can place one on each side and maybe drop a 60w into th overhead & extend it up higher.

With th Flesh - I looked at your pallete & We pretty much use th same colors. I picked up this mix from a Military Modeling mag .... Way back, the article was written by Mark Bannerman - Vol.32 #9 August 2002. It's a 100 pg. All Figure Extravaganza !! I've used it so much now that when I open th mag, it automatically goes to th Bannerman article !! * Bannerman does not note to add a dab of Sap Green *

Th Colors I use -
Burnt Sienna , Raw Umber , Flake White , Yellow Ochre , & a small dab of Sap Green . I mix it to a well sun tanned flesh color. I'll add the Green after I've mixed the other colors in, still having a Well tanned skin tone, later for High Lights I'll add some more white to a small mix that I borrow from th original batch, and even then I'll add dots of Flake White to the highlight areas - Cheeks, chin, bridge of nose.

I was in My LHS around th same time I bought th magazine. A gentleman was standing at th case looking at th painted figures. I was talking with one of th owners when this gentleman walked up. He looked th figures over ( different scales - 54mm - 120mm ) and asked who painted them. One of the Owner's that I was talking to spoke up & said that He had painted some ... Why ? The Guy said that th figures lacked the "green tone". The Guy inquiring later said He was a Portrait painter & that the Human skin tone naturally has a slight shade of green in it( something he was taught in Art School). He mentioned to try adding a touch of green to your Flesh mix & see how it works.

I was a touch skeptical, I went home that night & mixed up some Flesh & added a touch of Sap Green , that I had picked up from th College Art Store around th corner from Me ( They have Awesome seasonal prices on Paint etc). So I mixed My flesh tone together & lastly added th dab of Green ( a pinky nail size of Sap Green to a 1/2 Dollar(US) size of skin tone.) Damn if He didn't Nail it !! I was surprised at the tone it gave the Flesh. It really does look more realistic (IMHO) - Chris , I think you mentioned adding green to your mix as well , right ?

These particular figures I held back a touch on the highlights , I'll add more next time. I've got a few figures in th Q & will hit you up upon painting.

Thanx again for th Advice & Thanx for doing this Tutorial !!! Great Job !! Now .... On to th leather ?? ;D
 
Hi Erik ,Good to know you're getting something out of it buddy .

Yes ,if you flick back and look at my pallette I always use an aqua or peppermint colour in my skintones ,I was given this tip by a brilliant painter by the name of Malcom Cumming ,you've probably seen his work in Military Modelling lately ,real nice fella too .
The green gets rid of the orange tint that is produced by the Burnt Sienna ,Blue would also do the same job ,but it depends on the tone of skin you want .Never be scared to use greens and blues in skin colour ,even my Indian bust has green in the skin mix .

Back to your lights ,make sure when you put them to the sides that they are also to the front a bit, kind of at a 45 degree angle to the figure if you know what I mean ! ,It should help get rid of shadows ;)

Chris.
 
CHRIS,

On th Green - Right On ! I guess if you wanted to Portray someone in th Winter time you could use Blue ?

Just a thought . I'll look up Malcolm .

I understand completely what you are saying on th lighting !!

Talk to ya soon,

ERIK
 
Chris any chance of you showing us the rest of your painting process?
Cheers
Lukasz
 
Sure is Biskup ,no problem buddy ,I was going to restart a while back ,but I thought I'd let it sit untill the comp was done and dusted ....Should be starting up again during the coming week ;-)..

Anything in particular you want to know about ?

Chris.
 
Everything :)
If possible :)
Whatever you share will be great as I want to give oils another chance and your sbs will be very helpful with it :)
 
what ild like to know is what oils u use to get the skin tones
 
No problem Biskup ,but just shout if I dont explain things clearly enough ;) or if I dont cover something .

Spud ,if you go back to the start of this thread I show all the colours I use to make skintones ...also how I mix them ;)

Chris.
 
well i shoulda geused that :p thanks chris will have a more detailed look before i paint my figure heads for my dio
 
No worries fella ....Funny I used to get called Spud too ;D

Chris.
 

Latest posts

Back
Top