Face painting with oils 'How to'

Ok ...Moving swiftly on ..............

Best get comfy folks ,this may take a while ::)


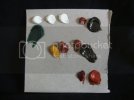
Laying out my palette .....

DSCF3101.jpg

The colours set out here are the basic mix I use for all my faces I just increase and decrease colours as required for different tones . Along the top I lay out a couple of spots of white some Burnt Sienna and finally Vandyke Brown. You will also notice there is some Hookers Green there too (more on that in a minute ) Below that is the colours I mix for the skin colour and shadows which are Yellow or gold ochre ,Burnt Sienna and Vandyke Brown . The two colours at the bottom are Crimson and Venetian Red .

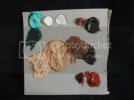
Mixing the palette.....

DSCF3102.jpg

To mix my skin tone I mix up the Yellow ochre with the Burnt Sienna ,then add White until I reach the shade I want ,to the left of it I take some of the mix and add more White to get the first Highlight .
You can see I also mixed some of the green with White to make an Aqua or peppermint colour .This is a tip I learnt from a brilliant painter called Malcom Cumming...or Malc .
Take a tiny amount of Aqua and add it to the skin tone ,This does two things .Firstly it helps blend the colours better and also it gets rid of the Orange colour that the Burnt Sienna creates.
For the shadows ,I mix the Vandyke Brown and some Burnt Sienna to make a dark Reddish Brown . I then mix some of the skin tone with the shadow colour to make a mid tone ,I probably wont use that ,but its there if I need it :)

so with the Palette all sorted we can move on to some painting ;D

Continued.............
 
Right then ...on to the fun bit ....Huurraahh !! I hear you say ;D

Painting the face ....

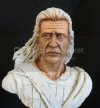
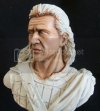
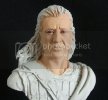
The face is first basecoated with an Acrylic flesh colour . Seeing as this chap hails from the Highlands of Scotland I want to create a pale weather beaten sort of look , a bit pale with maybe a bit of red in the cheeks from the cold ...well thats the plan ::)
So to start with I used Model colour Basic skintone ,but I mixed in a tiny amount of Prussian Blue to kill the pink .
DSCF3100.jpg

After that dried its on to the oils ...........
Now this will look a bit scary to start with ,but it will come good ....I hope !
A couple of things to keep in mind . You dont need to put a lot of paint on ...a little goes a long way ,all you need is a thin film of oil over the basecoat ,and dont be in a hurry as the oils take a long time to dry so you have plenty of time to work ..up to a couple of days in some cases .
Also if you do make a mistake the paint can be cleaned of with some clean thinners and as the basecoat is acrylic it wont harm all the work you done on the eyes earlier or the basecoat .

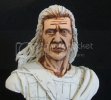
Stage 1..... Shadows.

Using the shadow colour ,paint in all the shadow areas being very careful around the eyes ,you need to get that dark colour up underneath the eyebrow and in the corners where they meet the nose.
DSCF3105.jpg

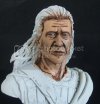
Stage 2.....Skintone.
Once the shadows are on ,paint in the rest of the areas with the skintone colour carefully painting right up to the edges of the shadows.
DSCF3107.jpg


Sage 3....blending the shadows and skintone.
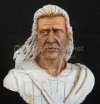
We now have to blend the two colours together to get rid of the harsh look and smooth everything together . This is done by 'stippling' Bsaically all you do is take a clean dry brush and where the dark and light colours touch use the point of the brush and dab at the paint 'stippling' this will result in the two colours merging together .You can carry some of the skintone onto the shadow if it looks too dark by using the same method just stipple into the shadow ,or vise versa if you want to pull the shadow out a bit more ,If you make a mistake you can always correct by adding more skin colour or shadow ,whichever is needed.
Once blened it should result in something like this........
DSCF3111.jpg


Stage 4....First highlight.
The first highlight is bascally adding the lighter skintone (more white in the skin colour) This is added the same as the skin colour BUT in smaller areas .Apply this mostly to areas like the forehead ,nose ,tope of the eyebrows,top lip,tops of the cheeks and the chin ,not forgetting any areas on the neck and ears that need highlighting.
It doesnt show well in the pic because the colour is only slightly lighter than the skintone.
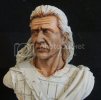
DSCF3112.jpg

And again ....after blending...
DSCF3113.jpg


Stage 5....Highlights
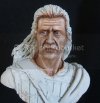
This is the final 'wet' highlights I shall be adding .I've chose to go with white on this face because as I said I want a pale finish.
The White is added to all the 'high points ' of the face ,again forehead ,nose,cheeks etc and blened in the same way .Remember ...always use a clean dry brush for blending !
DSCF3115.jpg


Stage 6....Adding some colour.
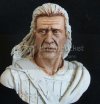
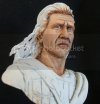
This final stage of wet on wet is adding some colour to the face ,I added a tiny amount of Crimson to the cheeks and around the end of the nose.Be very careful and only put some tiny specks on as the colour is very strong !! Blend this in well to those areas ,you should just be able to see it and no more ,it will become more obvious when dry ,so dont be tempted to add more !

Next is the five oclock shadow or beard area .
Add some Paynes Grey around the top lip ,chin ,and up the sides of the face where a beard would grow.BUT,again only use tiny flecks and dont cover the whole area ,you just want to give a hint of colour !
DSCF3116.jpg
DSCF3117.jpg
DSCF3119.jpg

So ...If all went well You should have a face something akin to this ....
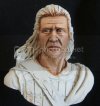
DSCF3120.jpg


I shall have to let this dry for a day or so before going any further ,I shall then add more highlights ,shadows and details . So for now to keep my palette usable ,I will put it in a sealed food container and leave it in the bottom of the fridge,this will keep the paint workable for a few days .

Back soon with more ;D

Thanks for looking ,questions and comments most welcome.

Chris.
 
All that! With Oils? I must have been living under a rock! This is amazing!

Thanks for the Tutorial! Will try it for sure! I got a tall Laura croft waiting for paint! Maybe that's the ticket?


Later !
 
Hi Rob ,Thanks buddy ;D, bear in mind the oils are still wet in those pics as I had to do the pics 'realtime' ,the colours will settle and lighten a bit when dry ,then theres' more to do :D.
Acrylics are a completely different kettle o fish !

Norm ,Thanks fella ,much appreciated ......more to do ::)

Chris.
 
Yeah I found out ((LOL)). I am using very old Vallejo acrylics I bought at a club figure painting workshop our club back in Germany had hosted. Time for new paints I guess.

looking forward to the next part. Awesome work so far bro.

Scratchmod

www.scratchmod.com
 
Are you telling me you've been trying this with acrylics ;D.... yeah they are a completely different technique and you need to use them very thin ,build up the layers ;)

Chris.
 
Yep I was doing it with the acrylics....very thin as I was taught back when. Just following yours to see how it's done with oils. It's the shading and highlights that are the same. And man it's hard to paint eyes in 1/35 ((LOL))

Hey Chris, me and you tonight bro.

scratchmod
 
Yeah ...we'll have a look at 1/35 or 54mm soon ;) I wont be about much longer buddy its 01:15 here !!

Chris.
 
Absolutely a phenomenal job! Thanks for this tutorial! ;D That's it, the figs for the Convoy are comin' out! ;)
 
Yeah I'll have to get a good 54mm or 90mm figure so I can see the damn face ((LOL)) Night dude.

scratchmod
 
panzerace007 said:
CHRIS,

Just wanted to add a note so I don't forget it :
At the End of this Tutorial, can We post Figure pix & you critique them ? A little Q & A session if you will . We'll tell ya what We did & you give some incite ? or something like that ??

I'll be back ... I'll go read this next instalment !!! ;D ;D


Haaaaaaa Smart man !!! that would be cool ? a sort of Distance Learning experiment !!! yeah...
Chris !! Feel like a Tutor yet ???

but it could also get out of control... maybe it could be contained... on its own ??? food for thoughts !
 
Thank you very much fella's ,Im happy if some of you get something out of it ,Im no expert ,but I might be able to pass on a few tips that I've learnt over the years :D

Norm....As I said to Erik ,there's no need to wait until the end ,feel free to jump in any time ,Thats what the thread is here for and Im happy to keep it running as long as needed ,perhaps look into painting clothes ,leather belts etc..

Chris.
 
Thanks Phil ,glad you're enjoy it :D, Should have the next stage up tomorrow .As Im doing this 'real time' I had to leave the oils to dry for a while before I continue . You can force dry oils in an oven at low heat ,but I've found you can sometimes get a bit of discolouration in some colours ...so I let them dry naturally .

More soon...

Chris.
 
Love your work Chris.

I've found that Acrylic base colours are not strong enough to stand up to thinners used for oil paints.
I've had to use a Lacquer clear coat to protect the base colour from being dissolved.

I use to use oil paint straight from the tube and found that the oil in the paint was causing the paint not to apply correctly. When it was worked or blended, the paint would start to be wiped away, leaving a pale ting behind.
So your paper pallet method is a definite requirement for using oil paints.

I would recommend using a fresh set of paint brushes for figures, especially if you model a few kits at once.

Good work Chris, keep 'em coming.
 
Hi Mark,

A couple of good problems you brought up there .
Firstly ,I use odourless thinners for oils when washing paint of and as yet have never had a problem with the acrylic lifting of .However that can happen if the figure is not primed ! as the acrylic does'nt take to well to the resin or metal.

The point you raise about using the oils straight from the tube .Well ,if you put a clearcoat on you need to make sure its a mat finish,oils dont like going over a shiney surface and you will end up just pushing the paint around to the point it just goes into a mucky mess.

So ,Starting with a mat surface and using a palette that will absorb most of the oil will make a big difference to how the paint goes on ;)

And yes a fresh set of brushes is a good idea ,but you dont need to keep buying brushes if they're looked after properly :D, I've been using some of the same brushes for a long time now and they're still in very good condition.

More later....

Chris.
 
Hey bud...............this is great, the transformation on the face is superb!!!, so............new brushes, some greaseproof paper and a selection of fine oils `eh.................and a figure to put it all on!!!!!!.................good job i`m skint..LOL!!!! ;D

`Boots`
 

Latest posts

Back
Top