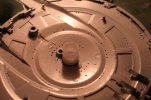
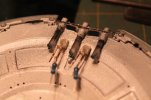
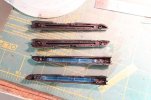
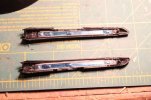
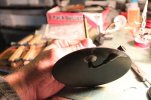
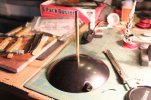
Enterprise NX-01 Refit---NEW VIDEO!

trekriffic

Well-Known Member
Joined
Jan 6, 2012
Messages
953
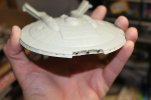
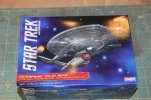
Here's my next project, the NX-01 Refit as designed by Doug Drexler.
11091509813_5f2a94cce0_b.jpg
NX-01 Refit Box by trekriffic, on Flickr

Although never seen on screen during "Enterprise"'s four seasons rumors had it that, had the show been renewed, we might well have seen the refit make it's debut in season five. Regardless of whether or not you like the look of the refit, the redesign does go a long way in bridging the gap between the look of the NX class and the later Constitution class of ships with the additon of a secondary hull, ostensibly added to increase the ship's combat and deflector capabilities.
Per Memory Beta:

Refit to Columbia-class

The SS Enterprise refit to Columbia-class.The Enterprise underwent a 180-day refit in spacedock, during which an outboard module was fitted to the ship. The module, developed from lessons learned during Enterprise's conflict with the Xindi, was constructed to house an improved matter/antimatter reactor core and a larger, more capable deflector dish. These improvements were intended, respectively, to improve the ship's combat power and ability to deflect dense interstellar particles. The ship became one of the first vessels of the new Columbia-class, and her name was changed to SS Enterprise. (ST calendar: Ships of the Line 2011)


I plan to build it mostly OOTB (don't laugh guys) with the exception of adding lights and a few other small things.
 
Re: Enterprise NX-01 Refit

I'll be following this one as well.
Got one of these in the stash myself
 
Re: Enterprise NX-01 Refit

Almost done with mine. If you light it, go small bulbs and magnet wire. Also, careful drilling out the windows on the decks between the saucer halves. Nacelles are also tricky on the refit version.
 
Re: Enterprise NX-01 Refit

biomedchad said:
Almost done with mine. If you light it, go small bulbs and magnet wire. Also, careful drilling out the windows on the decks between the saucer halves. Nacelles are also tricky on the refit version.

Thanks for the advice. I've finished with drilling out the windows and will post some pics shortly. I plan to use some 28 awg wire for the lighting. I think I can get it to fit. I have a few ideas for the nacelle lighting but nothing firm yet.
 
Re: Enterprise NX-01 Refit

And away we go!

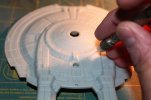
First off I drilled out the round and slotted window ports using a pinvise. The round ports will be filled with fiber-optic strands:
11196191564_0ca47ba69e_b.jpg
IMG_6096 by trekriffic, on Flickr

There were some smaller holes I drilled out for spotlights over hatches, atop the bridge superstructure, on the nacelle pontoon shoulders, and so forth.
I actually bent the drill bit a tad on purpose as I drilled to impart a downward angle to the hole above the hatch doors. I'm hoping this will help the fiber cast a glow down in front of the hatch this way:
11196191514_4defbe3805_b.jpg
IMG_6097 by trekriffic, on Flickr

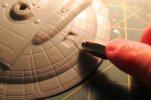
Some of the windows after I drilled, carved, and filed away any scrappy remnants with an exacto knife:
11196165245_2129975c9f_b.jpg
IMG_6098 by trekriffic, on Flickr

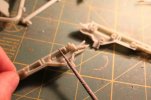
The neck peg that fits into the underside of the primary hull got filed out in the engineering hull upper halves. This is to allow for passage of wires into the saucer from the power jack which I'll locate in the secondary hull:
11196306793_24c249fe70_b.jpg
IMG_6099 by trekriffic, on Flickr

Holes for those little red and blue lights located in the recessed front of the dorsal cowling got drilled out. The outer two will be red on each side while the innermost one will be blue:
11196195756_940c6211b7_b.jpg
IMG_6100 by trekriffic, on Flickr

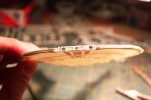
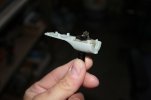
The observation room located at the rear of the primary hull was a bit of work. I cut the peg off the dome that slides into a tunnel in the lower part that has the three window ports and substituted clear round acrylic rod, the better to transmit light. I also carved out a slot about 2/3 of the way aroud the rim of the tiny dome facing the stern. Then I glued the dome to the top of the clear rod and glued in 2 tiny bits of styrene strip into the slot equally spaced to frame the openings and form 3 narrow windows at the base of the dome. You can see the strips sticking out before I trimmed them flush inthe pic. Then I drilled holes thru the lower 3 windows and squared them up as best I could using files and an exacto knife. FO strands were then heated to bloom the ends and fed thru the three lower window ports:
11196306413_c5c193c345_b.jpg
IMG_6101 by trekriffic, on Flickr

Styrene strip was cut to form the lower frames of the 2 outboard windows. A tiny dollop of CA was dropped into the 3 slotted openings in the dome and the lower windows.
Still some work to do but it's coming along:
11196163205_ce8dcb4dbb_b.jpg
IMG_6107 by trekriffic, on Flickr

The fiber stands from the inside:
11196162805_8070d5c958_b.jpg
IMG_6108 by trekriffic, on Flickr

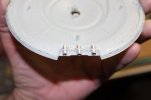
I started gluing the saucer rim segments into the lower hull. I had to remove some plastic in order not to block the light from entering the slotted windows:
11196164235_504832655d_b.jpg
IMG_6102 by trekriffic, on Flickr

Likewise channels were carved out of the individual segments where the slotted windows were located to allow light to reach them:
11196189754_8bd5516f7c_b.jpg
IMG_6103 by trekriffic, on Flickr

After gluing the segments in on the port side you can see how the light shines thru now:
11196163565_cfafe16518_b.jpg
IMG_6104 by trekriffic, on Flickr

Here's how the rim walls look from the inside:
11196189504_01b3d41c8a_b.jpg
IMG_6106 by trekriffic, on Flickr

Once I finish gluing the rest of the rim segments in place and come up with an idea for the three long range sensors that will be replacing the deflector dish in the saucer I'll spray the inside surfaces with Tamiya primer, lightblock with black enamel, then spray on a coat of gloss white.
Then I'll run some electrical wiring and figure out what I'm doing with the LEDs before I run the rest of the fiber.

More to come...
 
Re: Enterprise NX-01 Refit

I didn't care for the look of the dual deflector dishes so I came up with the idea that, after successful field tests with the new secondary hull deflector system, the now redundant deflector in the saucer was replaced with new long range sensors. These represent a leap forward in sensor technology but have the added benefit of being reconfigurable as navigational deflectors in the event of an emergency saucer separation. Since the refit has warp engines in the primary hull, as well as the secondary hull, the saucer needs a deflector for warp flight so the dual functionality of the new sensor array meets that need. They also provide another visual link to the later Constitution class ship with it's three round ports on the bow of the saucer.

Anyway, here's last night's progress...

Drilled out the holes in the clear kit part for the long range sensors:
11226448465_56fde9eca9_b.jpg
IMG_6110 by trekriffic, on Flickr

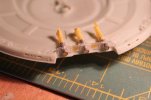
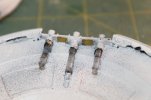
Cut three pieces of aluminum tubing and glued them in with CA:
11226448185_43a6a0df40_b.jpg
IMG_6113 by trekriffic, on Flickr

I think this will work:
11226564113_b2b01a3fd4_b.jpg
IMG_6114 by trekriffic, on Flickr

I made a nice discovery. I could use sections cut from the sprue from the clear parts tree from the 1/350 scale TOS Enterprise kit (the one that had the little round bussard flasher bulbs and some of the other tinier clear bits) to insert into the sensor tubes. It is just the right diameter.
 
Re: Enterprise NX-01 Refit

Figure I should past an update. Nothing too sexy to report.. let's see...

I drilled a hole thru the display rod mounting tube and used AVES to mount a power jack in the secondary hull. I used a size K plug and jack:

11369799455_0911b2df3f_b.jpg
IMG_6115 by trekriffic, on Flickr

11369936783_b1a34c3d24_b.jpg
IMG_6117 by trekriffic, on Flickr

This way the ship will be removeable from the stand.

A channel was carved into the lower half of the pirmary hull wings for wires to passs thru into the nacelles:

11369859314_7f6d555ace_b.jpg
IMG_6120 by trekriffic, on Flickr

I wrapped some masking tape arohnd the 3 clear rods I inserted and glued into the forward sensor tubes before spraying the interior of the primary hull with Testors flat black enamel followed by white Krylon:

11369799035_ac79f97591_b.jpg
IMG_6119 by trekriffic, on Flickr

Masking tape was removed. I also masked a couple of rectangles on either side of the center sensor. After painting the black and white layers on the back of the clear piece I
removed the masks and glued a couple of pieces of photo-etch mesh to the backside:

11369798685_7ca6c6a661_b.jpg
IMG_6123 by trekriffic, on Flickr

These panels will be lit with a blue tint.

I found a vinyl cylnder in my misc parts stash that was the perfect diameter to fit around the lower sensor dome opening. About 100 holes were drilled into the cylinder for lower primary hull fibers to be inserted before I glued it in palce with 5-minute epoxy. A 5MM Superbright (5000mcd) white LED will be mounted facing downward above the fiber ends into the lower saucer dome. Before I glue the LED in place though I'll place a cotton ball inside the sensor dome for light diffusion:

11369826636_fd498d1f32_b.jpg
IMG_6124 by trekriffic, on Flickr

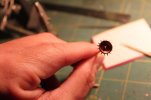
The clear impulse engine parts were glued into the lower primary hull openings. They will be masked, light blocked, and backed with either a cut section of blue plastic (salvaged from a used Glide floss dispenser) or a piece of transparent blue film. I haven' decided which will look best yet. A white LED will provide illumination on each side. I'll do the same thing with the smaller engine vents further forward on the rear perimeter of the saucer itself although those will be lit by ambient light only:
11369858234_18572b482d_b.jpg
IMG_6126 by trekriffic, on Flickr

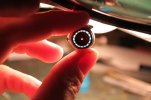
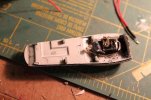
Finally, holes were drilled thru the hull at the base of the pylons in the lower half of the primary hull pontoons. The same was done for the winglets that glue in between the secondary hull and the primary hull pontoons above them. These will get fibers for the upper and lower winglet spotlights that shine upwards along the outboard faces of the pylons:
11369857974_8309415120_b.jpg
IMG_6127 by trekriffic, on Flickr
 
Re: Enterprise NX-01 Refit

A lot of work going into this.

Liking your sensor array idea for the front of the saucer
 
Re: Enterprise NX-01 Refit

well this sure is alot more detailed then mine!! good job man!! i see you have amd skills and patience to put all that work into a 1/1000. my current refit is the first 1/1000 kit ive ever lit so i learned a lot!! keep up the good work!! :)
 
Re: Enterprise NX-01 Refit

Sharp work you're putting into this, I bet it's gonna look awesome all lit up!
 
Re: Enterprise NX-01 Refit

Thanks for the comments guys!

Made some more progress on the LEDs in the lower saucer...

Two white LEDs were mounted with 470 ohm resistors behind the blue panels between the long range sensors. The sensors will glow with a nice bright cool white with blue screened panels in between:

11408877836_a6be024fdb_b.jpg
IMG_6130 by trekriffic, on Flickr

30 AWG solid kynar wires were glued into the trenches for lighting the nacelles. You can also see the fiber installed for the upper pylon spot. Also visible is the black Tulip fabric paint I brushed on to light block and frame the clear impulse engine ports:

11408878625_edc54d71e3_b.jpg
IMG_6132 by trekriffic, on Flickr

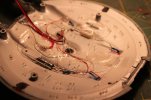
Wiring in progress. The circuits will all run all run off a 12V DC wall adapter.

The red and green running lights are clear flashing 2mm LEDs wired in series to flash in sync with each other using a 330 ohm resistor.
Some plastic had to be removed from both the upper and lower saucer halves where the flashers were mounted so the halves would close.
I painted them with transparent Testors red and green. I also painted the tiny clear plastic kit running light inserts with the same paint on their inside surfaces.
Adhesive foil was wrapped around the barrel of each flasher leaving only the tip exposed.
Black Tulip paint was also brushed where the wire legs extend out the base of each LED for light blocking:

11409013123_0c76dd651c_b.jpg
IMG_6133 by trekriffic, on Flickr

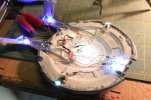
Light test. Everything lights up thankfully:

11408876746_c40f799bc5_b.jpg
IMG_6135 by trekriffic, on Flickr

Close up of the blue 2mm LEDs I am using to light the impulse engines.
I used foil tape for additional light blocking and reflectance. I used leftover soft foam packing sheet material from the 1/350 scale TOS Enterprise kit for light diffusion:

11408877635_578dfeb1b8_b.jpg
IMG_6136 by trekriffic, on Flickr

I need to run fibers from the rim windows and spotlights in the lower saucer to the 5mm ultrabright (7000 mcd not 5000 mcd as I sated earlier) white LED in the center. Then I need to wire a couple of 2mm LEDs to the upper saucer. One will flash for the strobe behind the bridge dome. Then I can glue the saucer halves together and fix any external light leaks of which there are a few.

Thanks for reading!
 
Re: Enterprise NX-01 Refit

Looking forward to your progress. I had no clue 2 versions of the NX01 exist.
 
Re: Enterprise NX-01 Refit

OK. Time for another update I guess... if anyone is still following this thread lol.

Spent a day just working on the fiber runs...remember to get plenty of fiber for modelling regularity...

For the lower saucer only the rim windows and lower spots will have fibers running to the center LED "tower". The rest of the round ports closer in will get short fiber strands that will just pick up ambient light:

11454847294_0cc0431c20_b.jpg
IMG_6140 by trekriffic, on Flickr

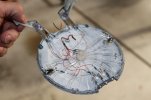
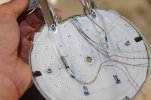
The upper saucer LEDs were wired up. The one on the left is a flasher for the strobe behind the bridge dome and red and green flashers at the top rear of the nacelles; I'll run fibers up both pylons and into the nacelles for those. The LED on the right will light the spots on the upper saucer. The rest of the windows will have fiber strands inserted in them to catch the light from the central LED below in the lower saucer half. Two conductor wire will be soldered to the leads and fed thru the hole in the lower saucer into the secondary hull for power from the jack there:

11454911586_25e806a3e9_b.jpg
IMG_6142 by trekriffic, on Flickr

I used Tamiya Basic putty around the rear saucer observation/control tower. It will look nice once I finish cleaning up with sanding sticks and needle files:

11454847334_665d61f053_b.jpg
IMG_6144 by trekriffic, on Flickr

Once the saucer halves are glued together there will be a LOT of light inside.

I'm making a modification to the secondary hull deflector dish housing.
First I cut loose the central disc where the dish support shaft mounts.
Then I sprayed it, the dish, and the rear portion of the dish spike with Alclad copper:

11454911536_3a9ed70bba_b.jpg
IMG_6138 by trekriffic, on Flickr

I cut a round piece of clear styrene to fit inside the deflector cowling and sprayed it with Testors transparent blue on the backside:

11454847904_7bd5e67f76_b.jpg
IMG_6139 by trekriffic, on Flickr

I trimmed some tiny squares from the fret of some leftover photo-etch brass and glued them around the edge of the center disc. This took over an hour using tweezers and CA glue:

11454971503_94a961719d_b.jpg
IMG_6145 by trekriffic, on Flickr

The center disc with it's brass ribs was dropped into the back of the cowling and glued with water-based super glue (it says it's super glue but it's really thick white glue). It will dry clear:

11454846674_4e7d5bcc43_b.jpg
IMG_6148 by trekriffic, on Flickr

11454909996_ed7f255f1d_b.jpg
IMG_6151 by trekriffic, on Flickr

Backlighting test of the modified deflector housing. It was a bit of a chore to get the blue disc to the right shape as the housing is not exactly round as you can see here:

11454910166_34e39a66d7_b.jpg
IMG_6150 by trekriffic, on Flickr

So I need to finish inserting the rest of the fiber strands and glue the saucer halves together. Then more seam filling and sanding. iot some ideas for nacelle lighting to work on too.

See ya later!
 
Re: Enterprise NX-01 Refit

WOW dude. Amazing work thus far with all this. I tried lighting the first issue kit with fiber optics and it's tough to pack them all in there. Getting the right gauge wire for the pylons is key, too! Looking forward to this...
 
Re: Enterprise NX-01 Refit

Thanks my fellow addicts!

OK...More photos to share...

Lower secondary hull LEDs:

11522294293_80c0261fed_b.jpg
IMG_6159 by trekriffic, on Flickr

Light test:

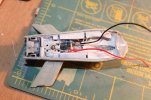
The LED in the very front is a 2mm blue LED to illuminate the back of the deflector housing. I cut a round piece of thin styrene sheet and covered it in Duck brand white reflective tape before gluing the LED in with CA. Getting the disc to fit required removal of a locator tab at the front of the hull which was easy with my dremel grinder bit. The LED shines forward thru a round disc of translucent foam padding glued to the back inside of the deflector housing with white (super) glue. This material came from the box my mother-in-law's new Panasonic phone came wrapped in. When I unpacked the phone and saw the bag the base unit came wrapped in I thought it would make for great diffusion material and it sure did.
The LED in back of it on the other side of the power jack is a 2mm white LED cut and desoldered from a Christmas tree light string I bought some years ago at Target. The two LEDs are connected in series thru a 330 ohm resistor and soldered directly to the coaxial power jack contacts:

11522263286_96016f40e5_b.jpg
IMG_6155 by trekriffic, on Flickr

The upper saucer with wiring all soldered in and fiber optics in place and glued in with "super" glue (white glue as previously mentioned). The wire leads have all been dobbed with globs of 5-minute epoxy for strain relief. Some of the fiber strands were taped down with Scotch transparent tape after insertion:

11522263466_3bb8060338_b.jpg
IMG_6156 by trekriffic, on Flickr

Upper secondary hull LED ready for soldering to the lower secondary hull power jack. This is a white LED that will shine upwards underneath the main warp core module to light the blue deflection crystal in the center of it. I'm using one of the small round transparent blue bussard dome lighting inserts from the 1/350 TOS Enterprise kit for this rather than the clear kit part. This LED also lights the fibers running to the lower pylon spotlights and a porthole in the side of the hull at the aft edge of the pylons. I also ran some fibers up into the neck to better illuminate the round ports and the oblong windows located at the front of the neck up close to the bottom of the saucer:

11522294843_6a41944c83_b.jpg
IMG_6158 by trekriffic, on Flickr


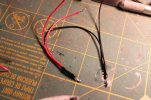
Wiring harnesses for upper and lower saucer lights. These will be soldered to the coaxial power jack (positive red wires to the center of the jack and negative black wires to the outermost jack contact to match the polarity of the 12V DC wall adapter power coupling) and fed up thru the hole I made in the dorsal connecting tab before being soldered to the wire leads in the saucer halves. This was a change from my original plan of feeding the wires down from the saucer halves into the secondary hull, soldering the leads to the power jack, then gluing the secondary hull halves together. So what I'm doing now is the reverse of that:

11522262676_cbda8ab85e_b.jpg
IMG_6160 by trekriffic, on Flickr

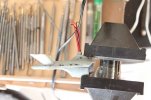
After a minor feat of modeling intrepidity and legerdemain (all the wires and fibers made for a tight fit) I managed to sodler all the leads and feed the saucer/nacelle lighting harnesses up and thru the connecting dorsal. I then applied Testors styrene cement to the rim of the lower secondary hull and the back of the deflector housing which fits into slots at the front of the hull. I then gave it a manly squeeze with my manhands but eventually got tired and clamped the sucker into my hobby vice to dry:

11522191765_4d9234a399_b.jpg
IMG_6161 by trekriffic, on Flickr

I did a light test with the power plugged in and all went well. I can see some minor light leaks around the base of the deflector housing which I'll need to fill with putty before applying more paint. The plan is to shoot the hull exterior with black lacquer followed by silver. Then I'll mask off some panels all over the ship before shooting with a medium gray color. That's all I'm going to say about the exterior painting plans for now. The rest I'll leave for you all to ponder as you sip eggnog next to a warm fire this Chistmas Eve...because I know how you model addicts are and you love to ponder things like that...

Oh... oh... almost forgot to mention... the wife and I were doing some shopping at the mall today and she got me the 2014 Ships of the Line calendar.
I was so excited to see the NX-01 Refit (artwork by Doug Drexler) featured for one of the months. How cool is that?!!!
 
Re: Enterprise NX-01 Refit

Thanks Q! Yes. It is a LOT of work!

Hope everyone had a nice Christmas holiday! Here's the latest...

I installed the clear inserts (previously tinted blue) into the inboard halves of the warp nacelles with CA.
I also removed the locator pin and socket from the front of each nacelle half to allow for mounting a bussard LED.
The outer halves were light blocked after filling in the sizeable gaps on the top and bottom of the inserts with putty:

11586396105_ea7640af08_b.jpg
IMG_6162 by trekriffic, on Flickr

AVES was packed in around the clear blue grills:

11587187036_2264f0ec4d_b.jpg
IMG_6167 by trekriffic, on Flickr

The stand was constructed...

I used hollow brass tubing in place of the solid metal rod from the kit.
This required a slight enlargement of the mounting tube in the base which I did using a drill press.
Wires from a vinyl rubber jacketed female power jack (provided with the power supply I got from Modeler's Brand Hobby Supplies:http://modelersbrand.com/) were fed up into the tube from below then the jack was mounted in a hole drilled and filed out in the base using AVES:

11586596063_925d93cdd9_b.jpg
IMG_6163 by trekriffic, on Flickr

The base with a size K power plug atop the tube. I'll need to sand around the power coupling (may need some more puttying first) then paint it black.
I may try the splatter technique too with some white paint I saw another modeller use with his domed base.
His was done by accident but it turned out looking like the base had stars on it which was a pretty neat effect:

11587187616_70ceb28d8f_b.jpg
IMG_6164 by trekriffic, on Flickr

11586720924_db3fc0f918_b.jpg
IMG_6166 by trekriffic, on Flickr

The brass tube had to be filed out a bit to accomodate the plug but that was no big deal.
Care had to be taken with the plug to make sure the center contact didn't touch the outer brass tube and create a short circuit.
Once I was sure I had a good circuit after soldering the wires I glued it in with 5-minute epoxy.

The secondary hull shown masked off and plugged onto the stand after puttying with AVES, sanding, then priming and light blocking with Testors flat black.
You can't see the blue deflector dish ring glowing with the mask on but, trust me, the effect is really cool:

11586721274_b21a2e54f3_b.jpg
IMG_6165 by trekriffic, on Flickr

I fashioned a translucent bridge dome by slicing off the top of one of the unused kit bussard domes.
I'm using the domes with the holes in the center for the bussard spikes so had 2 domes without holes (for the original NX-01 version) I could put to other uses.
I must have dropped this sucker on the floor about a half dozen times while sanding it.
The dome was sprayed with white Tamiya Fine Surface Primer to give it a nice even glow when lit:

11586594403_a68591ae6c_b.jpg
IMG_6168 by trekriffic, on Flickr

The top of the solid kit dome was glued on after I sanded the top of it flat to make it the base of the new bridge dome and drilled a hole thru the center to allow light to shine thru from below.
I masked over the hole with Tamiya tape prior to priming and light blocking the saucer exterior:

11586393575_ef31f85e90_b.jpg
IMG_6170 by trekriffic, on Flickr

Take care everyone!
 

Latest posts

Back
Top