Enterprise NX-01 Refit---NEW VIDEO!
- Thread starter trekriffic
- Start date
trekriffic
Well-Known Member
- Joined
- Jan 6, 2012
- Messages
- 1,023
Re: Enterprise NX-01 Refit
Spent about 5 hours on her today...
Finished the sanding with 600 grit and any touchups with the hull color.
Unmasked the forward sensors and blue navigational deflectors and touched up.
Unmasked the bussard domes.
Unmasked the impulse engines and nacelle trenches.
Unmasked the secondary hull deflector shroud.
Brushed on the accent colors-Testors aluminum, neutral grey, and medium grey.
Installed the blue matter/antimatter pod crystal on the back of the secondary hull and the two little blue crystals on the upper saucer pontoons.
Still need to install the bussard spikes and main deflector dish.
I'll probably wait until I'm done decaling before installing those though.
I'm thinking about remaking the spikes uing tiny metal pins for the shafts so they would never break.
Here you can see me poking the fibers into the 3 holes I drilled last time in the stern. I tinted them with Testors transparent blue last night:
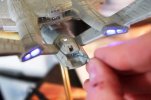
IMG_6384 by trekriffic, on Flickr
And I took some pics with the lights on for you guys:
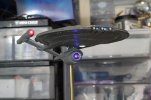
IMG_6386 by trekriffic, on Flickr
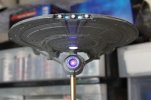
IMG_6388 by trekriffic, on Flickr
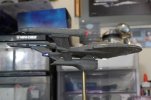
IMG_6394 by trekriffic, on Flickr
Here you can see the upper saucer dome glued on over the bridge:
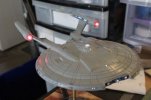
IMG_6391 by trekriffic, on Flickr
Love those three little blue lights:
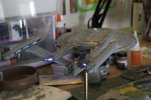
IMG_6393 by trekriffic, on Flickr
The nacelles light up really nice:
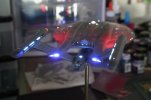
IMG_6397 by trekriffic, on Flickr
Obligatory blurry picture:
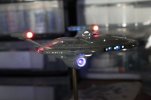
IMG_6400 by trekriffic, on Flickr
So she needs to dry overnight while I mull over modifying the spikes...
Spent about 5 hours on her today...
Finished the sanding with 600 grit and any touchups with the hull color.
Unmasked the forward sensors and blue navigational deflectors and touched up.
Unmasked the bussard domes.
Unmasked the impulse engines and nacelle trenches.
Unmasked the secondary hull deflector shroud.
Brushed on the accent colors-Testors aluminum, neutral grey, and medium grey.
Installed the blue matter/antimatter pod crystal on the back of the secondary hull and the two little blue crystals on the upper saucer pontoons.
Still need to install the bussard spikes and main deflector dish.
I'll probably wait until I'm done decaling before installing those though.
I'm thinking about remaking the spikes uing tiny metal pins for the shafts so they would never break.
Here you can see me poking the fibers into the 3 holes I drilled last time in the stern. I tinted them with Testors transparent blue last night:

IMG_6384 by trekriffic, on Flickr
And I took some pics with the lights on for you guys:

IMG_6386 by trekriffic, on Flickr

IMG_6388 by trekriffic, on Flickr

IMG_6394 by trekriffic, on Flickr
Here you can see the upper saucer dome glued on over the bridge:

IMG_6391 by trekriffic, on Flickr
Love those three little blue lights:

IMG_6393 by trekriffic, on Flickr
The nacelles light up really nice:

IMG_6397 by trekriffic, on Flickr
Obligatory blurry picture:

IMG_6400 by trekriffic, on Flickr
So she needs to dry overnight while I mull over modifying the spikes...
nicholassagan
sippin on gin + juice
- Joined
- Dec 28, 2011
- Messages
- 2,013
Re: Enterprise NX-01 Refit
Wow. Looking mighty fine so far!!
Wow. Looking mighty fine so far!!
trekriffic
Well-Known Member
- Joined
- Jan 6, 2012
- Messages
- 1,023
Re: Enterprise NX-01 Refit
Thanks! The camera overexposes the brightness on those last two low light pics. The lighting is very much to scale in person.
Grendels said:Looks good!
Thanks! The camera overexposes the brightness on those last two low light pics. The lighting is very much to scale in person.
trekriffic
Well-Known Member
- Joined
- Jan 6, 2012
- Messages
- 1,023
Re: Enterprise NX-01 Refit
Today I finsihed modifying the bussard spikes using .060 dia styrene rod and some piano wire I found in the back of my LHS next to the model railroading section...
First I drilled a hole in the end of the plastic rod, sanded an angle to form a cone on the end of the rod, sliced it off with my xacto knife (it was a teensy weensy cone with an even tinier hole in the center), slid it onto the piano wire and glued it in position with CA leaving a little wire sticking out the end. This is the tip of the new spike:
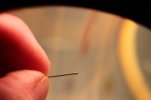
IMG_6404 by trekriffic, on Flickr
I sliced the old plastic spike shaft off the collar of the kit part and using the same bit in my pinvise I drilled a hole dead center and straight thru the part:
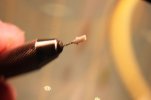
IMG_6402 by trekriffic, on Flickr
Then I had a spacy sandwhich for lunch:
Cheese sandwhich by trekriffic, on Flickr
After lunch I slid the piano wire with it's conical tip thru the collar and glued it with CA:
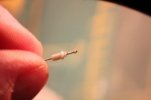
IMG_6406 by trekriffic, on Flickr
Here's the new steel shaft spike next to the old plastic spike:
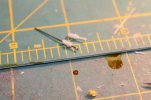
IMG_6405 by trekriffic, on Flickr
And the two new spikes:
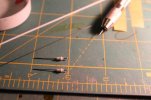
IMG_6412 by trekriffic, on Flickr
The piano wire is high tensile strength carbon steel and should never bend or break which was my concern with the flimsy plastic spikes.
Next I'll do the same thing with the deflector dish spike.
Today I finsihed modifying the bussard spikes using .060 dia styrene rod and some piano wire I found in the back of my LHS next to the model railroading section...
First I drilled a hole in the end of the plastic rod, sanded an angle to form a cone on the end of the rod, sliced it off with my xacto knife (it was a teensy weensy cone with an even tinier hole in the center), slid it onto the piano wire and glued it in position with CA leaving a little wire sticking out the end. This is the tip of the new spike:

IMG_6404 by trekriffic, on Flickr
I sliced the old plastic spike shaft off the collar of the kit part and using the same bit in my pinvise I drilled a hole dead center and straight thru the part:

IMG_6402 by trekriffic, on Flickr
Then I had a spacy sandwhich for lunch:

Cheese sandwhich by trekriffic, on Flickr
After lunch I slid the piano wire with it's conical tip thru the collar and glued it with CA:

IMG_6406 by trekriffic, on Flickr
Here's the new steel shaft spike next to the old plastic spike:

IMG_6405 by trekriffic, on Flickr
And the two new spikes:

IMG_6412 by trekriffic, on Flickr
The piano wire is high tensile strength carbon steel and should never bend or break which was my concern with the flimsy plastic spikes.
Next I'll do the same thing with the deflector dish spike.
trekriffic
Well-Known Member
- Joined
- Jan 6, 2012
- Messages
- 1,023
Re: Enterprise NX-01 Refit
Today I decided I wanted to add some detail to those little secondary impulse engines on the back of the saucer, the ones that flank the pontoons. The kit detail was pretty poor, just a flat face with a rectangular opening with no fibers running to it that didn't light up very well, if at all:
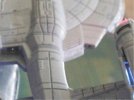
IMG_6440Detail by trekriffic, on Flickr
First, I wanted more light to shine out the ports. So I drilled two holes next to each other in each opening. Then I worked the drill bit back and forth until the holes joined and became a slot. Cutting two fibers about 2 inches for each opening I tinted them blue and fed them into the openings until they were flush. I used canopy cement to glue them in. I have a big roll of transparent blue film that I cut two little rectangular pieces from and glued over the openings with Elmer's clear "super" glue. Then I cut a couple of pieces of paper thin sheet styrene to the shape of the face around each port and cut out a tiny rectangular opening. I glued these to the hull on each side. Then I added some greeblies to add more interest before painting everything with ModelMaster steel:
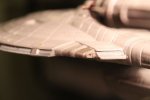
IMG_6465 by trekriffic, on Flickr
You can see the blue glow from the fiber strands in this pic:
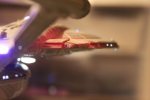
IMG_6466 by trekriffic, on Flickr
You can see both of them glowing to the far left and right in this pic:

IMG_6470 by trekriffic, on Flickr
I can see they need a little more cleanup after viewing these pics in high resolution so I'll do a little more work on them before touching up with more steel.
Tomorrow evening I should be able to shoot her with Dullcote prior to adding some pastel chalk effects. She's not going to look pristine as I have decided this ship is a year 7 refit. She's gonna show a little wear accordingly.
Am I nuts for putting this much effort into such a small model? Perhaps, but, that's just the way I am.
Today I decided I wanted to add some detail to those little secondary impulse engines on the back of the saucer, the ones that flank the pontoons. The kit detail was pretty poor, just a flat face with a rectangular opening with no fibers running to it that didn't light up very well, if at all:

IMG_6440Detail by trekriffic, on Flickr
First, I wanted more light to shine out the ports. So I drilled two holes next to each other in each opening. Then I worked the drill bit back and forth until the holes joined and became a slot. Cutting two fibers about 2 inches for each opening I tinted them blue and fed them into the openings until they were flush. I used canopy cement to glue them in. I have a big roll of transparent blue film that I cut two little rectangular pieces from and glued over the openings with Elmer's clear "super" glue. Then I cut a couple of pieces of paper thin sheet styrene to the shape of the face around each port and cut out a tiny rectangular opening. I glued these to the hull on each side. Then I added some greeblies to add more interest before painting everything with ModelMaster steel:

IMG_6465 by trekriffic, on Flickr
You can see the blue glow from the fiber strands in this pic:

IMG_6466 by trekriffic, on Flickr
You can see both of them glowing to the far left and right in this pic:

IMG_6470 by trekriffic, on Flickr
I can see they need a little more cleanup after viewing these pics in high resolution so I'll do a little more work on them before touching up with more steel.
Tomorrow evening I should be able to shoot her with Dullcote prior to adding some pastel chalk effects. She's not going to look pristine as I have decided this ship is a year 7 refit. She's gonna show a little wear accordingly.
Am I nuts for putting this much effort into such a small model? Perhaps, but, that's just the way I am.
trekriffic
Well-Known Member
- Joined
- Jan 6, 2012
- Messages
- 1,023
Re: Enterprise NX-01 Refit
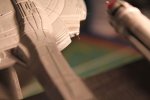
Getting back to the impulse engines on the saucer I drilled a few holes in the round bit at the edge and inserted a 3 inch length of fiber. More detail on top of detail ya know. On the starboard round bit, I was off center with the drill so cut it off and replaced it before drilling again. That's why it is unpainted in this pic:
IMG_6474 by trekriffic, on Flickr
After retouching the paint I now have a tiny white light on the outboard of each exhaust vent. Kinda cool.
Started in and finished the weathering yesterday. Took about an hour and a half. First I gave her two shots of Dullcote. Then I used sponge tipped makeup applicators to apply the pastels starting with silver. For smaller hard to reach areas I used a microbrush:
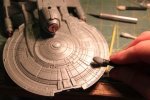
IMG_6477 by trekriffic, on Flickr
Then I rubbed the chalk into the finish using a cotton cloth. If I went a little overboard I removed the chalk by wetting the cloth or using a moist cotton swab to wipe it off:
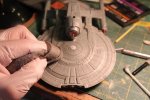
IMG_6479 by trekriffic, on Flickr
After sealing the silver with more Dullcote I went at it with Gunmetal powder. Here's a shot of the upper saucer after a rub using the makeup applicator and before her rub down with the cloth:
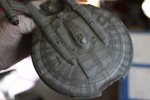
IMG_6480 by trekriffic, on Flickr
After weathering and sealing with Dullcote:
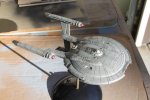
IMG_6484 by trekriffic, on Flickr
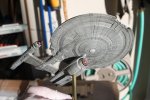
IMG_6485 by trekriffic, on Flickr
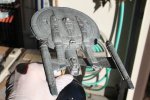
IMG_6486 by trekriffic, on Flickr
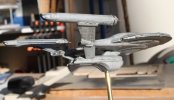
IMG_6492 by trekriffic, on Flickr
Pastels are like fairy dust I think. Really quite miraculous the level of realism they impart.
It's pretty neat to see something go from a toylike finish to something that looks like it's been in space for 7 years with a wave of the pastel magic wand.
Next step is Glosscoting before I apply decals!
Getting back to the impulse engines on the saucer I drilled a few holes in the round bit at the edge and inserted a 3 inch length of fiber. More detail on top of detail ya know. On the starboard round bit, I was off center with the drill so cut it off and replaced it before drilling again. That's why it is unpainted in this pic:

IMG_6474 by trekriffic, on Flickr
After retouching the paint I now have a tiny white light on the outboard of each exhaust vent. Kinda cool.
Started in and finished the weathering yesterday. Took about an hour and a half. First I gave her two shots of Dullcote. Then I used sponge tipped makeup applicators to apply the pastels starting with silver. For smaller hard to reach areas I used a microbrush:

IMG_6477 by trekriffic, on Flickr
Then I rubbed the chalk into the finish using a cotton cloth. If I went a little overboard I removed the chalk by wetting the cloth or using a moist cotton swab to wipe it off:

IMG_6479 by trekriffic, on Flickr
After sealing the silver with more Dullcote I went at it with Gunmetal powder. Here's a shot of the upper saucer after a rub using the makeup applicator and before her rub down with the cloth:

IMG_6480 by trekriffic, on Flickr
After weathering and sealing with Dullcote:

IMG_6484 by trekriffic, on Flickr

IMG_6485 by trekriffic, on Flickr

IMG_6486 by trekriffic, on Flickr

IMG_6492 by trekriffic, on Flickr
Pastels are like fairy dust I think. Really quite miraculous the level of realism they impart.
It's pretty neat to see something go from a toylike finish to something that looks like it's been in space for 7 years with a wave of the pastel magic wand.
Next step is Glosscoting before I apply decals!
trekriffic
Well-Known Member
- Joined
- Jan 6, 2012
- Messages
- 1,023
Re: Enterprise NX-01 Refit
Finished Glosscoting her today in preparation for decaling. Gave her 2 coats:
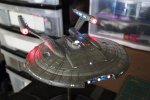
Glossy001 by trekriffic, on Flickr
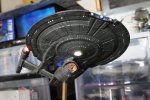
Glossy002 by trekriffic, on Flickr
Finished Glosscoting her today in preparation for decaling. Gave her 2 coats:

Glossy001 by trekriffic, on Flickr

Glossy002 by trekriffic, on Flickr
trekriffic
Well-Known Member
- Joined
- Jan 6, 2012
- Messages
- 1,023
Re: Enterprise NX-01 Refit
Thank you fellow addicts!
Finally! We have reached the decal stage!
Here's my decaling station. I got this square votive candle holder at Michaels to hold my bottles of Micro SOl and SET. They wedge in nice and tight. Yaaaay! No more tipped over bottles spilling the precious fluid all over my workbench!
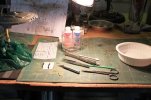
IMG_6502 by trekriffic, on Flickr
I use these special flat-tipped tweezers to dip the declas:
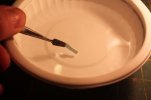
IMG_6503 by trekriffic, on Flickr
I poked holes in the largest decals using my exacto knife to let any trapped air escape so as to avoid the dreaded silvering:
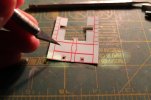
IMG_6504 by trekriffic, on Flickr
Upper saucer just about done. I added a few extra decals left over from the PL 1/1000 TOS Enterprise kit around the flashing formation lights:
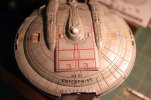
IMG_6505 by trekriffic, on Flickr
The toughest spot to decal was under the back of the saucer where there are two shuttle bay doors-only the aftmost doors because the other two are covered by the back of the connecting dorsal. I decided it would be easiest to cut the decals that frame the doors into sections:
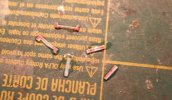
IMG_6506 by trekriffic, on Flickr
I placed the decals using fine tipped tweezers then used my dental tool to fine tune their positions. Once in place I gave them a gentle splash of MicroSOL using a microbrush:
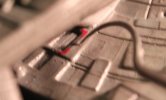
IMG_6510 by trekriffic, on Flickr
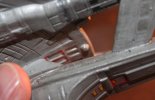
IMG_6513 by trekriffic, on Flickr
I added numbers to the cargo bay doors at the aft end of the saucer using some leftover decals from another model kit:
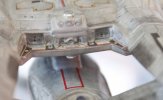
IMG_6518 by trekriffic, on Flickr
For the observation dome windows top and bottom I cut tiny rectangles of white decal film so they look illuminated. And when I say tiny I mean tiny!
Here are some pics I took just after finishing up the decals. I'll let her dry overnight before sealing everything with another shot of Glosscote. Then she'll get a few coats of Dullcote. After that I'll go back with a fine tipped brush and hit all the windows, engines, domes and such with Future to differentiate them from the matte finish of the hull:
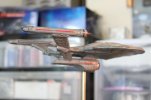
IMG_6519 by trekriffic, on Flickr
I added a tiny "Ion Pod" to the lower sensor dome. Yet anotherm upgrade linking this Year 7 Refit to the NCC-1701 Grey Lady some 90 years later:
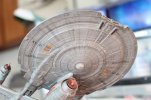
IMG_6521 by trekriffic, on Flickr
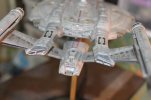
IMG_6522 by trekriffic, on Flickr
It's interesting how she takes on a steel gunmetal look with the lights down:
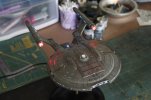
IMG_6525 by trekriffic, on Flickr
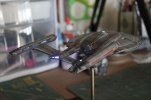
IMG_6527 by trekriffic, on Flickr
Next weekend I'll set the camerra and lights up for some final pics!
Thank you fellow addicts!
Finally! We have reached the decal stage!
Here's my decaling station. I got this square votive candle holder at Michaels to hold my bottles of Micro SOl and SET. They wedge in nice and tight. Yaaaay! No more tipped over bottles spilling the precious fluid all over my workbench!

IMG_6502 by trekriffic, on Flickr
I use these special flat-tipped tweezers to dip the declas:

IMG_6503 by trekriffic, on Flickr
I poked holes in the largest decals using my exacto knife to let any trapped air escape so as to avoid the dreaded silvering:

IMG_6504 by trekriffic, on Flickr
Upper saucer just about done. I added a few extra decals left over from the PL 1/1000 TOS Enterprise kit around the flashing formation lights:

IMG_6505 by trekriffic, on Flickr
The toughest spot to decal was under the back of the saucer where there are two shuttle bay doors-only the aftmost doors because the other two are covered by the back of the connecting dorsal. I decided it would be easiest to cut the decals that frame the doors into sections:

IMG_6506 by trekriffic, on Flickr
I placed the decals using fine tipped tweezers then used my dental tool to fine tune their positions. Once in place I gave them a gentle splash of MicroSOL using a microbrush:

IMG_6510 by trekriffic, on Flickr

IMG_6513 by trekriffic, on Flickr
I added numbers to the cargo bay doors at the aft end of the saucer using some leftover decals from another model kit:

IMG_6518 by trekriffic, on Flickr
For the observation dome windows top and bottom I cut tiny rectangles of white decal film so they look illuminated. And when I say tiny I mean tiny!
Here are some pics I took just after finishing up the decals. I'll let her dry overnight before sealing everything with another shot of Glosscote. Then she'll get a few coats of Dullcote. After that I'll go back with a fine tipped brush and hit all the windows, engines, domes and such with Future to differentiate them from the matte finish of the hull:

IMG_6519 by trekriffic, on Flickr
I added a tiny "Ion Pod" to the lower sensor dome. Yet anotherm upgrade linking this Year 7 Refit to the NCC-1701 Grey Lady some 90 years later:

IMG_6521 by trekriffic, on Flickr

IMG_6522 by trekriffic, on Flickr
It's interesting how she takes on a steel gunmetal look with the lights down:

IMG_6525 by trekriffic, on Flickr

IMG_6527 by trekriffic, on Flickr
Next weekend I'll set the camerra and lights up for some final pics!
Similar threads
- Replies
- 4
- Views
- 1K
