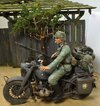
"Easy Pickins"

Steve Ski

Well-Known Member
Joined
Oct 9, 2012
Messages
433
Restart "Easy Pickins" 200mm Dio

Resurrecting this older 200mm dio has been a long time in coming. I literally had to stop the build, because there was nowhere to put this huge base once it was finished, and that's not cool. It only took a few years, 10 plus to be honest, to get another cabinet built so I could reacquire my original cabinet. Common, yall know how much a happy wife is worth right, everything!

This may sound crazy, but my oil painting style has changed somewhat and I can see some of the figures will need some minor attention to get them up to speed. The bikes are looking ok, but the R75 will need to be properly weathered since I did not do that before I stopped this build.

A lot has changed in those few years, yes few, cause time does fly. Even my SBS build log organization has changed; the way I personally file my write-ups on my PC, etc. No worries, we got this. And lastly, after the PBucket sham I had to find a reliable photo storage site for all my builds. Fotki has filled the bill perfectly. They aren't like some of the others, as in, "If it ain't broke, bloody well don't fix it!" Yall know what I mean.

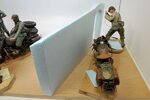
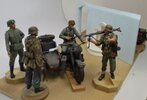
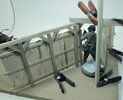
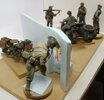
Ok, so once the figures had been finished, minus dirt and grime, I built the Harley Hog followed by the R75 with sidecar. I then began working the basic layout to fit the story line. This scenario is of a Ranger relaxing and taking a break behind a cemetery wall when all the sudden Jerry and his cohorts show up out front without a clue as to his presence, hence, "Easy Pickins."
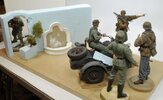
_DSC2128c-vi.jpg _DSC2130c-vi.jpg _DSC2127c-vi.jpg _DSC2126c-vi.jpg _DSC2158c-vi.jpg

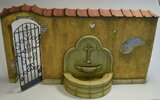
Looking over this layout 10 plus years later it's obvious the Ranger is not the same scale as the German figures. I have always known this from the beginning, so having him placed at a distance away from the others, as far as possible, should mitigate this issue. At least that was my intention. However, that gate is just a little too short for our Ranger, so I am rethinking this structure.

My initial intent was to build a corner section of an old barn, shed, or whatever, with plenty of foliage and overgrowth to make the Ranger's hidey hole much more realistic. I am still mulling this over as I prep the R75 for completion. I can always use this wall section for my 1/16th Airborne figures too, so not all is lost on that cemetery wall. I will certainly redo the wall tiles, they are way, way, too big, especially looking at them right now, woof!

So, more updates to follow soon. It sure feels good to get these massive figures back on the bench and finish this beast of a dio.

Thanks for watchin. Cheers, Ski.
 
Last edited:
MG34 and Mount


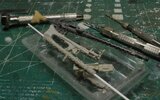
The MG34 that comes with this kit is rather crude compared to the MG34 that is produced by Reedees Miniatures. There really is no comparison. Before I had received Steve's kit, I had already drilled out the barrel and was having no fun with the kit gun mount, it was very weak.

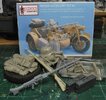
As you can see from the box photo there's quite a bit of gear that Steve has included in this accessory kit and I will be using much of it. Since this R75 crew is very close to home I won't be using the gas can or chow jugs, but I will use the rest of it. Steve also provided the ammo cans and potato mashers. Inside that plastic box are several belts of MG ammo. They are very well molded, but even so, it's a very delicate operation to clean up. Resin is not as tough as styrene, so I'm really taking my time with these belts.

_DSC0603b-vi.jpg

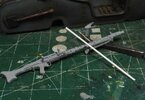
Below you can see how I drilled out the barrel of the MG and inserted plastic rod. The details on this MG34 are very accurate as is all of Steve's gun parts and kits. I don't know how he does it, but I'm likin it.

_DSC0599b-vi.jpg

_DSC0601b-vi.jpg

I had to refabricate another gun mount using brass which was cut, bent, and attached to the base of the kit mount. With some careful and delicate filing and shaping I was able to get this mount into shape to take the MG without too much difficulty and still be very close to accurate. I'll give this MG and mount some paint and set it aside while I clean and paint the rest of the gear.

Momentum is rolling along nicely, so we'll keep at it until the base work. Hopefully I will have figured out my plans for the Ranger's hidey-hole. Whatever I come up with I want a lot of veggies, vines, and grass.

More to follow soon and thanks for watchin. Cheers, Ski.
 
MG34 and Mount


The MG34 that comes with this kit is rather crude compared to the MG34 that is produced by Reedees Miniatures. There really is no comparison. Before I had received Steve's kit, I had already drilled out the barrel and was having no fun with the kit gun mount, it was very weak.

As you can see from the box photo there's quite a bit of gear that Steve has included in this accessory kit and I will be using much of it. Since this R75 crew is very close to home I won't be using the gas can or chow jugs, but I will use the rest of it. Steve also provided the ammo cans and potato mashers. Inside that plastic box are several belts of MG ammo. They are very well molded, but even so, it's a very delicate operation to clean up. Resin is not as tough as styrene, so I'm really taking my time with these belts.

View attachment 114455

Below you can see how I drilled out the barrel of the MG and inserted plastic rod. The details on this MG34 are very accurate as is all of Steve's gun parts and kits. I don't know how he does it, but I'm likin it.

View attachment 114456

View attachment 114457

I had to refabricate another gun mount using brass which was cut, bent, and attached to the base of the kit mount. With some careful and delicate filing and shaping I was able to get this mount into shape to take the MG without too much difficulty and still be very close to accurate. I'll give this MG and mount some paint and set it aside while I clean and paint the rest of the gear.

Momentum is rolling along nicely, so we'll keep at it until the base work. Hopefully I will have figured out my plans for the Ranger's hidey-hole. Whatever I come up with I want a lot of veggies, vines, and grass.

More to follow soon and thanks for watchin. Cheers, Ski.
Love watching you're work. Pantherman
 
Time for the Details

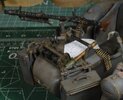
When getting back into working this R75 I realized just how much I had to do to get it in shape for the finish. I had to redo the unit decals, because I never paid attention to which unit was portrayed in the kit set. I needed to mount the MG34 gun plus the ammo belt, add the ammo drum rack, and pin and mount the storage boxes. The ammo belt took a bit of careful work, but Steve has made working the belts easier by how they were cast. They are still very delicate, and you will break them. I think everyone does break a few, but with a little care you can make them work as needed.

_DSC0606b-vi.jpg

_DSC0608b-vi.jpg

_DSC0610b-vi.jpg

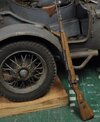
In between working the R75 I also prepped the 98K rifle. For that I added a light wood grain pattern and used Raw Umber oils for the stock color tone. For the metal I did and experiment that seems to be working well so far. With a layer of Tamiya Flat Black in place I used standard carpenter's pencil lead applied with a mascara applicator to all the high points. I then gave the metal a wash mix of Ivory Black and Brunt Umber oils to set in all the recesses. Once this was completely dry, I then used the applicator again but this time I used tube graphite that had been crushed fine. This last step seems to give a more silver tone to the barrel on the top high points. It may not look like much yet, but the MG34 is a better example of how well this worked.

_DSC0613b-vi.jpg

I'm now in the process of painting the stowage gear, and I still need to fling on some dirt and mud splatter onto the R75, plus get the tires in order. Once the R75 is up to speed I will finish any punch list items for each figure, there are quite a few, and get ready for the base.

Just a quick note; the difference in my figure painting quality from ten plus years ago to today is glaring me in the face. I'm almost embarrassed to put some of these guys into this dio, but I'm going to let it ride and get this beast of a project finished. No, I am not going to redo any of the older figures, other than add a glint to the eyes and adjust some minor issues. Wow, I never really gave that "glint" a thought way back then, HA! What a trip, lol. Ahhh, we'll call this dio a time capsule, Ya?

More to follow soon and thanks for watching. Cheers, Ski.
 
Time for the Details

When getting back into working this R75 I realized just how much I had to do to get it in shape for the finish. I had to redo the unit decals, because I never paid attention to which unit was portrayed in the kit set. I needed to mount the MG34 gun plus the ammo belt, add the ammo drum rack, and pin and mount the storage boxes. The ammo belt took a bit of careful work, but Steve has made working the belts easier by how they were cast. They are still very delicate, and you will break them. I think everyone does break a few, but with a little care you can make them work as needed.

View attachment 114909

View attachment 114910

View attachment 114911

In between working the R75 I also prepped the 98K rifle. For that I added a light wood grain pattern and used Raw Umber oils for the stock color tone. For the metal I did and experiment that seems to be working well so far. With a layer of Tamiya Flat Black in place I used standard carpenter's pencil lead applied with a mascara applicator to all the high points. I then gave the metal a wash mix of Ivory Black and Brunt Umber oils to set in all the recesses. Once this was completely dry, I then used the applicator again but this time I used tube graphite that had been crushed fine. This last step seems to give a more silver tone to the barrel on the top high points. It may not look like much yet, but the MG34 is a better example of how well this worked.

View attachment 114912

I'm now in the process of painting the stowage gear, and I still need to fling on some dirt and mud splatter onto the R75, plus get the tires in order. Once the R75 is up to speed I will finish any punch list items for each figure, there are quite a few, and get ready for the base.

Just a quick note; the difference in my figure painting quality from ten plus years ago to today is glaring me in the face. I'm almost embarrassed to put some of these guys into this dio, but I'm going to let it ride and get this beast of a project finished. No, I am not going to redo any of the older figures, other than add a glint to the eyes and adjust some minor issues. Wow, I never really gave that "glint" a thought way back then, HA! What a trip, lol. Ahhh, we'll call this dio a time capsule, Ya?

More to follow soon and thanks for watching. Cheers, Ski.
If I could do now what you were doing 10 years ago I would be a very very happy boy.
You're builds are amazing. Pantherman
 
Sorry for the delayed reply, Gents, and thank you very much.

You do great work, Pantherman, so ya ain't foolin me, HA!;)
 
R75 Almost Complete

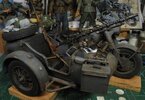
The R75 and sidecar are nearly completed. I just have a few more items to deal with such as toning down the rusty tail pipe, clean up some overzealous scratches and rust marks, splatter some euro dirt, and dust up a few locations up from the underside.

All the gear has been painted and installed including some paperwork and maps, a few stick grenades, ammo cans, and the aftermarket accessory set from Reedees Miniatures. I wanted the sidecar to look somewhat messy with papers and gear in disarray. I understand many of the motorcycle units pretty much lived in their rigs, but these guys are local to the Normandy area, so I couldn't get too carried away. I just love the passenger's smirk on his face indicating he's not really sure where he is, lol. He doesn't appear to be the most organized fellow anyway. More on him later as we get closer to the figure placement.

View attachment 115228

View attachment 115229

View attachment 115230

View attachment 115231

View attachment 115232

View attachment 115233


Here's a few full rig shots. The tires have been dusted as well as the spare on the rack. I used an odd mixture of pine sap and bees wax to clean off the Mig Pigments dusting on the tire treads. I know this is a very odd thing to use, but the wet sponge just wasn't "cuttin the mustard" and the pine salve just happened to be handy, lol. It actually worked very well and without a sheen, excellent!

View attachment 115235

View attachment 115236

View attachment 115237

View attachment 115238

Now you can see the unit decal on the front of the sidecar. I had to play with the patch in "MS Paint" before printing on clear decal paper. There was a learning curve. Then, not being satisfied with the results, I hand painted each decal over the printed pattern. It wasn't too difficult, I used a very tiny brush and painted over the yellow printed color. I may need to touch up the decal on the R75 saddle box, it's looking a bit odd from these photos.

View attachment 115239

View attachment 115240


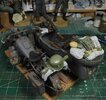
The R75 is in the cabinet until the figures have been addressed. Once the figures are set, I will figure out how the layout will work best and begin the base work. The final stages are in motion and the veggies will follow very soon.

Thanks for watchin. Cheers, Ski.

View attachment 115180

View attachment 115181

View attachment 115182

View attachment 115183

View attachment 115184

View attachment 115185

View attachment 115186

View attachment 115187

View attachment 115188

View attachment 115189

View attachment 115190

View attachment 115191

View attachment 115192

View attachment 115193

View attachment 115194

View attachment 115195

View attachment 115196

View attachment 115197

View attachment 115198

View attachment 115199

View attachment 115200

View attachment 115201

View attachment 115202

View attachment 115203

View attachment 115204

View attachment 115205

View attachment 115206

View attachment 115207

View attachment 115208

View attachment 115209

View attachment 115210

View attachment 115211

View attachment 115212

View attachment 115214

View attachment 115215

View attachment 115216

View attachment 115217

View attachment 115219

View attachment 115220

View attachment 115221

View attachment 115222

View attachment 115223

View attachment 115224

View attachment 115225

View attachment 115226
 
Last edited:
Building the Woodshed/Out-Building

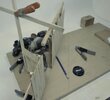
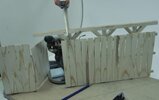
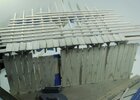
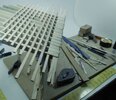
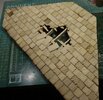
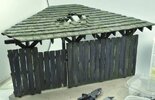
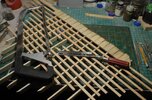
After serious consideration on how to lay out this scenario I've decided to build a woodshed/out-building. Since most of the barns in Normandy back in WWII were made mostly of stone with wood roofs and trusses, and I wanted to make an out-building, no stone work will be done. The lumber material has a rough sawn texture and would be typical of what would have been used for such a secondary structure.

_DSC0640b-vi.jpg

_DSC0641b-vi.jpg

_DSC0642b-vi.jpg

The scenario will work the same and I'll be able to keep the scene open enough for the action to be visible without losing sight of the Ranger, he won't be hidden. And of course there will be plenty of climbing ivy and bushes to cover and climb the old wooden structure. I will be using several shades fo dark brown and black to give the old wood appearance, so this should work just fine.

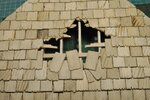
I cut all the material on the table saw using weathered 1"x10" pine board scraps. I left an area open for some weather damage as well. The shake shingles were cut from a board that had not been planed, so the width would wider and be close to scale. I'm going to be busy for some time placing all those shingles, but the effect will be worth it.

_DSC0643b-vi.jpg

_DSC0644b-vi.jpg

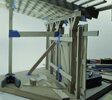
The posts all have heavy metal pins and the base has been drilled for each location making for a stable set up. Right now, I'm debating what kind of equipment might need to be built to fill in some spaces as well as a few oil drums and maybe some tractor equipment as well. If I could find some 1/9th scale aftermarket equipment that would be great, but I'm thinking I will have to build all of it from scratch. No worries, that's another fun [part of this Sport, the imagination and creation, right?

_DSC0645b-vi.jpg

_DSC0646b-vi.jpg

More to follow soon, but right now I've got my work cut out for the next few days. Thanks for watchin.

Cheers, Ski.
 
Slow Going.

Bunker time has been shortened a bit, but I'm still able to get a little time in daily. With Spring kicking in high gear that time will only get shorter, so I need to keep the momentum going without rushing the results.

I've finished the roof system with the weather damage in the mid-section. The evidence of neglect over time will add a bit of character to the structure and will be weathered accordingly. Man, that was a lot of shingles to make and ruff up.

_DSC0647b-vi.jpg

_DSC0648b-vi.jpg

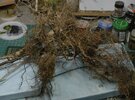
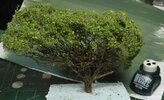
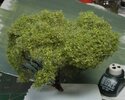
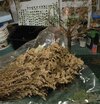
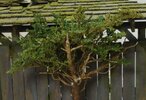
After the structure was built, I moved on to making the veggies. Trying to make bushes in this larger scale takes a bit of pre-planning as there really isn't any decent foliage on the market. But you can, however, always scratch build your veggies using whatever is on hand. As you can see from the photo below, I save a few tomato roots and other garden plants each fall. They dry over the winter in the green house and are always ready in the spring. Ya just never know when you'll need them and it's always a good idea to plan ahead.

_DSC0651b-vi.jpg

_DSC0653b-vi.jpg

_DSC0655b-vi.jpg

_DSC0654b-vi.jpg

I started by taking apart the root system and separating usable sections for my bushes and set aside the longer strands for ivy or crawling plants. Many times, I couldn't find exactly what I would consider a decent clump, so I had to combine several portions to fabricate the plant bases and structures needed. There are quite a few YT vids on how to make realistic bushes that are very helpful. I watched more than a few of them before starting the veggie work and that saved me a lot of time.

I used fine and course flock and Super Leaf from Scenic Express on the bushes after applying small amounts of poly fiber, or pillow stuffing, on the branches. This really is too small for the scale I need, but I used it anyway. I won't go over the process, but this video gives a good run down of the process.

When it comes to making veggies, I prefer to find as much foliage as possible from the hillsides and mountains in my area. The realism, imho, can't be beat and the material is very cheap, just pick it.

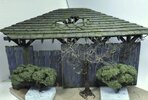
Once the bushes were done, I started on the roof color tones and weathering. I added some moss on the shingles and a little bit on the top and bottom of the fence and gate. Ivy will be crawling all over this structure, so the wet and decaying wood needs this prep work to add realism to the effect.


_DSC0650b-vi.jpg

_DSC0657b-vi.jpg


There is still a lot to do before I can start the ground work, but progress is moving forward. Feel free to add suggestions or comments and thanks for watchin.

Cheers, Ski.
 
There's Got to Be a Better Way!

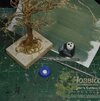
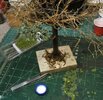
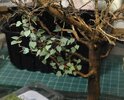
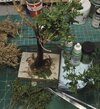
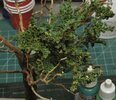
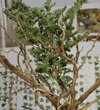
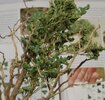
Progress report: Maybe I'm not looking hard enough, but placing these leaves one at a time is getting old real fast, hours actually, for this small area alone. I know, gluten for punishment, but I haven't found anything else that would come close to the scale I need.
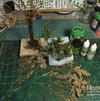
Belly Ache Alert!!! Pass the snivel wipes, if you please.

If there's a better way to tackle this, I'm all ears. I thought the ivy plants were tough on "Early Mornin Dew", but this is much more difficult. Getting in between these tiny twigs without breaking any of them is a real challenge. It's not like I can use flock and poly fiber, or even a MiniNatur set, and get decent results.

_DSC0659b-vi.jpg

_DSC0661b-vi.jpg

If you are going to take this route in this scale, I don't see any other choice but to grind through it and carry on. Like I said, maybe I didn't look heard enough, but I have not found a better solution and using fish tank plastic won't cut it, too fake, IMHO. I will be adding a lot of smaller punched leaves in the gaps to make this tree look as real as possible and not so much like a sparse cactus, or a cheap knock-off attempt.

Well, like you said Glenn, "Welcome to the nut house", or better yet, welcome to the lunatic fringe! More to follow and please, if there are any suggestions out there, I'm all ears.

Cheers, Ski.
 

Latest posts

Back
Top