Big Kitty - Tamiya's Leo 2A6

Scale Model Addict - Model Tips, Guides, Tools & Tech, Tutorials, and Community

Help Support Scale Model Addict:

BEO ,

Sah-Weet !! IT's cool when you put all of that time into something & it fires up th 1st. time & acts right !!

I'm lookin' forward to th weathering etc !!

Smokin' Job Bro !!
 
Thanks guys. Once it's finally all done including weathering I'll get a video done with an obstacle course to show the stab in action and the articulation of the suspension.

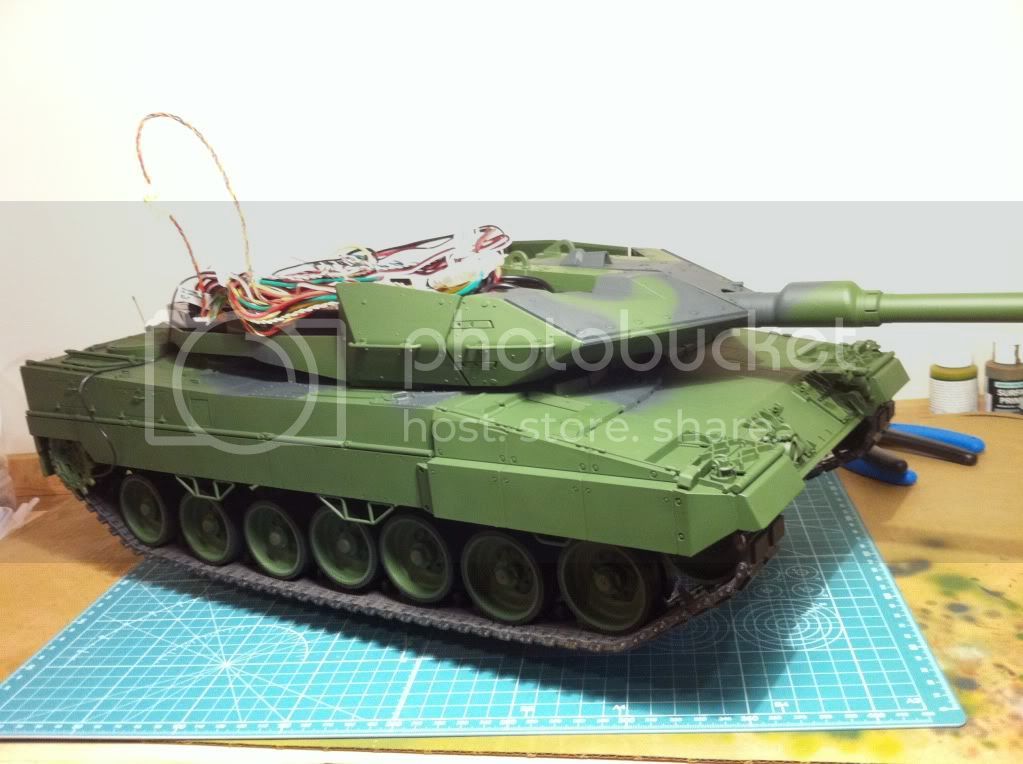
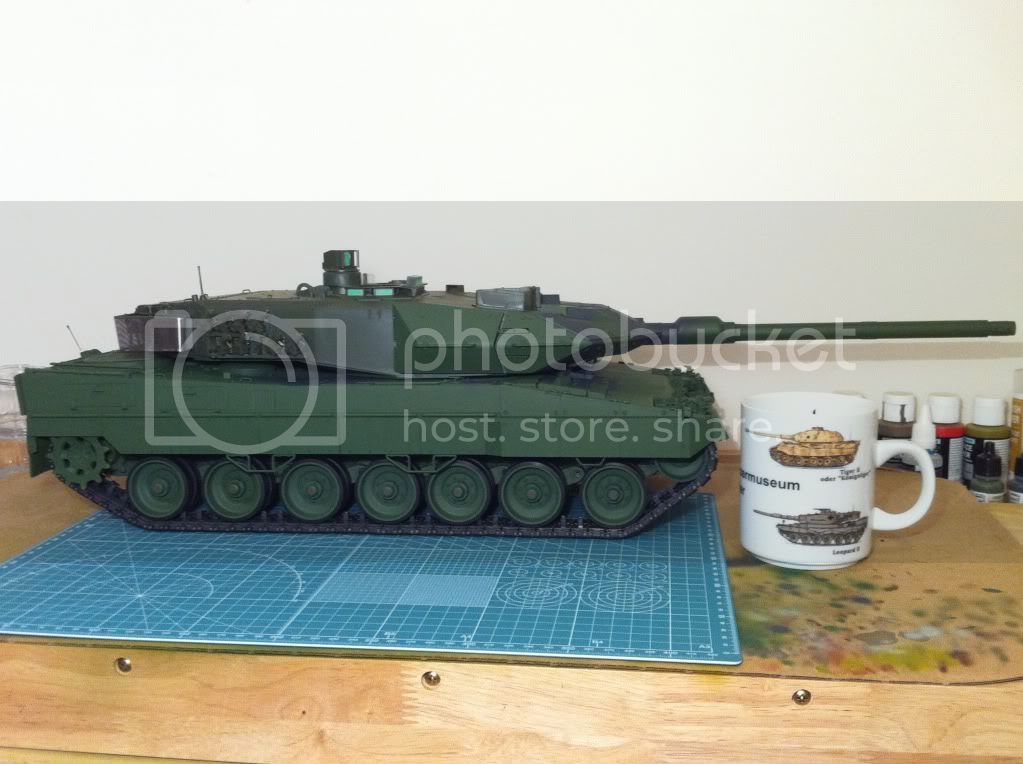
So It's getting down to the finer details now before final priming and paint and then on to weathering.

Elephant ears and frontal turret applique armour now secured

IMG_0375.jpg


Upper turret on and almost completed for parts to be attached.

IMG_0378.jpg


Not too sure on how I'm going to do the "winkie dink" on the turret so I can detach it at any time, so I've left it off for now. It's supposed to be screwed into the turret top. It's used for dry training and maintenance to alert personnel that the tank is occupied and the turret can move at any time.

Scratch built the hull indicator on the driver's back up camera housing out of an acupuncture needle. The turret is so big that you can not see the hull at all in either the commander's hatch or the loader's hatch. The only way I could see the side of the hull was to literally hang myself out of the hatch waist high and lean out. To back up and get an idea of where the hull was you have to look for the little ball on a stick to see where the center of the rear hull was. If you're buttoned up, the PERI sight in the pix 6 position couldn't see it....it's all up to the driver to get you where you wanted to go.

I've put on some of the NATO black on it in the areas where it would have been literally impossible to get later on during the build.

TANKS for looking!
 
Well it's been a while since I've last updated you on the big cat. Been rather busy on a career course and the build had to take a back seat for the past 2 weeks. Still have 5 weeks to go.....

But I digress....

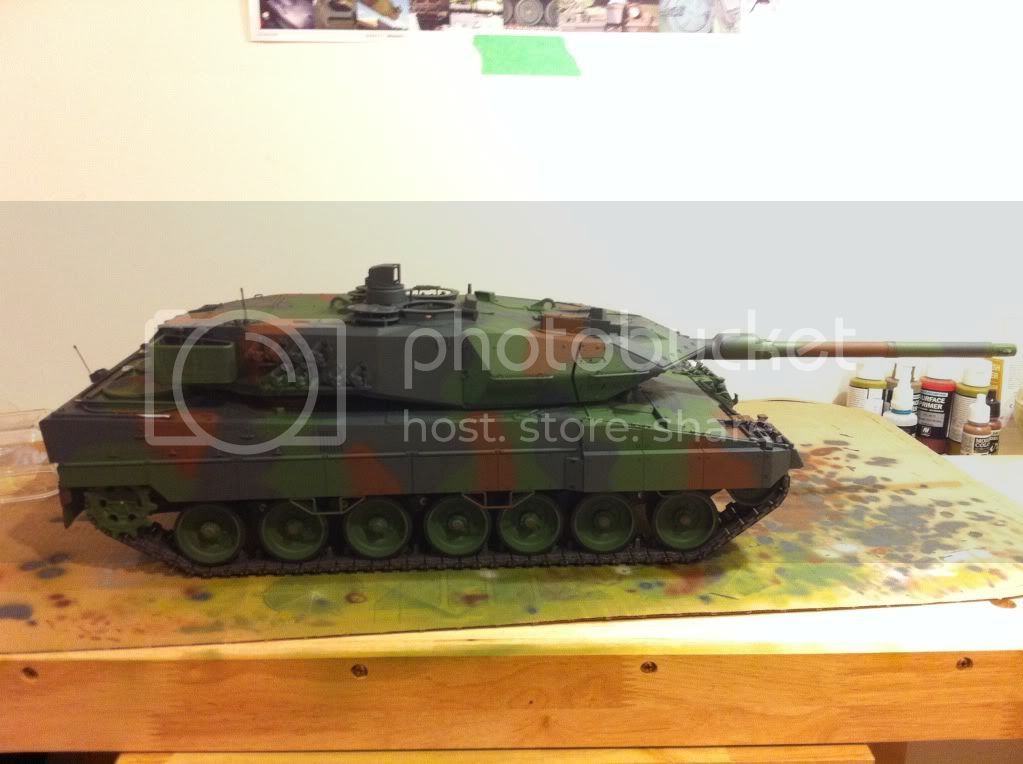
The paint scheme is now done. I laid it all out and shot the paint only to find that the brown was way too dark. On a real Leo C2 that's still wearing some NATO tri colour on for comparison it was a close match. Put it on something smaller scale and it gets dark real fast. That being said, had to go in and get a shade lighter brown and shot it again.

It was still a touch too dark....time to start mixing.

Finally shot it the other day and it's looking fairly decent. Still have to shoot on some clear to even out some mistakes and paint some other parts as well. It's getting close to being completed for paint.

Then it's on to weathering.

I'll be posting pics shortly.
 
As an Amazon Associate we earn from qualifying purchases. Product prices and availability are accurate as of the date/time indicated and are subject to change.
Damnit....life got in the way yesterday. Sorry for the delay.

Here she is:

IMG_0381.jpg


Started to paint the pioneer tools and get them ready for wear and tear last night. Have to touch up the barrel a bit.

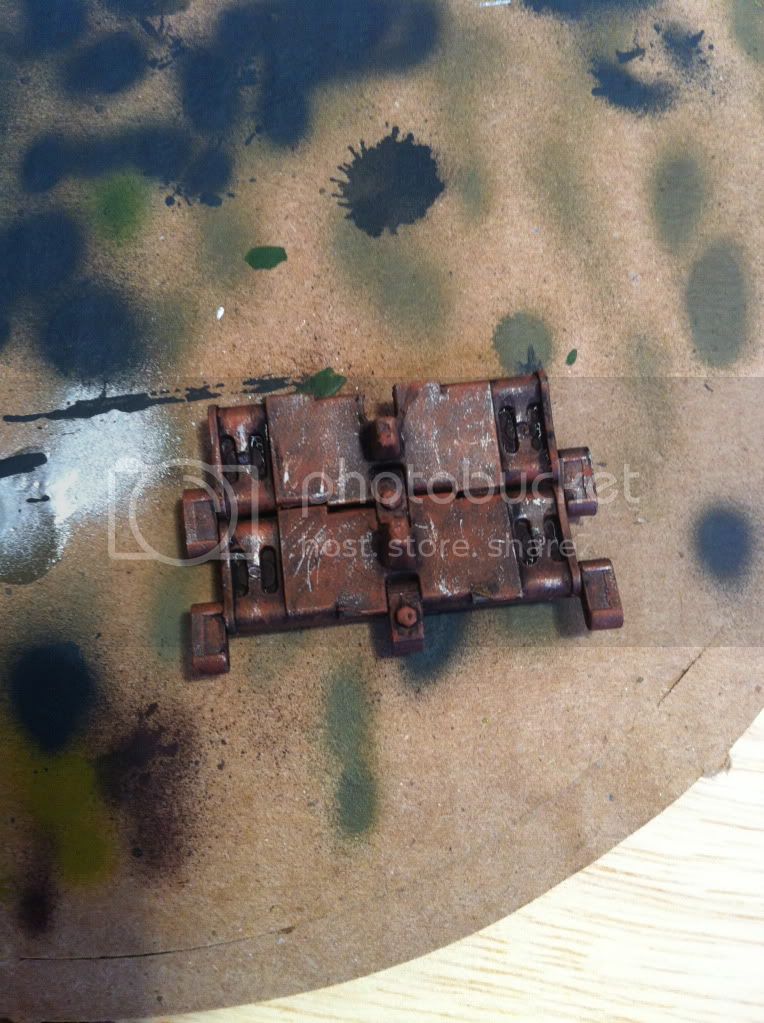
One thing I've learned is the techniques used for 1:35 does not work well for 1:16.

For example, applying rust to the spare track links that's carried on the front of the tank.

IMG_0383.jpg


Thoughts?
 
Hi ya Beobach,

My only thoughts are that your model looks really impressive and that the camo scheme is top nocht.

A very good one - so cheers, Beobach,
RG
 
BEO ,

I too dig th look !! I can't wait to see it weathered !! It's lookin Hot !! Great Job.

I actually like th look of th track. maybe add another wash to tone down th rust ?? Did they rust that bad in th field ?
 
panzerace007 said:
BEO ,

I too dig th look !! I can't wait to see it weathered !! It's lookin Hot !! Great Job.

I actually like th look of th track. maybe add another wash to tone down th rust ?? Did they rust that bad in th field ?

Thanks. They can if they've been used and the protective coating (wax) has been worn off. Most times though, not that much. Any idea of how to tone it down?

Regards
 
BEO ,

They don't look that bad. You could try may be a subtle wash of Raw Umber ? Just a little bit, Although .... Truth be told, Since this is gonna be Radio controlled( which I forgot when I originally commented on th trax) , I'm sure it'll wear off a little - Just like th realy thing. Once you get her movin' through th gravel & dirt ... It'll look th part !!

Don't sweat it !! It Rox ... just let it Fly ! ;D
 
panzerace007 said:
BEO ,

They don't look that bad. You could try may be a subtle wash of Raw Umber ? Just a little bit, Although .... Truth be told, Since this is gonna be Radio controlled( which I forgot when I originally commented on th trax) , I'm sure it'll wear off a little - Just like th realy thing. Once you get her movin' through th gravel & dirt ... It'll look th part !!

Don't sweat it !! It Rox ... just let it Fly ! ;D

Thanks for the encouragement but the track pieces are for the front of the tank, mounted on the glacis plate of the hull as spare parts. The rust look I'm going for is from sitting in the elements.

Maybe a pigment combo to tone it down as well?


Another thing I'm looking to do is somehow take the 6" antenna whip and convert it into an internal antenna. Anyone ever do this before?


TANKS again for looking!
 
BEO ,

Ah ! I would say that in that case of spare track , th none use would look cool rusty !! Give it a shot dusting it down with some rust pigments. Although since you served on these ( right ??) that you have 1st. hand knowledge , so I'm sure it's spot on !!

I'm lookin forward to seein th Beasty run around in th Open country !!
 
Very impressive camo. Got to hand it to you guys who build and paint modern tanks with this camo scheme. The tracks look pretty good to me.But then it's in my fav color ;D
 
geegad said:
real nice you've got to get some video of it moving around

geegad
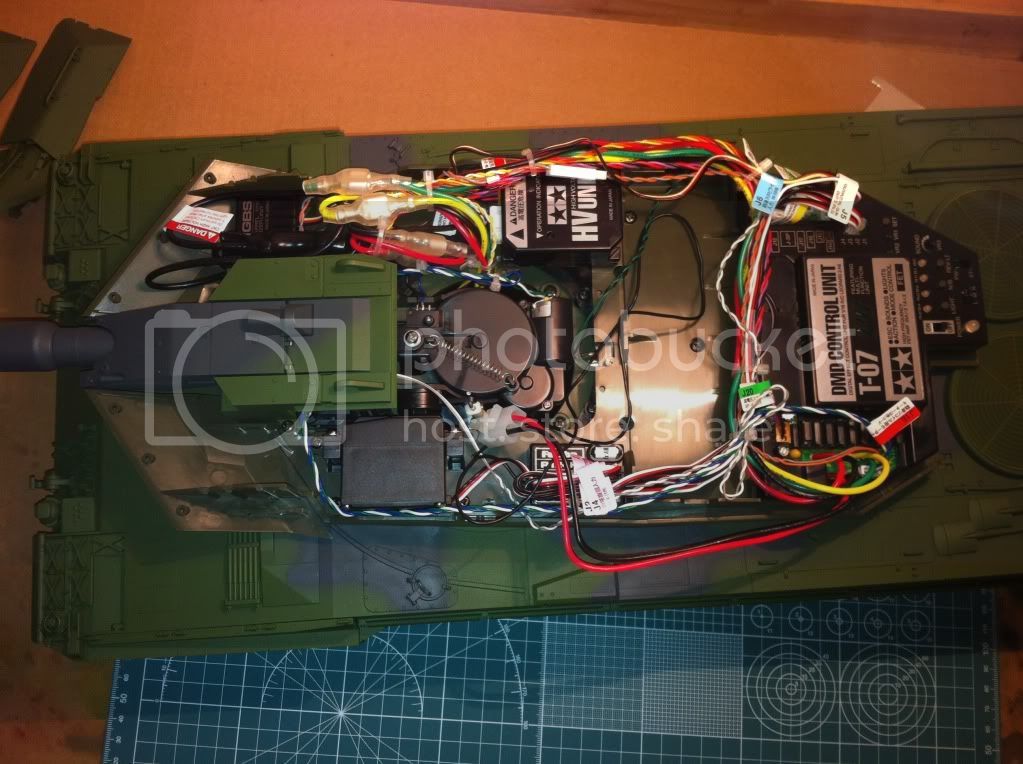
I will have something as soon as I get the internal antenna installed. Got a rough idea of what needs to be done.

Basically, 27 cm of 12 gauge copper wire coiled around 1/4" tubing evenly and not touching any other metal in the tank.

The turret is pretty tight though.

IMG_0373.jpg


I'm thinking in the lower left corner for a spot.
 
Well, it's been quite a while since I did an update. This isn't much of one though, I've been on course since mid Jan and didn't have very much time to put to the panzer...at least not as much as I wanted.

Just picked up an order from ECH of some AK products and tried out one last night.

AK's Dark Steel is amazing!

That is all. ;)
 
Beobachtungsbereich said:
I will have something as soon as I get the internal antenna installed. Got a rough idea of what needs to be done.

Basically, 27 cm of 12 gauge copper wire coiled around 1/4" tubing evenly and not touching any other metal in the tank.

I'm thinking in the lower left corner for a spot.

I don't think your antenna needs to be 12 gauge, or does it ?
It could be thinner and insulated... PVC coating only... won't affect reception ! and Remember that if you COIL it.... it will become very focused ! almost directional !

Can you make the two Tank antenna part of your Antenna system ? As long as you respect the LENGTH necessary for that Frequency.... or even look into making a Impedance matching circuit... to enable you have shorter antennas.... maybe you can get away with it ???

maybe some RC stores even Have such an Antenna kit...?
 
Beobachtungsbereich said:
Directional as a transmitter....not as a receiver apparently.

Got that info from a Sigs guy who specializes in that stuff...and satellite stuff too.

Regards

so do you mind showing us the ANTENNA you came to fabricate then ?? !!!

and nice paint job!!! love the Flash when then gun goes...

Keep us Updated !
 
schweinhund227 said:
Beobachtungsbereich said:
Directional as a transmitter....not as a receiver apparently.

Got that info from a Sigs guy who specializes in that stuff...and satellite stuff too.

Regards

so do you mind showing us the ANTENNA you came to fabricate then ?? !!!

and nice paint job!!! love the Flash when then gun goes...

Keep us Updated !

I haven't put it in yet. Been busy on course for the past 6 weeks.

I plan on getting the entire build done over March break and I'll post some detail shots when it's all said and done.

Regards
 

Latest posts

Back
Top