AMT/MPC Falcon rebuild
- Thread starter ozzyguanche
- Start date
ozzyguanche
New Member
- Joined
- Nov 3, 2011
- Messages
- 66
Thanks scratchy, but if I scratched the whole thing I couldnt call it an AMT falcom LOL.
I am rebuilding the engine light at the moment to see if I can get the little fans under the rear deck. Dont think I have enough space. I will post some pics this weekend.
Cheers
Ozzy
I am rebuilding the engine light at the moment to see if I can get the little fans under the rear deck. Dont think I have enough space. I will post some pics this weekend.
Cheers
Ozzy
ozzyguanche
New Member
- Joined
- Nov 3, 2011
- Messages
- 66
Well thank you Mr Girvan ;D
schweinhund227
New Member
- Joined
- Jun 24, 2009
- Messages
- 2,511
Good for you ! seems like you have tons of Energy behind you !
looking forward to your next Update !
ozzyguanche
New Member
- Joined
- Nov 3, 2011
- Messages
- 66
Thanks Quaralane, Thanks schweinhund.
Just a quick update, With some little electric fans I have made an engine vent and a working fan insert.
Process pics.
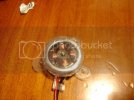
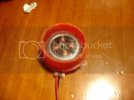
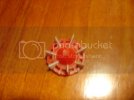
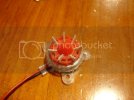
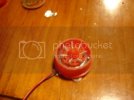
The vent itself with PE grill
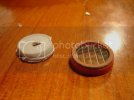
together
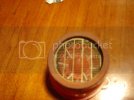
And this is my original engine lights box. Unfortunatel due to me wanting to put these working vent fans in it will not fit anymore, so Ihave pulled the fluro light out of it and am starting from scratch with led's but still using the clear plastic jet (vent) bits i made from screw gun strips. RE: the strips that the screws come in that insert into the auto screw guns.
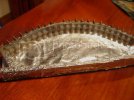
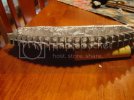
Have got some ideas from members build here that may work for me.
Will be thinning the edging of the falcon overhang plate, cutting out the notches, and a few other small things this weekend.
ozzy
Just a quick update, With some little electric fans I have made an engine vent and a working fan insert.
Process pics.


The vent itself with PE grill

together

And this is my original engine lights box. Unfortunatel due to me wanting to put these working vent fans in it will not fit anymore, so Ihave pulled the fluro light out of it and am starting from scratch with led's but still using the clear plastic jet (vent) bits i made from screw gun strips. RE: the strips that the screws come in that insert into the auto screw guns.


Have got some ideas from members build here that may work for me.
Will be thinning the edging of the falcon overhang plate, cutting out the notches, and a few other small things this weekend.
ozzy
Omegaman55
Member
- Joined
- Nov 12, 2011
- Messages
- 76
Great work Ozzy,
I'm looking forward to seeing how this turns out... Keep it going Ozzy!
I'm looking forward to seeing how this turns out... Keep it going Ozzy!
ozzyguanche
New Member
- Joined
- Nov 3, 2011
- Messages
- 66
Thanks guys!
Back to the body of the falcon. Have filled in the engine holes. Sanded it back and marked it out for the new holes. Made some adjustments to the engine rings as well.
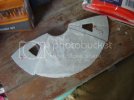
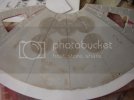
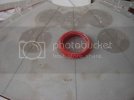
While thining the edge plating I realised that the raised areas inside the plating were the side walls attach were no were near as far back as the should be. The inner walls around the ship should be the same as the inner circle.
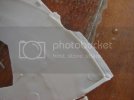
So I sanded them down so I could cut the walls and space the ship the right height.
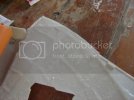
I have marked how far in the walls will go.
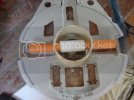
I did the same around the mandables as I found the greebles I have made become too high when including the raised parts.
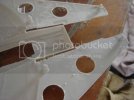
My new wall hight for this build is 1.6cm. So for the mandables it is a 1.2cm spacer, as the thikness of the kit top and bottom are 2cm each.
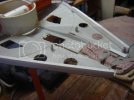
I have debated with others as to the hight of the curved side walls being the same as the mandables or slightly larger. I of the opinion that the spacers have to be higher, as they are further back in the body of the ship and therefore are higher by 1cm in this build. (sorry didnt take pic).
Other areas worked on are the front mandable strips, both top and bottom. (first pic) they have been lowered to the correct hight. And the piping all over the ship has been removed. I used a sanding disk in a hand drill. The hand drill on low worked much better than the rapid spin of the dremil.
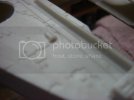
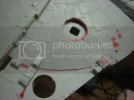
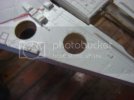
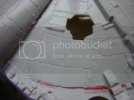
This one needs a bit of work though.
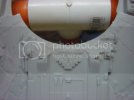
Sorry its a long post.
Lastly after doing a dry fit with the walls in place (spot on 1.6cm) I tried the placement of a few scale parts I have made (none finished) to see if the side wall hight works. I think considering I did these parts from measurments of the real things and scaled them down against the AMT size, that 1.6cm is pretty close. Could actualy be higher, what do you think? Sorry bad pic.
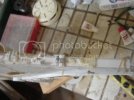
Well thats it. Thanks for looking.
Ozzy
Back to the body of the falcon. Have filled in the engine holes. Sanded it back and marked it out for the new holes. Made some adjustments to the engine rings as well.


While thining the edge plating I realised that the raised areas inside the plating were the side walls attach were no were near as far back as the should be. The inner walls around the ship should be the same as the inner circle.

So I sanded them down so I could cut the walls and space the ship the right height.

I have marked how far in the walls will go.

I did the same around the mandables as I found the greebles I have made become too high when including the raised parts.

My new wall hight for this build is 1.6cm. So for the mandables it is a 1.2cm spacer, as the thikness of the kit top and bottom are 2cm each.

I have debated with others as to the hight of the curved side walls being the same as the mandables or slightly larger. I of the opinion that the spacers have to be higher, as they are further back in the body of the ship and therefore are higher by 1cm in this build. (sorry didnt take pic).
Other areas worked on are the front mandable strips, both top and bottom. (first pic) they have been lowered to the correct hight. And the piping all over the ship has been removed. I used a sanding disk in a hand drill. The hand drill on low worked much better than the rapid spin of the dremil.


This one needs a bit of work though.

Sorry its a long post.
Lastly after doing a dry fit with the walls in place (spot on 1.6cm) I tried the placement of a few scale parts I have made (none finished) to see if the side wall hight works. I think considering I did these parts from measurments of the real things and scaled them down against the AMT size, that 1.6cm is pretty close. Could actualy be higher, what do you think? Sorry bad pic.

Well thats it. Thanks for looking.
Ozzy
schweinhund227
New Member
- Joined
- Jun 24, 2009
- Messages
- 2,511
Can't wait to see what's next on the table...
Keep working at it... it is gonna be EPIC !
later buddy !
ozzyguanche
New Member
- Joined
- Nov 3, 2011
- Messages
- 66
Thanks scheinhund227, and thanks Grendels.
Because I have been all over the place with this thing, I have refocused a bit and am going to concentrate on the main body of the falcon first, and correcting all the faults. I was trying to approach it as though I was scratch building the whole thing, re: building the greebles first like kit bashing. Turns out that was a stupid idea and I have waisted a lot of time making parts that do and never will fit.
The AMT/MPC Falcon is very close to the dimensions of the 5 foot falcon, even to the extent it is the only kit that has the mandibles toe in.(along standing debate among Falcon builders). The plating is also for the most part correct, although the underside plating represents the ANH (original) Falcon, as I believe the plating was rearrange/replaced when the extra landing boxes were added.
So, here is the plan. To get the falcon body into Shape and before I get back to any grebe building These areas will be addressed first.
1/ Finish the side wall spacing, including engine opening which is heigher still than the side walls.
2/ Level the (docking ring) walkways and extend side walls of walkways. Add correct sized cylinders For docking rings.
3/ Rebuild the forward landing gear bay (above picture I cut it out)
5/ attach all landing gear doors, and access ramp in closed position ( clean up and fill in gaps)
6/ Cockpit cylinder and walkway, replace with resized ones. ( already made )
7/ Possibly! Put a tapered edge on the gun turret walls.
8/ replace the ( actuators/feathers ) at rear of the engine deck (cut off old ones)
9/ clean up or replace plating were piping has been removed
10/ new holes for engine vents
That should give me a nice clean ship to Start attaching greebles to. The original idea was to make the side walls a full strip and just attach the whole thing to the body. same idea for the engine deck. Now I will just greeble up the falcon.
sorry for the long winded post,
regards
Ozzy
ModelMakerMike
"It's Slobberin' time""
- Joined
- May 28, 2011
- Messages
- 1,838
I see all your years at I.L.M. paying off......
what? you didn't work at I.L.M.....You should have/be.
Great work, and what a complex project.
What did you use for the vent motors?
what? you didn't work at I.L.M.....You should have/be.
Great work, and what a complex project.
What did you use for the vent motors?
Captain Han Solo
Active Member
- Joined
- Feb 3, 2012
- Messages
- 168
Excellent work Ozzie(as usual), Simply Excellent
Similar threads
- Replies
- 0
- Views
- 1K
Latest posts
-
-
-
-
thinning tamiya bottle paints for airbrushing
- Latest: styrenemachine
-
-
-
-
