AMT 1/43 X-wing "the Last Dogfight"

Quaralane

Well-Known Member
Joined
May 22, 2009
Messages
11,263
Okay, the next project on the bench will be revisiting an old "classic" kit.
I'll be building the 1/43 (or so) AMT/Ertl X-wing fighter kit.
The flaws of this one have been well documented, but I won't be trying to fix all of them, just a few that really stand out.

Box art.
Ironically, the model pictured here is ACTUALLY the smaller, snap together kit.
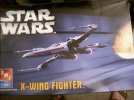
Amt-x-43-00.jpg

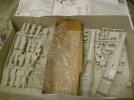
Box contents.
Amt-x-43-01.jpg

Now, for the actual plan for this build.
Aside from fixing some of the flaws in the model itself, I'm going to go for something of a custom paint scheme inspired by an old novel I read as a kid.
Namely, "The Last Dogfight" by Martin Caidin.
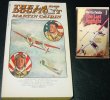
AMT-X-43-02-plan-1.jpg

I've kind of roughed out what I plan to do with the X-wing itself
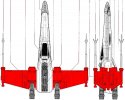
AMT-X-43-03-plan-2.jpg

Starting construction with the engine cans.
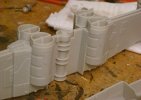
Using my dremel, I thinned down the sidewalls of the exhausts. Then I used a file to trim up the edges of the exhaust
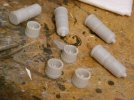
AMT-X-43-04.jpg

I finished assembling the engines, then built the base units for the guns
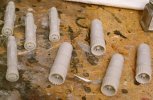
AMT-X-43-05.jpg

Youtube link:
AMT X-wing-The Last Dogfight-Part 1
 
I like the idea behind this build. Custom colors and some sort of star wars mouth.....
 
Cool idea Q. That's funny, I never noticed that box art before, and I've looked at that several times.
 
The paint scheme sounds really interesting Quaralane.

I have this kit completed in the attic (parts broken off) I didn't know about the inaccuracies on the underside....i'll maybe dig it out....perhaps repair the broken parts and attempt to correct the faults

J
 
@Scott. I only noticed it when I was looking for ideas on the paint.

Thanks for the compliments, guys.
I'm hoping the model looks as good for real as the idea looked in my head.


And, after a bit of a wait (which I do apologize for) we have progress on the X-wing.

I finished the main engine cans, and added the front detail bits
AMT-X-43-06.jpg

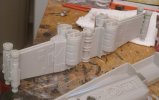
I've also attached the laser mounts, without the fragile tips for now.
The wings will be cut apart later, I've left the like this mostly to ease assembly at this point.
AMT-X-43-07.jpg

Glued in the back detail piece on the upper fuselage
AMT-X-43-08.jpg

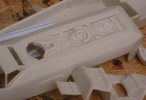
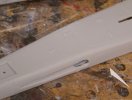
Using the grinding bit in my Dremel, I deepened the proton torpedo tubes on the lower fuselage.
I also opened up holes at the backs of the indents
AMT-X-43-09.jpg

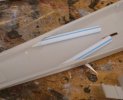
I epoxied some drinking straw pieces into place to simulate the rest of the tube going back.
Ignore the bad angle, as it looks just fine from outside
AMT-X-43-10.jpg

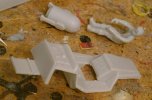
I also put together the R2 and pilot figures and cleaned up the cockpit piece a bit
AMT-X-43-11.jpg

Youtube link:
AMT X-wing-The Last Dogfight-Part 2
 
Watched both update videos, fuelling my interest to see how this build progresses. Keep up the super work :)
 
I used the very same trick for your launch tubes on my Space shuttle (a "big" project for an original diorama about Farscape One) for the thrusters you know...


It was with straws not done for drinking though. The kind we find attach to air balloons at "Quick" a Hamburger restaurant.
The fact is it's perfect, it's the kind of plastic that can be glued with regular modeler glue, and soft enough to adapt to an ovoid hole for example :) since it's not very thick, once dry, you can rip of the excess of straws with a blade. That's what i've done with my Bespin pod kitbash too... :)

You may consider to add a lot of detail on the dome of your astromech. Or replace it with something else. I've got number of ideas, using object I'm familiar with (beads ? with the right diameter made with a straw as a "body" ?). It's easier with smaller scales. I used a part from the Anakin's podracer Sprue to make an astromech on a ARC-170 Revell easy kit, a small cylinder with a dome-like shape. Some photo-etch from Kotobukiya and that was done. :)
 
Here's my old AMT X-wing retrieved from the attic, she's a bit beat up & dusty

p1030688p.jpg

p1030689p.jpg


Yours is looking great, good to see someone modding the AMT kit
J
 
Slowly getting work done on this build.

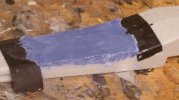
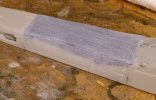
Using Aves Apoxie Sculpt, I set about fixing the incorrect angle MPC put in the bottom of the fuselage.
First, I masked off the area I wanted to fill with electrical tape.
Then I filled it as well as I could with rough application of the Aves and some smoothing with a wet finger.
AMT-X-43-12.jpg

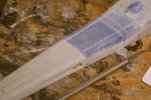
Using a combination of drywall sanding screen and wet sandpaper, I smoothed out the new section and removed the masking
AMT-X-43-13.jpg

I filled in the slot for the kit stand, and installed the landing gear doors.
With that done, I scribed panel lines into the Aves section in order to make it look better, if not wholly accurate.
AMT-X-43-14.jpg

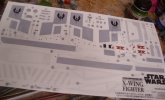
I've altered/adapted a scanned copy of the decals from the 1/48 Fine Molds kit and resized them for use with the AMT kit.
The red markings are for the cockpit.
The greys should just show up on the colors of the ship.
AMT-X-43-15.jpg

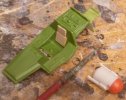
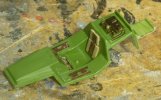
Gave the cockpit a coat of Interior Green, then cut a couple of pieces of sheet styrene to use in creating the appearance of a seat back.
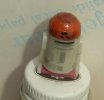
I've also masked and painted the droid's dome in red.
The bleed through will be filed away before I apply the decals to him
AMT-X-43-16.jpg

The droid ready for insertion into the ship.
The decals are the ones I recolored and scaled up from the Fine Modls 1/48 kit.
The only painted details are the "lenses" on the little guy's "face."
AMT-X-43-17.jpg

Decals in place on the cockpit panels.
Added a darker strip of paint to the middle of the seat.
The back section was painted in Vallejo Smoke, with the details picked out in gold
AMT-X-43-18.jpg

Youtube link:
AMT X-wing-The Last Dogfight-Part 3
 
Thanks, Scott.
For you, it was styrene cut and fill. That, I didn't have the patience for. So, I went straight to the filling step.
 

Latest posts

Back
Top