A-Wing Hasbro Scaled Scratch-Build

Jamaicanmodels69

New Member
Joined
Apr 17, 2011
Messages
604
Well guys started on this one and its really
my wifes fault! See she sent me up into the attic
and i started going through SW stuff!LOL I found
the old Hasbro toy i had and well ........thats how it
got started. I see a lot of guys Mod this thing and it
really does have potential in that area for sure! The hull
shape is nice the engine shape is beautiful......but there
were to many other areas that would be a lot of work on
the toy. Saying that i would still like to really clean up
one of those Kenner A's and have a shot at it! ;D

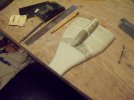
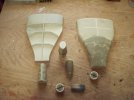
Anyway here is all i got one group photo of
some of the vacuum plugs to be formed. I still
need to finish filling in lower hulls pattern with clay.

The parts so far......
1. Top and bottom hull plugs
2. Canopy frame work plug
3. Canopy bulkhead plug
4. Vector ring plugs
5. F-16 like intake master (To be done in resin)
6. Top and bottom stabilizers which i had laser cut. (Waiting on them)
100_3322.jpg
 
I have a 16mi bike today and then a 3mi run right off
the bike when i get back......i will work on some clay
for this little guy!
 
Quaralane said:
Looks like an ambitious build so far
;D Yea they always seem to end up that way!
Ok I noticed the front ramp was off just before the
canopy and down to the nose. So I draped some clay
on her, I will let that dry and it will give me a good
hard base to tweek further.
100_3325.jpg
 
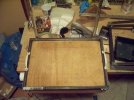
Well herders cant make this without a former
i have a few, i bought this one two others others i built myself.
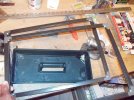
I like this former but the frame work that holds the plastic
in the oven kind of sucks! ;D It was made from aluminum
window screen frame, it has these 90 deg insertable corners,
but they are made out of plastic. When you have to heat styrene
2mm and up those corners get hot and start to melt. This is
not a good thing wobbling never allows good placement onto the
formers platen!
100_3327.jpg

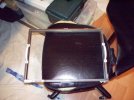
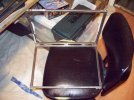
So I headed to good old Home Depot and picked up
some square steal stock(Wanted aluminum but didnt have the size i needed)
some....hinges, handels, L brackets, I can put this in the oven all day with no fear now!LOL
It was some work but worth it for sure!
100_3328.jpg
100_3329.jpg
100_3330.jpg
 
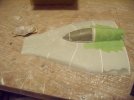
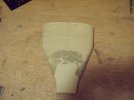
Been working on the two hulls top and bottom.........
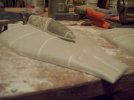
This is the issue i had with both hulls the angle of
the keel was to steep. Which if left would cause the
"Nose cone" area of the canopy and rail to slope to
much.
100_3343.jpg

To build this area up I added some clay under the end of the canopy,
and actually used the canopy to smooth it out level while everything
was still wet,then i let that dry over night.
100_3344.jpg

Dried platform for canopy......
100_3346.jpg
100_3347.jpg

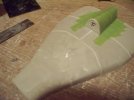
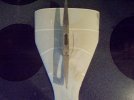
Checking the levelness of the area the canopy
and canopy bulkhead will sit on.
100_3348.jpg

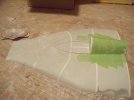
Clay added to match the new platform created for
the canopy.
100_3349.jpg

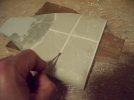
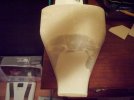
Top Hull:
Using a small chisel to bring down the styrene rib
cross sections. It gives it a "tiled' look this will allow
me to add clay in the grooves and alleviate any chance
of the ribs showing up in the final pull.This allows me to
sand clay across clay instead of clay across styrene, sanding
across different densities is always a problem!!
100_3350.jpg

Channeled cross sections filled with clay, when dry i can
sand them down to match the surrounding areas.
100_3353.jpg
 
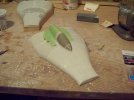
Small update .....sanded down the clay i added into
the cross sections.
100_3356.jpg

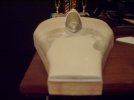
Front under canopy much better but the pattern
still needs shaping her and there.
100_3357.jpg
 
Definitely progressing, though.
Got a couple of scratch projects of my own I need to work on
 
Thank you for keeping us updated on this! Very interesting to see something like this scratch built!
 
Thanks Guys! ;D Once you see it in plastic and it starts
to come to life i think your really going to get a kick out
of it. I got a handi-cam so i plan on doing some video
during the build.
 
Ok Back at the ranch decided my original engines
were going to be to small in diameter. So time to
make new ones. ;D

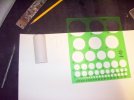
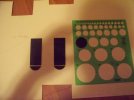
I used the toy's engine half and some templates
to find the right size at the rear, the front of the engine
is "EYE" shaped so i just used the toys profile for this.
100_3458.jpg

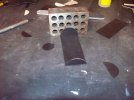
In this picture the bottom profile, which I traced from the toy's
bottom profile,the front of the engine and the rear which I popped
into the template to make sure it was sanded properly. The rear circle
is then cut in half for each engine half same situation for the front.
100_3459.jpg

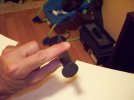
Glued together the keel i added later sorry no pics,
just measured the height of the front cross section and the
rear and the span in between.Then i cut that out of styrene and
glued it in the center of each engine making sure it was at 90deg.
100_3460.jpg

Both halves together waiting for keel and clay!
100_3462.jpg
 
Thats pretty much how you make a shape like this to
vacuum form, although you could use different mediums
i like the Apoxie sculpt especially the "FIX IT" clay because it's good
up to 500deg it's tough stuff it even sets up under water.
 
Oh, wow! I mean WOW! I've dreamt of vacuum-forming myself for a really long time, and this vid is pushing me forward to trying it at last. Thanks, Jamaicanmodels69! :)
 

Latest posts

Back
Top