A tale of two A-wings.....

Which color should I use for the large versions engines?


  • Total voters
    6
  • Poll closed .
Jamaicanmodels69 said:
Those Led's look perfect what did you go with?
what is their forward voltage or are those the
ones i sent? LOL

The LED's that I used in the snap kit are 3mm, they have a 2.2V forward voltage. These LED's are yellow or amber in color.

I don't have warm whites in this size. But I do for the one you sent me! (See the video)

The ones you sent me are 5mm. They also have a 2.2V forward Voltage, and are the same color as the ones that I used in the snap kit.

This is the first video in the series. It does cover some of the same ground that I have already show earlier, but it also covers

How to determine the voltage on an LED
Soldering
Which color of LED should I use?

A tale of two A-wings: Part 1: Getting started
 
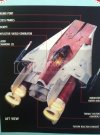
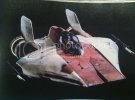
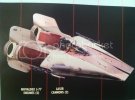
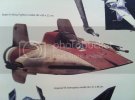
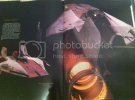
Hey John, I belive that is indeed the studio model on the box. I would go amber but by the following pics you can choose what you want because in some light they look amber and other light look warm white :-\ and I dug through some of my books for refrence for you hope this can be usefull (sorry about the quality scanner's broke and didnt have my camera to hand so these were taken on my phone ::) pm if you want them high res):
3ce0f79d.jpg
dafc1ba1.jpg
f7ea79bb.jpg
1d94be33.jpg
4668f452.jpg
Interesting seeing the cockpit lighted, and here's an awesome site (that your probably aware of) that has tons of hi res pics of studio models.http://www.halstensen.com/
 
Hey G thanks for the info on the Led's!
Yup thats 100% the filming mini for the box art,
there. I can see your dilemma with the color choice
for the Led, it looks amber in some shots as well
as the white. My vote is for amber in the big one ;D
but in the end go for what makes you happy it's your
model! Oh did you say you sent an E-mail
i didn't see it?

Regards,
Michael
 
Merseajohn: Thank you for the photos. They will come in handy! I checked your link, it really doesn't have much about the A-wing, the links I posted earlier have far more photos of the studio model, and the one at Modelers Magic: http://www.modelermagic.com/?p=15969 has about 30 detailed photos of the studio model. Every square inch of her is photographed. The only thing I really don't have clear photos of is the cockpit. One of the links earlier in the thread has them, but the photos are from one of Micheal's models. Not the studio model. Now that doesn't mean it is not accurate, it probably is.

I found out from one of my YouTubers that the studio model was lit up with Halogen bulbs. That would explain the color variations that you see in the photos. If the voltage is a bit low, the color will fade to amber from warm yellow.

I ordered some more of the higher powered LED's from China a few days back. They should be here before I get too far with the engines and I will post side by side photos of them for every one to see. (The warm white, with the amber.) I will make up my mind then.....

But most on YouTube are voting for the Warm Whites....

Now for tonight's update!

I haven't gotten a lot done, but here is what I did do:

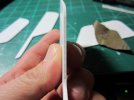
I took the stock parts for the vertical stabilizers and rounded off the edges. This is the part that came with the model:
20120109_1.jpg

I didn't take a photo of the finished part, forgot, Opps... :( But they are nice and rounded over, just like the studio model is.

Then I started working on the panel lines for the stabilizers. To do so I got out my micrometer, and did some measurements. The snap kit is 1/55, Micheal's model is 1/28.614, so I took every measurement from the snap kit and multiplied by (55/28.614) That gave me the measurement I needed for Micheal's model.

Here is an intermediate step:
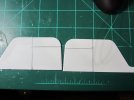
20120109_3.jpg

If you look closely, you can see the rounded edges...

And now they are ready for scribing:
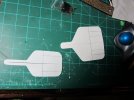
20120109_5.jpg

Tomorrow I start scribing!

And as some of you can tell, my build rate is faster than I post to YouTube. Partially this is because I have to wait three days before I can post another video. This allows all of my subscribers to view the video before a new one comes up and I am not flooding them with videos.
 
Progressing nicely. Very sensible not to release too many videos at a time.
 
Oh and G Guy Cowen's SS A-wing build......his cockpit
and detailing are about as close as you can get to the SS
bird.There are not a lot of great shots down low of her in the cockpit
area.

Small video below.....


Thanks Igard

Micheal: Thank you for the video. It makes sense to not detail out the engine cans until I have the body squared away and know what I am doing with it. The snap kit has the rings go all the way around the engine cans.

Here is where I got the studio model photos from:

http://www.modelermagic.com/?p=15969

This is where I got the idea to do that, and this photo also suggest that they did this with the studio model:

http://www.modelermagic.com/wordpress/wp-content/uploads/2009/09/KG_TOROMODELS_A-WING_STUDIO_MODEL-026.jpg


But I do see your point and it would be much easier to not do what they did. Not to mention, cutting out notches for the stabilizers would NOT be fun.


Here are the best photos I could find on the cockpit:

http://www.modelermagic.com/wordpress/wp-content/uploads/2009/09/KG_TOROMODELS_A-WING_STUDIO_MODEL-012.jpg

http://www.modelermagic.com/wordpress/wp-content/uploads/2009/09/KG_TOROMODELS_A-WING_STUDIO_MODEL-013.jpg

http://www.modelermagic.com/wordpress/wp-content/uploads/2009/09/KG_TOROMODELS_A-WING_STUDIO_MODEL-014.jpg


For those of you who are not familiar with what Micheal is talking about, here is a link to Guy Cowen's SS buildup:

http://www.therpf.com/f10/studio-scale-wing-finished-last-74549/index9.html

That particular page has his buildup of the cockpit.

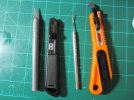
Not much progress was made today. I made an update video to the lighting tutorial, video will be posted tomorrow. And I also reviewed four different scribe tools:

20120110_3.jpg

That video will be up this weekend. Or maybe on Thursday.
 
Here is today's update!!

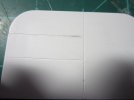
Scribing panel lines:

I used the Tamiya scribing tool. After trying out the four different tools, it was the best of the lot. I will save my conclusions to the video.

Here is my first run of scribing:

20120110_6.jpg

You can see, not perfect but not bad either. I will have to fix this one up later this week.

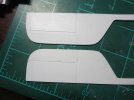
The other stabilizers went much better:

20120110_7.jpg20120110_4.jpg

I developed a technique as I went:

First do not rush, but take your time. Rushing will do nothing but cause mistakes. I knew this starting out, and did not rush these

Second, use Dyno tape to keep your lines straight. Don't reuse it more than two or three times. As you scribe, the edge of the tape gets chewed up and it becomes hard to keep a straight line.

Third, with the Tamiya scriber, do not use downward pressure. Just pull the tool across the plastic. The blade will do the work for you.

Fourth, reverse the direction of your scribe with each pass. This will even out the line.

When I get to the video, it will explain much better.
 
Looks very clean and even, Grendels.

BTW, I've only just realised there was a poll for your engine light conundrum. Didn't see it until it's closed, but I would have voted for warm white. So that's 4-3 in favour of Amber. ;) Not that that makes much difference to your life, but there you go. ;D
 
Well they key to scribing is to understand it's 110% technique
it's something you have to practice. And it's just one of those things
where you have to get your hands to do what your brain wants. The
more you do it the more memory you get for it and your set, it's like
riding a bike.

Looking good G nice scribing you will only get better!
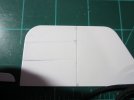
i noticed in the last pic the two horizontal lines coming
off the vertical don't look 90deg for their full run. That
means the distance is off on them from top to bottom.
I used to do this a lot also i learned to check the distances
from using reference points.

For example measure the distance from each end
of the lower horizontal line to the bottom of the
stabilizer, when they are equal then make your
pencil line and scribe. When you get the culmination
of straight and clean mixed with equal distances that's
when they really shine. Like you said you have to do it
slow because there really is a lot to concentrate on!

Your doing well and your learning that's really what
it's about! ;D
 
Igard: If I include in the YouTube votes (2 more votes for the warm white) it tips the scale over to warm white. I have about 1000 LED's coming from China, so I will take a look at what comes in and make a decision about the color then. Right now, I am leaning towards the warm white.

Good eye Micheal. I got out the calipers and measured. The line is off by .1mm. So I will get it corrected. I double checked my measurements when I drew the lines. Using the calipers to measure the distance for both ends to double check.

If you go back and look at the photo, you will see that I didn't score along the line. So what happened is that I didn't get the dymo tape to line up with the pencil marks. So one more thing to fix. But it isn't a major setback, only minor.
 
Ah panel scribing....i actually enjoy that now after all my practice. lol

Keep up the great work dude.

TTFN Matt
 
What I noticed G is that when you look at your work in front of you
you don't see everything. However when you take a picture and just look
at it things will jump right out. That's because your not distracted by
anything in the surrounding space when you look at the pic VS. up
on the bench.
 
BG ,

WoW ! This is really lookin Cool ! Great engineering .. gettin everything laid out .. Good Stuff !!


Can't wait to see more !!
 
Jamaicanmodels69 said:
What I noticed G is that when you look at your work in front of you
you don't see everything. However when you take a picture and just look
at it things will jump right out. That's because your not distracted by
anything in the surrounding space when you look at the pic VS. up
on the bench.

This is why I have hands three and four check over my work. (YouTube reference. For those of you who don't watch my videos, that would be the GF.) She took a look and found quite a bit wrong with the scribing work. She said that it was uniform in depth and width, but not straight in quite a few places. I am slowly getting it fixed and will post photos when done.

Right now I am spending quality time with the old Falcon.....

Thank you Panzerace007 and Maknifiso!

Here is the next YouTube video, this time Soldering the night away.....

A tale of two A-wings part 2: Soldering the night away....
 

Latest posts

Back
Top