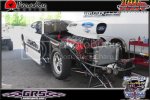
'56 T-Bird Kit Bash Gasser

ScaleDale builds a Quarter Stick in 1:25

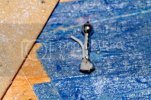
For the transmission I'm using, a Ford C6 automatic from Competition Resins, I need a shifter called a Quarter Stick. It's a short stick with a lever for the driver to select the gears with. They don't make e'm, people, so that's when the scratch gets built, as they say. The shifter is from the donor box and the lever is 0.50mm styrene rod hand glued to the front. I may hand paint it rather than risk blowing it away with my airbrush...
3-15-2525_zps53499c9b.jpg

Dale
 
So this is where I am with this as of now. I got a bunch of aftermarket stuff including an 815 cubic inch Mounain Motor for my kit build. It's resin and 31 pieces. I had a pic but managed to lose it.

I found a better shifter to work from and rebuilt my quarter stick with a reverse lock-out lever on it. I really need to stop wasting my time obsessing on these things. Sometimes I just do things for the sake of proving I can do them..
3-18-1525_zpsc92e5643.jpg

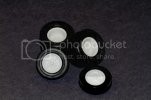
These are wheels and tires from Competition resins. I'm very pleased with the quality of the stuff from them. Having these rear tires and wheels gave me the opportunity to fit the rear end for the first time and it didn't fit the frame so I had to preform surgery on it again.
3-18-2526_zps8ecaef53.jpg

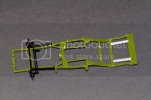
The frame used to be bow legged and now it's knock kneed. I used some thick CA to strengthen the four cuts I had to make, but I decided to scratch build some companion braces to shore it up back there. They are primed and in my drier now. I'll hand paint them and finish them off with the airbrush. I blended plenty of paint when I first did the frame. I call the color Black Lagoon green.
3-18-3001_zps575f7041.jpg

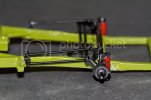
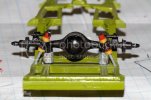
My big accomplishment was getting my front end finished. I got everything trimmed and glued with modeling cement and the axel promptly fell off, so I went with a drop of CA on each of the joints for the steering cross members. With all the tie rods and things this is delicate and handling it scares me. I have a shoebox that I keep it in when I'm not working on it.

That's all for now.

Dale
3-18-4002_zps7d821da7.jpg
 
Great work with the shifter Dale. I'm really looking forward to seeing this Bird come to life. Keep up the great work!
 
Thanks for all the comments. Things are moving along well here. As soon as I have a rolling chassis stuck together, I'll know how much I need to trim out the rear wheel wells and then I can get more done on the body. Building so much from the ground up is an interesting challenge, it really teaches you how interrelated all the systems of a vehicle are. Gotta get one done to a certain point before you can get another done to a certain point and so on and so on... See you all soon. Thanks again.

Dale
 
Time for an update on my build. I have been working on the engine and doing a lot of research this week. I decided to add some contemporary features to this car like a front spoiler since the NHRA doesn't run the old gas class anymore. This car would probably be in the Super Gas or Pro Modified class in today's drag racing. I looked up the transmission that came with the Mountain Motor that I got and it is a clutchless stick. It has a clutch for the starting line, but from then on it's more or less a bang it through the gears operation, I found a reference on-line and scratch built a shifter for it. The transmission is sprayed in Alclad magnesium.

Pile-o-parts. 31 piece Gibson resin "Mountain Motor" 815 cu in.
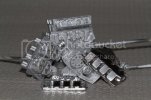
3-24-2002_zpsc65b9c1c.jpg
My version of the gear banger stick shift on the resin tranny. The 1:1 insert is a Pro Stock transmission. I'll scratch the rods when it's installed.
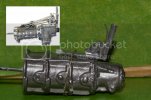
3-24-1_zpsc015077b.jpg
More tiny shocks. I faked some air shocks by wrapping some donor shocks with Tamiya masking tape and coating it with CA. I rebuilt the spring shocks yet smaller with tubes and 1.3mm rods I found at tacoma Trains and Hobbies. I wrapped them with slivers of electrical tape to cap them off with and sealed them with CA. I will be able to assemble my full suspension as soon as I finish painting my wheels. I messed up the rear ones and they are in the Purple Pond as we speak. I have a love/hate relationship with Alclad.
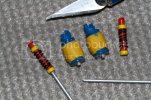
3-24-7007_zps80a28798.jpg
Installing the transmission tunnel meant modifying the roll cage. Read cut and glue. Cut and glue...
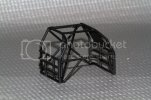
3-24-5005_zps2ba8be41.jpg
This is the "interior" it's the drivers box from a 1956 Thunderbird with the dash roll cage and firewall of a NASCAR late model Thunderbird (Mark Martin) and the transmission tunnel from a 1970 Mustang. Oh, and some scratch build here and there, too.
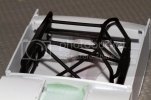
3-24-6006_zps7838b22a.jpg
The underside of the tub with the rear opened up to fit the drag slicks. Lots of scratch build here. If you look, you can see one of several "cranky welds" I used. If you try this ever, please spend the $20 USD on the battery operated solder gun Dr. Cranky uses in his video on this. If you want to know about using a regular solder gun on plastic, the ring finger of my right hand will be having a press conference in a week or so...
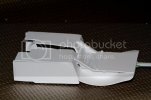
3-24-4004_zps8c31aaba.jpg
The flip side of the question. I have since Dremeled out the firewall so that the bell housing of the transmission can sit nice and tight to the rear with the engine as far back as possible.
All this is now in my paint dryer a nice bright red. It'll go great with the swamp green frame..Got some body work going this week and might be able to show you a mock up in a week or so.
3-24-3003_zps2792f204.jpg

Cheers!
Dale
 
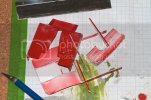
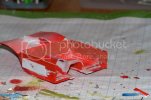
Thanks for the comments. I messed with Don Yost's cut enamel thing when I painted the undercarriage this morning and the result is a bit on the outrageous side. Screaming bloody red. I'll post a pic when it sets up a bit.

Dale
 
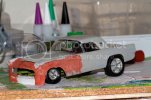
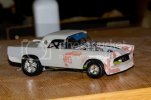
Things got a little nuts down in the shop this week. I got the frame set and leveled and comped it together with the body and it set to high for my taste so I redid the suspension to lower it. It was still to high so I took my razor saw and knife to it and cut a 4mm channel the length of the interior box to bring everything down as far as possible. The result was a pile of plastic and I thought I was up for an early exit from the contest but I managed to file and scratch it together so that everything fit fine. I’m pleased with the look I’m getting here.
3-28-1008_zpsbe0aae9e.jpg
3-28-2007_zpsf42c38bf.jpg
The tires are for a mock-up only. A week ago I didn't know the difference between CA and Super Glue and now I have a box full of the stuff. And a release agent...
3-28-3009_zpscb0ff081.jpg
This is the rear suspension I wound up with. Every time I work on it it turns into something else.
3-28-4010_zps457e4006.jpg
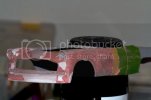
I got serious on sanding the body work and had to shower the Bondo dust off. Going for a flat look for the front by filling in all the curves of the stock ’56. I have an interest in making the front end flip up by hinging it at the bumper but I’m worried about cutting a rare kit. As if I haven’t already done so… The tape on the back is to protect the body from any overzealous sanding. Like that never happens...
3-28-5011_zps2207f473.jpg

Thanks for the time. I'll show you a finished chassis and one big motor next time.

Dale
 
Happy holiday if you celebrate today in your part of the world or in your particular faith.

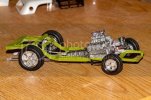
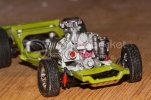
I wanted to complete my first month of work on this project with a free standing chassis and motor and was able to get that in. Coming up with motor mounts was difficult, so I just scratched together what I could to make it fit the frame and still be removable. I’d like to keep the key components seperate until the whole thing is ready for final assembly.


3-31-1011_zps3bf6ce89.jpg

It’s a really tight fit, but it goes in. The motor required that I cut into the firewall and I need to just chuck the dash and stock firewall and scratch build one more suitable to a drag race car. I have the set-back part of the firewall done and setting up. It still clears the roll cage and seat.

3-31-2012_zps9cc69a88.jpg

The motor is huge, a resin 815 cubic inch “mountain motor” from Ross Gibson Engines. In the 1:1 world they are built by companies like Precision Motors, Medina and Sonny’s and turn out 1200 hp on gas with carburetors. It’s not the best in terms of a clean, smooth casting, but it’s an engine block so I didn’t expect it to look like polished chrome. Some of the parts are meant to be steel and chrome but I just couldn’t get them smooth enough to take a good gloss from Alclad so I went with a darker finish. The cylinder on the right side of the engine is an external oil tank. It should be bright, polished aluminum but the pits in the resin prevented the finish from taking any gloss. The light red on the faceplate is a boo-boo. The radiator and fuel tank should help hide it. I’ve never detailed an engine but will add wires and some hoses to this. I’m a bit tight about that because drilling resin is a tad unforgiving.

3-31-3013_zps082d0349.jpg

Thanks for stopping by. Enjoy your own building.

Dale
 

Latest posts

Back
Top