'56 T-Bird Kit Bash Gasser

scaledale

New Member
Joined
Nov 23, 2012
Messages
91
My entry. This will be my first contest build since I won't say when... ;D

My entry photo. The main kit is the 56 Tbird and the 41 Willys will give up it's chassis and the 70 Mustang will donate a Boss 429 motor. The AMT Double Dragster has fyle tanks and stuff like suspension parts.
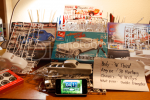
ContestEntryScaleDale515_zpsfbd7731f.png

My inspiration. Found this on the Net while doing research for this project. I was a drag strip photographer in Michigan in the late '60s and one of my favorite cars was a 56 or 57 Thunderbird that ran a 289 or 302 engine and ruled the competition. The owner ruined the car by turning it into a flip top Funny car with a ford Hemi that he never could get to run right.
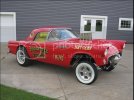
TbirdGasser04_zps93f20e67.jpg

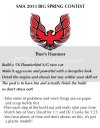
My "Sanity Crede"
SMAPoster_zpsea95e668.jpg
Wish me luck

Scale Dale
Gum and Tape (G/T) Engineering
 
I got organized and started last weekend so here is where I am so far. Lost... 8)

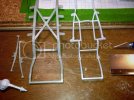
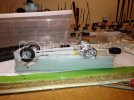
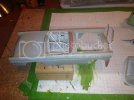
This is what I call FrankenFrame before the "experiment" That's the stock 56 T-Bird frame on the left and a 41 Wullys on the right. I chose the 41 for light weight and strength and needed to keep part of the Tbird for the body hangers and such.
FrankFrame1_zps8a8e61da.jpg

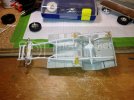
The frames after the experiment comped together with water based glue in the chassis of the 56.
FrankFrame2_zpsd88a25cd.jpg

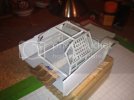
This is my first test fit of FrankenFrame in the Tbird body. I need to move the front axel crossmember back to center the front wheels better and move the rear leaf springs in. The wheels for the drag slicks are a lot wider than the stock Mustang wheels I used for the mock-up. I'm going to have to cut the rear wheel wells open and I'm not looking foreword to that. I had to order this kit from the East Coast.
TestFit_zps048a54b6.jpg

I decided to add a contemporary touch with a front air dam and started to scratch build it from sheet styrene. I used the thin stuff in layers to bend around the corners of the front end smoothly and I'll finish it off with Bondo. Looks nasty.
AirDam_zps246ce0c2.jpg

This little radius rod on the top cost be a ton of grief on Saturday. It shot across my bench with a Ping! when I clipped it off the sprue and vanished into a black hole. I spent an hour or so looking for it before giving up and fabricating a pair of new ones. So this morning I'm going through the Mustang box (which was covered-one of Scott's shoeboxes, at that) and what do I spy??? You go figure that out. PM me the answer and I'll email you two scratch built radius rods. j/k
RadRod_zps85cd14a0.jpg

Enjoy.

Dale

G/T Engineering
 
Picked up a sponsor. Just kidding...

Post_zps158a7b76.jpg

Back to the shop.

Dale
 
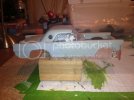
Time for an update on this. I did some work while under the weather and that wasn't such a good idea. It's a wonder how a good of primer can show the defects in body work and sanding that wasn't done very carefully. Good thing there is a good supply of Purple Power in my shop. I made some fine adjustments to the frame to fit the wheelbase better and re-did the joints between the Willys and T-Bird frames with a new crossmember to support the transmission. I got the 429 block assembled and sprayed with Alclad Gunmetal and I like the way it pulled out the details in the motor castings. I have a resin c6 transmission transmission coming from Competition Resins and will decide if I want to saw the stock stick off or not when it gets here. Here are some pics and other notes.

3-10-1515_zpsc4cf2402.jpg
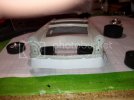
The mock-up so far. I got the rear wheel wells cut out with only a few minor scratches. I will probably have to round them out to fit the drag slicks. The top fits the modified interior pretty good.

3-10-2516_zps2bf8bff6.jpg
I found a Mark Martin NASCAR Thunderbird on the shelf at Discount Models and hacked it up for a roll cage and dash. I used a bunch of scratch styrene rod for the cage and put the instrument panel of the NASCAR on the dash of the 56 and sectioned it to fit with the cage in place. The roll cage required a lot of mod work to tweak it from a circle track to straight track configuration.

3-10-3517_zpsc1e63cfa.jpg
I gave up trying to make the interior panels from the 56 fit the hotrod junkyard of an interior of this thing so I built my own from scratch.

3-10-5519_zpsca56abb4.jpg
The 429 Boss Ford Mustang block done with Alclad II Gunmetal.

3-10-6520_zpsdb128ef6.jpg
I'm redoing the rear suspension and need to extend the shocks, so I used a Dremel and sanding stick as a lathe to turn down the tip of a styrene rod and drilled out the end of the shock with a pin vise and very small drill bit.

Off to the shop!

Dale
 
ScaleDale builds a ScottShock.

I was stuck on a rear shock treatment for my build until I went through Scott's Big Rig Rat build thread and saw his screw and wire treatment. I messed with the idea and ditched the screw and lowered the wire gauge to keep the scale correct for my thing. I got a micro pin vise kit in the mail today and had the last part of the puzzle, so here we go...
3-14-1520_zpsc242d107.jpg
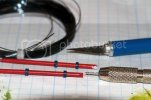
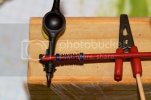
All the materials and tools I used. The drill bit isn't the smallest one in the kit by a long shot. The styrene rod is 1/16 in. or something like that.
3-14-2521_zps9341ab1b.jpg
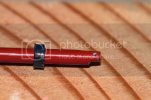
I filed one end of the rod down to make an end cap thing and drilled a hole to take the little nib on the shock mount on the axel brace. The rings were trimmed off of a styrene tube by spinning it in a drill bit and pressing a hobby knife against it. Only lost one in the process. They were a bit too tight after painting the rod, so I used a poor man's heat gun (wives hair dryer) to open them up a bit.
3-14-3522_zps3650abf6.jpg
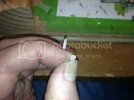
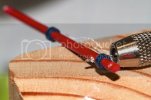
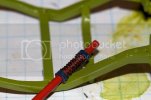
I drilled through the rod to anchor the wire for the first turn. The drill is so small that it looks huge in this photo. worked like a charm.
3-14-4523_zpsbb3acf24.jpg
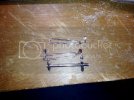
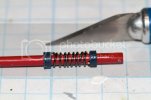
The finished shock. I was going to Super Glue it, but I think it will hold fine as is. Not as evenly spaced as Scotts being done free-hand, but it's in better scale for my application and I can squish it up if I need the spring to be more compact. I'm not concerned with the overall length at this time, I'll trim it down when I have the frame assembled and know where the rear axel will stand. I got aftermarket drag slicks in the mail today and they are seriously huge. Either I need new wheels or tires. The joys of building outside of the box...
3-14-5524_zps6113651f.jpg
With FrankenFrame.
3-14-6525_zpsc7943d66.jpg
With my back axel. I tried to balance it in place but it kept falling off the brace. My nerves are a little shot from building at this level of detail. I'll do the other one tomorrow.

In case you're wondering, I took these photos with one of those lenses that they use to photograph bug eyes with. It's called a macro.

Dale
 
I like your springs. One thing you could do if you wanted them evenly spaces is run a second piece beside the 'keeper', twisting them both (but only one is 'in the hole'). Once twisted just remove the 2nd piece but bending/unthreading. That second piece acts as a spacer keeping it uniform.

Just a thought. I like em.
 
I'm going down to make the second one now. I'll give that a try. Nice and simple solution.

Thanks, Dale
 
ScottShock II Double Wrap Edition.

3-15-1525_zps0b8be078.jpg
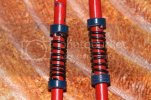
The shock on the left was done with two wires held together like Scott suggested with one slipped through the hole and the other going along for the ride to provide an even spacing for the coil. It did help, but not enough at this scale to bother redoing the first free-hand one. Holding the wires together without twisting was difficult for these old hands and keeping my stress level down is important in this build. I'm actually impressed with myself considering that I haven't scratch built anything in, like 50 years...

Back to the shop.

Dale
 
Cool. Like I said, they do look right on. I really like the hole idea, makes sense and finishes the top off nicely.
 

Latest posts

Back
Top