Ravhin
New Member
- Joined
- Aug 21, 2012
- Messages
- 332
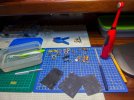
Here's my next challenge, a giant mecha fox from Kotobukiya's Highend Model Master line of model kits ;D.

Without further ado let's take a look at the parts.
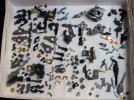
It's not a big kit, I would say that it's more or less the equivalent of a small master grade for those that are familiar with those kits , still it has quite a bit more detail and intricacies than most gundams, which obviously comes with a cost.
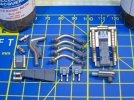
Leg axles
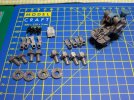
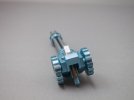
All these parts make the axles where the legs will attach with the body. Even though they will never be seen those "disk brakes" (or whatever they are) are quite detailed. The torso is made in a somewhat smart way since it doesn't have any seam line, which I find curious as most of it will be covered by the armour and the rest of the body and legs. Regardless this means that the blue section on top, where the gun will attach can be painted without worrying with masking when it comes time to paint the body.
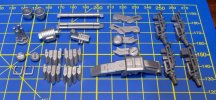
The cockpit
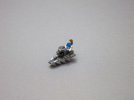
The poor guy doesn't have a proper chair but it does have a sort of console. The figure comes pre painted and I'm not going to bother with him. For now, figures (specially such tiny ones) are out of my league.
Left side of the head
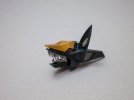
The head is sexy and certainly foxy . One thing I don't understand is why Kotobukiya bothered moulding the inner section of the ears separately.To have the inside of the ear in the proper colour masking is still needed so this strikes me as useless.
Right side of the head
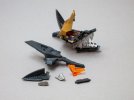
The fit for the pilot is incredibly tight, I would certainly not want to pilot that thing is such a cramped cockpit.
Some care is needed to have everything going in the right place in the right way or else the halves won't join properly. For some places of this assembly I will certainly be using some glue as they don't give me too much confidence.
Front Leg
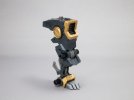
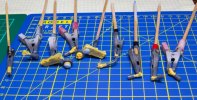
Sexy leg, but it's possible to see here some of the most annoying seam lines, in the armour below the vent and in the frame at the joint area. Though I didn't take a picture of the back side, it suffers from the same problem, also the feet and the anchors also have seam lines that will need to be filled. The fit is tight and very precise so a little bit of tamiya extra thin will do the trick but for the armour, masking will be required.
Also note that the knee disks are moulded in blue and will also need to be painted in the appropriate colour. This happens on all four legs.
Front Body
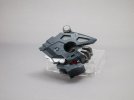
The only place where we are given separate parts for the meshed areas
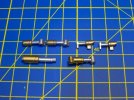
Gun
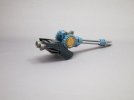
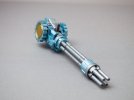
The fox is not heavily armed but that is one cool looking weapon. Not clear in the picture but the main part of the barrel, behind the 4 tubes, must go in before closing the light blue halves that make up the support structure. Unfortunately these blue parts have seams to fix, so I will have to either use a lot of masking or I'll modify the part in order to be able to slide the gun inside the structure. I will most likely mod the piece, it's not a complicated procedure in this case.
The neck
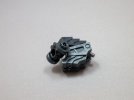
Good range of motion, no visible seam lines, but those disks need to be gold, while the inside is still blue. That will be fun, I like masking circular areas.
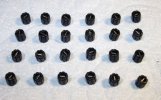
Some details more details
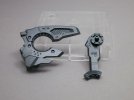
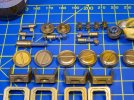
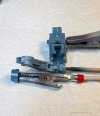
To finish just a close up on two parts that show two of the main characteristics of this kit. One of those is the detail, there is allot that one can do to bring more life into this plastic. On the other hand some of those details really need to be worked on to have the proper look like the disks in the leg armour and the mesh that exists all over the body.
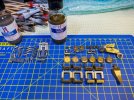
Next steps will be painting the piping as well as the golds and silvers before tackling the main body sections and armour as well as start fixing some seams in the inner body parts.

Without further ado let's take a look at the parts.

It's not a big kit, I would say that it's more or less the equivalent of a small master grade for those that are familiar with those kits
Leg axles

All these parts make the axles where the legs will attach with the body. Even though they will never be seen those "disk brakes" (or whatever they are) are quite detailed. The torso is made in a somewhat smart way since it doesn't have any seam line, which I find curious as most of it will be covered by the armour and the rest of the body and legs. Regardless this means that the blue section on top, where the gun will attach can be painted without worrying with masking when it comes time to paint the body.
The cockpit

The poor guy doesn't have a proper chair but it does have a sort of console. The figure comes pre painted and I'm not going to bother with him. For now, figures (specially such tiny ones) are out of my league.
Left side of the head

The head is sexy and certainly foxy
Right side of the head

The fit for the pilot is incredibly tight, I would certainly not want to pilot that thing is such a cramped cockpit.
Some care is needed to have everything going in the right place in the right way or else the halves won't join properly. For some places of this assembly I will certainly be using some glue as they don't give me too much confidence.
Front Leg

Sexy leg, but it's possible to see here some of the most annoying seam lines, in the armour below the vent and in the frame at the joint area. Though I didn't take a picture of the back side, it suffers from the same problem, also the feet and the anchors also have seam lines that will need to be filled. The fit is tight and very precise so a little bit of tamiya extra thin will do the trick but for the armour, masking will be required.
Also note that the knee disks are moulded in blue and will also need to be painted in the appropriate colour. This happens on all four legs.
Front Body

The only place where we are given separate parts for the meshed areas
Gun

The fox is not heavily armed but that is one cool looking weapon. Not clear in the picture but the main part of the barrel, behind the 4 tubes, must go in before closing the light blue halves that make up the support structure. Unfortunately these blue parts have seams to fix, so I will have to either use a lot of masking or I'll modify the part in order to be able to slide the gun inside the structure. I will most likely mod the piece, it's not a complicated procedure in this case.
The neck

Good range of motion, no visible seam lines, but those disks need to be gold, while the inside is still blue. That will be fun, I like masking circular areas.
Some details more details

To finish just a close up on two parts that show two of the main characteristics of this kit. One of those is the detail, there is allot that one can do to bring more life into this plastic. On the other hand some of those details really need to be worked on to have the proper look like the disks in the leg armour and the mesh that exists all over the body.
Next steps will be painting the piping as well as the golds and silvers before tackling the main body sections and armour as well as start fixing some seams in the inner body parts.

