1/72 Lancaster Mk 10 SAR
- Thread starter Carsenault
- Start date
Carsenault
Member
- Joined
- May 7, 2009
- Messages
- 846
I have found at least 1 clear photo of KB889 taken from the starboard side, the picture is small but it definitely shows no window present at the mid section, or maybe the window was painted over. Still not sure about the port side. Oh well, if I omit them both, I`ll be at least half right. I did manage to punch out the windows that I had previously puttied over. I sanded them down, then polished them up and re-inserted them, that looks better to me now.

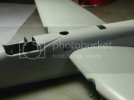
A fellow ARC member showed me how to creectly represent the patched over dorsal turret hiole on the Canadian Lancasters. I was simply planning to scribe a circle where the turret would have been. On the real deal, the disc would overlap the edge of the hole. So once I had puttied and sanded the seams, I cut out a disc of sheet styrene and thinned it out before placing it in position where the turret hole would have been on the Lancs. Once the glue had taken hold, I sanded some more til I was happy with the thickness of it. Tomorrow Ill tackle the re-inforcing strips that should be there also. Ill take some pics of that once Im all done.

A fellow ARC member showed me how to creectly represent the patched over dorsal turret hiole on the Canadian Lancasters. I was simply planning to scribe a circle where the turret would have been. On the real deal, the disc would overlap the edge of the hole. So once I had puttied and sanded the seams, I cut out a disc of sheet styrene and thinned it out before placing it in position where the turret hole would have been on the Lancs. Once the glue had taken hold, I sanded some more til I was happy with the thickness of it. Tomorrow Ill tackle the re-inforcing strips that should be there also. Ill take some pics of that once Im all done.
schweinhund227
New Member
- Joined
- Jun 24, 2009
- Messages
- 2,511
When I served in CFS Alert ! There was one of those... Crashed behind the Maintenance building...
The Big engines and wings and part of the rudders were still visible.... you could still see the Reddish paint on the wing tips... even after 40 odd years...
will be looking at this build for sure.... Keep up the good work
The Big engines and wings and part of the rudders were still visible.... you could still see the Reddish paint on the wing tips... even after 40 odd years...
will be looking at this build for sure.... Keep up the good work
Carsenault
Member
- Joined
- May 7, 2009
- Messages
- 846
schweinhund227 said:When I served in CFS Alert ! There was one of those... Crashed behind the Maintenance building...
The Big engines and wings and part of the rudders were still visible.... you could still see the Reddish paint on the wing tips... even after 40 odd years...
will be looking at this build for sure.... Keep up the good work
Im pretty sure I've seen a picture of that one while researching this build. My next CAF Heavy aircraft model after I finish the Lanc and the Globemaster will be a tribute build of the CC-130 that crashed at Alert, using the Italeri 1/72 kit and custom decals from CanMilAir.
Carsenault
Member
- Joined
- May 7, 2009
- Messages
- 846
A member at ARC informed me today that I may have made a small error on my conversion so far. Turns out the windows at the rear of the fuselage were not flat panes, but rather cylindrical shaped on the SAR Lancasters. I may try and fix that before its too late in the build to do so. Another feature of the SAR Lancs is a barrel shaped radome located just behind the bomb bay doors. I didnt take any pics tonight, but I managed to make a close facsimile of the ventral radome using a 1/48 Eurofighter external tank and an unused part from the lanc kit as a plug. Once it was all glued together and the glue had set, I chucked it, that is, I mounted it on a nut driver and spun it on a 12 cordless drill while I sanded the shape. Its not perfect, but it looks the part.
Before I started with the primer coat, I discovered that one of the canopy side inserts had somehow gotten detached and had set slightly inside the main canopy greenhouse. For some reason, the Revell Germany clear parts don't seem to work well with the Tamiya extra thin, I had issues attaching all the clear parts. Anyways, I had to break the part loose and attach it from the outside.
I did a better job than I thought with the seams, as only a few were visible underneath the fuselage once the Mr Surfacer primer coat was applied, a little light sanding should fix that. A few panel lines need to be fixed, then I should be able to start painting.
schweinhund227
New Member
- Joined
- Jun 24, 2009
- Messages
- 2,511
Just make sure! Your surface is polished to perfection! Or any discrepancies will shine thru!
Just saying! silver paint can be your enemy.... It shows everything.....
Love the project! BTW
Later.....
Just saying! silver paint can be your enemy.... It shows everything.....
Love the project! BTW
Later.....
MilitaryAircraft101
New Member
- Joined
- Apr 4, 2011
- Messages
- 454
This is so much nicer than the 60s Airfix Lanc... 8) But anyways... Nostalgia *cough*
Carsenault
Member
- Joined
- May 7, 2009
- Messages
- 846
still plugging away at this one slowly. Had a shoulder injury thats kept me sidlined for a bit plus we moved to a new apartment weekend before last so not much modling getting done. The shoulder injury is making it hard for me to do any work on the model right now as its my good arm that is affected so I can barely raise it. AS a result,I will be cutting a few corners from now in an attempt to get it completed on time.
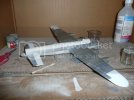
Here's where its at now with a well cured coat of white primer. Nexxt step will be to mask off a few areas then start the Alclad II ALuminium sections.

Here's where its at now with a well cured coat of white primer. Nexxt step will be to mask off a few areas then start the Alclad II ALuminium sections.

Elm City Hobbies
Active Member
- Joined
- May 7, 2009
- Messages
- 3,239
Hey Charlie,
How did you like the white primer? Haven't tried it myself yet...but I find the Grey and the Black very good, the black especially!
How did you like the white primer? Haven't tried it myself yet...but I find the Grey and the Black very good, the black especially!
Carsenault
Member
- Joined
- May 7, 2009
- Messages
- 846
Elm City Hobbies said:Hey Charlie,
How did you like the white primer? Haven't tried it myself yet...but I find the Grey and the Black very good, the black especially!
I havent quite found the perfect solution yet. My weak arm isnt helping matters either. I do find it tends to dry up on the needle so its important to give a quick shot of air pryior to passing it over the model. It does level off quite nicely though and dries dead flat. I had the vertical tail primed prior to the move and I did a coat of Alclad Aluminum over that, it looks quite nice.
MilitaryAircraft101
New Member
- Joined
- Apr 4, 2011
- Messages
- 454
Nice, looks good under a coat of primer 
schweinhund227
New Member
- Joined
- Jun 24, 2009
- Messages
- 2,511
Getting there..... Feels good to have it under some Paint hey ???
Those SAR decals will make it come to LIFE .... HOOT !
take your time.... lots of time left !!!
Those SAR decals will make it come to LIFE .... HOOT !
take your time.... lots of time left !!!
Carsenault
Member
- Joined
- May 7, 2009
- Messages
- 846
schweinhund227 said:Getting there..... Feels good to have it under some Paint hey ???
Those SAR decals will make it come to LIFE .... HOOT !
take your time.... lots of time left !!!
Thanks.
Lots of time left for the SMA contest, but I also have it a san entry in the Canadian Wings GB at ARC which wraps up June 1st and Id like to have it on the contest table at CAMS on May 28th as well.
Carsenault
Member
- Joined
- May 7, 2009
- Messages
- 846
Thanks. Will see what i can do.
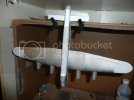
I got the first shade of Alclad on today, just the regular aluminum shade. Started off holding the airframe low against a back drop, but my arm was beginning to give out even before I was half done. I was able to suspend the model by the masked leading edges of the horizontal stabs, then I switched my grip up. using my left hand instead, that was awkward so I tird something different. Anyone here who has watched any of Brett Greene's airbrushing videos will know what I mean, but I held the airbrush like he does, kinda like youd hold a TV remote control, and in my left hand as well, that was actually a lot easier than I expected it to be. I got a pretty decent finish, Ill let it set up for a day before I mask off the other areas. Basically Ill use either Testors or Tamiya Chrome silver for the engine nacelles and surrounding area, then tamiya flat aluminum for the ailerons. That will leave the day glo red and flat black areas for last.
I got the first shade of Alclad on today, just the regular aluminum shade. Started off holding the airframe low against a back drop, but my arm was beginning to give out even before I was half done. I was able to suspend the model by the masked leading edges of the horizontal stabs, then I switched my grip up. using my left hand instead, that was awkward so I tird something different. Anyone here who has watched any of Brett Greene's airbrushing videos will know what I mean, but I held the airbrush like he does, kinda like youd hold a TV remote control, and in my left hand as well, that was actually a lot easier than I expected it to be. I got a pretty decent finish, Ill let it set up for a day before I mask off the other areas. Basically Ill use either Testors or Tamiya Chrome silver for the engine nacelles and surrounding area, then tamiya flat aluminum for the ailerons. That will leave the day glo red and flat black areas for last.
Carsenault
Member
- Joined
- May 7, 2009
- Messages
- 846
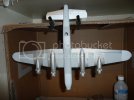
First big paint reveal... Finished the major painting this morning and pulled off all the masking tape. I had a bear of a time with the Tamiya Titanium Silver paint I used for around the engine nacelles, I could not get a decent thinner ratio, no matter what it kept gooping up and clogging my ab. I eventually just switched to the medium needle and nozzle set and bumped up the air pressure. Wasnt pretty, but its on there. needs some sanding before I do the clear coat. I still have some detail painting to do, maybe over the weekend.
ps: Really trying to resist the urge to paint the navigators dome up like R2-D2.


ps: Really trying to resist the urge to paint the navigators dome up like R2-D2.


schweinhund227
New Member
- Joined
- Jun 24, 2009
- Messages
- 2,511
Now that I see it !!! Painted... I want one !
Great job... love the variation in tones...
Keep going !
Great job... love the variation in tones...
Keep going !
Grendels
Active Member
- Joined
- Nov 24, 2009
- Messages
- 9,092
Carsenault said:ps: Really trying to resist the urge to paint the navigators dome up like R2-D2.
LOL I so would not count that against you in the contest!!
Similar threads
- Replies
- 30
- Views
- 5K
