1/48 Tamiya Mustang

rookie

This is not a toy
Joined
May 18, 2012
Messages
937
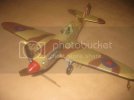
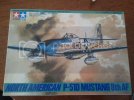
Thought I'd have a crack at this, the ol' Mustang. My Father in Law picked this up for me in Japan, cost about $15 AUD... nothing like going straight to the source.
2012-06-02112048.jpg

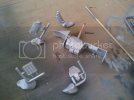
wont bore you with the sprue pics etc as I'm sure youve all seen them countless times. Actually started this a about a month ago. As per standard operating procedure started with the cockpit, basecaoted evrything with flat aluminum. I thought this might work well as chipping effect as naturaly handling the painted pieces took off little bits of paint here and there.
2012-06-02123117.jpg

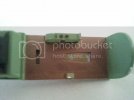
Saw a couple of refernce pics, the floor seemd to be a dark cherry colored wood, the closest I had was Nato brown which didnt look quite right. I tried Chris S's technique of lightly brushing burnt umber over the top and it toned it down nicely, not that evident in the pic but has a slight wodd grain effect. Thanks Chris :)
2012-06-17163501-1.jpg

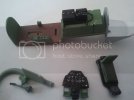
Got a few other bits and pieces painted, nearly went cross eyed doing the instument panel...used a tooth pick to highlight the instrument surrounds. Anyone got any other techniques ? Wasnt that pleased with the end result so would appreciate any other ideas on how to do this for next time. I brush coated everything with Future and will try and get some kind of oil wash on it tomorow.
2012-07-07130954.jpg

I picked up a pot of Tamiya acrylic Gloss aluminum, I am thinking of using this for the main fuselage color. Ha sanyone used it before that can comment on the finish ? I've read that Acald is the go for alloy finish but dont want to step too farout of my comfort zone as the Tamiya acrylics have been kind to me so far.

Advice welcomed as always
 
Thats a great kit for sure. I've built one a while back and have 2 more waiting in the stash. Sounds like these things can be had for a steal in Japan. There is a bit of a debate going right now at another site about the interior colors of the P-51D. The general concensus is "interior green" though some maintain that is a darker color called "bronze green". I like the interior green option as it makes more sense to me since it was so widely used in the 40's and I already have a bottle of it, plus its quite easy to make slight tint variations by mixing "yellow zinc chromate" and flat black. One thing about the wooden floor, any pics of Mustangs floating around with wood floors are more than likely restored aircraft. Yes, they did have plywood floors, but these were generally not made with high quality plywood. Remember that these were made as fast and as cheep as possible so the plywood floors were very likely made with construction grade materials. These were also painted over in flat black. The paint would normally wear away along the path of the rudder pedals and maybe in a few other spots where the pilot would step into the cockpit. The 2 little circles on the floor represent fuel guages. They wont be very visible in the finished model, maybe just paint the centres in gloss black and do a little drybrushing on the raised detail. The armor plate behind the seat from what I know was normally painted interior green with a black head rest. I have seen others done all in black, again, interior green makes more sense to me here. The seatback cushion is actually a life raft... should be painted an orangy yellow color.

Wondering what markings you will be using and weather you will be depicting a wartime aircraft or a modern restored aircraft. The gloss aluminium color would be better suited to a modern restored aircraft. But the wartime Mustangs were generally more subdued. Tamiya's own mix of equal parts X-11 and XF-16 should do. You could maybe even vary the finish a bit by doing odd panels in slightly different shades. One last thing, this is about the wings. These were prepped and painted at the factory by filling most of the rivets and panel lines with putty, sanding smooth then painted over with silver paint. This was done to most of the wings upper and lower surface wth the exception of the flaps, ailerons, gun/ammo covers, fuel filler caps, landing gear doors armor plating and wingtips. This was done to mainting as smooth an airflow over the wings as possible, the smoother the airflow, the faster they go. Under daily use, these would generally wear away a bit and the lines and rivets would start to become more visible.

I've rambled on enough.. There are plenty of decent refs out there and lots of great builds posted at many sites like ARC and Hyperscale, even right here at SMA, look for Merseajohn's Tuskeegee Mustang build in the group build section. Enjoy the build, this is one of the best Mustang kits available, builds up very nicely and is well detailed right out of the box. Looking forward to following your progress. Cheers.
 
Thanks for all the tips, spent a bit of time debating the interior color myself, even bought a pot of yellow green chromate but deiced it looked a little too much like baby vomit and decided to stick with the interior green. Good call on the fuel gauges, was wondering what they were, I'll sort that out tomorrow. I'm thinking I will go with the markings straight form the box art.

I got this link form a previous post on this site but thought I'd put it up again just coz its so darn cool, a good example of a fully restored Stang cockpit...

http://www.stclairphoto-imaging.com/360/P51-Mustang/P51_swf.html

I Checked out Merseajohns red tail, wow, I'd be happy if I could get something even closely resembling that! So I think preshading the panel lines will be in order, another technique I've yet to try...

Cheers
 
That is a cool 360 view of the Mustang "Office". great references actually. Glad I could help ya out. If you have any questions, feel free to fire away. I'll answer them if I can. If not Ill try and steer you in the right directions.

ps: There is a really nice aftermarket decal sheet out there that features a really nice Australian WW2 Mustang, with the RAF style camo, and a blue rudder with the Southern Cross on it. if I can find the link, Ill send it your way.
 
Nice start on the Stang :) cockpit is coming on good . Glad the wood trick was useful to you . I havent used The Tamiya gloss aluminium ,interested in seeing how it works out .

Keep it coming ;)

Chris.
 
Hey Rookie,
Great start out of the box.
Those decals look very similar to the markings on the
Aeromaster/Eagle Strike set, that you posted a link to.
The dark green for the Mustang is plausible for sure, in
the interior. You could use it some other time for something different.
One question. Which P-40 kit is that? I am starting to
get that bug. A couple of those builds recently.
 
Thanks for the comments, Peppy thats the Academy African Aces Kit.

Well made a little more progress today in between working on the Chev Bel Air with my son.....I wish there was more Sundays in the week .

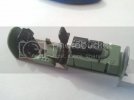
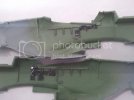
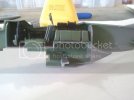
Got the cockpit put together and applied a wash aroung the inner walls do give it a little more depth

2012-07-08140959.jpg
2012-07-08140937.jpg

Time to get this thing closed up

2012-07-08150140.jpg

As expected the Tamiya kit went together nicely there will only be minmal wotk on the seams etc..

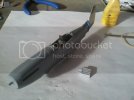
Just when I was feeling pretty chuffed with myself for a nice days work, I found this floating around in the box... :'(

2012-07-08154106.jpg

Not to worry there is an option for the cooler flap to displayed closed, so I guess thats one decsion I dont have to make ...lol

2012-07-08154212.jpg

Thanks for looking
 
Looking great Rook!! The office looks really nice!! Keep it going!!! ;)
 
rookie said:
Are these the declas you are talking about ?

http://www.modelkitsonline.com.au/pages/main/moreDecals.php?Key=3160

very cool, wasnt even aware that the RAAF had them in service...

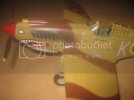
here is a couple of pics of my aussie themed Tomohawk, love the kangaroo!

143-2.jpg
142-2.jpg

Hmmm, nope didnt know about that one, but I like it. The one I was refering to is an Xtradecals sheet, the 1/32 scale version is reviewed over at hyperscale. Im pretty sure I have seen a 1/48 version, but Im not sure where. There were 2 P-51Ds on that sheet from 3 Sqn RAAF as well as a few others from the RCAF (442 Sqn)

That Tomahawk is really nice. Well done. I have the AVG version of that kit with some aftermarket decals and a resin cockpit in the stash. I'd love to get my hands on a newer tooled version of the Early P-40s some day.
 
Coming along nicely. If it's comforting you i always forget to add something when closing halves or even more often i forget to drill holes in wings before i join upper and lower part... ;D

Cheers!
 
Got most of it put together yesterday, needed some filler around the wing root, used correction fluid ( thanks Chris ) worked a treat !

2012-07-15144439.jpg

Had a go at preshading, put I nice new .02 needle in my airbrush. I used some skygray as a basecoat.

A little wobbly..lol but should be OK once the topcoat goes on
2012-07-22100458.jpg

Was going well untill this happened, a big blob of paint on the underside of the wing, might be ok ?

2012-07-22100521.jpg

Am going to try and get some topcoat on this today, time and humidity permitting.

Thanks for looking :)
 
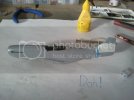
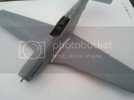
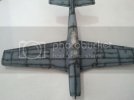
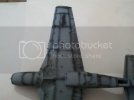
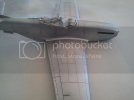
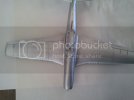
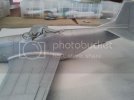
Got some silver on , hard not to overdo it, but I'm pretty happy with the way it looks

2012-07-22131059.jpg
2012-07-22131041.jpg
2012-07-22131021.jpg
 
Looks great rookie, what did you use for NMF?

How do you like Tamiya kit so far, details, parts breakdown etc?

Cheers!
 
Looking good Rookie ,she's coming on a treat mate ;)

Chris.
 
thanks for the comments :)

Flip Flop, I used Tamiya x11 chrome silver for NMF, came out ok for what I wanted to do but I wouldnt recomend it if you were looking for a super gloss finish, the metalic in it is quite coarse and "sparkly". I sprayed it on quite lightly as I was concious of not covering my preshading, this may have had something to do with it...

As for the kit, its a Tamiya so the engineering is quite good as you would expect. The interior lacks detail ootb, but I have seen many examples where a little scratch building or PE will fix this. The panel line and rivet detail is very nice.

Still deciding which color scheme I will go for..
 
Thanks for the info. :)

As far as scheme goes - i always liked ones with black&white stripes on the wings and fuselage, this one for an example (P-51D Ferocious Frankie):
WSPM-4.jpg


10772.jpg


Maybe you'll find them cool looking too.
Anyhow, keep up the good work ;)
Cheers!
 
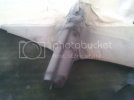
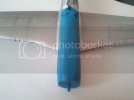
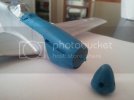
Decided to go with the box art scheme and decals. Masked of the nose and went over it agin with some grey so the metalic flakes didnt poke through the blue. Did some more pre shade to keep it in line with the rest of the bird..

2012-07-29161400.jpg
2012-07-29161419.jpg

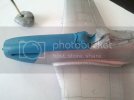
Used Tamiya sky blue and slowly built it up, the effect is realy cool although not that evident in the pics.

2012-07-29164149.jpg
2012-07-29164107.jpg
2012-07-29164025.jpg

I think I'm a convert when it comes to preshading .. ;D took alot of insipration form merseajohns redtail, Thanks John!
 

Latest posts

Back
Top