1:24 Back To The Future I Delorean Time Machine

Barsprojects

Member
Joined
May 27, 2013
Messages
84
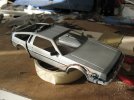
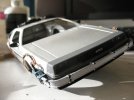
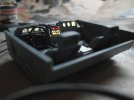
Decided that I'm gonna build some movie cars from the 80ies, got the DeLorean, '89 Batmobile and a Police Spinner. Wasn't going to start until I got the Speeder Bike done but I've been kinda stuck on that one (scout and diorama undecided). Anyway, got started on the Delorean, thought I'd do it it very straightforward, but the longer you look at reference photo's the more you feel like going a little further :) So now I'm doing the outer wiring (painted 0.2 mm fibers) and drilling holes for lights everywhere! The interior is a whole job in itself, loads of wires and lights, screwed up on the time machine device, decals too small so now have just colored fibers instead). Lost 2 parts sofar but nothing you'll notice I hope.
Got plenty of work to do and I guess soon I'll be back to the Speeder bike :)
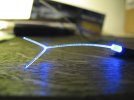
Notice the holes on the front rail where the blue light is supposed to go (a sanded fiber with blue led in the body is the plan).
Kit is Aoshima 1:24 with photo etch, movie I or II version, I'm building version I. Really nice kit, especially the PE for the rear vents is very nice detail and the numerous little metal plates on the blue parts.
For the BTTF fans out there, there's a new documentary coming in october back in time film

Barry
16788833635_948157a303_b.jpg
16762963336_eeba02b311_b.jpg
16166520444_bb1c54991e_b.jpg
 
It is a nice kit, Mandoman. I don't know about other kits but this one doesn't have doors that open and the wire bundles on the side are molded to the body, they shouldn't have done that I think. Got the kit at Hobby Link Japan but they don't have em anymore with the PE set. Was called "super detail", paid 30 dollars including shipping.

Since this kit is for BTTF I and II there's an elaborate system under the car that allows you to tilt the wheels for flight mode, it's a bit flimsy and I still have to find out how the wheels will sit with this sliding system, wether they will sag or not. I haven't touched the underside as it won't be seen, if you do you the number II version you can add all kinds of detail there, lights etc, there's details molded in the bottom for that.

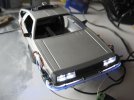
I just now did a test with the leds in the front of the car. But I noticed something missing, the PE DMC badge on the grill, it's gone! I can't find it and the car was in a box. I guess this is what you get if you change plans after you already put details on the car. Oh well, back to the stock badge, just have to paint it.

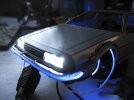
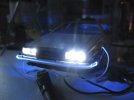
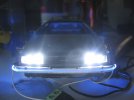
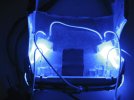
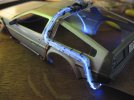
The lighting looks awesome, there's 4 led headlights (I will tone them down a bit, this is at full power) and 2 blue led's for the light on the rail, in daylight the blue light doesnt quite reach all around but I think I'm gonna leave it, looks good in the dark. Fortunately the housing for the blue leds just fits with the wheelwells of the underside part. Under the hood there's plenty of room there is just the sliding mechanism for the wheels to be tilted into flight mode. Obviously there's a bit of of a lightleak issue with the blue leds.

In the rear there's less room because of the wheel slider switch mechanism. I have to put a number of leds in there for rear lights, lighting for the rear bulkhead AND the blue lighting on the rear rails, that's gonna be a challenge, also cause the rear rails are longer and have curves. Haven't started on that yet, still figuring out where the fibers will go, cause they will enter the interior behind the seats, so visible. In the meantime enjoy these lighting test photos, guys. Thanks for watching.

Barry

16174195254_37a5048879_b.jpg
16609216910_af37dff1ed_b.jpg
16610447729_a60315e1cc_b.jpg
16795455301_ea48e25501_b.jpg
 
Stunning :eek:
Thank You very much for sharing this - your work is truly inspirational: makes me wan to start on mine De'Lorean without any further second of hesitation :)
 
This is looking seriously cool!

Possible tip from an amateur to a pro: I know you said you were going to leave the rail as it is but I seen fogging it up slightly with very fine grit helps the light bounce all the way around. Might ruin the smooth neon look. You could try it on a test piece first.
 
Thanks guys,

About the fogging, I did fog the front fiber, but I just found out I sanded it a bit too much actually. While working on the rear rails I found you need to just sand it very little to maintain the light coming through, too much sanding and it will barely travel an inch even through a fiber that is straight.

Barry
 
Made fiber brackets for the blue light fiber that runs from the underside of the car to the roof (8 brackets per rail cause of the bends).
16190722734_260e4d5789_b.jpg
Test fitted and lighted, very happy with that! Even with only one led, this means I can keep the interior hopefully clear from fibers sticking down into it and will try to put led in the boot.
16787190006_4376f70249_b.jpg

Barry
 
Flux capicator was already painted and installed, took it apart and removed plastic flux capacitor and now have to figure out how to make that lighted fork, tricky cause not much room to stick fiber through bulkhead.
Sorry for many updates but enjoying myself ;D
Barry

16628241028_286d13c4b1_b.jpg
16608499227_92d935fe89_b.jpg
Fiber fork test but weak bond.
 
Thanks Quaralane

Something else, does anyone know how to get rid of a kind of sticky transparent goo that is left after you dechrome a plastic part? I put some parts in MrMuscle cleaner, worked before but this time it leaves a residue behind that I'm not sure how to get rid of. It's sticky and flaky, falls off easily on some parts but it's in all the little recesses and a pain to remove by hand.

Let me know if you know what I'm talking about :)

Barry
 
Barsprojects said:
Thanks guys,

About the fogging, I did fog the front fiber, but I just found out I sanded it a bit too much actually. While working on the rear rails I found you need to just sand it very little to maintain the light coming through, too much sanding and it will barely travel an inch even through a fiber that is straight.

Barry

Yes, very light on the sanding is all you need. Just enough to scatter it back into the fiber and bounce it around.

I've heard that bleach will take off the chrome and not leave the sticky behind. Takes a while and several scrubbings. Maybe in this case bleach will take off the sticky that is there now?

This thing is looking awesome! I never though I'd want to do this model and now ...

You've given me some ideas for lighting my hover tank. When I get to it.
 

Latest posts

Back
Top