Group Build: Biplane - barnstormer to fighter

Scale Model Addict - Model Tips, Guides, Tools & Tech, Tutorials, and Community

Help Support Scale Model Addict:

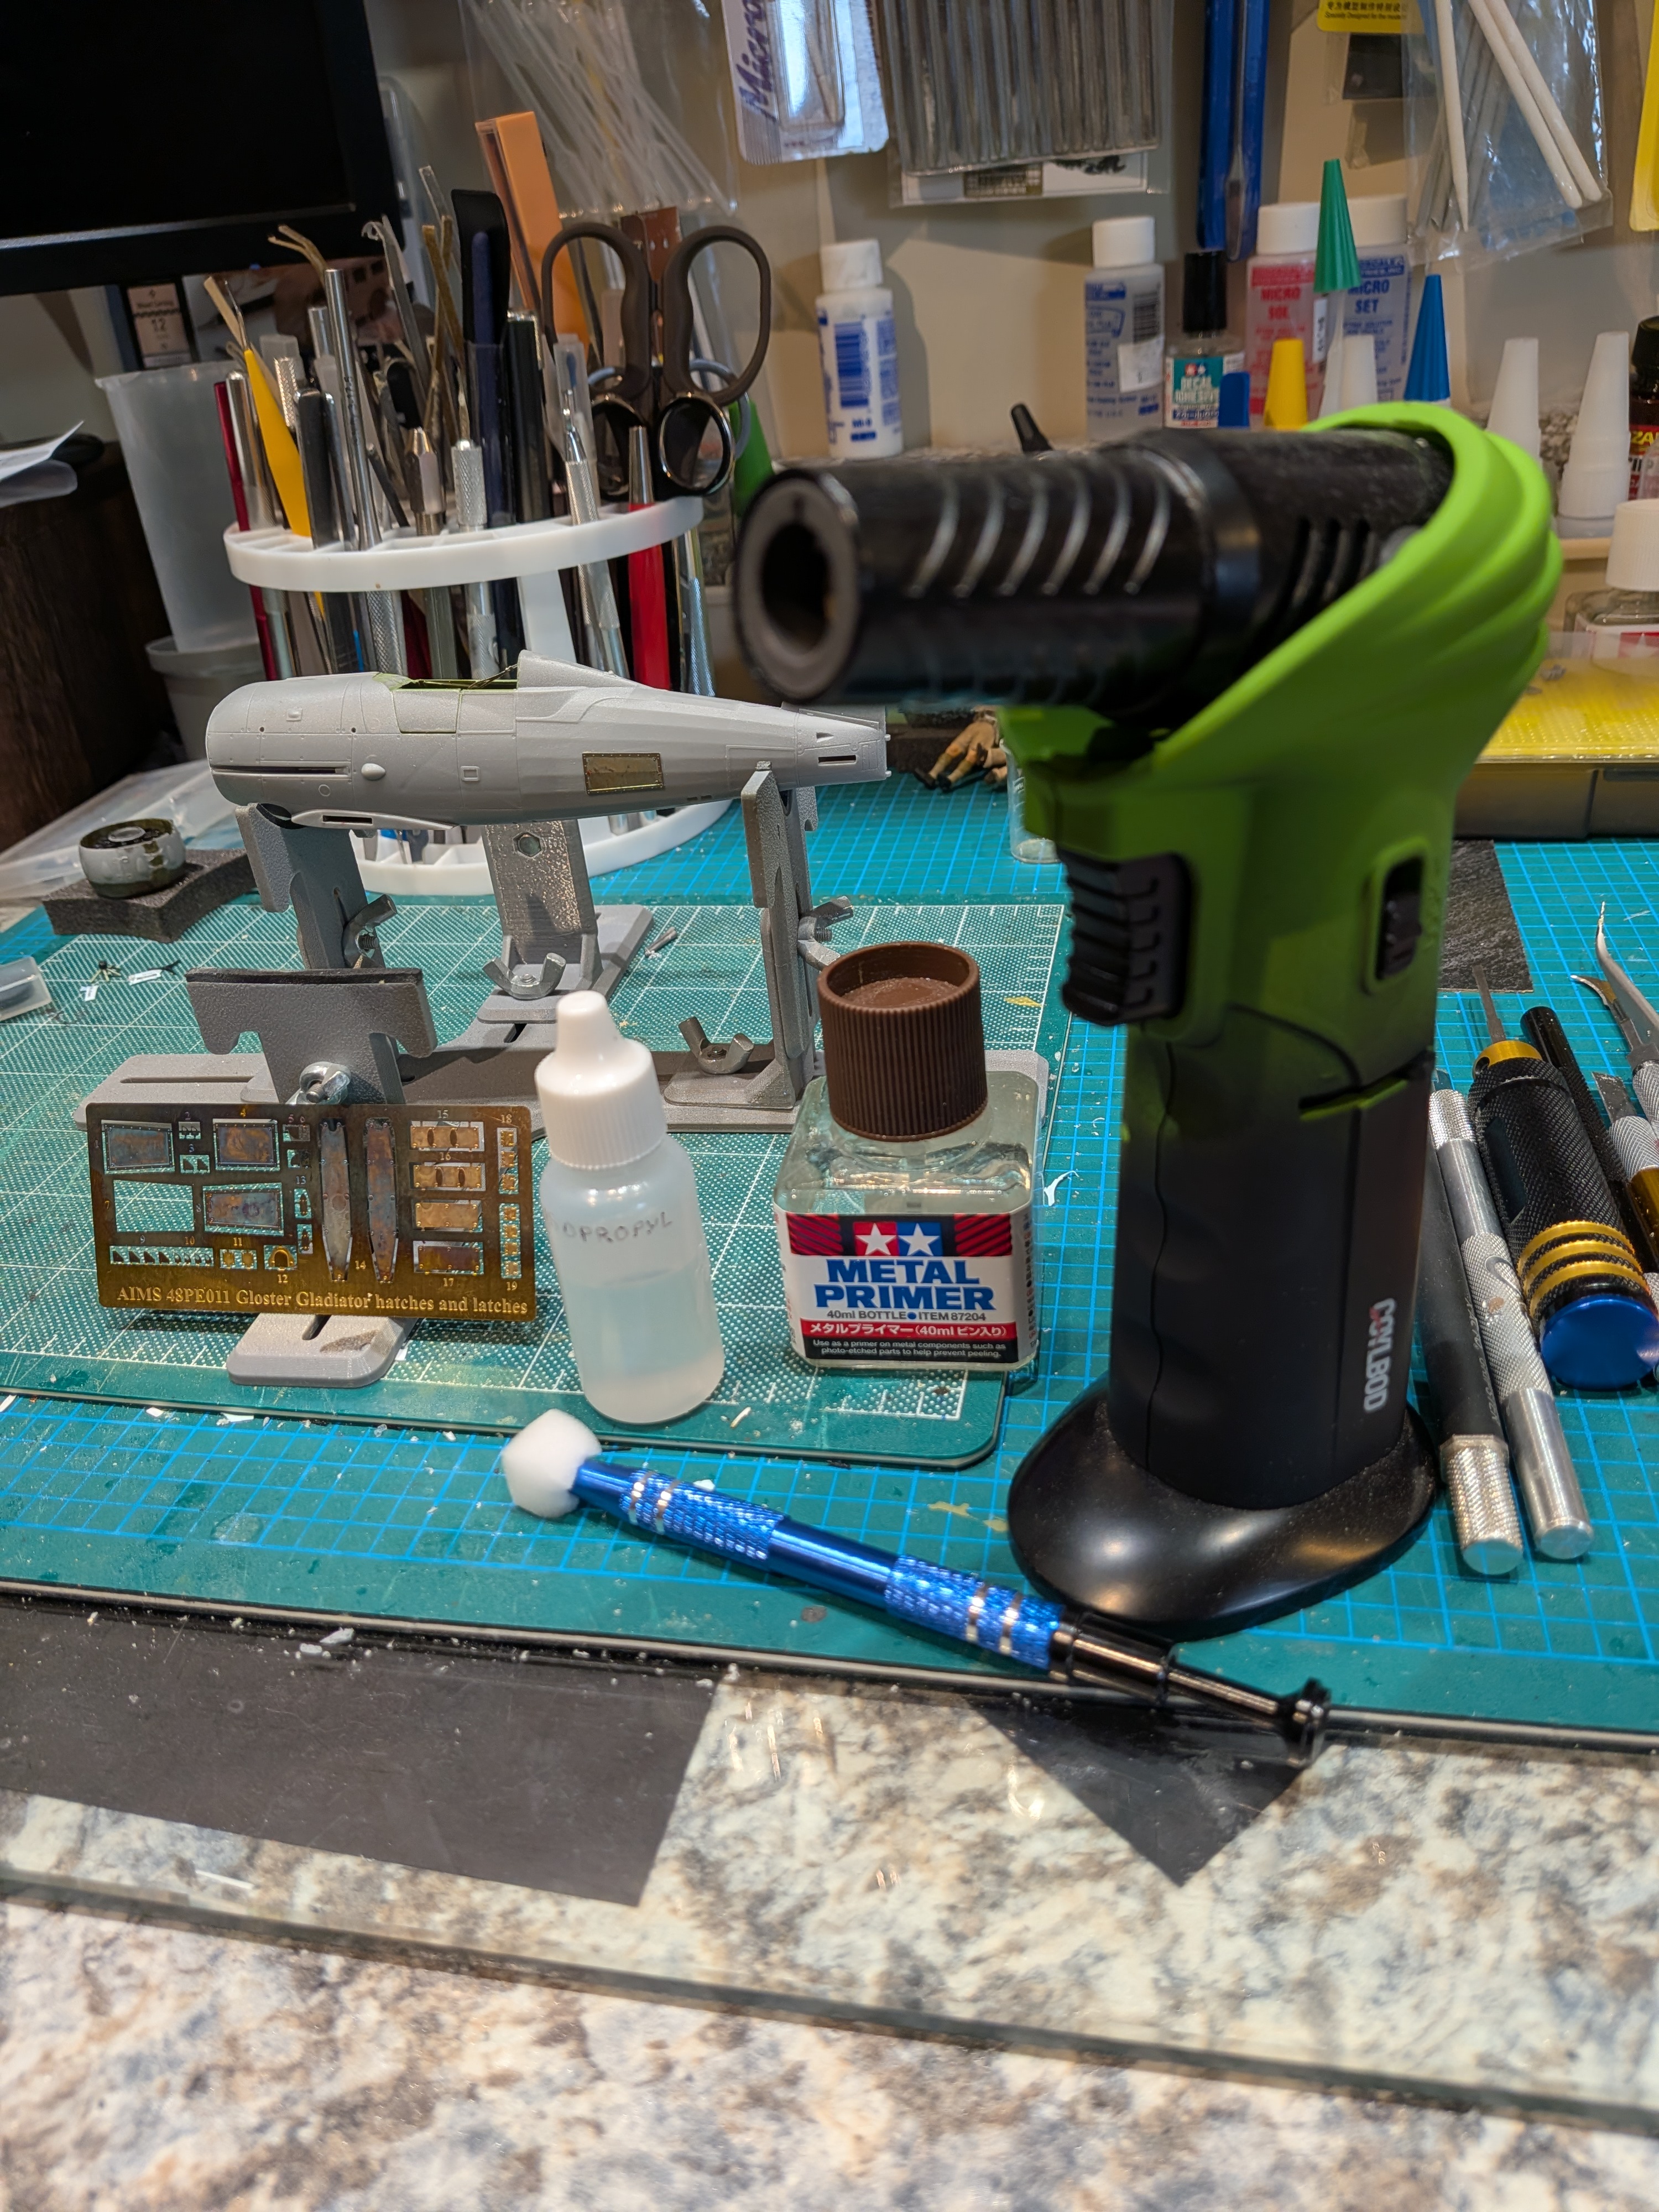
Explain your process here please. I see marks that make me think there was an acid bath.
No acid here, just a sponge wipe with isopropyl, then quick heat with the mini torch.
I'm thinking I will lightly brush PE primer before priming the whole thing.

3900.jpg

...learning as I go... 🤔
 
I always hope for the best but brace for the worst, makes coming out somewhere in between more palatable. In the end, my experiment came out like a "Spaghetti Western" aka the Good the Bad and the Ugly. All of these pics are just after pulling up the tape, so no touch-ups yet.

Good
View attachment 197316

Bad
View attachment 197317
Ugly
View attachment 197318


But when I remember how bad the stickers looked, I'm fine with doing the repairs I'm about to embark on.
I always hope for the best but brace for the worst, makes coming out somewhere in between more palatable. In the end, my experiment came out like a "Spaghetti Western" aka the Good the Bad and the Ugly. All of these pics are just after pulling up the tape, so no touch-ups yet.

Good
View attachment 197316

Bad
View attachment 197317
Ugly
View attachment 197318


But when I remember how bad the stickers looked, I'm fine with doing the repairs I'm about to

... Well, at least we can't say RODEN isn't consistent! 🙄

Next step for the Gloster Sea Gladiator fuselage and wings is to try and integrate a set of hatches and latches from AIMS.

I'll just show the process for one.
  • Scrape off the plastic details to fit the PE. (all new to me).
  • Cleaned the PE up with alcohol,
  • Lightly(?) annealed it with my mini torch.
  • Because the PE is flat, the hatches need to be lightly scored on the back to produce the ribbing effect of the fuselage.
not scraped yet...

View attachment 197327

cleaned and annealed

View attachment 197328

scored from behind

View attachment 197329

view from the front, ready to be test fitted once the fuselage detail is removed

View attachment 197330

View attachment 197331


View attachment 197332
That is really an improvement!
 
... Well, at least we can't say RODEN isn't consistent! 🙄

Next step for the Gloster Sea Gladiator fuselage and wings is to try and integrate a set of hatches and latches from AIMS.

I'll just show the process for one.
  • Scrape off the plastic details to fit the PE. (all new to me).
  • Cleaned the PE up with alcohol,
  • Lightly(?) annealed it with my mini torch.
  • Because the PE is flat, the hatches need to be lightly scored on the back to produce the ribbing effect of the fuselage.
not scraped yet...

View attachment 197327

cleaned and annealed

View attachment 197328

scored from behind

View attachment 197329

view from the front, ready to be test fitted once the fuselage detail is removed

View attachment 197330

View attachment 197331


View attachment 197332
Nice. Pantherman
 
Got some decals on today...was a struggle. Don't know how old the kit I got was, but the Roden decals take some time. Instructions say put them in water for 1/2 minute. Ha! Turns out 2-2 1/2 minutes is about right. The long decals on the sides went OK, except the right side one broke twice, but I got it on.
The decals don't match the drawing well. The upper and lower wing number decals are smaller than what the drawing shows, so placement was a guess.
Still have to put the landing gear together and a little detail painting.


Got some decals on today...was a struggle. Don't know how old the kit I got was, but the Roden decals take some time. Instructions say put them in water for 1/2 minute. Ha! Turns out 2-2 1/2 minutes is about right. The long decals on the sides went OK, except the right side one broke twice, but I got it on.
The decals don't match the drawing well. The upper and lower wing number decals are smaller than what the drawing shows, so placement was a guess.
Still have to put the landing gear together and a little detail painting.


That gold pinstriping looks great with the red! I had to soak my decals quite a bit too.
 

Latest posts

Back
Top