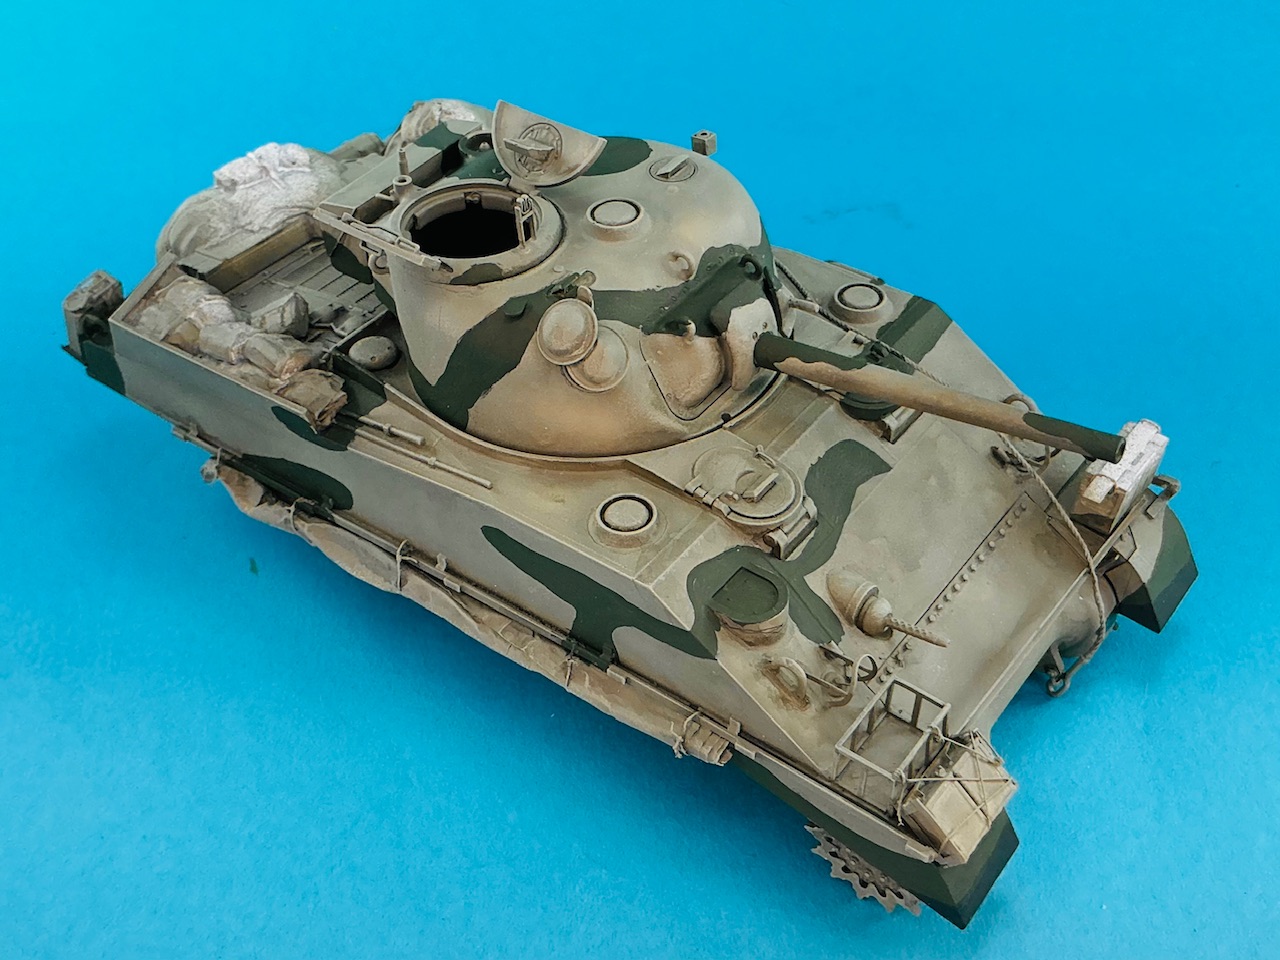
Sherman III of 3 County of London Yeomanry, Sicily

Scale Model Addict - Model Tips, Guides, Tools & Tech, Tutorials, and Community

Help Support Scale Model Addict:

Bison Decals is now Star Decals, so you can always buy them direct, of course.
I recall seeing sets that arent available now.If i go to.Show in October he might be there again.Werent many Shermans on club tables sadly apart from Fury someone made and M4a3 with Cullin prow.There were very few M4s to buy,Somebody had The late Asuka M4a3 for 70 pounds and 5 Dragon ones but no way id pay nearly 40 for the M4A4 Burma kit!!!.Saw an Operation cobra m4a1 but im more into the 75 versions.
 
If you want a Sherman V, you'd be much better off with either the Asuka one or the recent kit from RFM instead of the Dragon one. And £70 seems a lot for an Asuka Sherman. If you mean the M4A3 Cougar kit, I see that advertised for €50–65, which is about £43–56. Trouble is that you'd need to add postage and UK import duties, of course, so you'll still end up in the £70 range :(
 
Yes some traders really hike prices up.At Telford you can get a good deal but some bigger vendors charge silly prices.I wonder how they can sell Asuka for 70 pounds mark.When i opened the M4a2 DV kit there was a small packet inside by Value gear.Had wooden side armour and best of all rear Wading kit!!!.I think the seller kindly put them in.
 
Check the box lid if there's a sticker on the side that puts an S behind the product number, and possibly has Japanese text and "special edition" on it. My Sherman III kit has that, because it came with the Value Gear set I used on it. That set also had a label in Japanese on it with both Value Gear and Asuka logos on it. If your kit is like this, then it's indeed a special edition that includes the resin set, and which accounts for it being more expensive than usual (mine was €55 instead of around €45, for example).
 
Hi Jakko.
I must have got lucky pal.No stickers on box so maybe the E.bay seller was being kind or didnt realise what was in this kit.I paid just over 50 pounds so not too bad for a kit ive wanted awhile.
 
As an Amazon Associate we earn from qualifying purchases. Product prices and availability are accurate as of the date/time indicated and are subject to change.
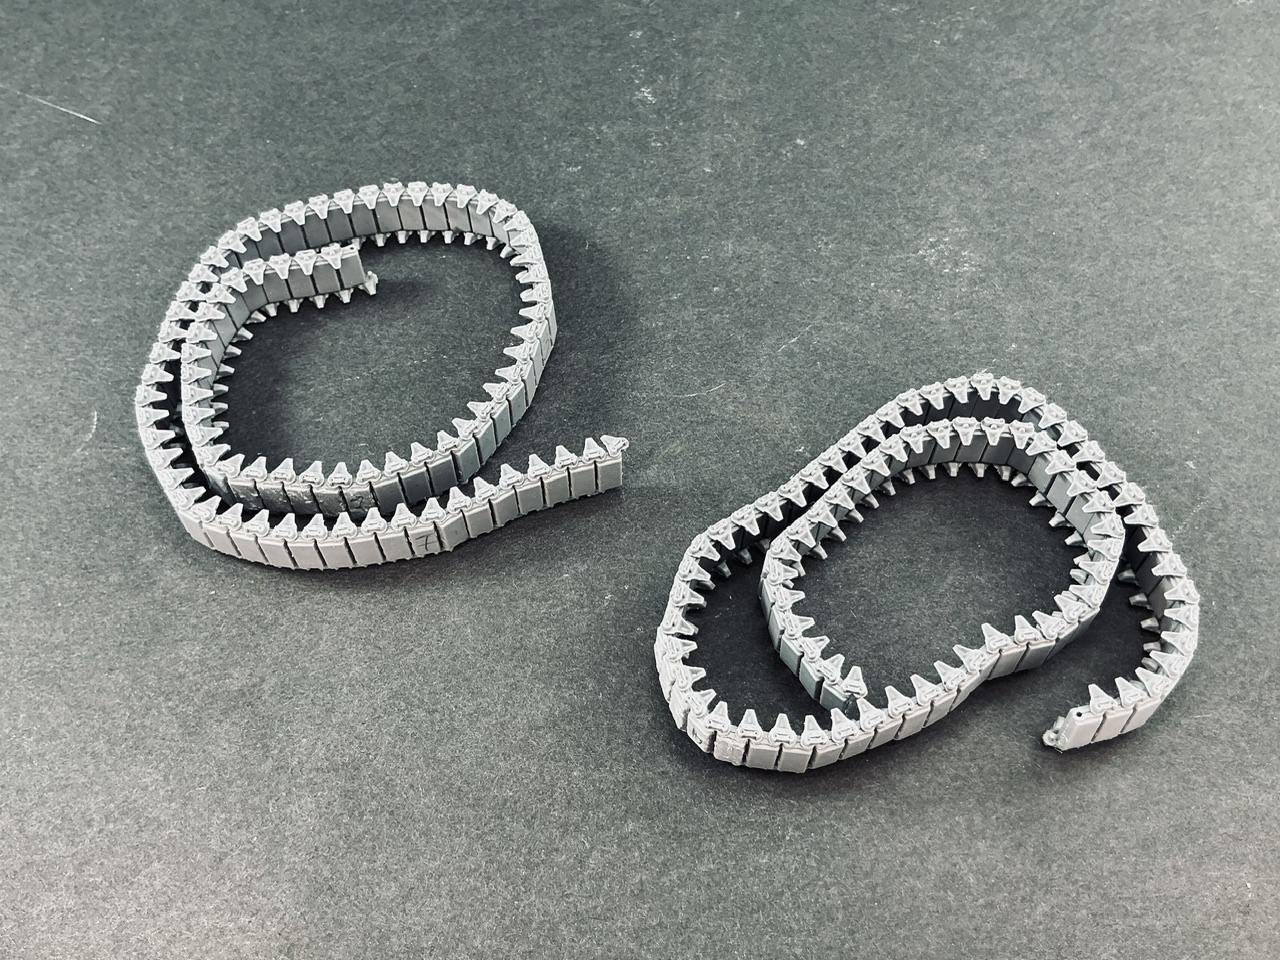
Keep plodding on and you'll get there eventually:

IMG_3091.jpeg


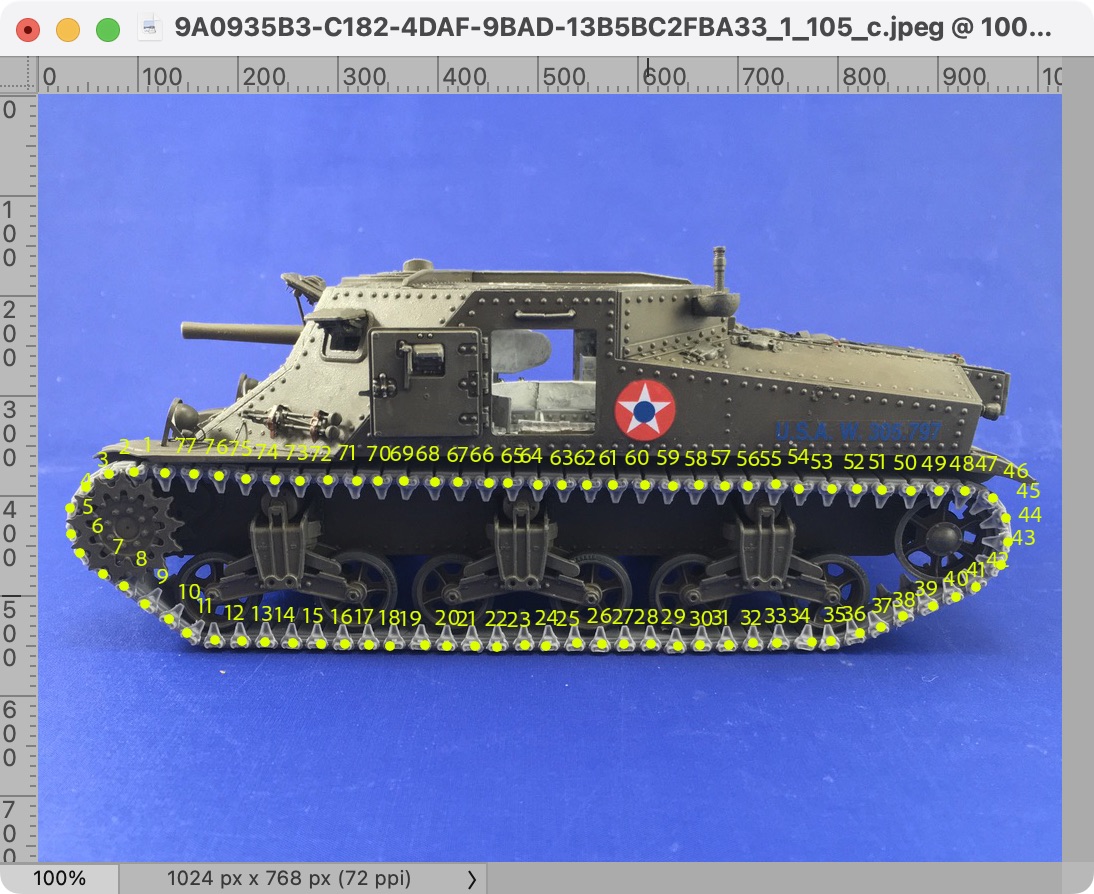
The real tank needed 79 blocks per side, but to make sure I counted them in (a photo of) another model with the same MiniArt tracks:

M3 medium track blocks count.jpeg


77, then :) In addition, I had to work/count out where to put the damaged blocks so that the undamaged ones will be out of sight.
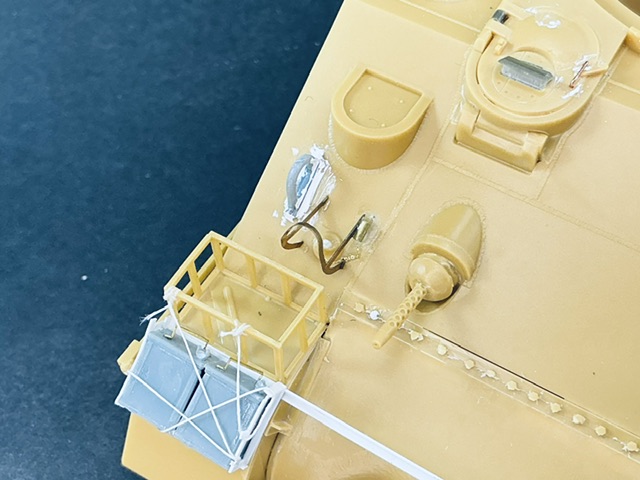
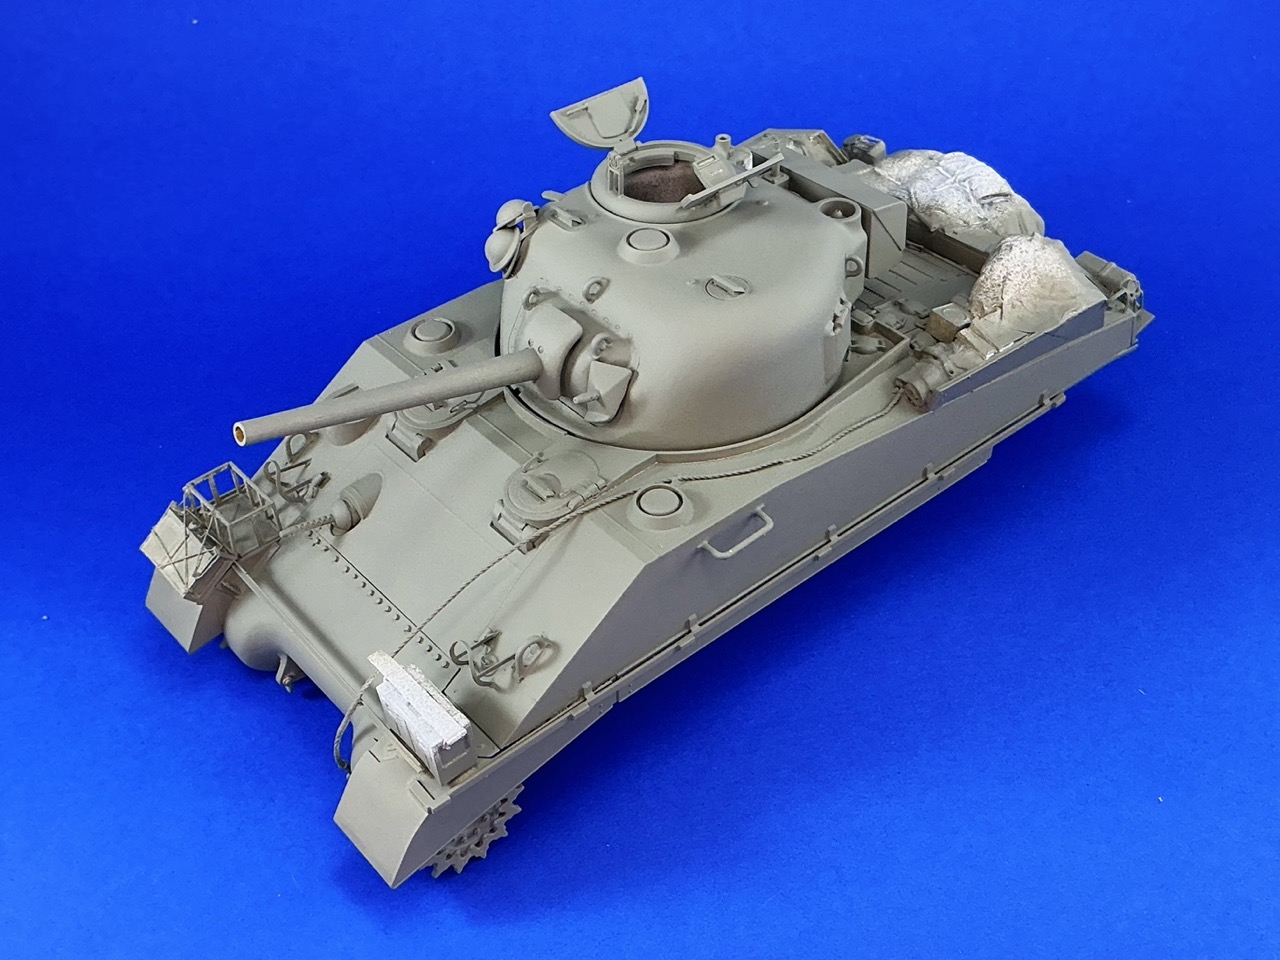
Oh, and I forgot to mention in the last update that I replaced the holders for the plugs for the headlight sockets:

IMG_3094.jpeg


Where that bit of brass tube is on the side of the headlight guard, I had initially put a part from an RFM Sherman that represents the stowage tube with the plug in it. But after looking at the photos of the real tank a bit better, it proved to have had the plugs in the sockets, so I cut that RFM part away again and glue an empty tube there instead. The plugs themselves are just punched plastic-card discs and the chain between the tube and the plug is from the Dragon Panther that I built as Cuckoo earlier this year.
 
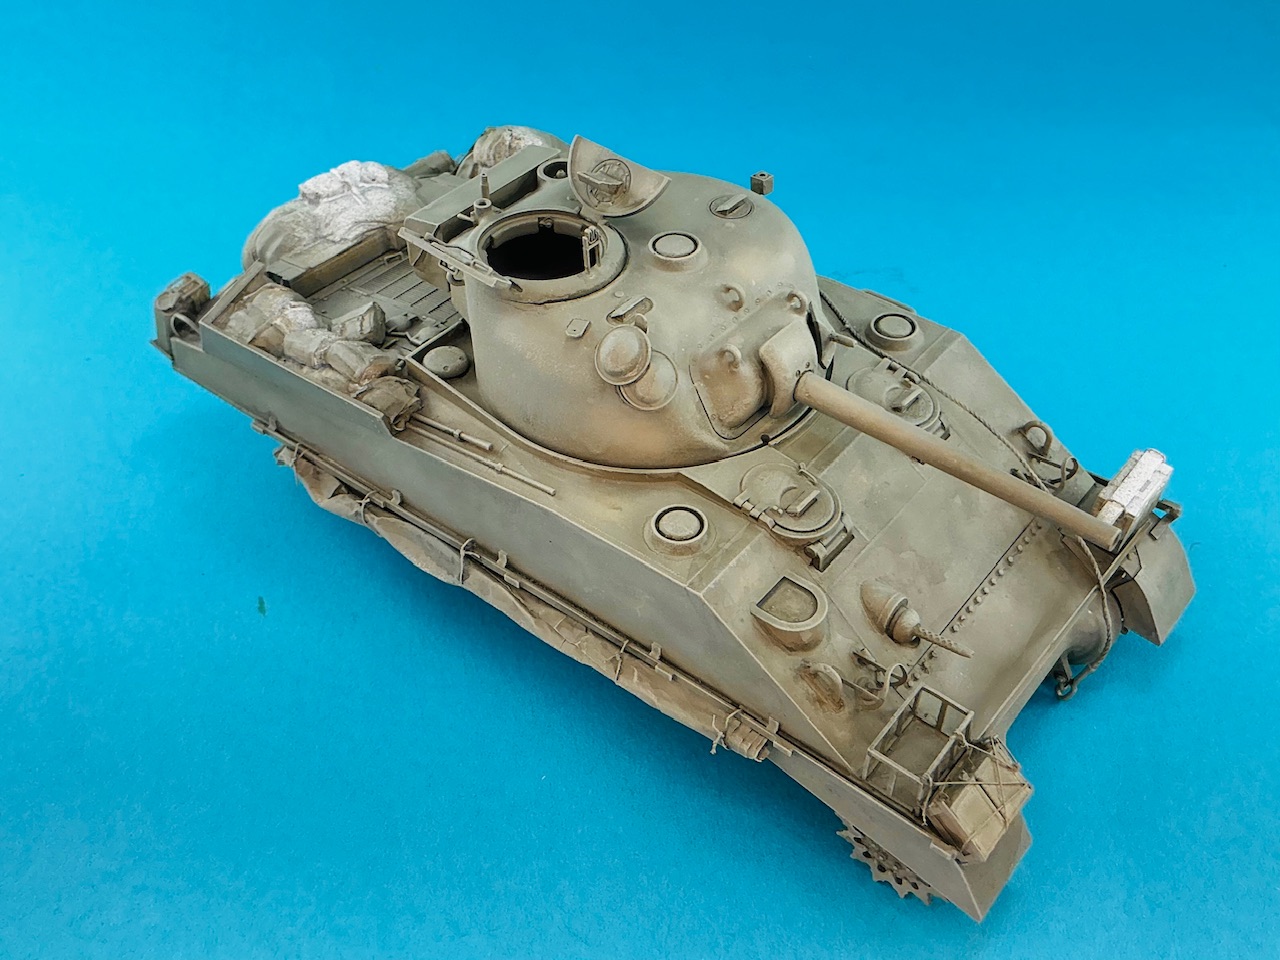
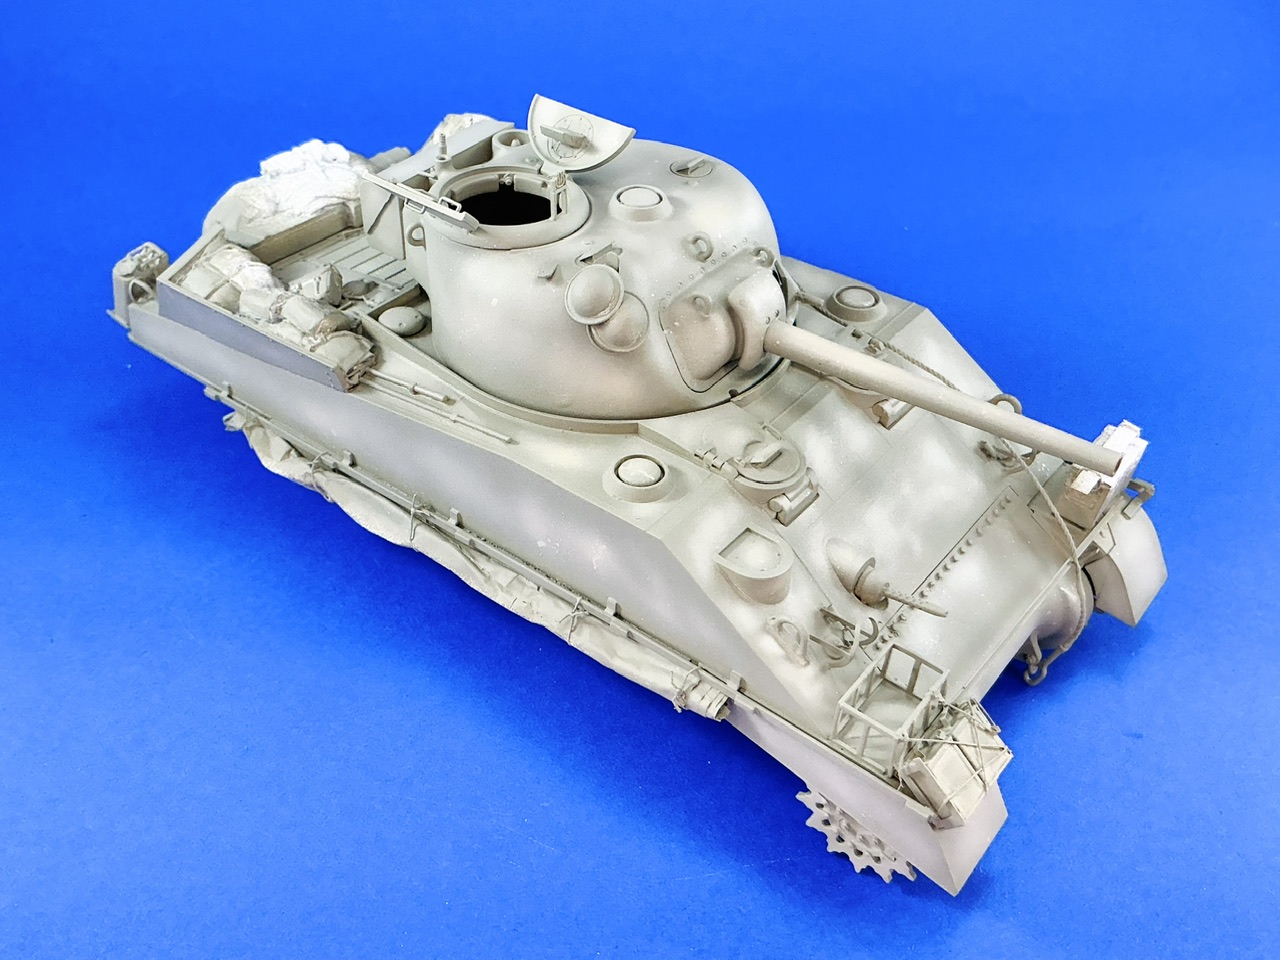
After working on some other stuff, the model now has an initial coat of paint:

IMG_3142.jpeg


Or three, actually. I had first sprayed the model with a cheap aerosol can of general-purpose primer, because I wanted to use AK 3rd Gen for the Light Mud base colour, and as that's a water-based acrylic, I'm not sure it will work well on bare plastic — hence the primer first. Well, that, and there being a good deal of resin and some metal on this model, which needs to be primed first if you want paint to stick to it.

The AK paint was more trouble than I had expected, though. I've not used it much, so I'm still learning — and what I learned here is that there's only a small margin for getting the amount of thinner right. The paint is too thick to spray straight from the bottle, so I thinned it with water, but used too much of that on most of the model. I had to refill my airbrush a couple of times, so some bits of the model were better-painted than others, but when I returned the next day there was primer shining through all over the model and the paint had even run down to the bottom in some areas. This despite it looking fairly good while I was spraying.

So, I just put some more of the paint in my airbrush, with just enough water to get it through the airbrush, and resprayed the whole model. Luckily, that took less time and paint because there was already a coat of the right colour on it.
 
Good to see your progress Jakko.Looks great with some paint on.Thanks for the heads up with the AK third gen paint.Its a real minefield knowing which paint to use.
 
I would love it if Tamiya and Mr. Hobby would release a much bigger range of acrylic colours replicating real-world paints. They both have a bunch, but (as far as military vehicles are concerned) mostly aimed at Japanese and German subjects, not so much Allied. I never have trouble thinning those acrylics, even though I do it by eye, but if you want to paint a British vehicle (that's not Lend-Lease), you'll have to mix them, and good luck figuring out which ones and how much.
 
Yes spot on Jakko couldnt agree more.And mixing can be bit haphazard.A lot of people seem to use Lifecolour acrylics,Have you used them mate?,Ive got some track painting and weathering sets and MERDC set.They are nice for brush painting and more sets are becoming available i saw on youtube other night.
 
I have limited experience with LifeColor, and the main thing I can tell you is that they're absolutely crap for brush-painting: they don't cover worth a damn that way, so you have to keep going over it to get rid of the colour(s) underneath. I think I had to put on five coats on one model before the plastic didn't show through anymore.

Oddly enough, spraying them, OTOH, works quite well (thinned with a little water) and the few I've tried cover properly in one go. However, I've been told that you need to make sure there are no thinners etc. for other types of paint left in your airbrush, because LifeColor paints can gum up really badly when exposed to those.

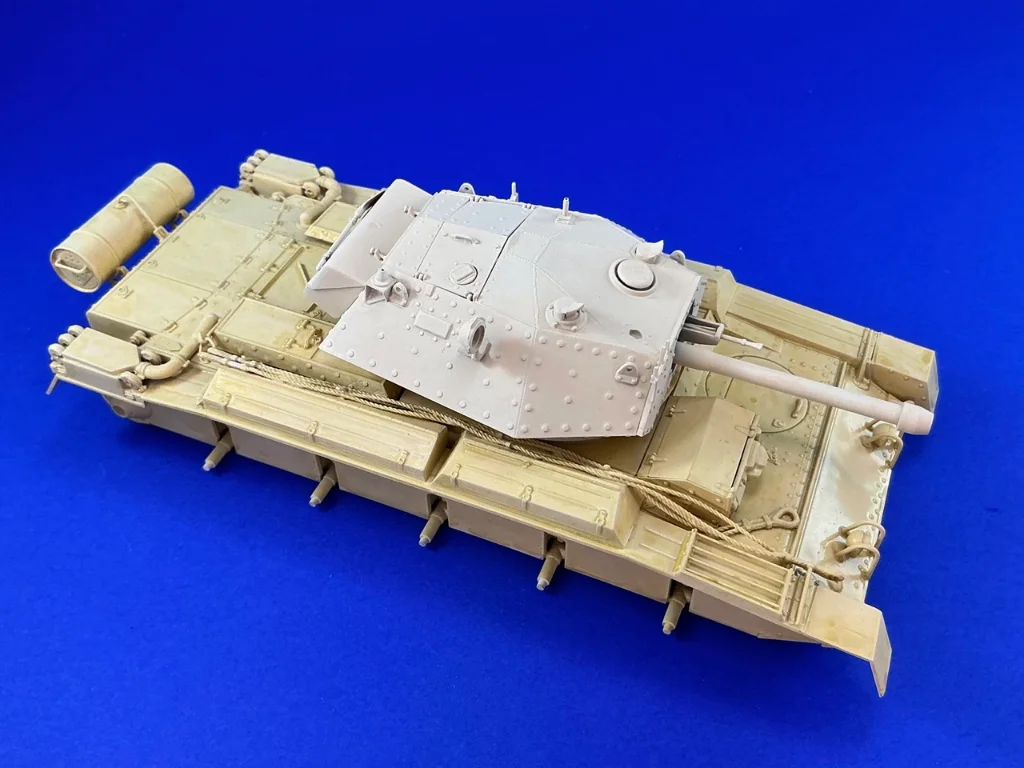
Also, I'm not overly impressed by their colour matching. See this example:

IMG_3137.webp


This is one of the Crusaders I may have mentioned a few times recently :) I sprayed it in LifeColor's version of Light Stone, which went well enough, but after drying I compared it to the colour sample in one of Mike Starmer's books, and … well … I then took out a bottle of AK 3rd Gen Light Stone, that I also have, and it was a much better match for the sample. What I did was make a wash of the AK paint and brush it all over the model: the hull has the wash here, the turret doesn't yet. This turned the whole model close to the sample but gave it both a faded effect and shading, so in the end, I killed two birds with one stone because of starting with a totally wrong colour :)
 
Im guessing that some of the ytube gurus endorse products so they get freebies and lure us in with our eager wallets.One of our club swears by Lifecolour and i seem to recall when i tried painting a German para figure it was wishy washy and i gave up.I know some who wont give up their enamels and the Humbrol Gen 2 acrylics arent bad.Come on Tamiya etc allied stuff.Italeri acrylics ive heard are good but nobody in uk does them.ICM seem to be doing lots of stuff.I scour model shows for paints like xtracrylics that vendors sell off very cheap.
 
I like Italeri acrylics, but I haven't tried spraying them more than once or twice — largely because I don't have any of their paints in colours I need for whole tanks :) What I do know from experience is that you shouldn't thin them with any kind of alcohol, as it causes your airbrush to spray short threads of paint after a few minutes.
 
Nice shading Jakko.Really looking nice.Im sure i have a 1.72nd one in my stash.Probably a Dan Taylor conversion for Heller Sherman kit.Might do a Sherman soon but still got 72nd Churchills to finish.
Richard
 
Because the T6 isn't cooperating at the moment (I can't seem to get the shape of the housing around the bow gunner's sight correct) and I can't really get myself to paint the figures for the Comet, I think it's time to finish Churchill. Completing one model usually helps with the motivation for the rest :)

Shortly after I sprayed the lighter patches (see above) I had given the model an all-over wash of olive drab paint, but then did little or nothing else to it. It did hit me soon after that I had forgotten to build the additional antenna mount on the left side of the turret, so I did that last night and just now:

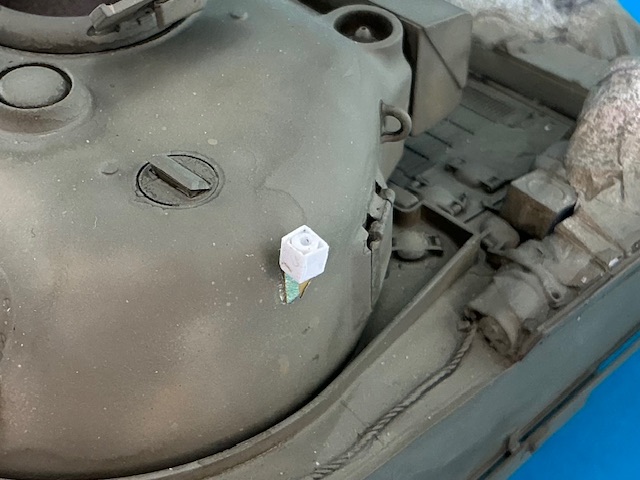
IMG_4135.jpeg
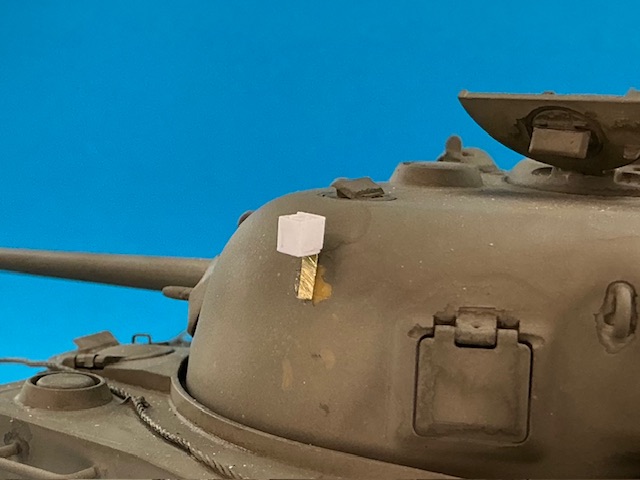
IMG_4136.jpeg


It's a piece of 2 mm plastic rod, drilled out to accept an antenna later, with a square box built around it from 0.25 mm plastic card. It's attached to the turret by means of a bit of brass strip cut from leftover fret from an etched set. Presumably, there was an antenna cable somewhere, but I can't see it in the photograph of the real tank, so I just left it off. After taking these photos, I quickly brushed the same Light Mud over it that I had sprayed the tank with, and once that dries I'll also give it an OD wash. After that, I can continue painting the rest of the tank :)
 
After the wash on the antenna base had dried too, I drybrushed the whole model:

IMG_4137.jpeg


First with AK Light Mud, the same colour as underneath the wash, because that wash had darkened the whole model a bit and this way I could make it lighter again. After that, I mixed Army Painter Skeleton Bone into the Light Mud, about 1:1 to make it clearly paler, and went over the whole model with that. Finally, I mixed the two as about 2:1 Skeleton Bone:Light Mud and drybrushed the higher bits with that once more.
 
That side hatch looks sooo good!
The pistol port on the turret? It does look rather nice with that unplanned (and usually unwanted) tide mark from the wash over it, I agree :)

Cool how just a bit can add so much dimensionality and heft to the model.
It's funny, really, how making a model look painted also makes it much better to look at. If you just spray a model in the same colour as it has in real life, it will look dull, lifeless and toylike. But put some shadows and highlights on, by the very simplest techniques possible (a darker wash followed by a lighter drybrush) and it will look much better. Not necessarily more realistic, but it's suddenly not like a toy anymore. Just a little more elaborate work, like spraying highlights, and it looks better still, IMHO. I think the key is to give depth to the paintwork by using multiple layers of different shades of paint that overlap but don't totally obliterate each other. The important thing, though, is not to overdo it. Models on which the contrast between highlights and shadows is too stark, quickly start looking artificial to me.
 
I love the finish you have on that, really looks like steel that has been out in the South Pacific sun!

Because the T6 isn't cooperating at the moment

I can't really get myself to paint the figures for the Comet

it's time to finish Churchill
This is exactly how I build too. Find something interesting and pull it out to work on until it gets either boring or frustrating, then switch to something else. Eventually a finished one rolls out of the shop :-)
 
Though theater makeup can be over the top, it does share some aspects with our builds
Good analogy. The idea behind both is to make the viewer see things that otherwise get lost because they're too small to stand out well enough — on a model because they are small, in the theatre because the viewer is too far away to see them properly.

I love the finish you have on that, really looks like steel that has been out in the South Pacific sun!
I may need to do a sun-faded Pacific Island tank at some point, good idea :) I read just today that the US Army thought amtracks faded to "light blue", which may make an interesting subject.

However, this model doesn't really represent a tank with faded paint :) It's not olive drab but British Light Mud, which appears to have been a kind of medium grey-green? It was used in the later part of the war in North Africa and the early part of that in Italy.

Eventually a finished one rolls out of the shop :-)
I try not to work that way :) Once I put something back in its box, chances are it will never get finished. I do my best to not start too many kits for that reason, but at the same time, I have this problem that when something gets to be uninteresting, I can't make myself work on it much yet I also don't want to start something else that will get bogged down too …
 
I try not to work that way
The thing I try not to do, well maybe I should say one thing I have limited sucess avoiding is the urge to break bags on a new kit. I have the HKM B-17 and Border (1/35) He-111 that are killing me right now, so far so good, the boxes are open, but still sealed bags.
 
I have no problems with that. I usually only take the sprues out of the plastic bags when I actually start the kit, but if I need to do that earlier for some reason, it's real easy for me to put the kit back on the shelf in the stash. I also sometimes open them right after the kit gets delivered, usually on kits I haven't built before and want to take a close look at. These also go on the shelf very easily.
 
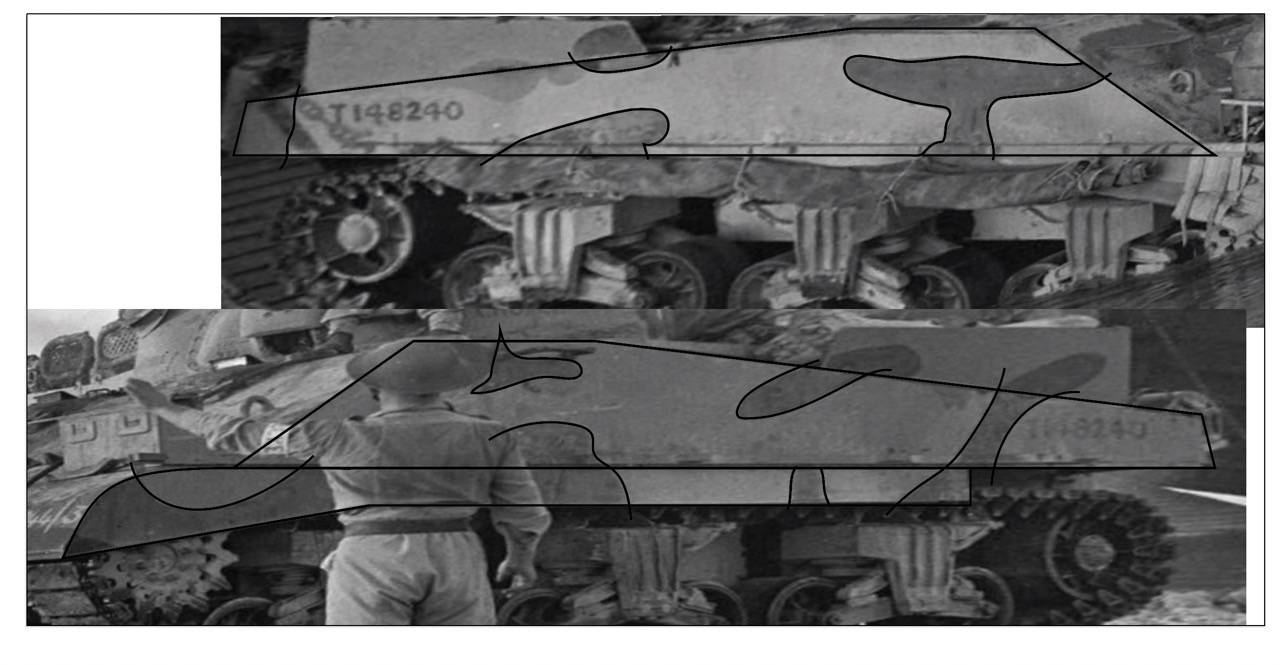
Churchill's camouflage pattern as shown in the Asuka kit's instructions is some way from being correct. Because there are photos of the left and right sides of the tank, I removed the perspective from those, resized them to 1:35 scale and then traced over the pattern on the hull:

Churchill camouflage.jpeg


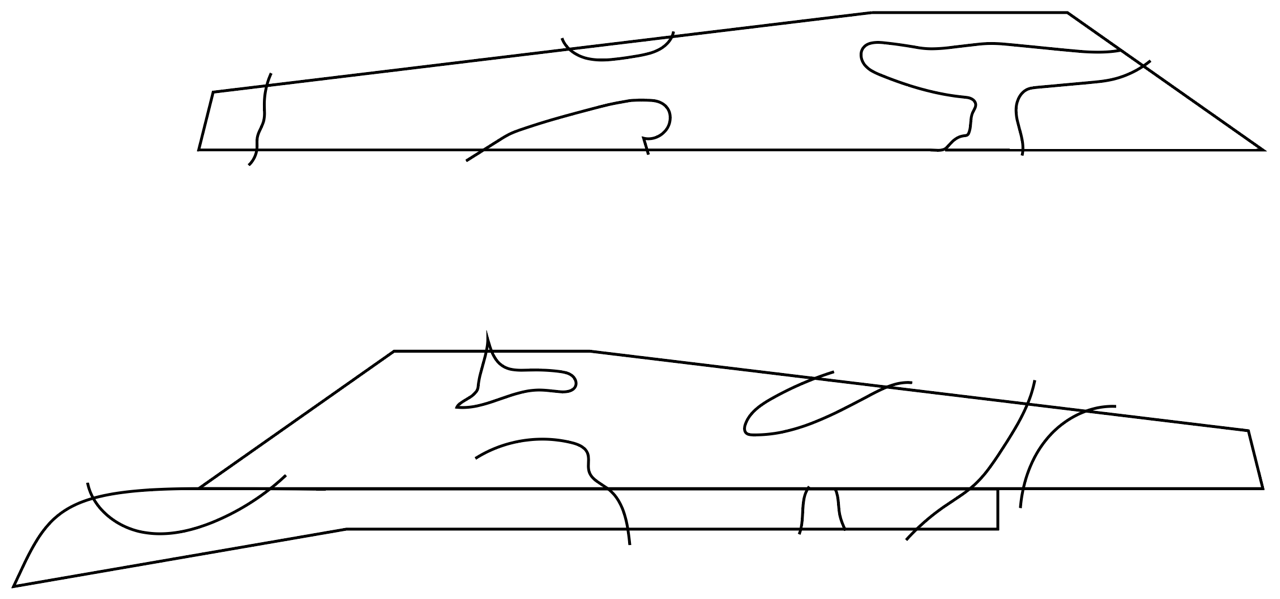
Without the photos:

Churchill camouflage.png


Though I must say I find it a bit inconsiderate that that soldier went and stood in front of the tank without paying any attention to the needs of modellers 83 years in the future, which meant I could only reconstruct part of the pattern on the left side …

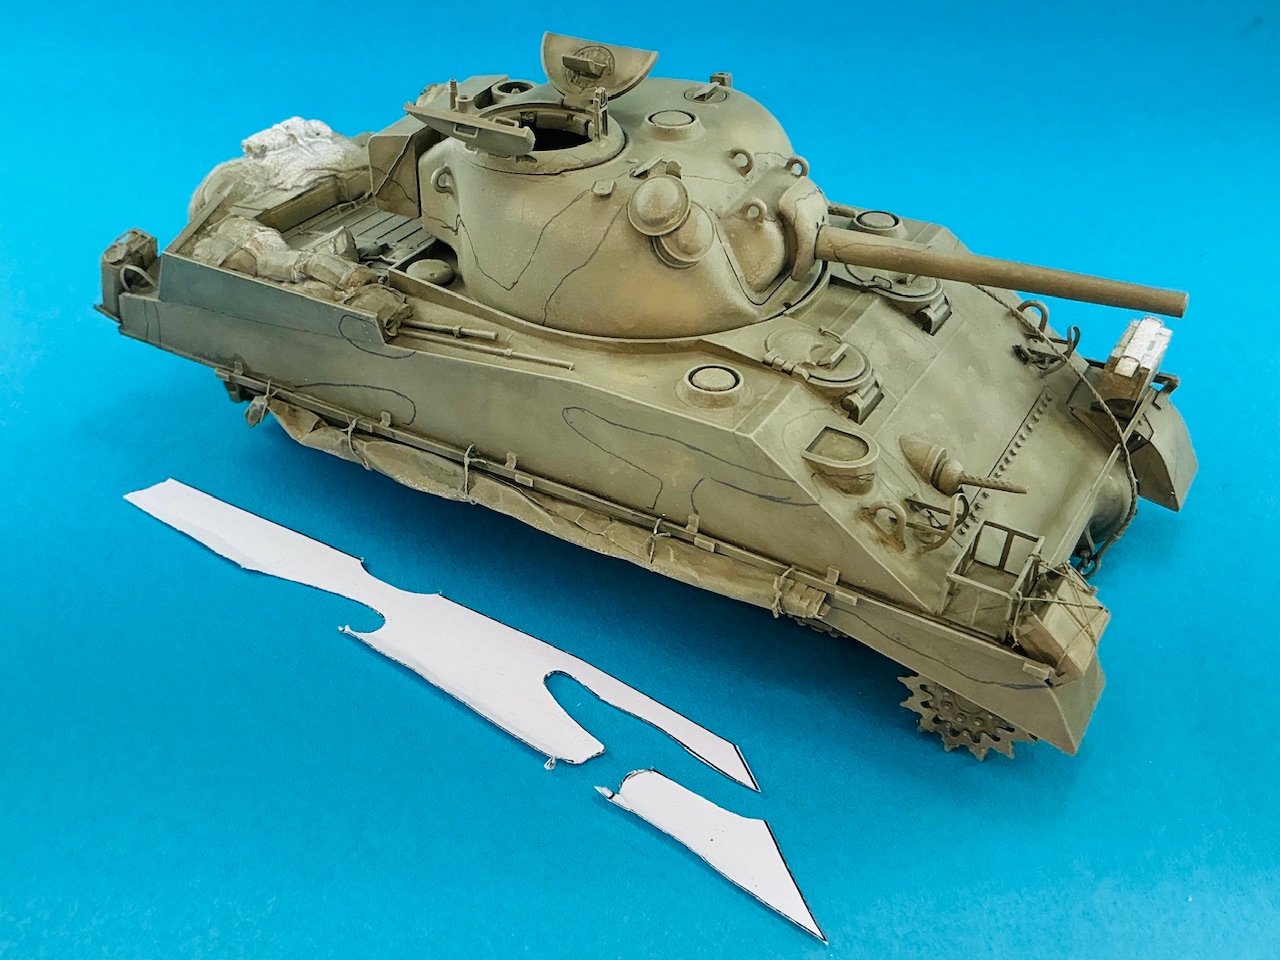
By cutting out the drawings, I could then hold them against the hull and trace them onto that with a pencil:

IMG_4138.jpeg


That was easier to do on the right than the left, largely due to that handle on the left-hand side. To fill in the gaps, I referred to the official camouflage pattern (in one of Mike Starmer's books) and a photograph showing the top of another 3 CLY tank on Sicily, and then painted the patches:

IMG_4142.jpeg


For this, I used AK 3Gen French Army Green — yes, not Blue-Black. This because Mike Starmer noted on Missing-Lynx that the contrast colour on Churchill was probably close in colour to SCC 7 green. After looking up a mixture for that (for which I even happened to have all the necessary paints), I thought it looked a bit on the light side. The AK paint is fairly close to it in colour, but a little darker.

The front edges of the sand shields are in Tamiya XF-67 NATO Black, because the photos show there to be darker paint there. At first sight, it gives the impression they're simply wet, but I doubt it because they're also darker on the photo of the tank leaving the landing ship, and there, it hasn't gone far enough into the water yet.
 

Latest posts

Back
Top