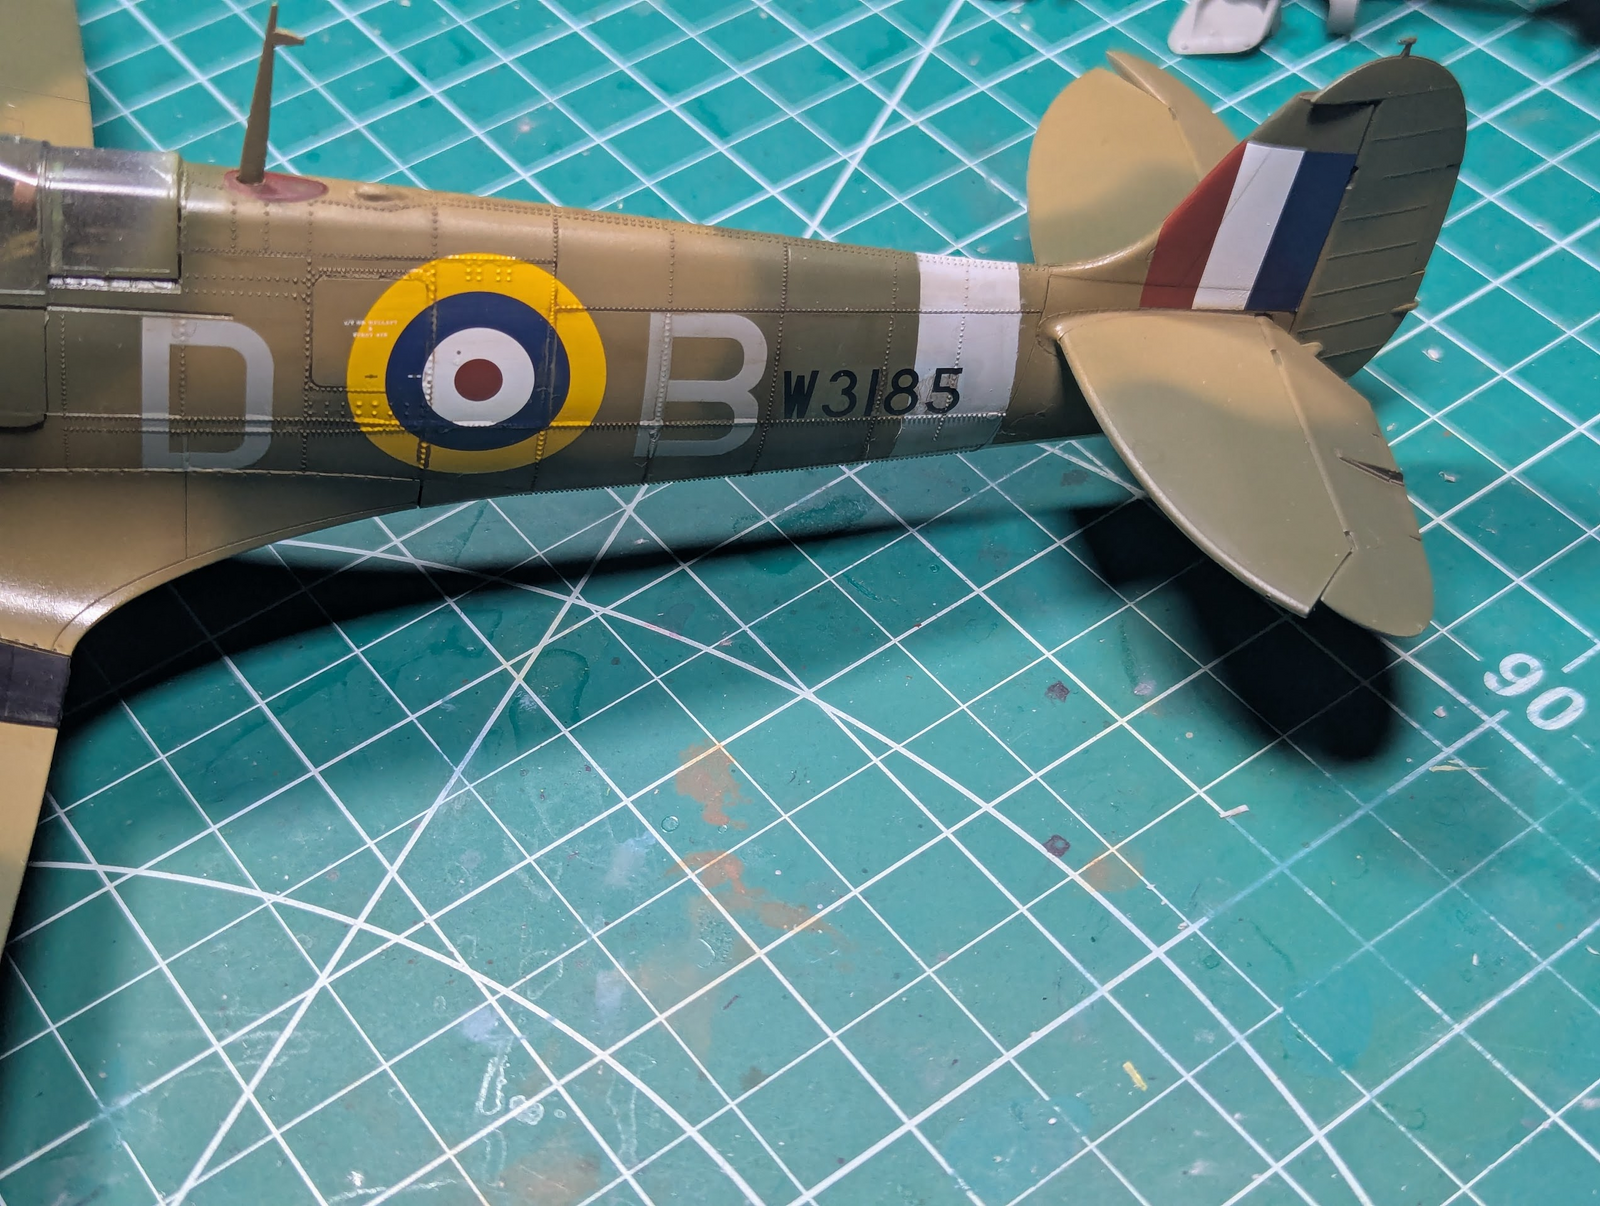
Kotare 1/32 Spitfire Va as flown by Douglas Bader

Scale Model Addict - Model Tips, Guides, Tools & Tech, Tutorials, and Community

Help Support Scale Model Addict:

1751560418749.png
 
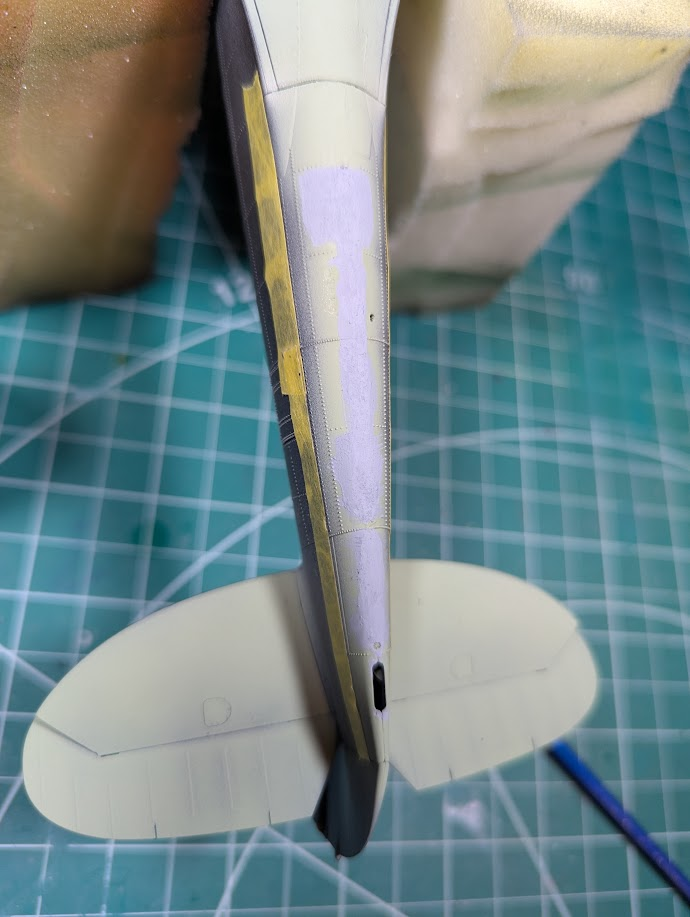
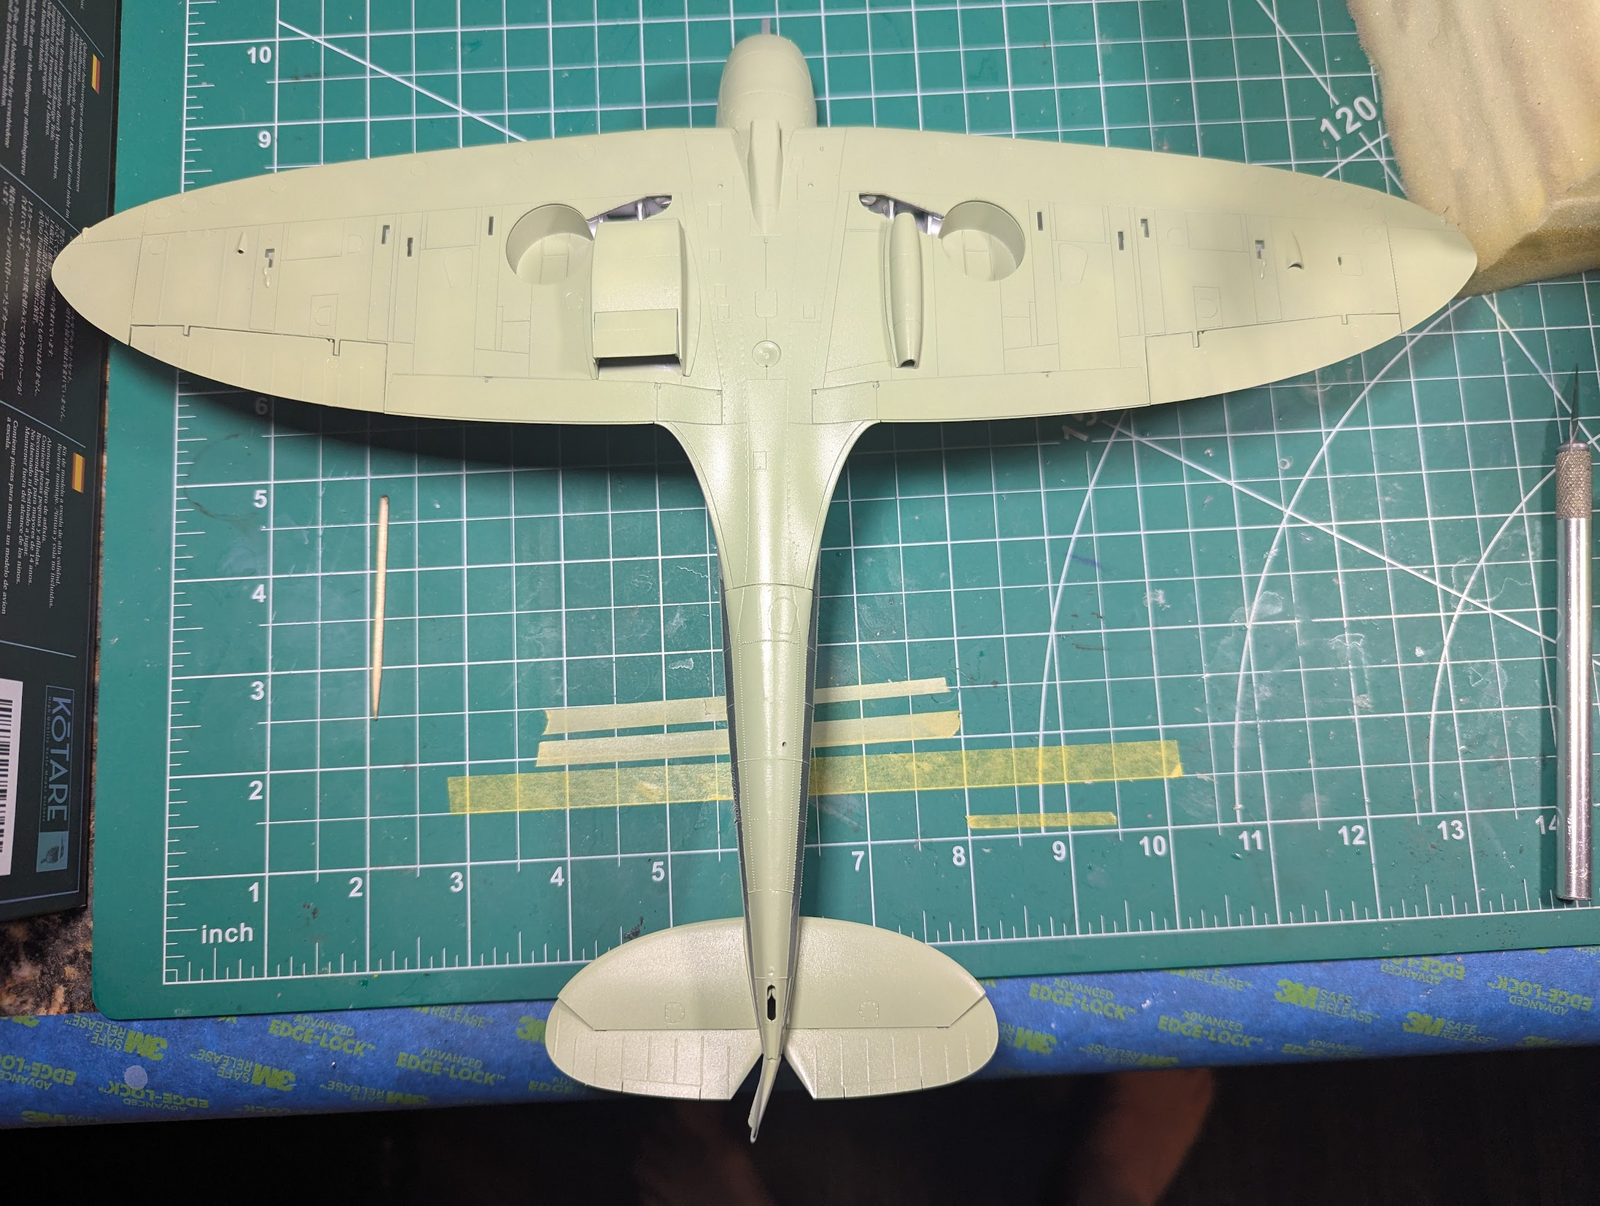
Just a bit more surface work, waiting for my rivet decals. Not sure if you can tell, but I think the kit's rivets are too small, the smallest ones I could find were 0.4mm, these look smaller than that to my eye.

1751635391418.png


Think I'll apply a heavy dose of Finisher 1500 and sand that instead of the plastic. Wondering why these are raised instead of recessed, but shaving them from those damaged panels and putting in negative rivets might be my only route.
 
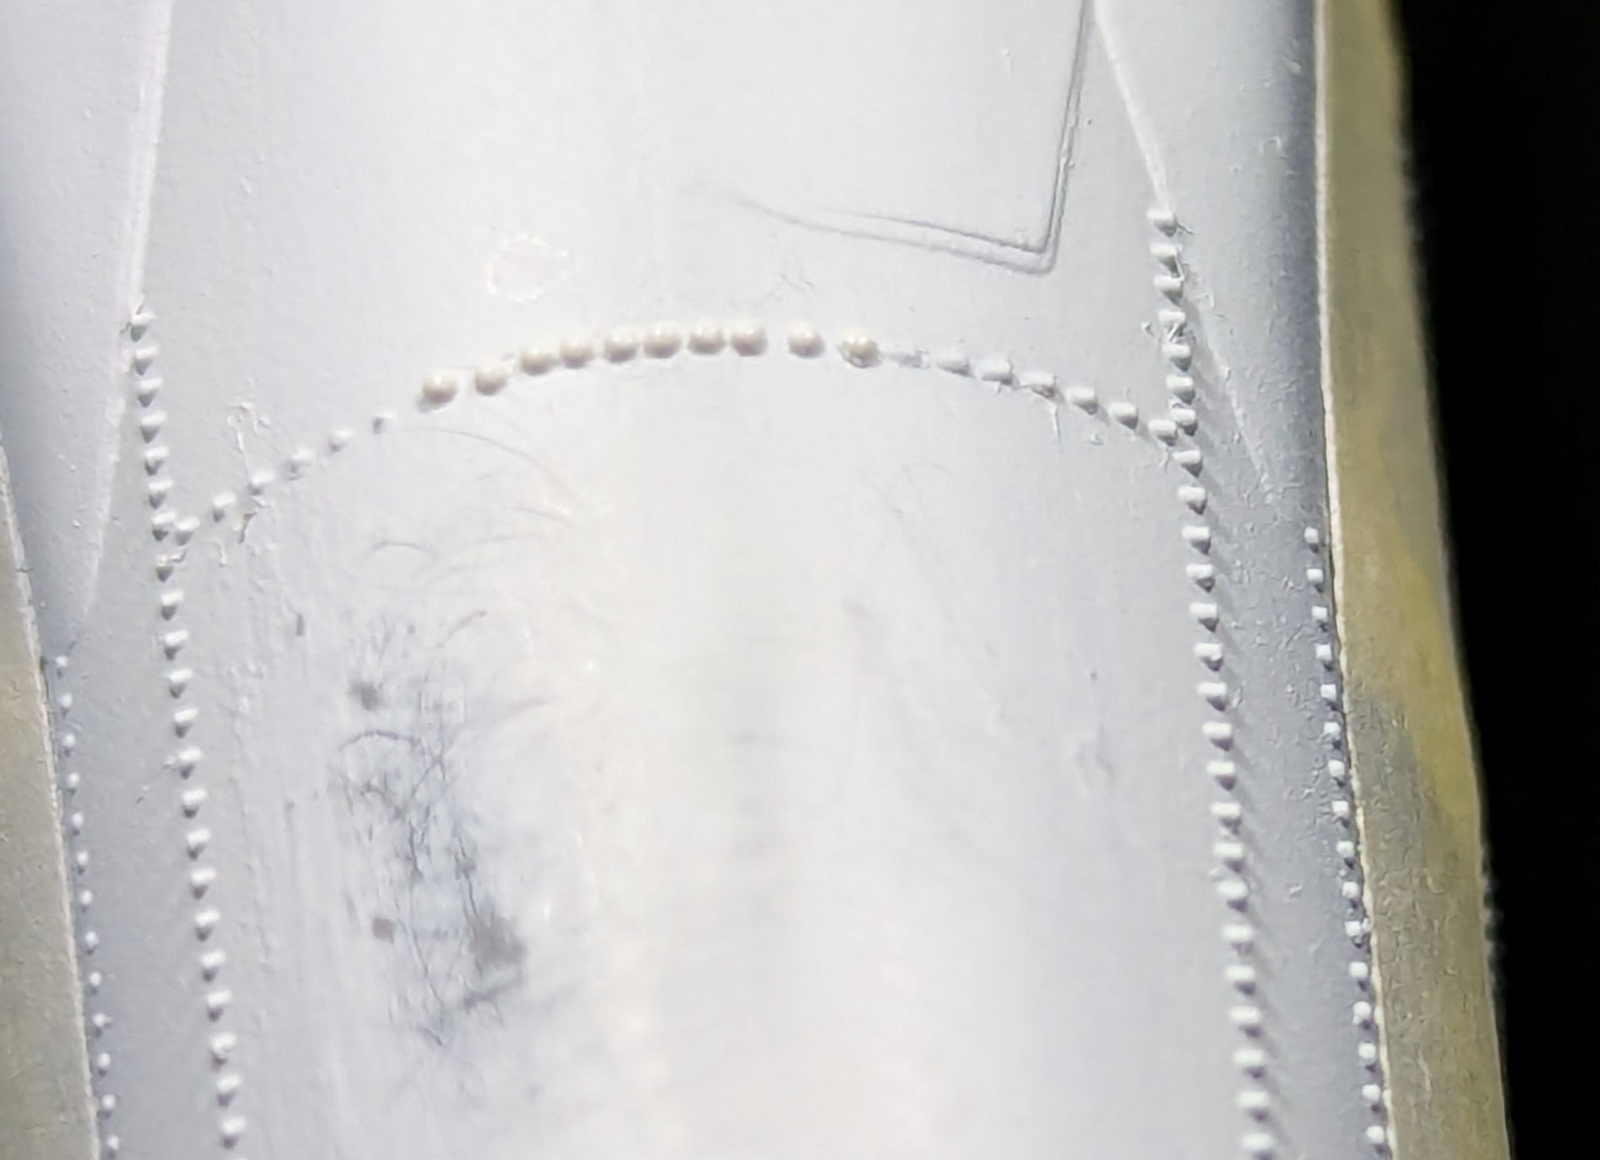
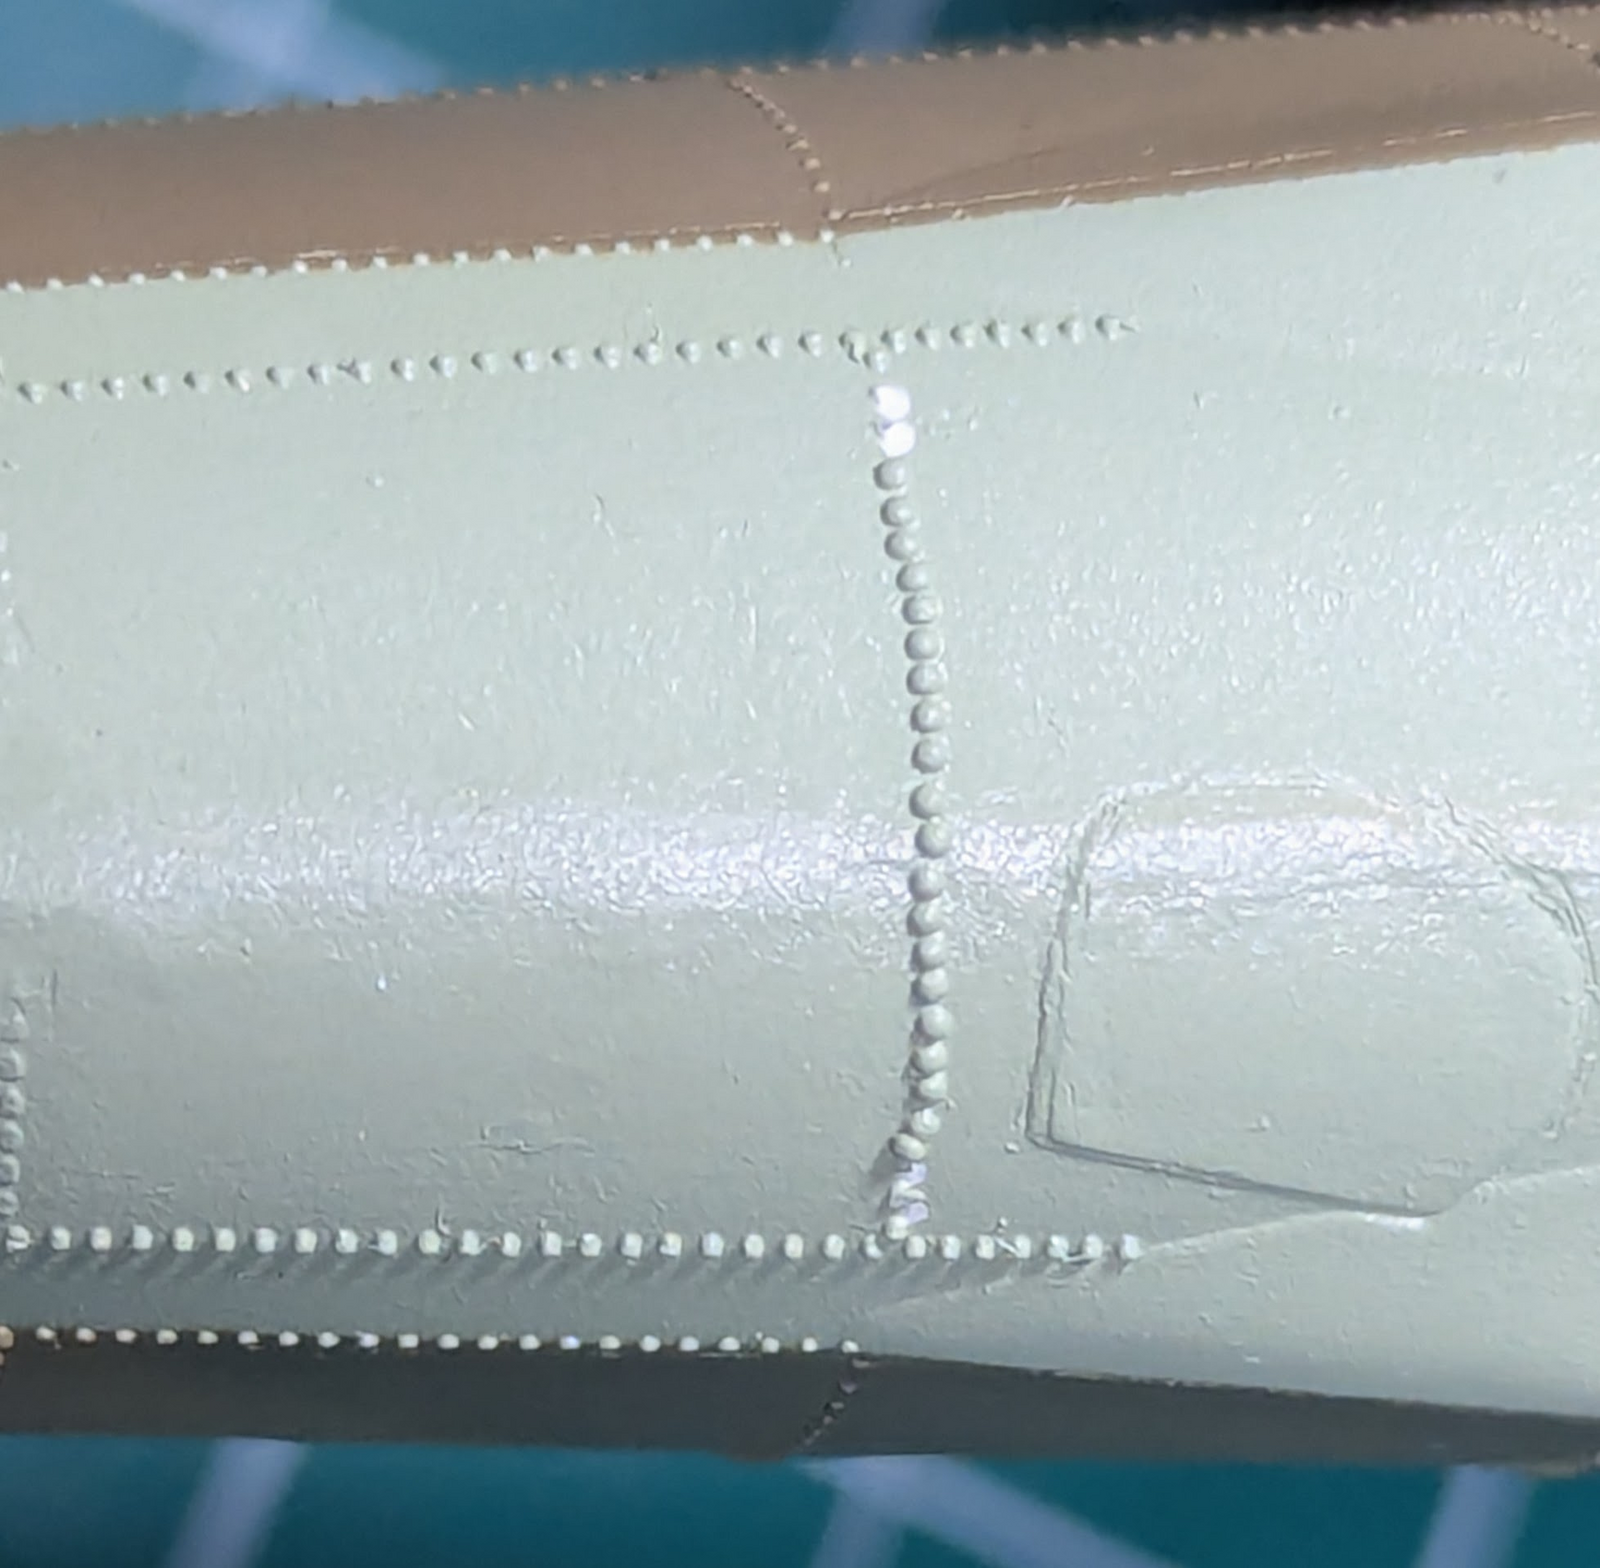
The picture above illustrates some gray filler/primer, Floquil "railroad colours" to be specific. As I said that day I did apply some Mr. Surfacer 1500-white and sanded more. What appeared to be panel lines, which I thought about using stretched-sprue for, are not lines per-se, they are several positive rivets VERY close together. See below.

1751895519200.png


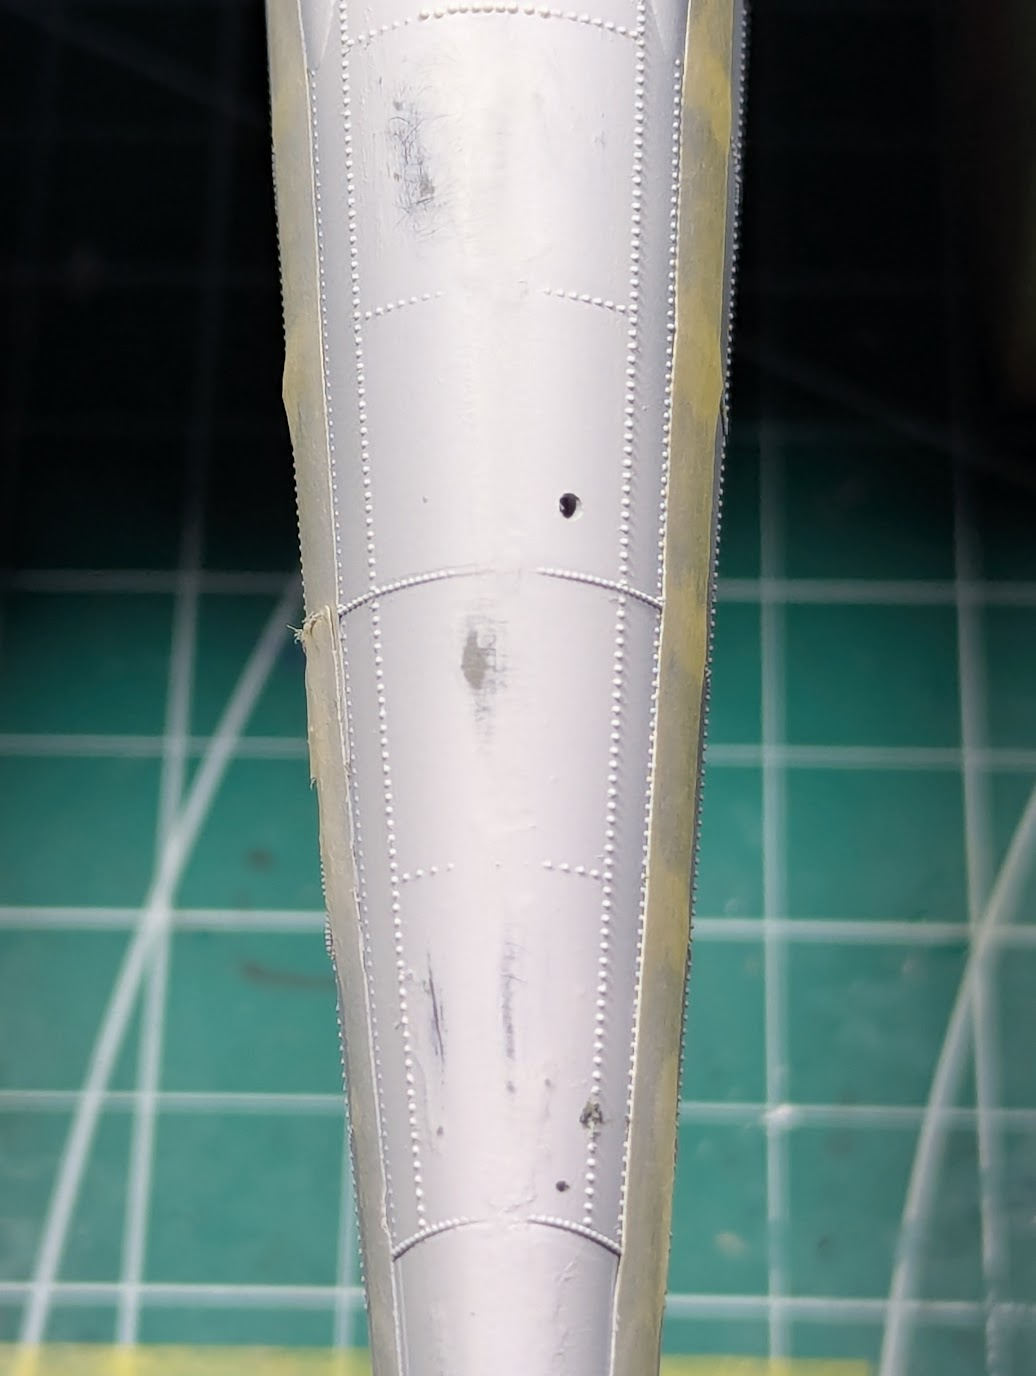
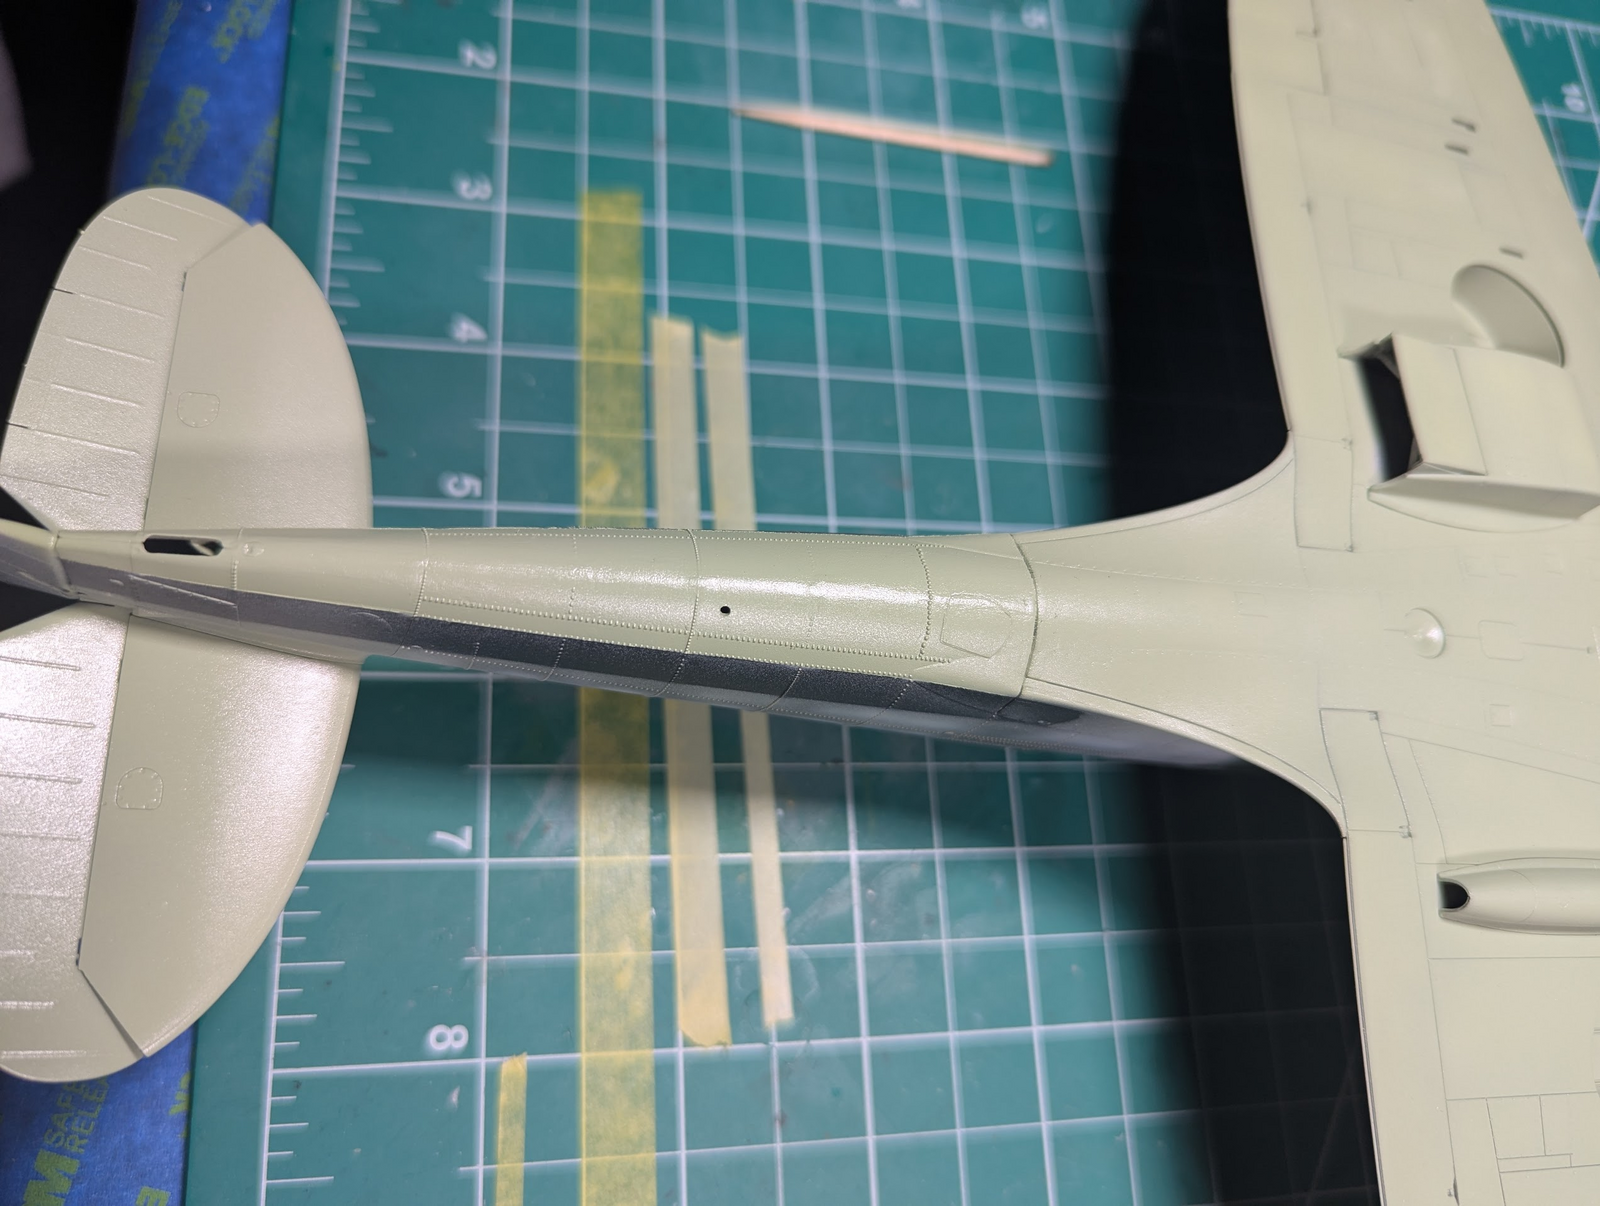
You can just see in the very top of that picture, I put my new rivets in. They are a little bit large, but you might notice, there's more than one size on the model itself.

1751897961857.png


This is as good as I can get with my phone. Note the larger size, think I'll shave off the kit's rivets within those small (damaged) panels and replace them all with the 0.4mm ones from Quinta.
 
Welp...back to the drwing board.

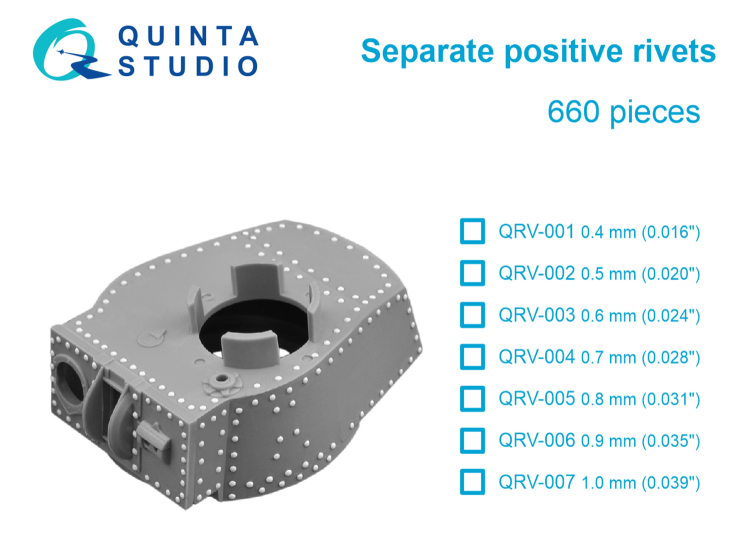
These are not cast resin bits, they are decals. As such the adhesive is fragile, strong enough to hold an insignia or instrument panel on. Probably strong enough to hold the rivets on too, just not if you are messing around with filing/shaving/sanding them. I saw one had fallen off so I tested the adhesion. One wipe of the thumb and they all came right off.

I've reached out to the manufacturer asking for advice. I think micro-set or micro-sol might melt them. Styrene glue will definitely ruin it, and CA glue will show. Perhaps that is just how they are, and I need to apply a protective layer of paint immediately. There were no instructions and the only picture makes them look sturdy/permanent. QRV-001 are the ones I have, all of them get this same little insert sheet.

1751902856703.png
 
Kudos. That takes some serious patience that I definitely do not have. I hope there's a good and easy solution for you.
 
As an Amazon Associate we earn from qualifying purchases. Product prices and availability are accurate as of the date/time indicated and are subject to change.
I hate to say it at this point, but in some of those pictures, the rivets look out of scale—too big. I just spent half an hour browsing pictures of Va's, trying to find those showing the underside of the tail. Not many, but in what I could find, I saw no visible rivets at all. Maybe it would be better to just sand them off entirely? :oops:
 
I have put rivets on 1/8th RC models and even at that scale, it was tedious and hard. 1/32 looks even more challenging. It will look dashing in the end though and be worth the time and effort.
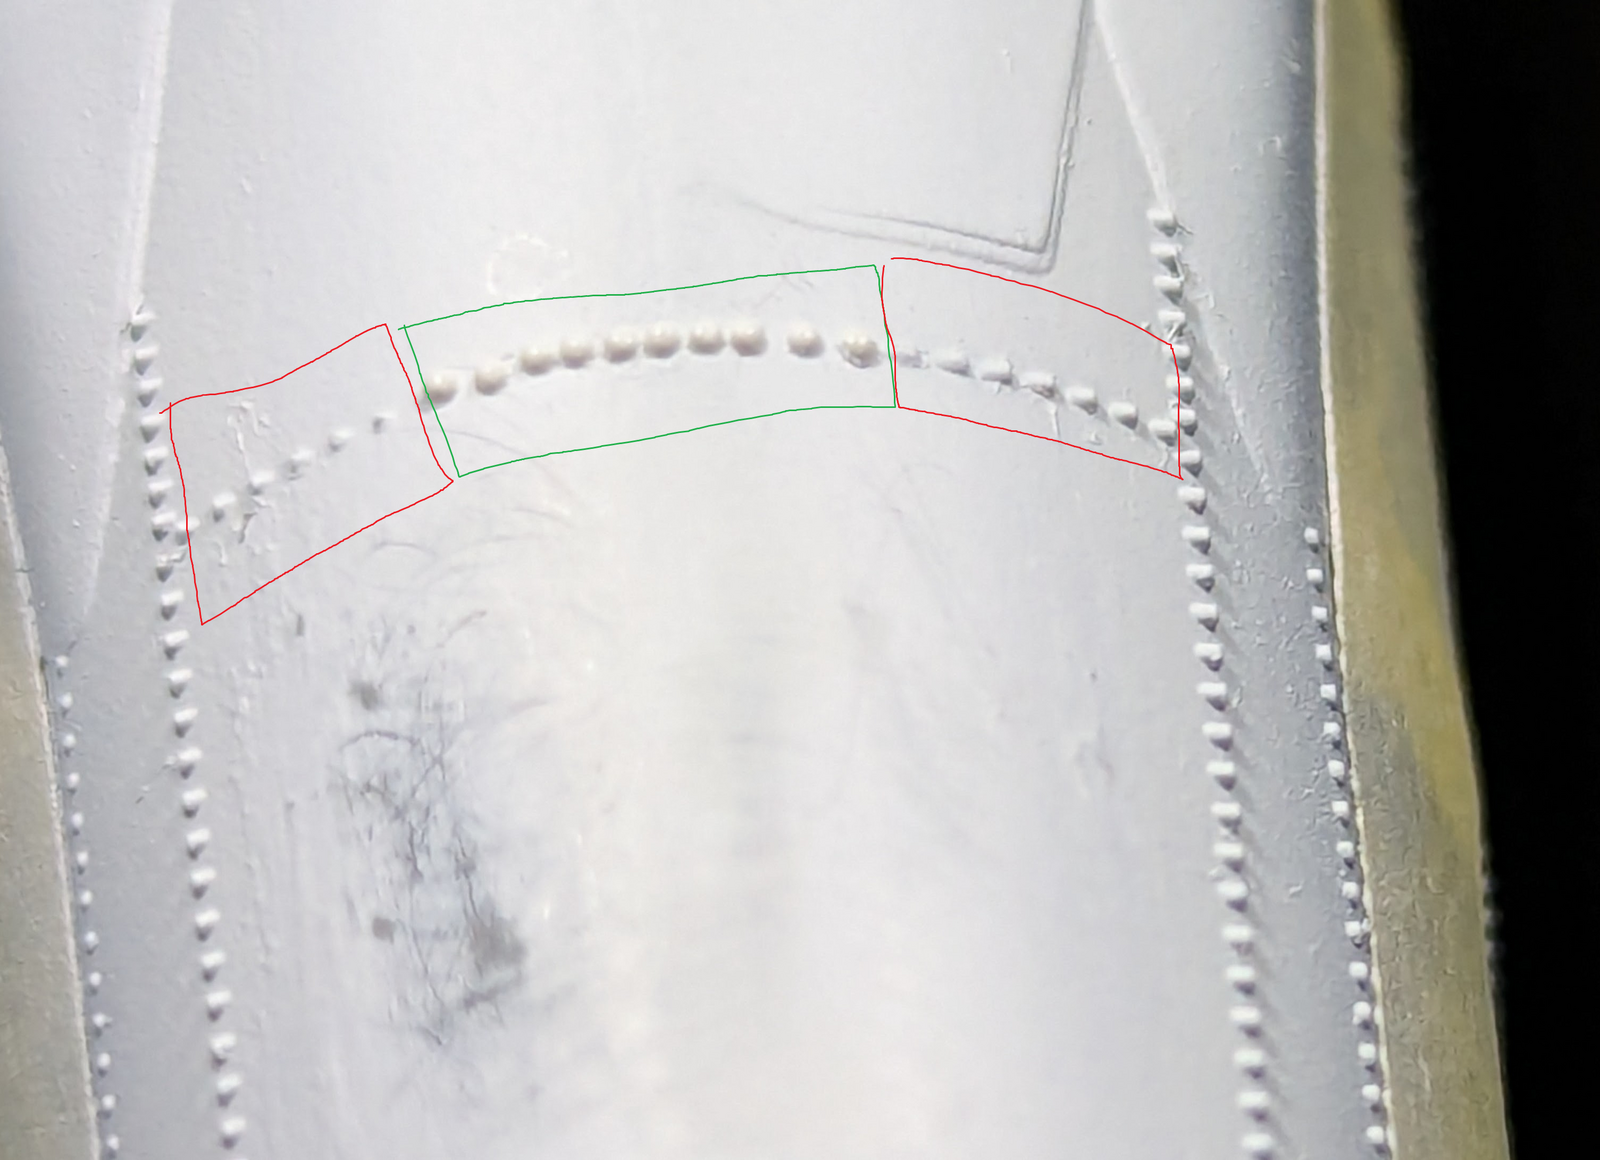
 
I hate to say it at this point, but in some of those pictures, the rivets look out of scale—too big.
If you mean that top-center row in the picture, yes they are, perhaps as much as 40% oversized. The kit's integrated one are at least 3 sizes, just in that section.

Maybe it would be better to just sand them off entirely?
Believe me I've thought of that. But most of the fuselage is similarly riveted, positive rivets and positive panel lines. Not like Monogram in the 1970s, but a combination of the two styles. I might be the victim of marketing, bot Kotare is widely considered to be accurate to the extreme.

It will look dashing in the end though and be worth the time and effort.
This is my hope, I'm going to sit tight and see what I can find about making them more secure before I do more work on it. I have plenty of stuff in-progress to work on. I want to hear from Quinta or someone wo knows, I am sure there's a solution to getting them adhered in a solid way.

================

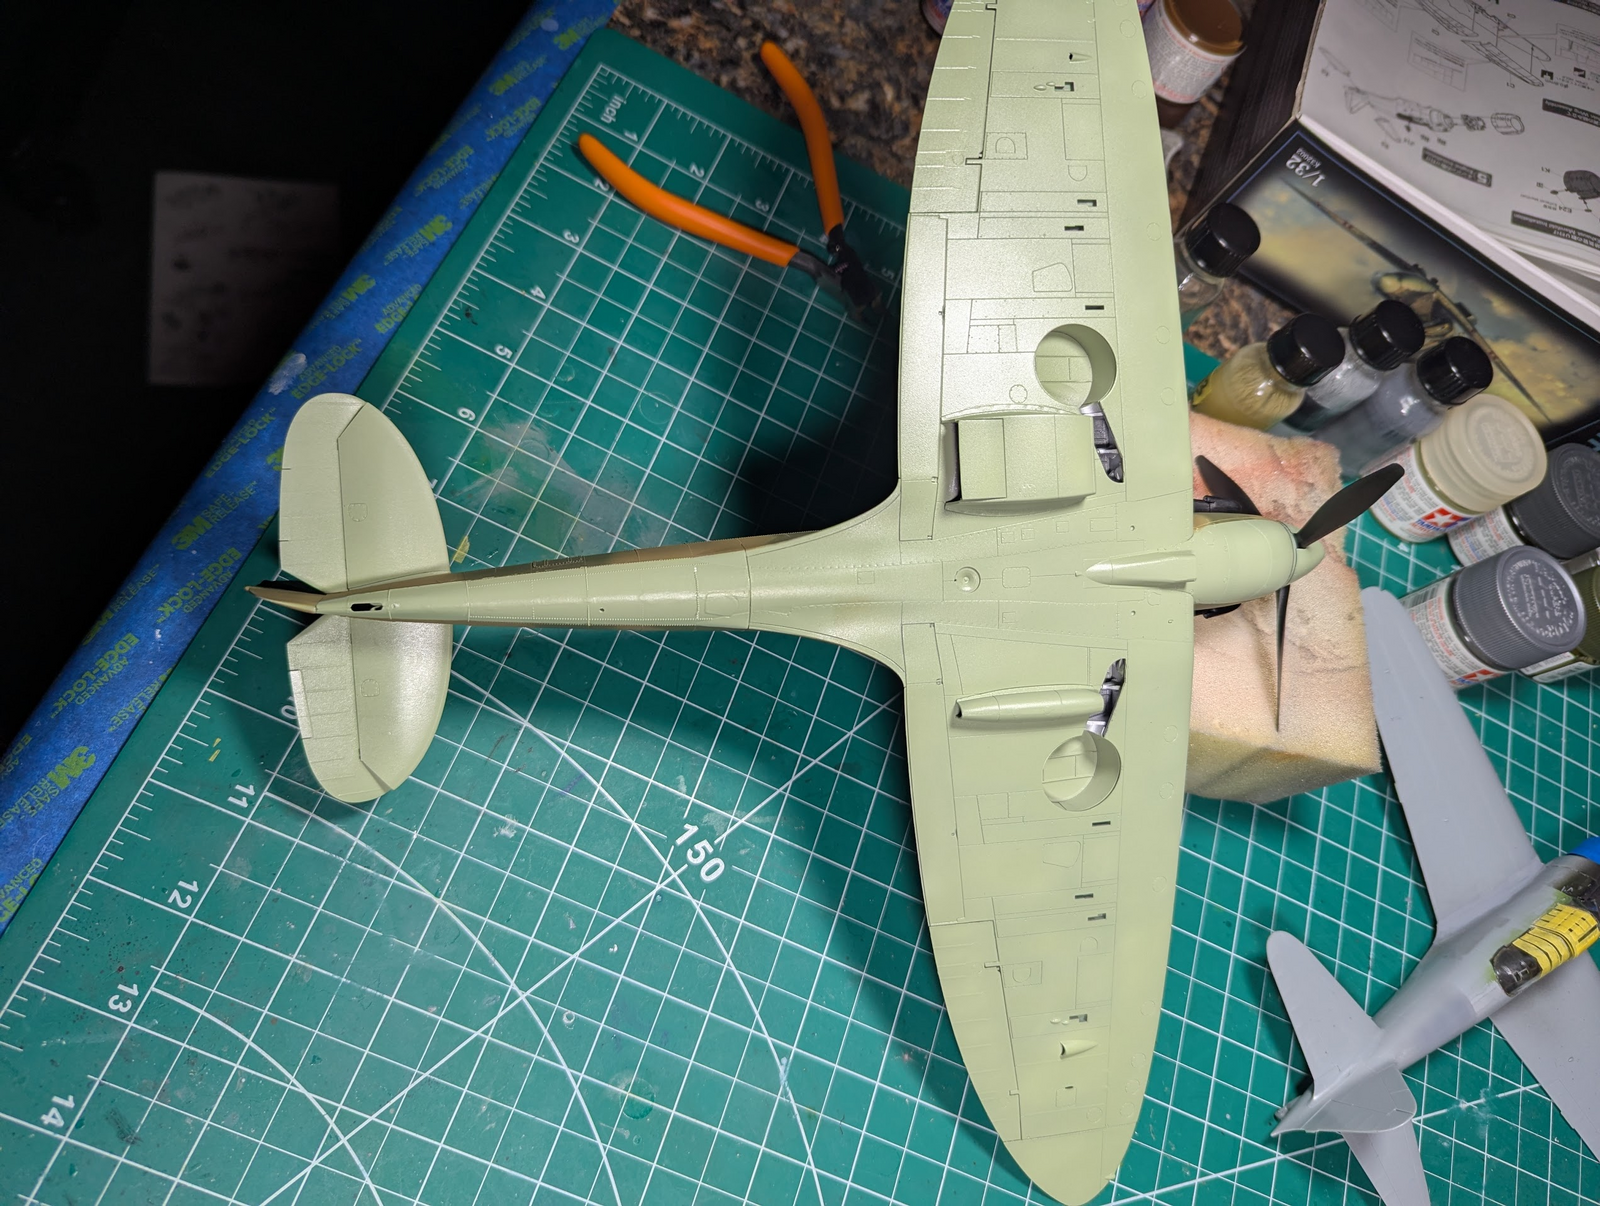
My intent (until convinced otherwise) is to remove the kit parts in red below, and replace what I have in green with a longer row of the Quinta ones. I might skip one of the other rows further down, but I can clearly see the rivets at the rearmost row are even smaller, when my blind arse first looked I thought it was a ridge!

1751928903414.png
 
Last edited:
Tech support never got back to me, I did notice he company (Quinta) is headquartered in Azerbaijan or one of the "*stans", so maybe that is why.

I intend to make a go with the underside as is. It should be relatively easy to change my mind and seek perfection, or try.

What you can see above is the row of rivets toward the front have been replaced, again. I did two other rows as well. The one immediately behind I shaved off, the row right behind that one was mostly there so I skipped it. But that second to last row I replaced them, only to see they fell off by the time I was ready to paint, so I just said screw it and painted.

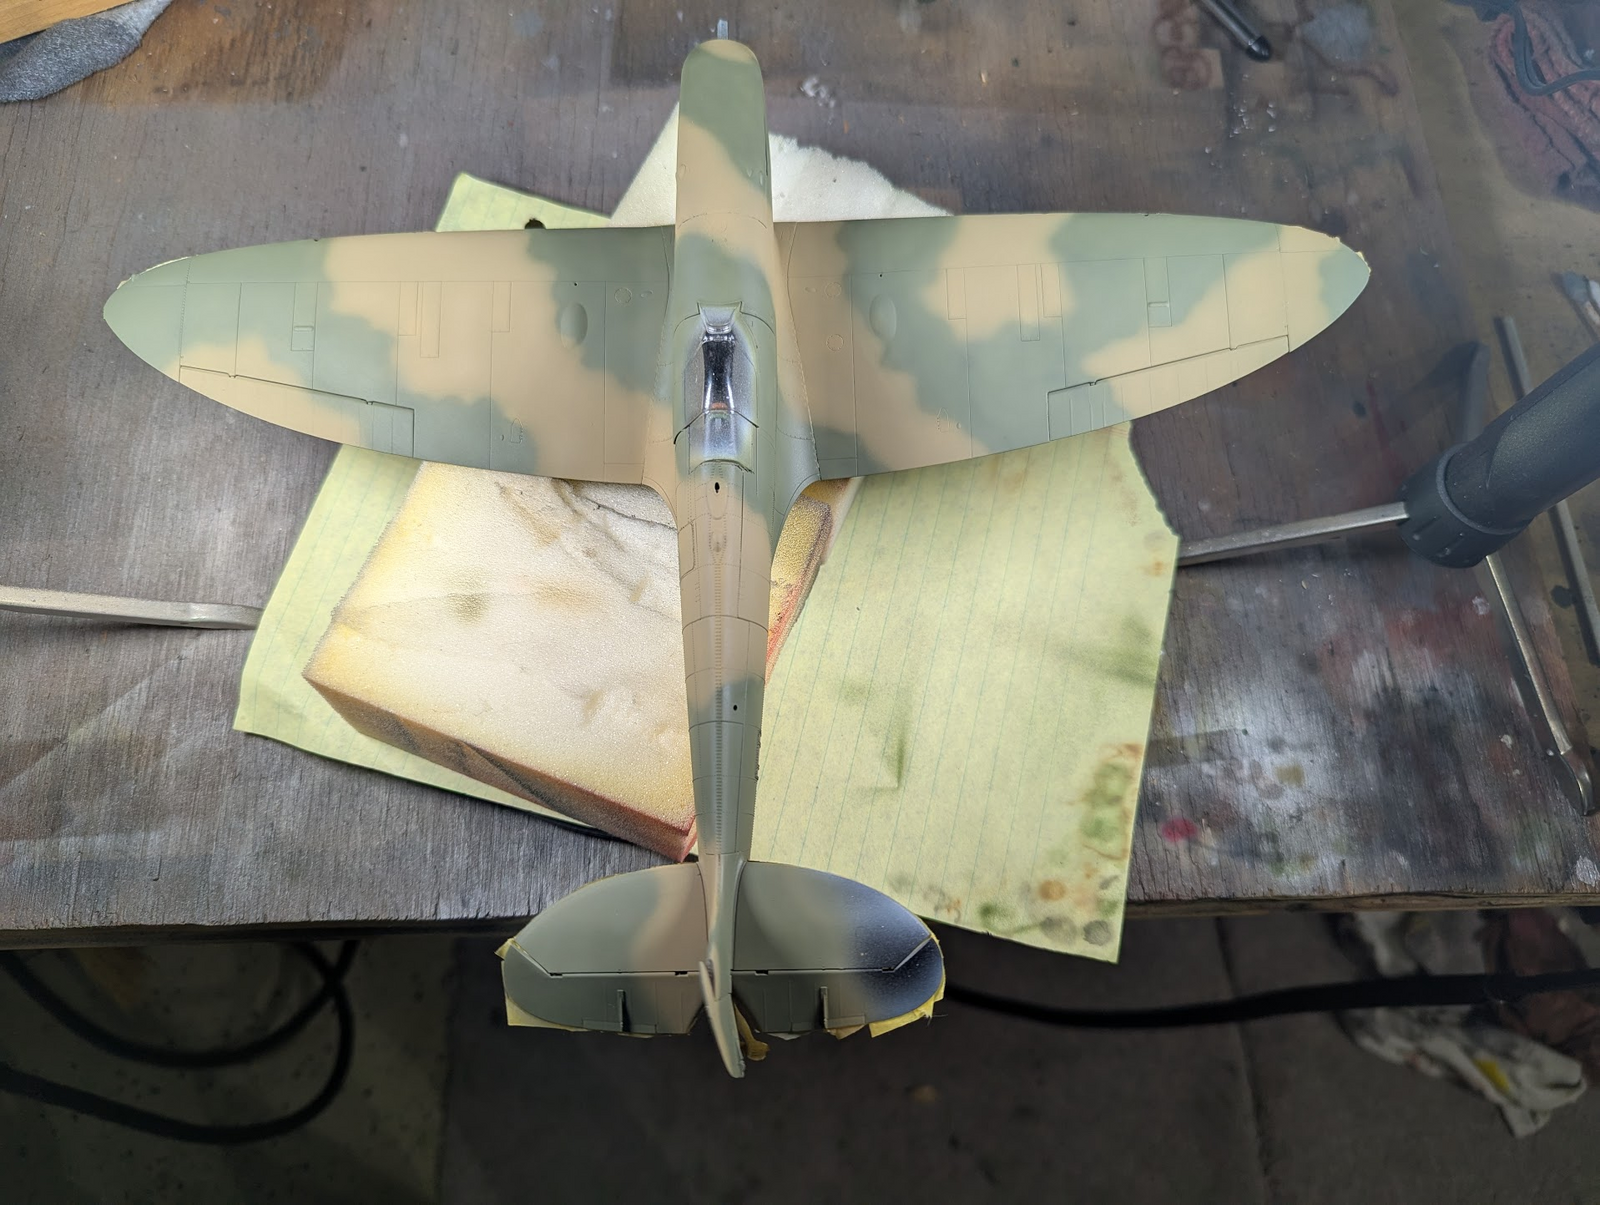
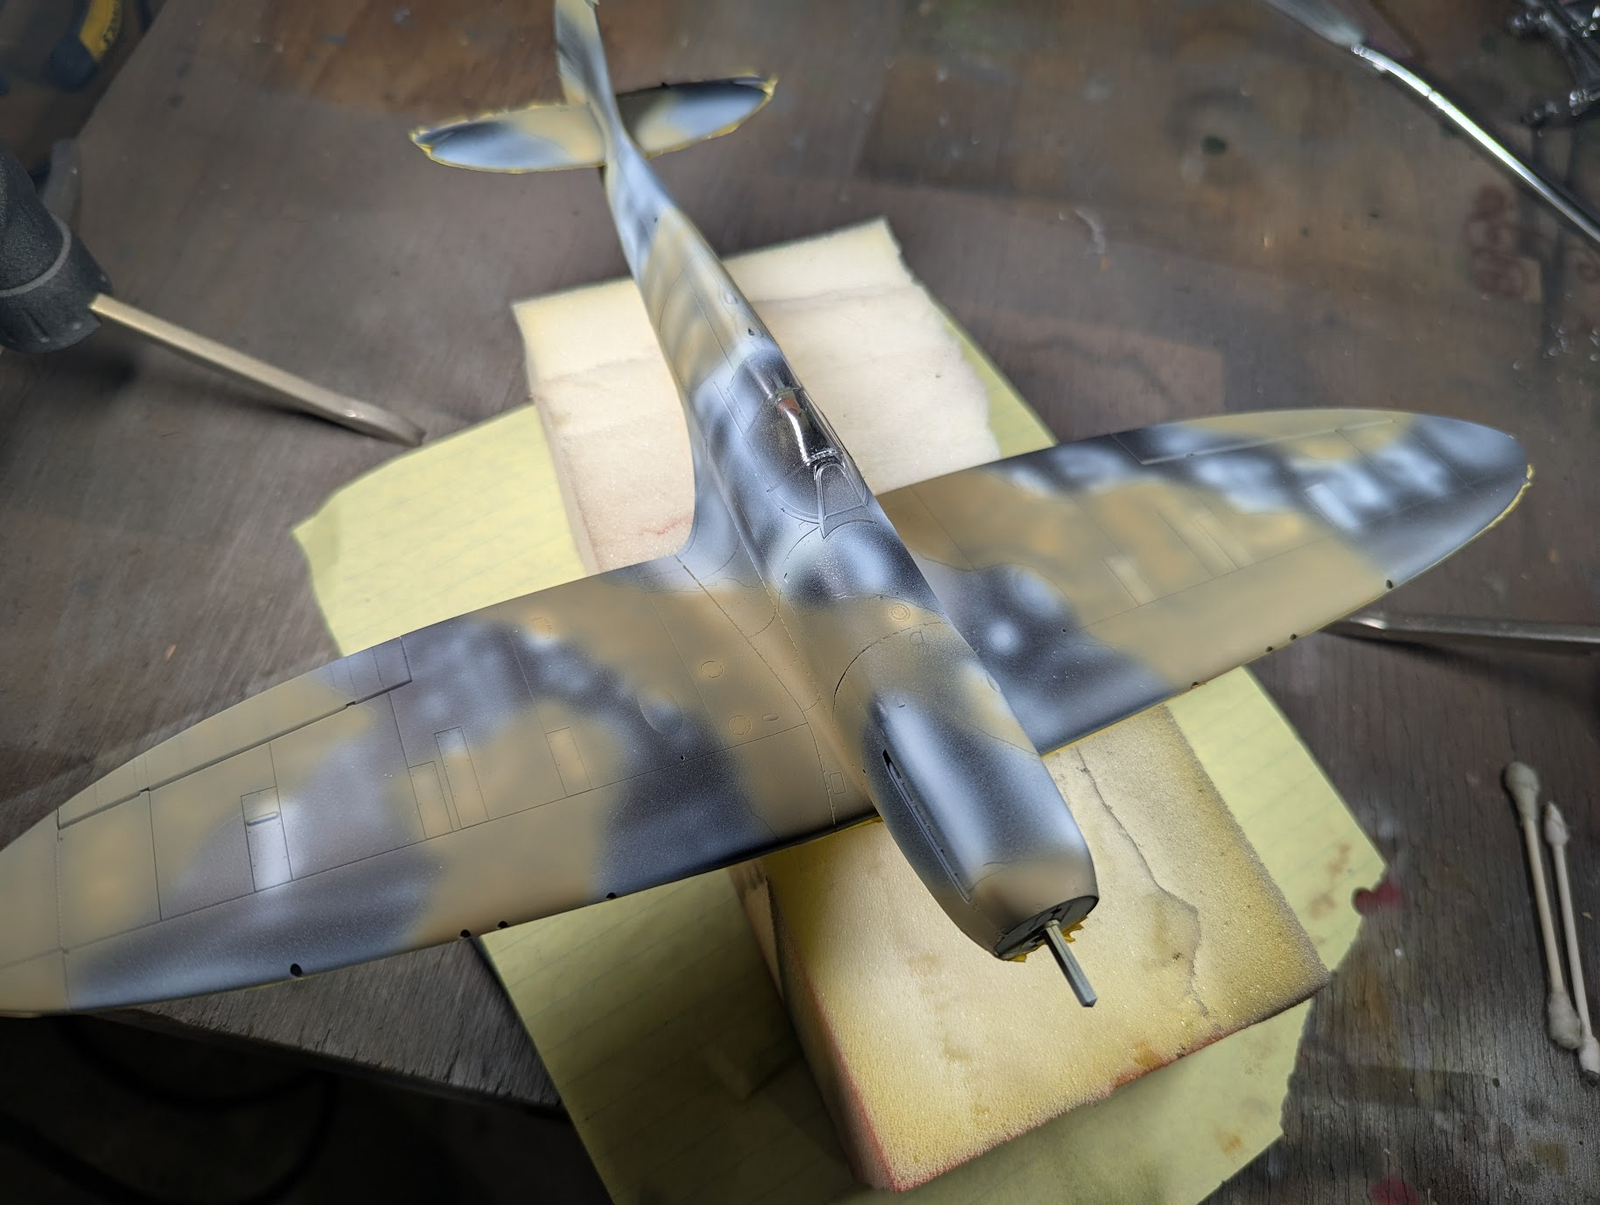
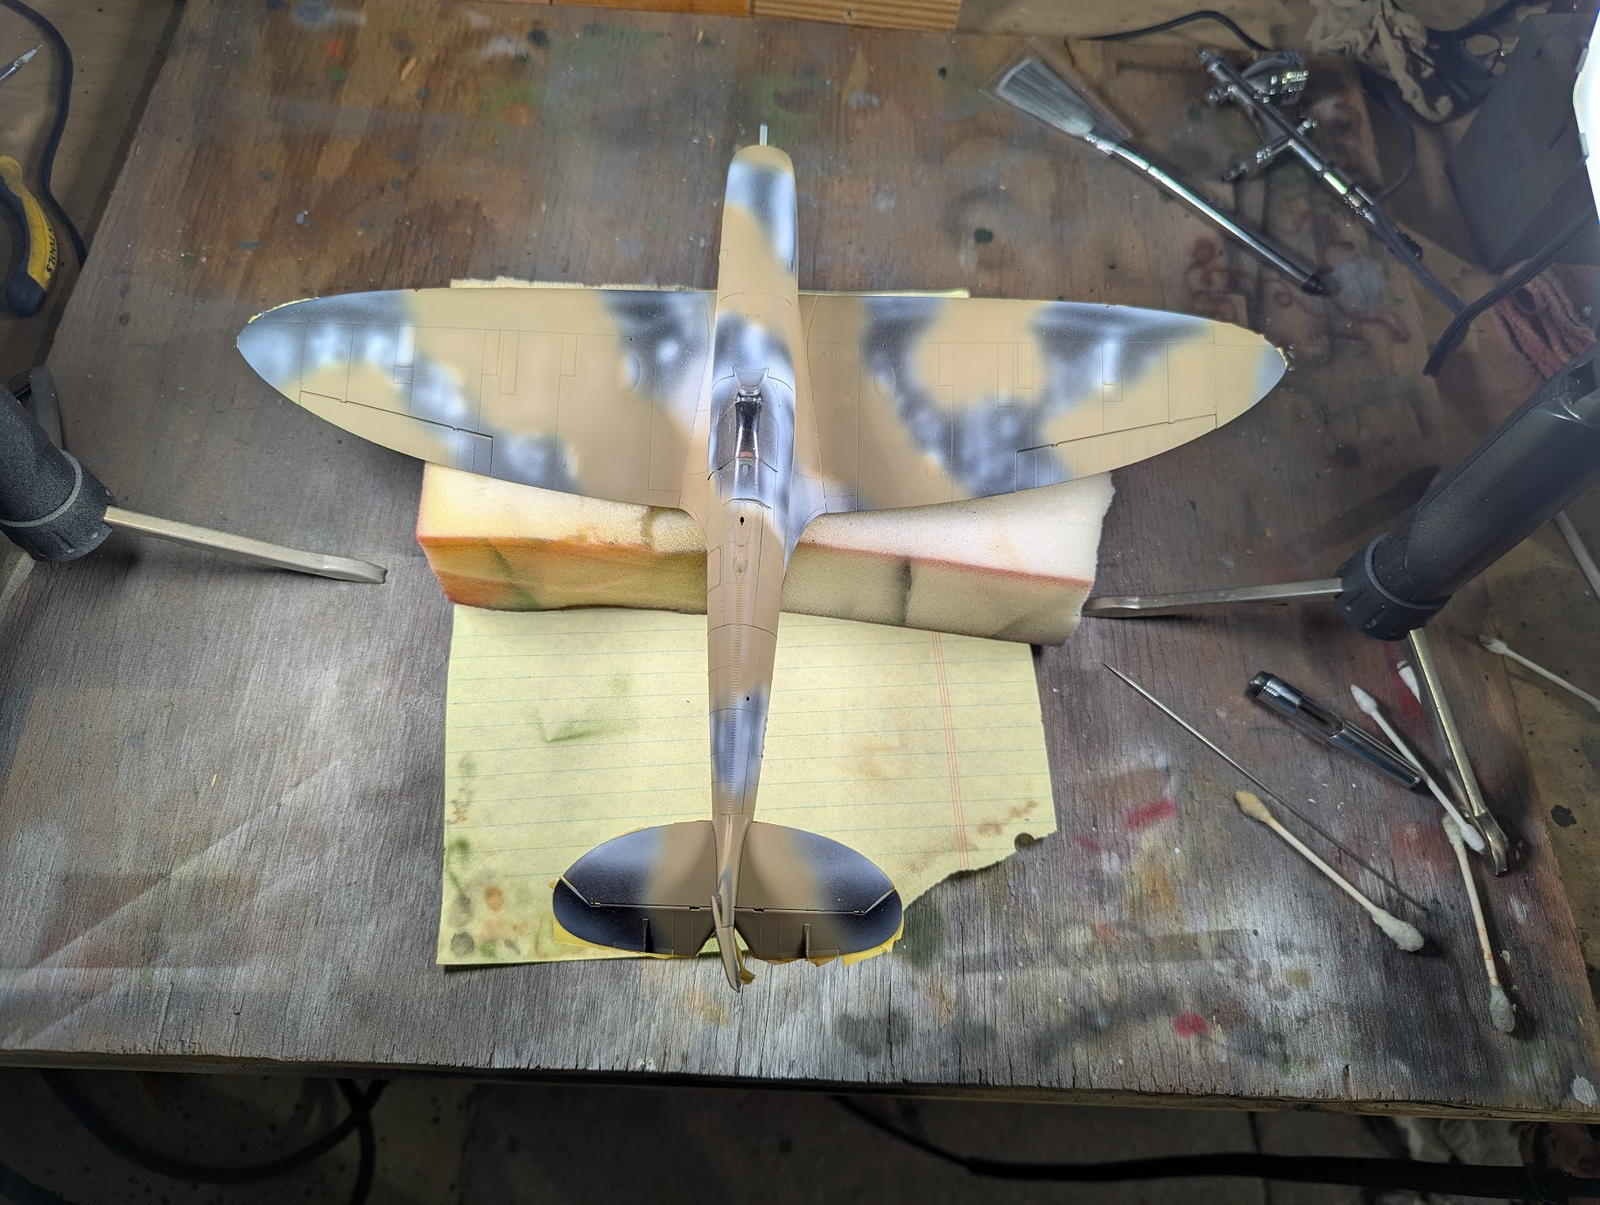
Heavy dose of XF color, then a couple of passes with X-22 to seal it up. I'm afraid to rub on them, but the layers of paint does seem to have helped. Now it is time for top-color. Kotare provided two different formulas for the brown (1:1 of two colors in each option) as well as two different Tamiya greens straight from the bottle.
 
That is an obviously too-thin coat, you can see my pencil lines showing through and even a "B" or two where I tried to keep myself following the pattern correctly.

1752165712724.png


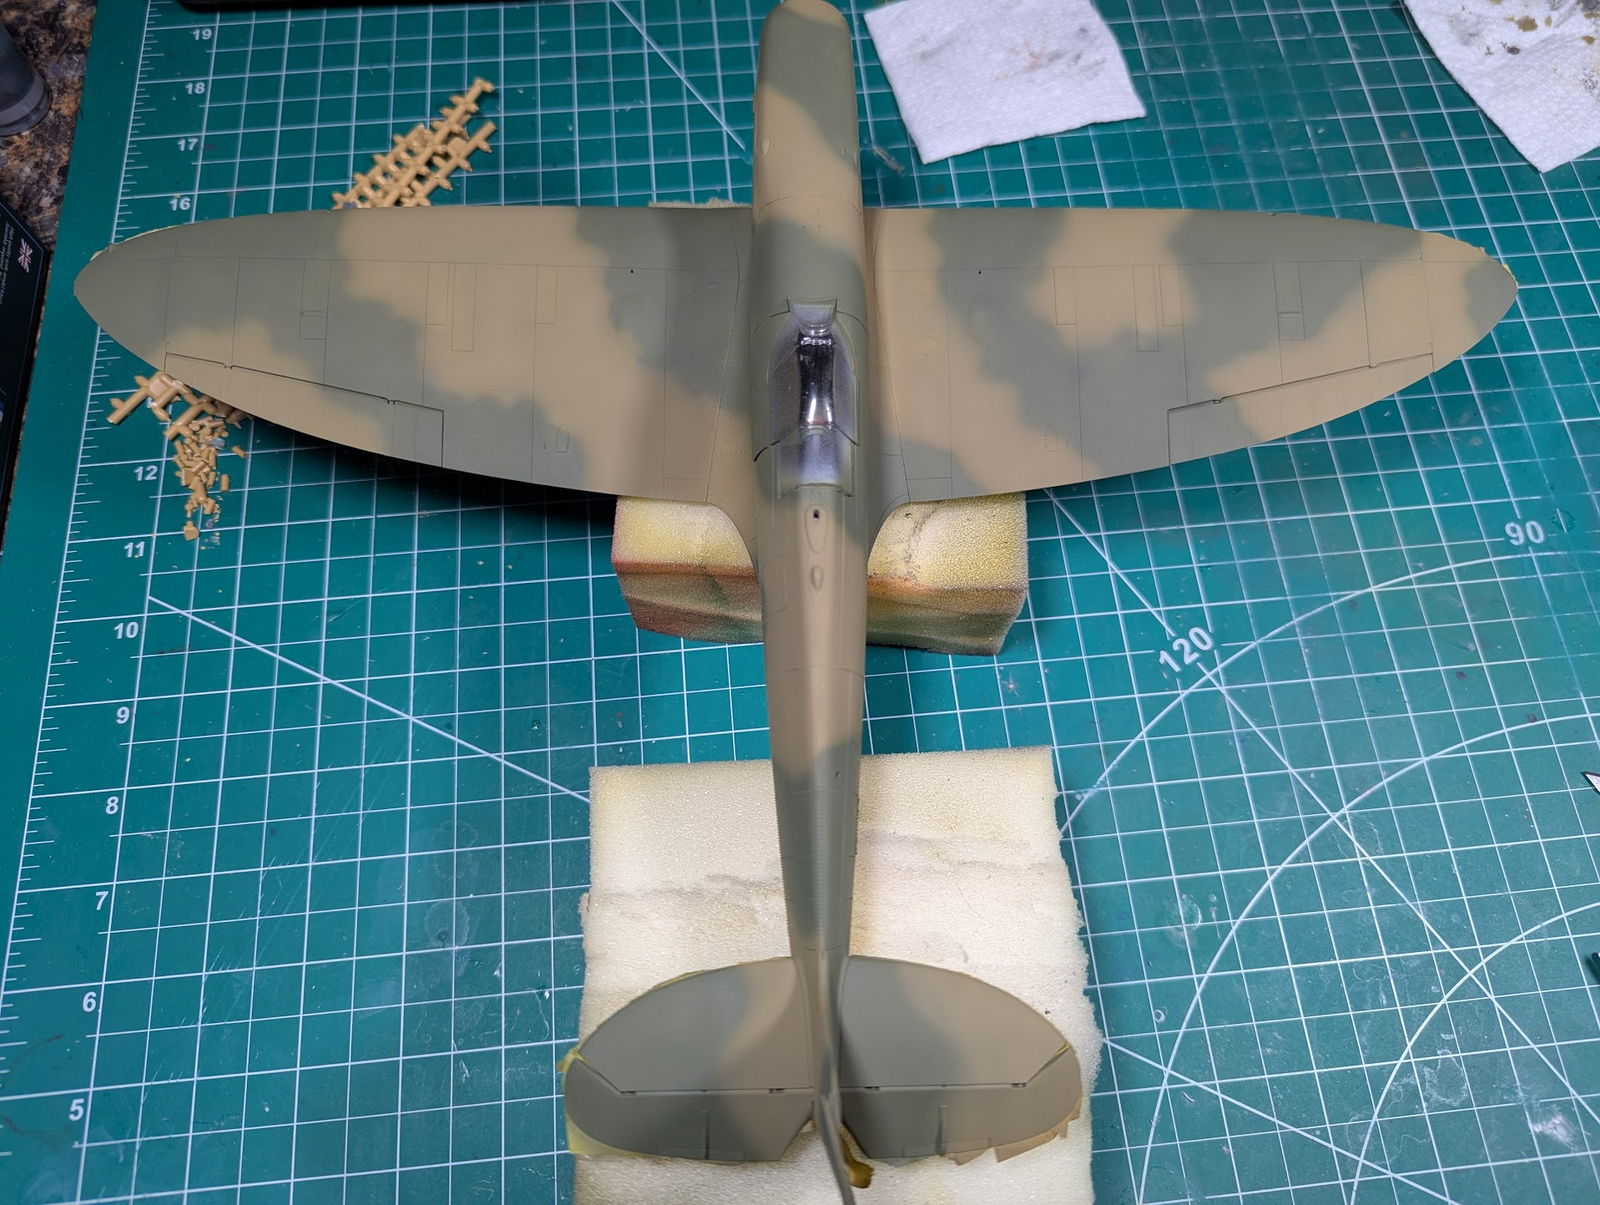
Here it is after several more coats, thicker in some areas thinner in others. Note, my use of those "B"s did not work everywhere, the starboard rear stab is bassackwards, should be brown on the tip not next to the vert stab. You can even see the "B" there :-(
 
Last edited:
...and then the green...

1752182245887.png


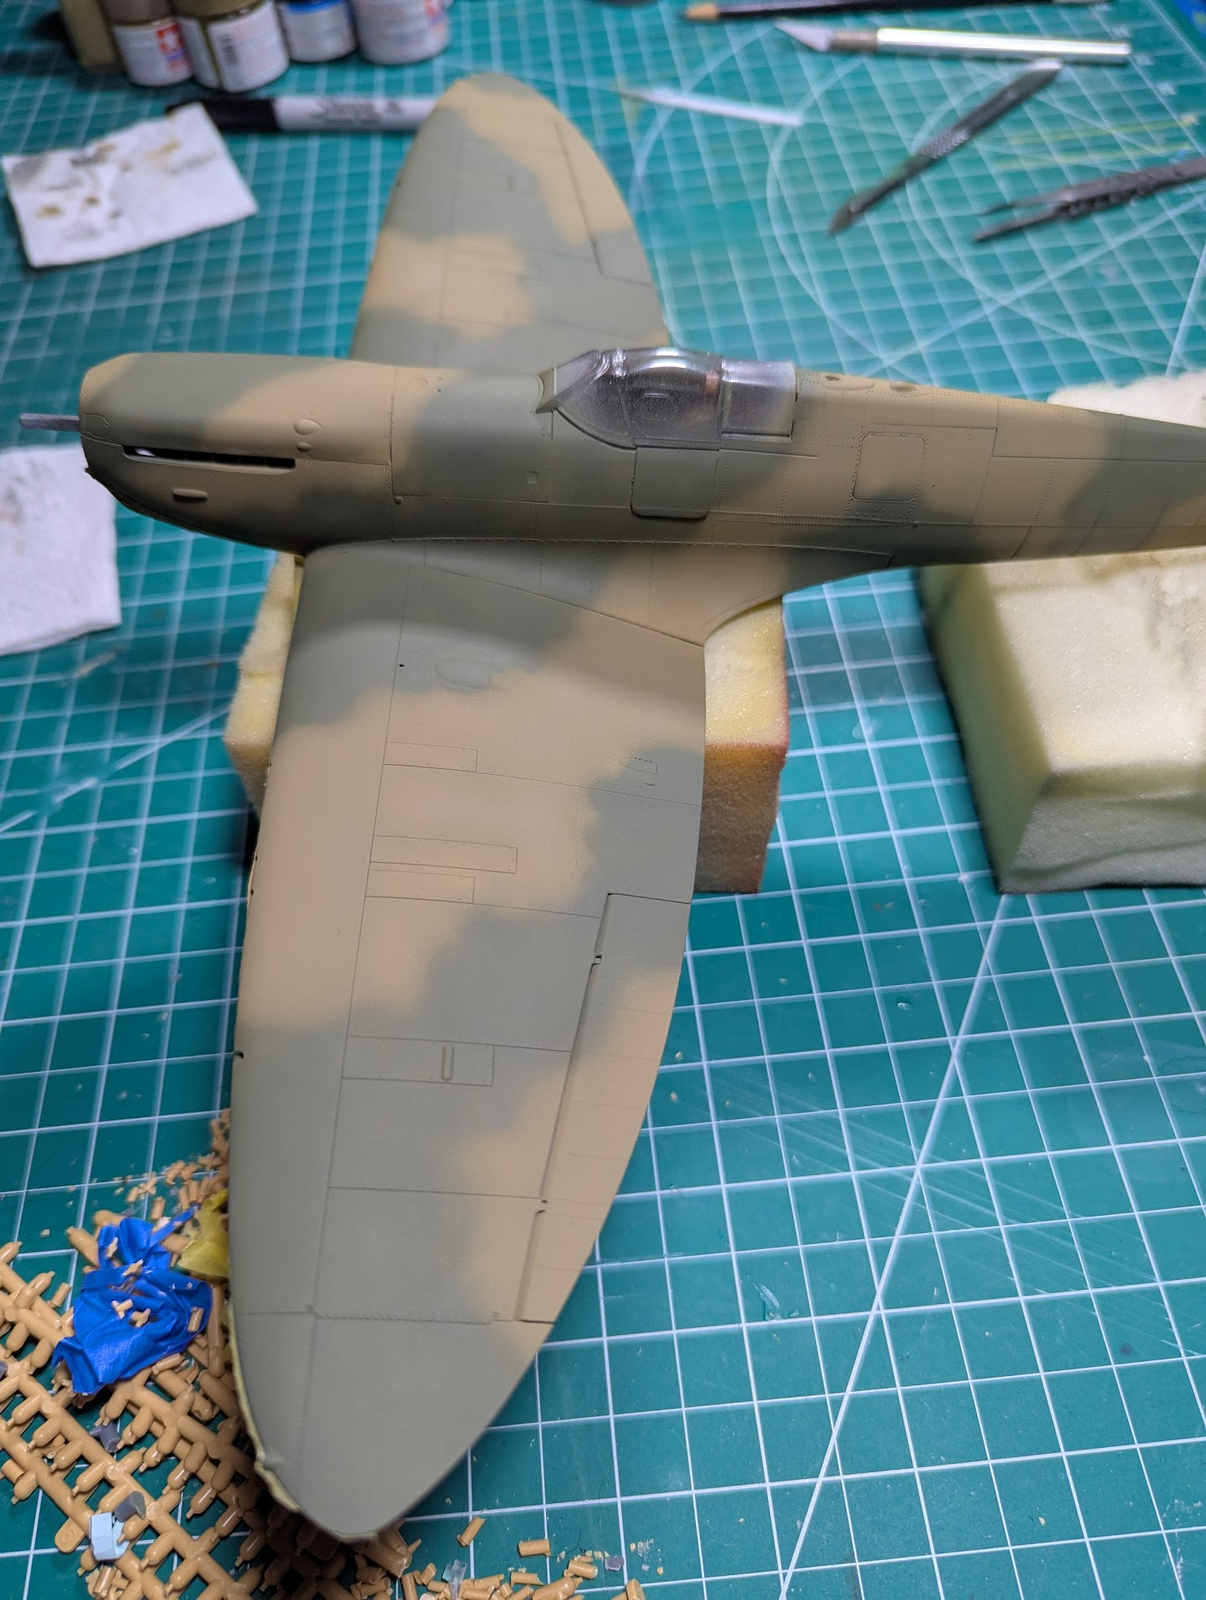
Kotare said either XF-81 or XF-89 were appropriate. I put her into the closet to cure while I decide if I want to do any post-shading or not and if so how much.

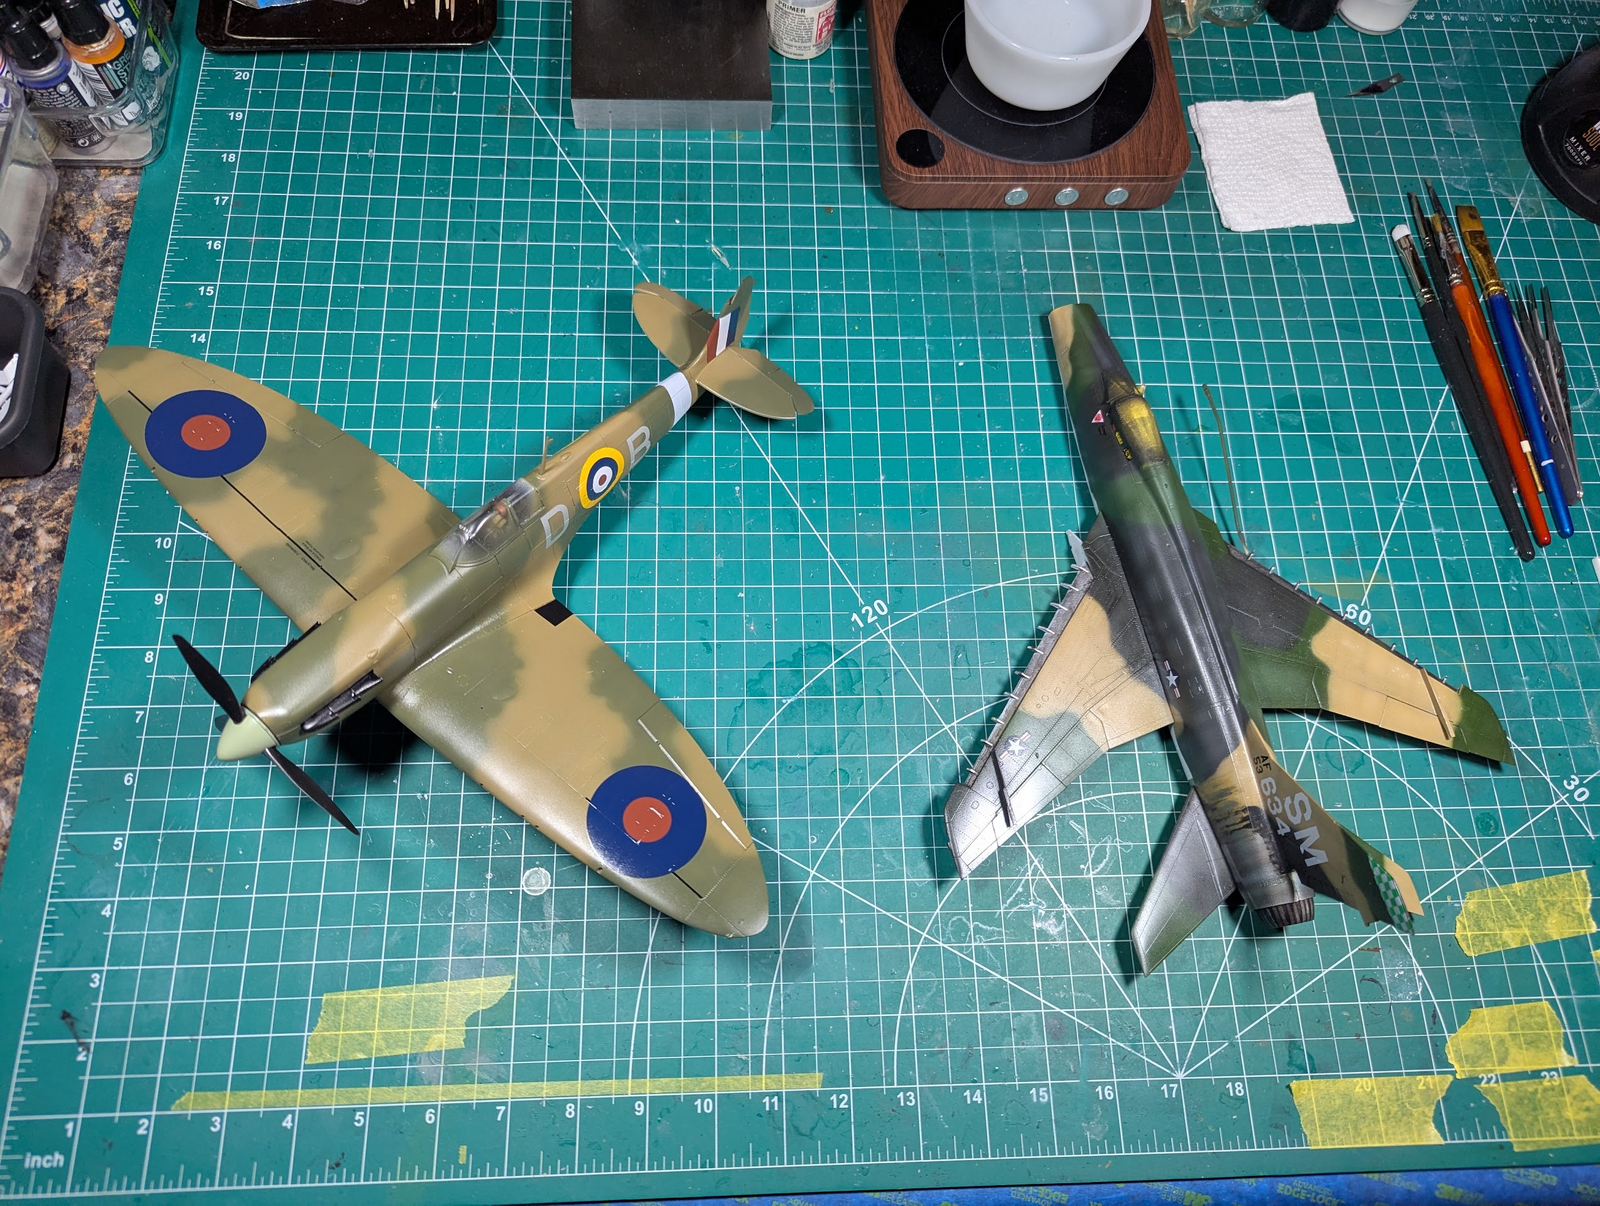
More shots without the intense lights at the spray-bench.

1752182391043.png


1752182404964.png
 
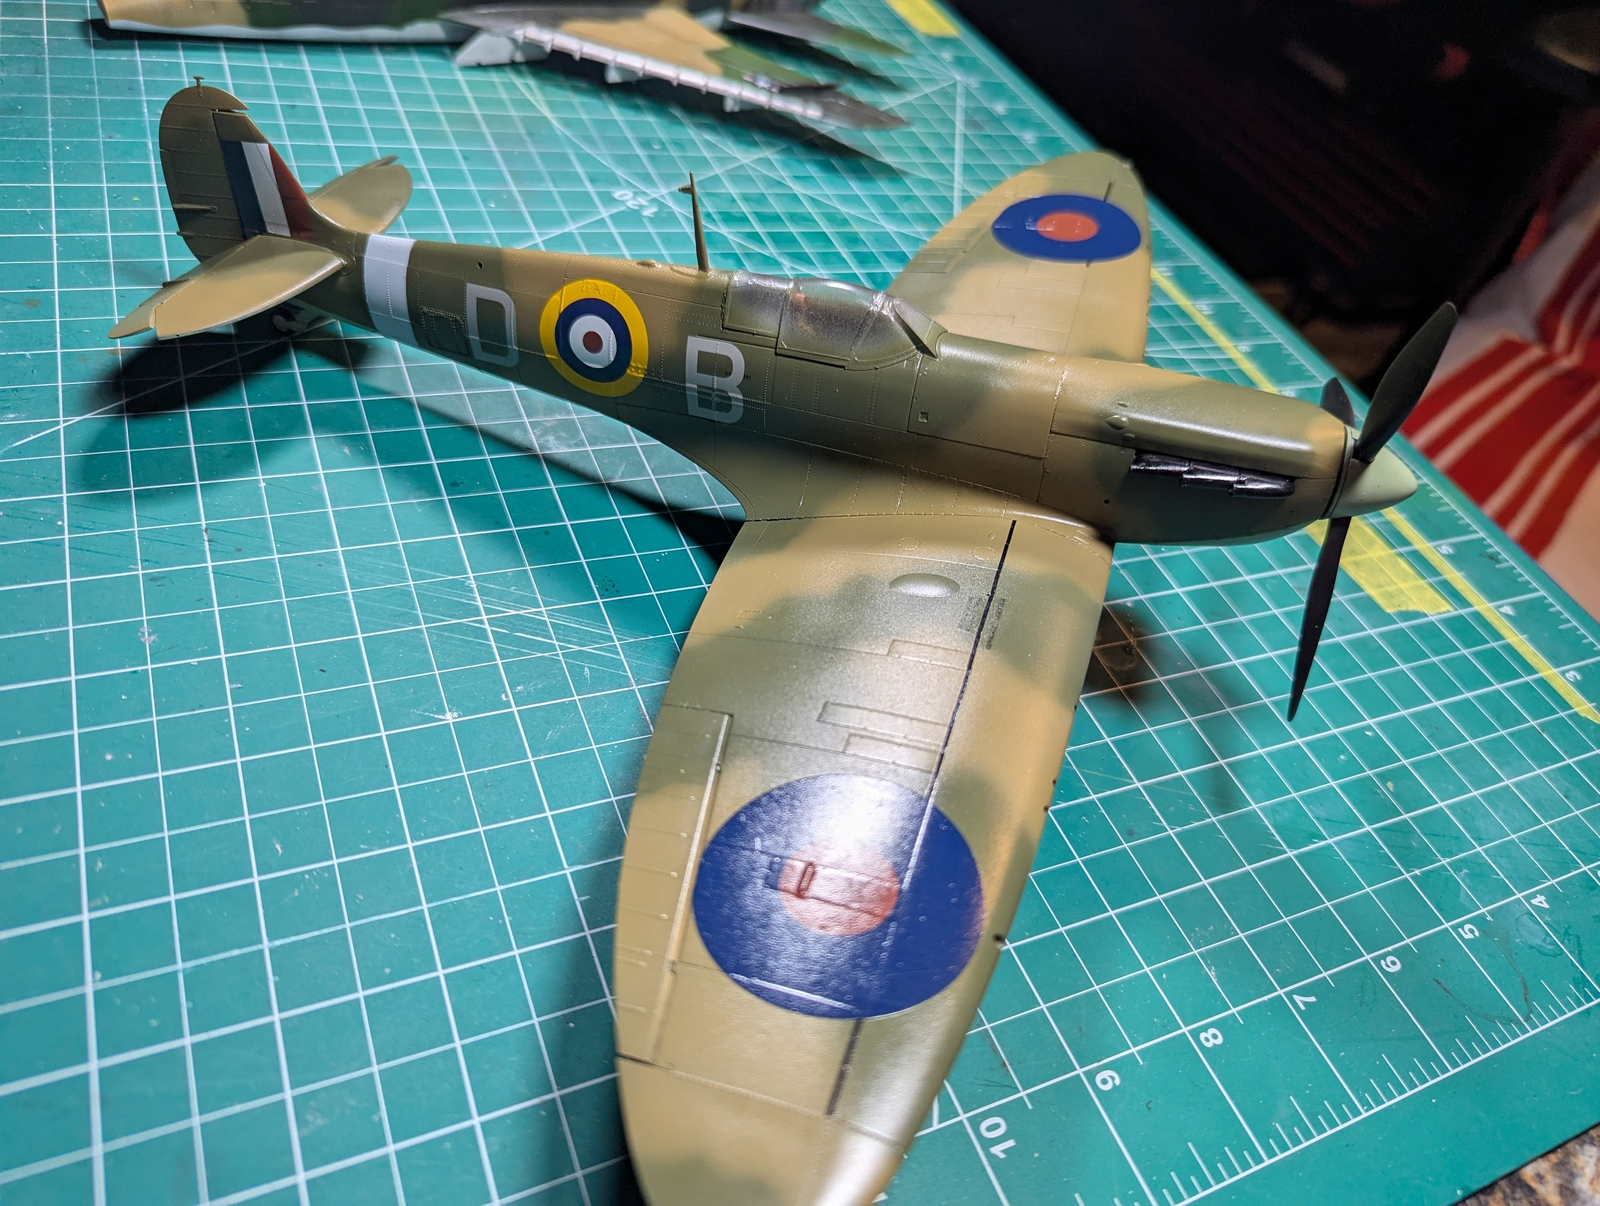
I decided that I will not add any more shading to this, want to keep the overall weathering down to a major degree. This plane was lost (pilot captured famously) before the Mk.Vs were prevalent which is partly why this one uses the A-wing not the B as most Mk Vs had.

Since I was done spraying the green/brown for a while I wanted to get the tape off, I try to not leave it on any longer than needed. I knew the risk when I took it, one mantra that is as close to universal as anything I can think of is "never put tape (even Tamiya-yellow) on top of decals".

1752351345977.png


I also knew these Quinta Studios "rivets" were decals, but I think I was just hoping that 3 or 4 layers of paint and a thick coat of clear (X-22) would hold them on. Lost 4 of the buggers, although zoomed in it looks like 3.5 maybe, one is kinda hanging there.

1752351549053.png

At "normal" focal length the biggest issue is the white primer showing up. I'll deal wit that somehow, but I am done trying to adhere tiny little dots without proper adhesives.

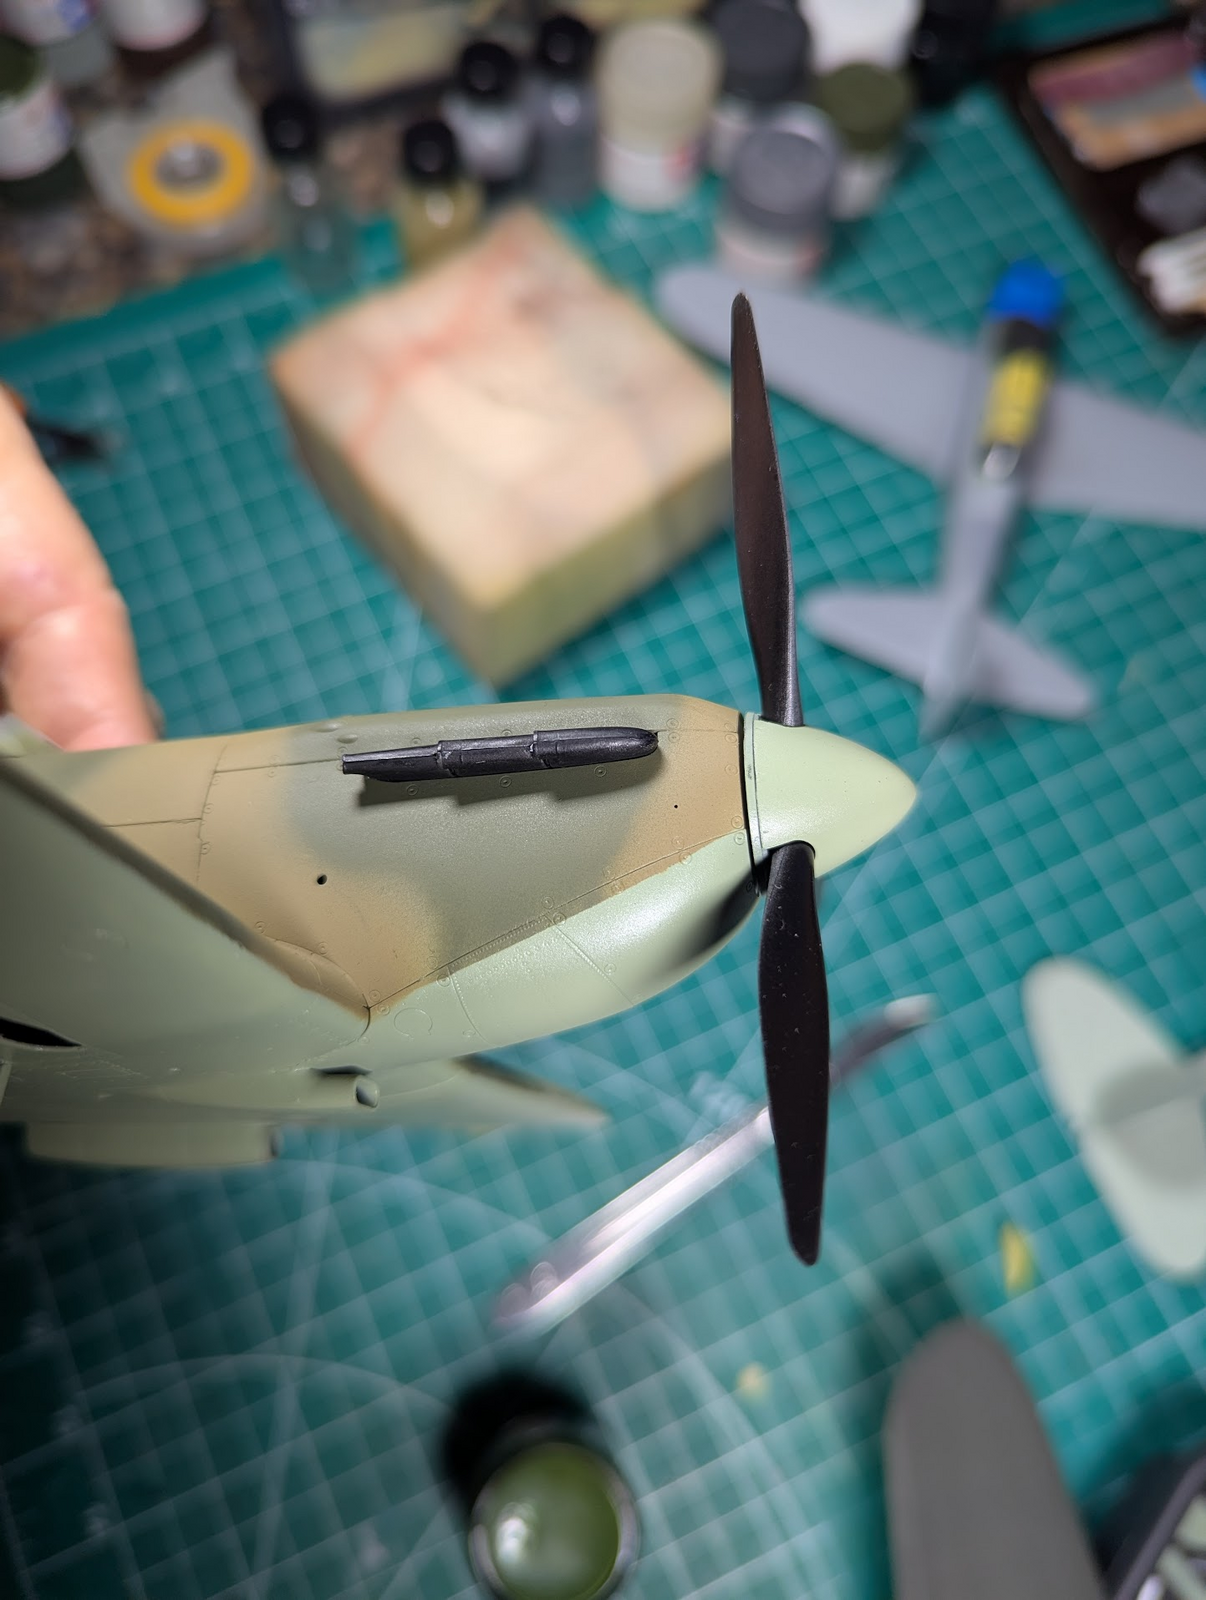
On detail that bugs me about Spitfire builds is the common mistake of following the panel line as the demarcation up front. Almost all models use that line which is an error, at least I got that part right.

1752351811240.png
 
Last edited:
The only place I've used Quinta Studios 3D decals is in the cockpit, where they appeared to adhere quite well—but there's no masking to be done.

I have a suggestion: repaint over the exposed primer. Paint the rivets on the decal sheet the exterior color. Reapply the rivets with the kit decals using your regular technique.

Now why the heck didn't either of us think of this before?!:oops:
 
Edbert
Beautiful job on the camo paint work. !!!! Nicely done. Your build is coming along nicely!
best
Gary
Docsudy
 
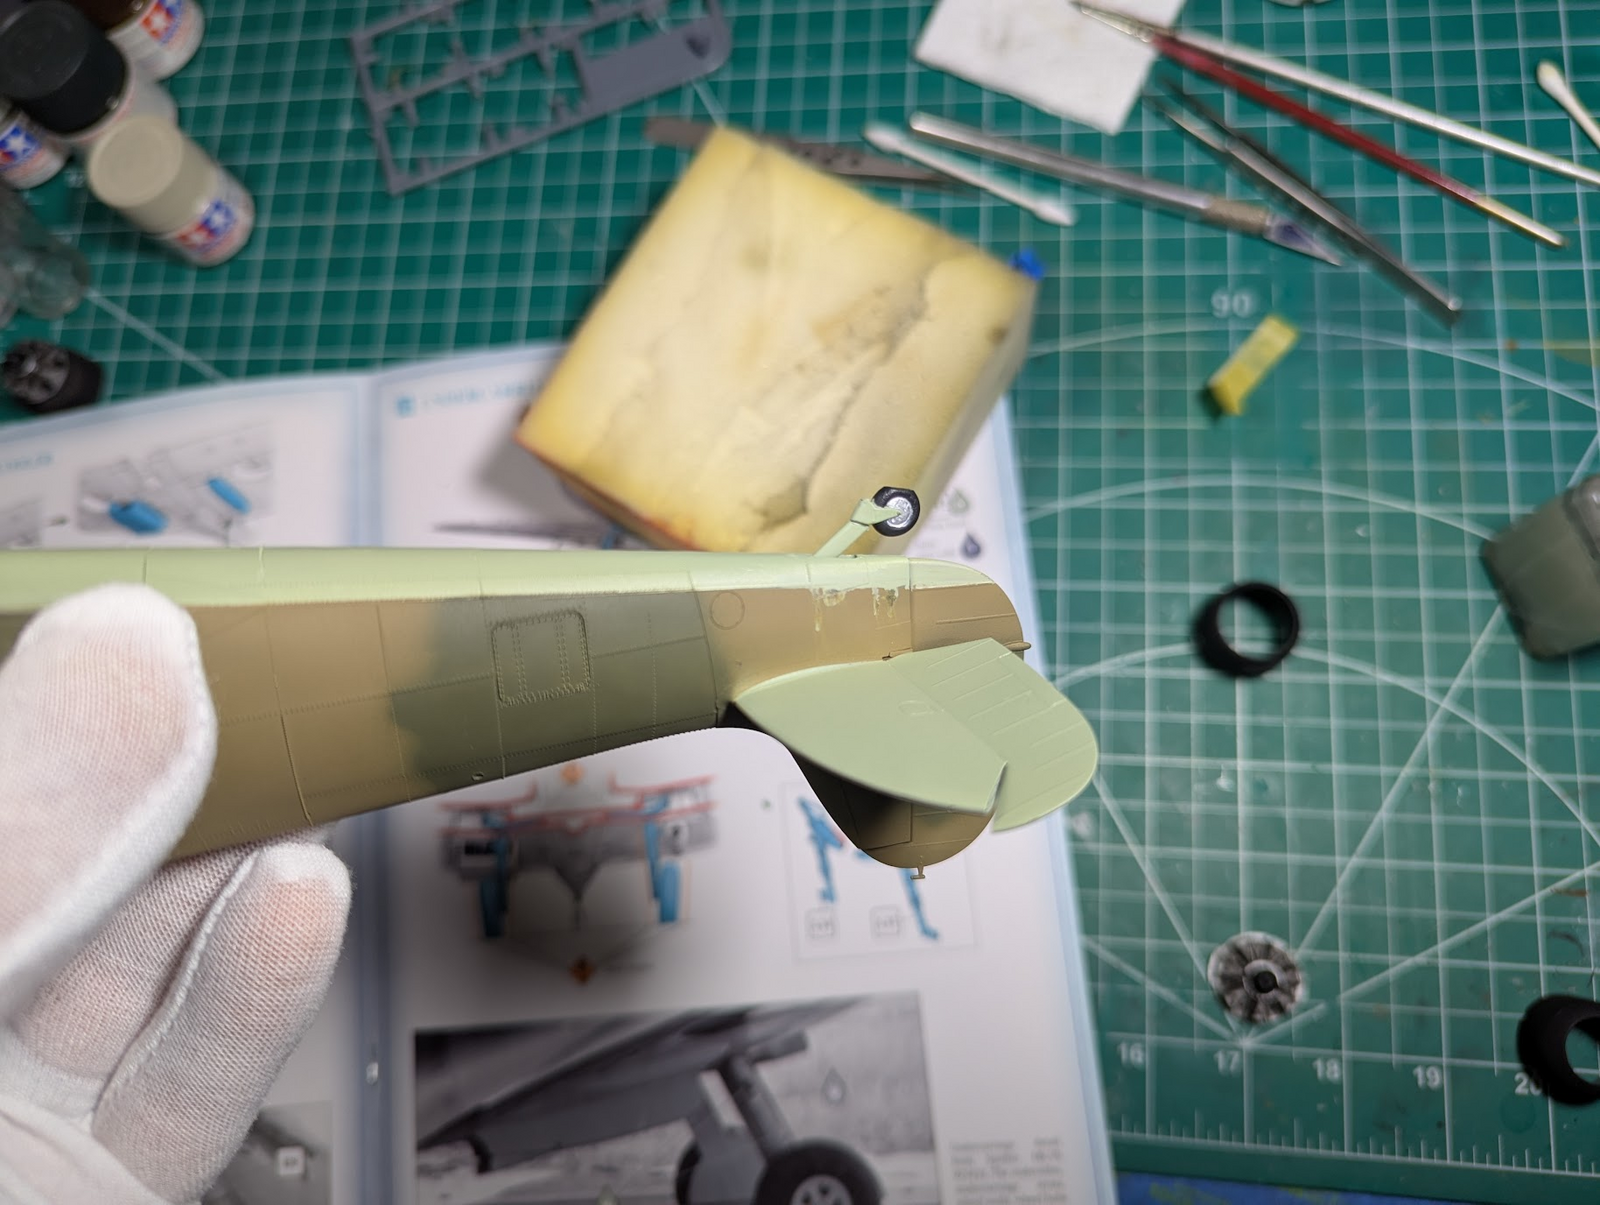
I noticed a small mistake, I did not extend the underside color far enough up the rudder. No big deal right, throw some tape on there and hit it with a little XF-21 and a regular brush.

1752508734495.png


I peeled the tape off and saw that it had bled underneath in two large and two small places. This is another argument in favor of the airbrush, that would not have happened, but at least it is an easy fix.
 
The touch up on that tail was cake of course, and I decided to quickly clear the whole thing before anything went wrong. Because of that I took no pictures, and yesterday started a sticker-session.

1753201881751.png

They are from Cartograph, and slightly on the thick side which I appreciate as long as they stick well.

1753201932274.png


After spending about 3 hours doing stickers, I was doing 2 kits at once again, I caused a near disaster. I'm feeling jinxed somehow, but I think I saved it. The walkway line shown in the 2nd pic is there in about 8 pieces. I had it really close to position and it wouldn't slide well so I picked it up. Did that without damage, but parts of it curled almost instantly, then stuck to themselves. I broke it up trying to untwist and " unadhere" itself. You can see some crookedness in there.

1753202129980.png


The other sticker-session mate.
 
Last edited:
Saving that walkway sticker was the point where I quit for the day. Cannot work while frustrated.

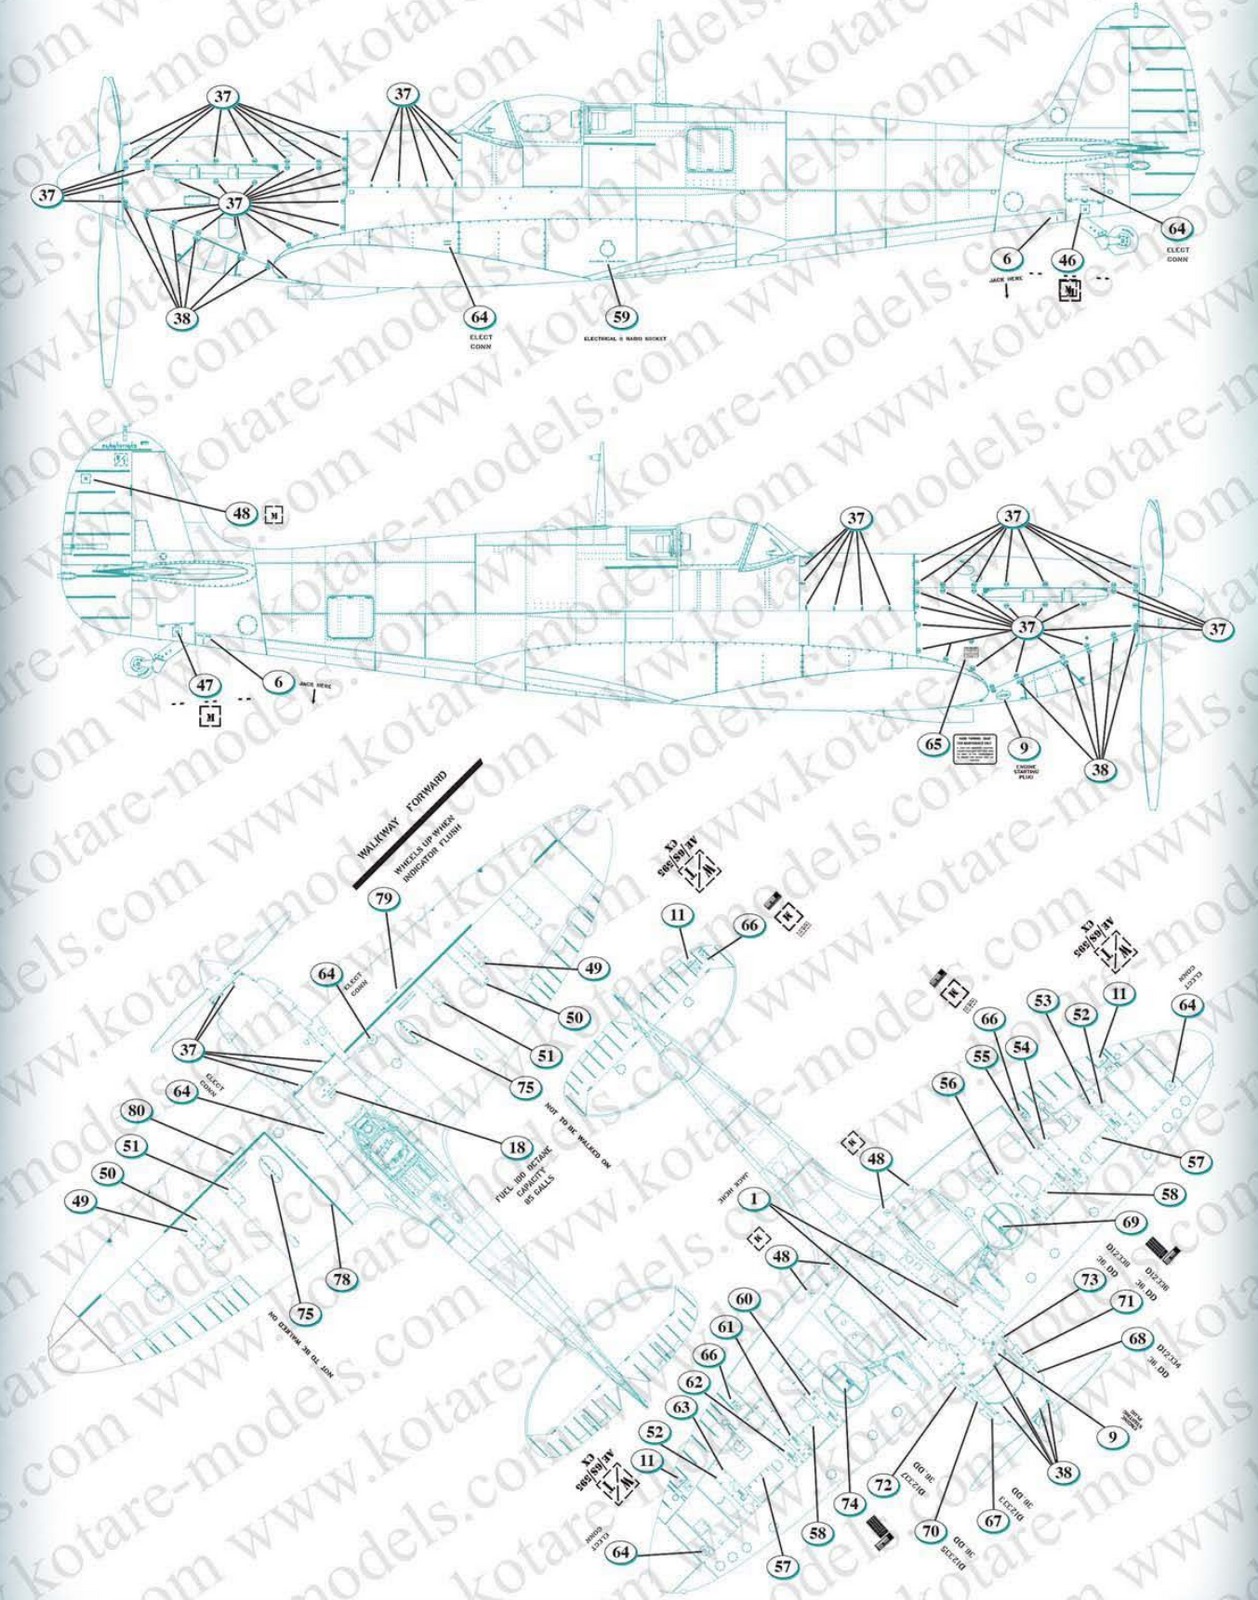
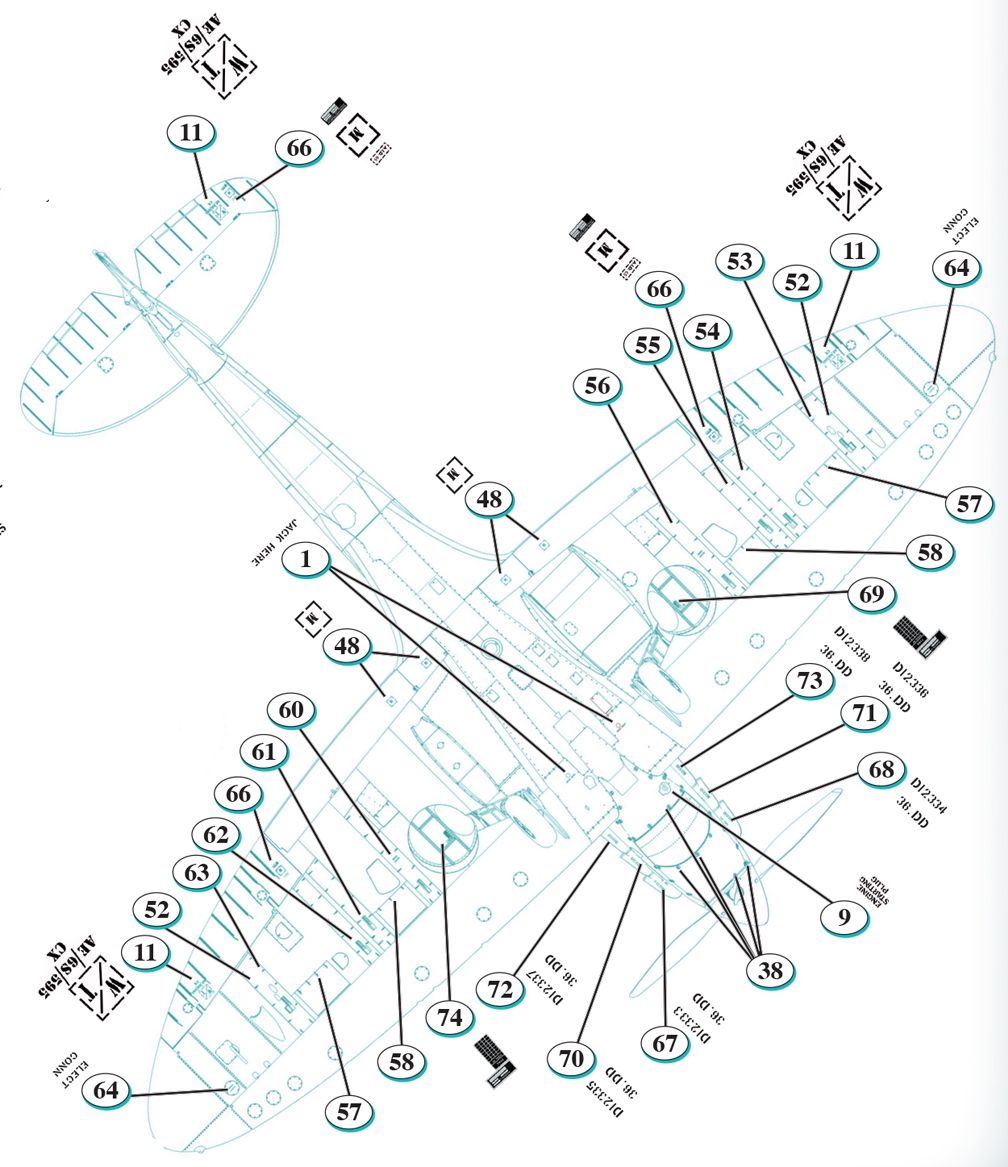
But I was considering stopping soon before it went sideways, based on the stencil sheet. It is nowhere near F-4 Phantom II levels, but I've never seen such as this on a WWII aircraft...

1753203007344.png
 
I'm still moving forward with this one. Learning (the hard way sometimes) to slow down is helping.

1753653624281.png


1753653652238.png

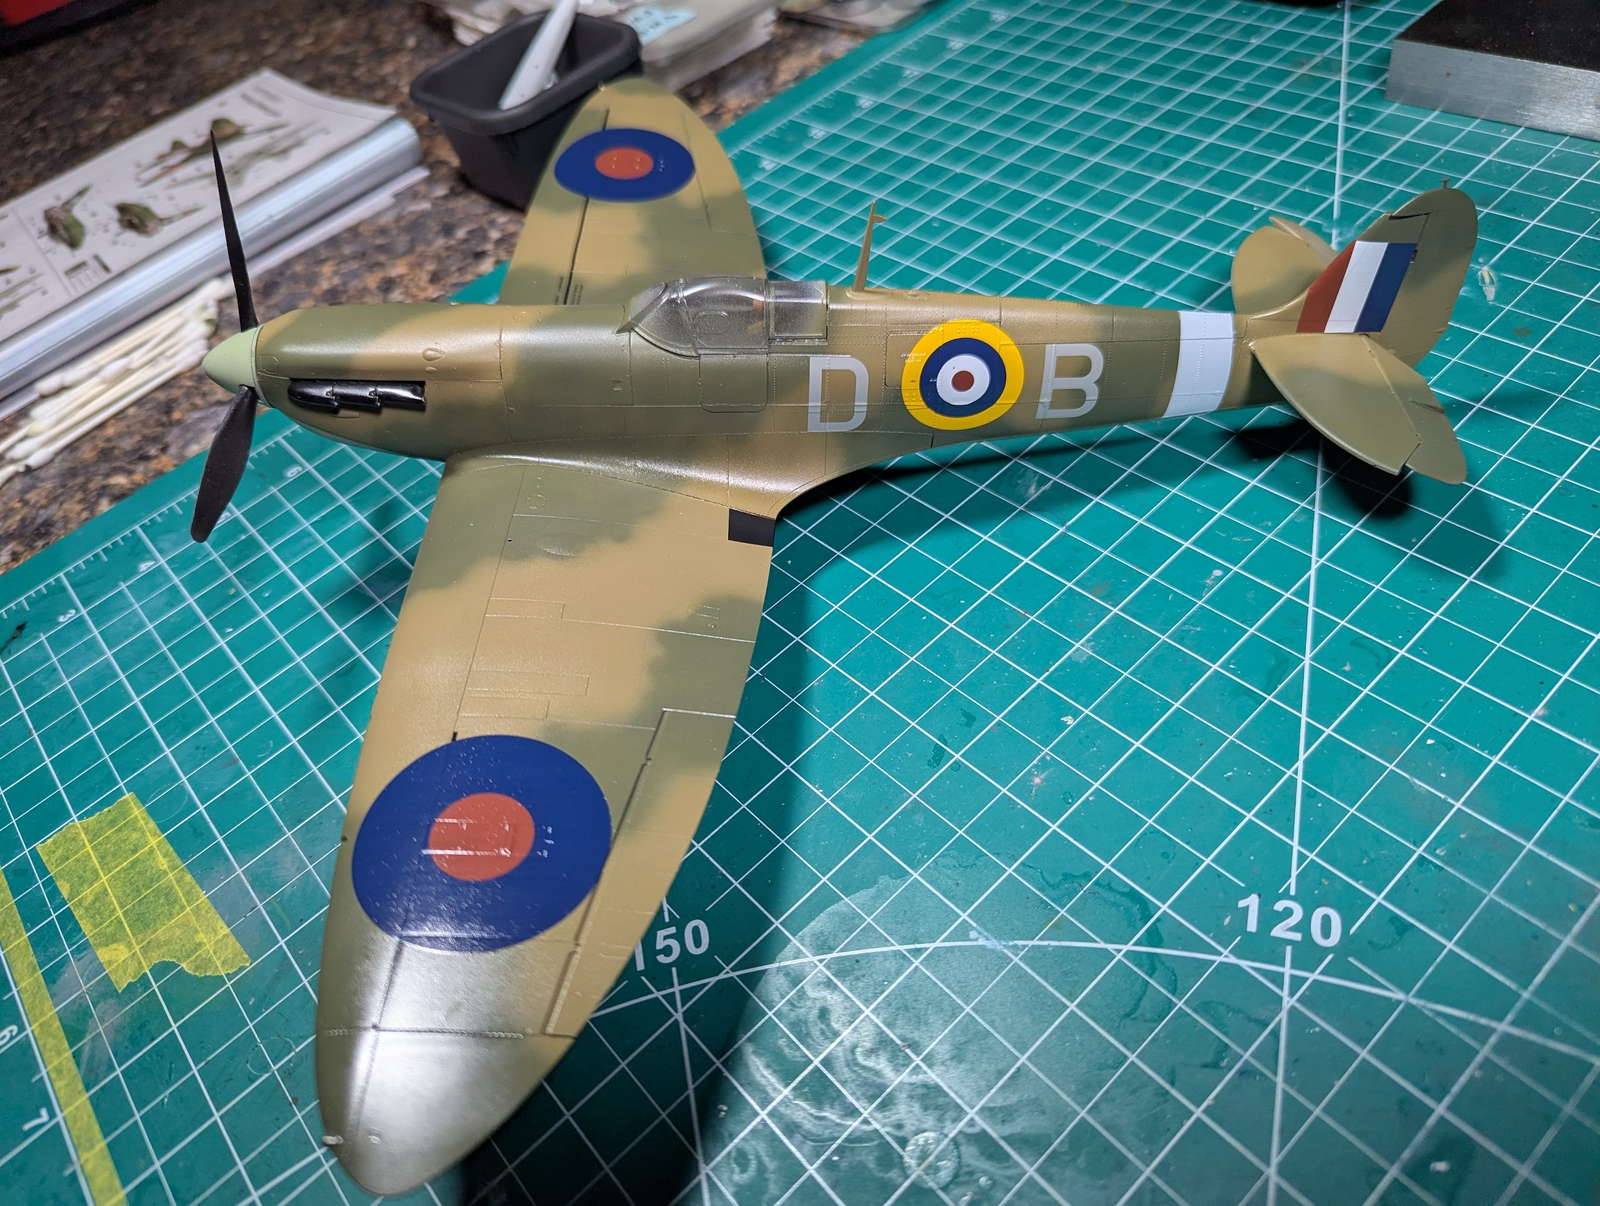
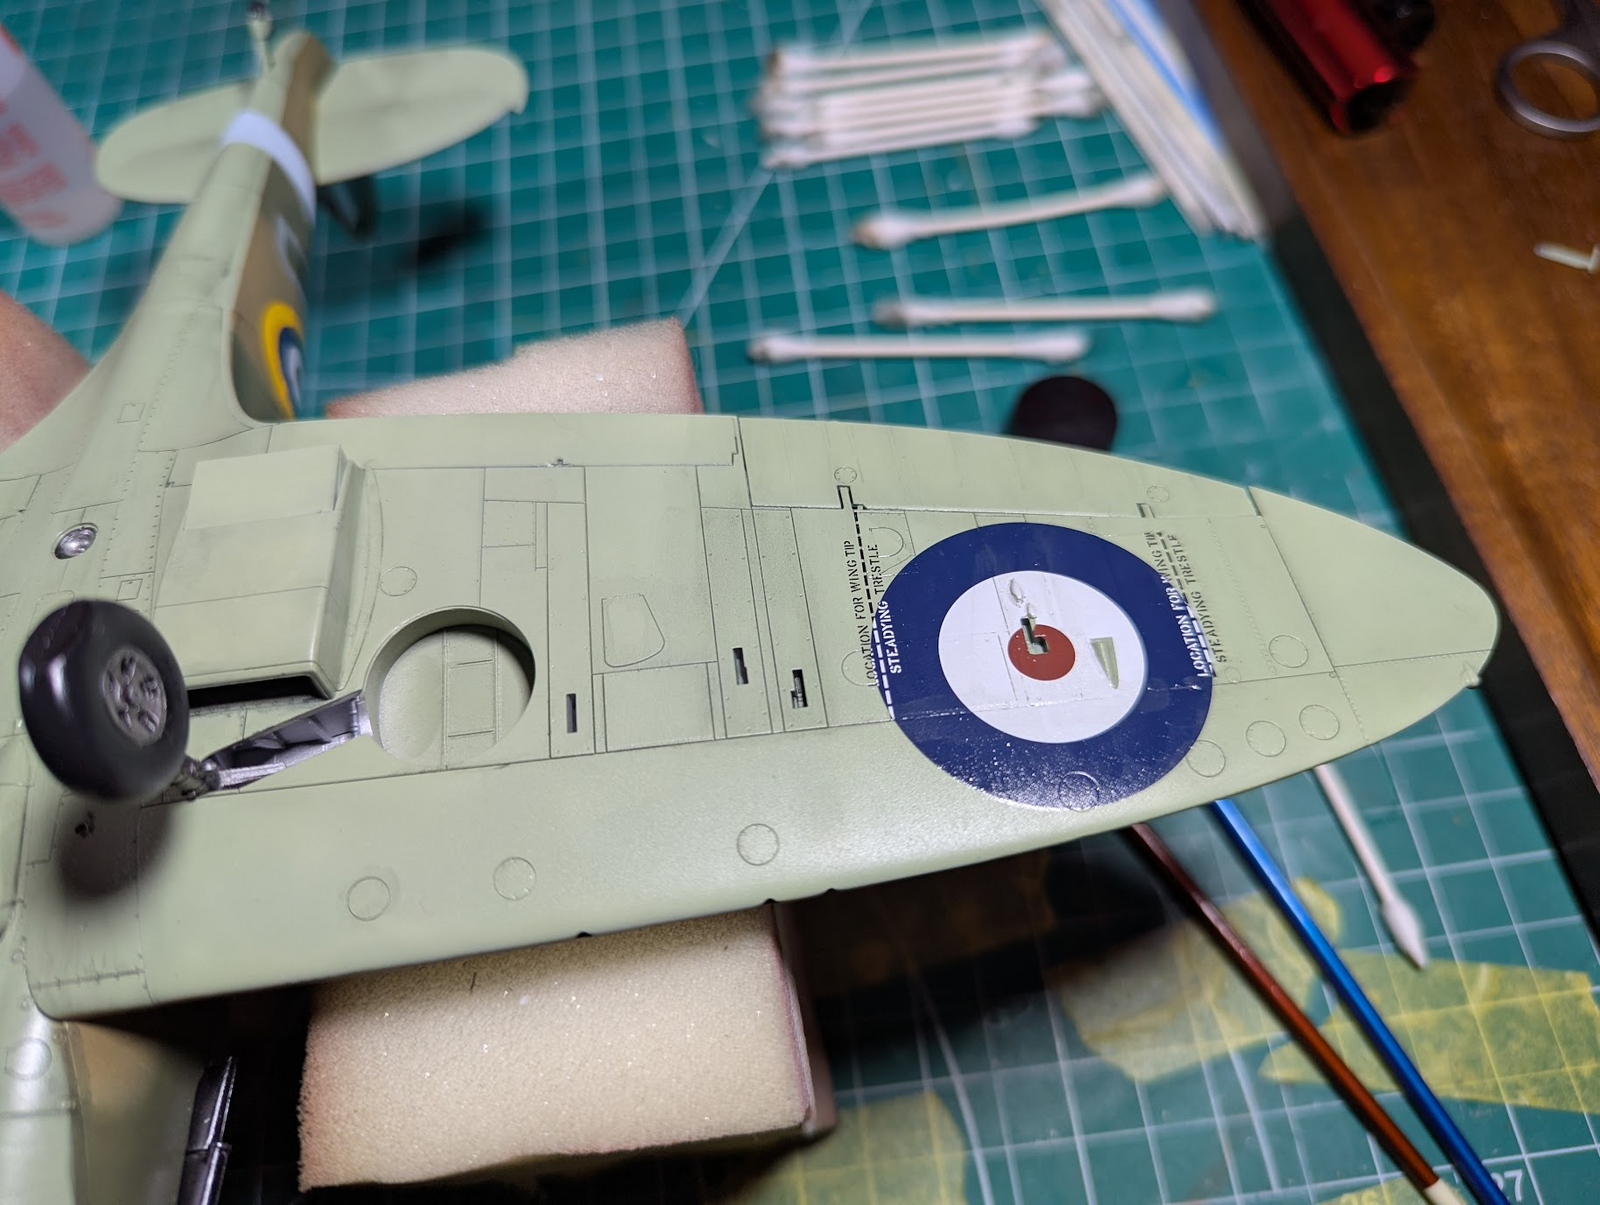
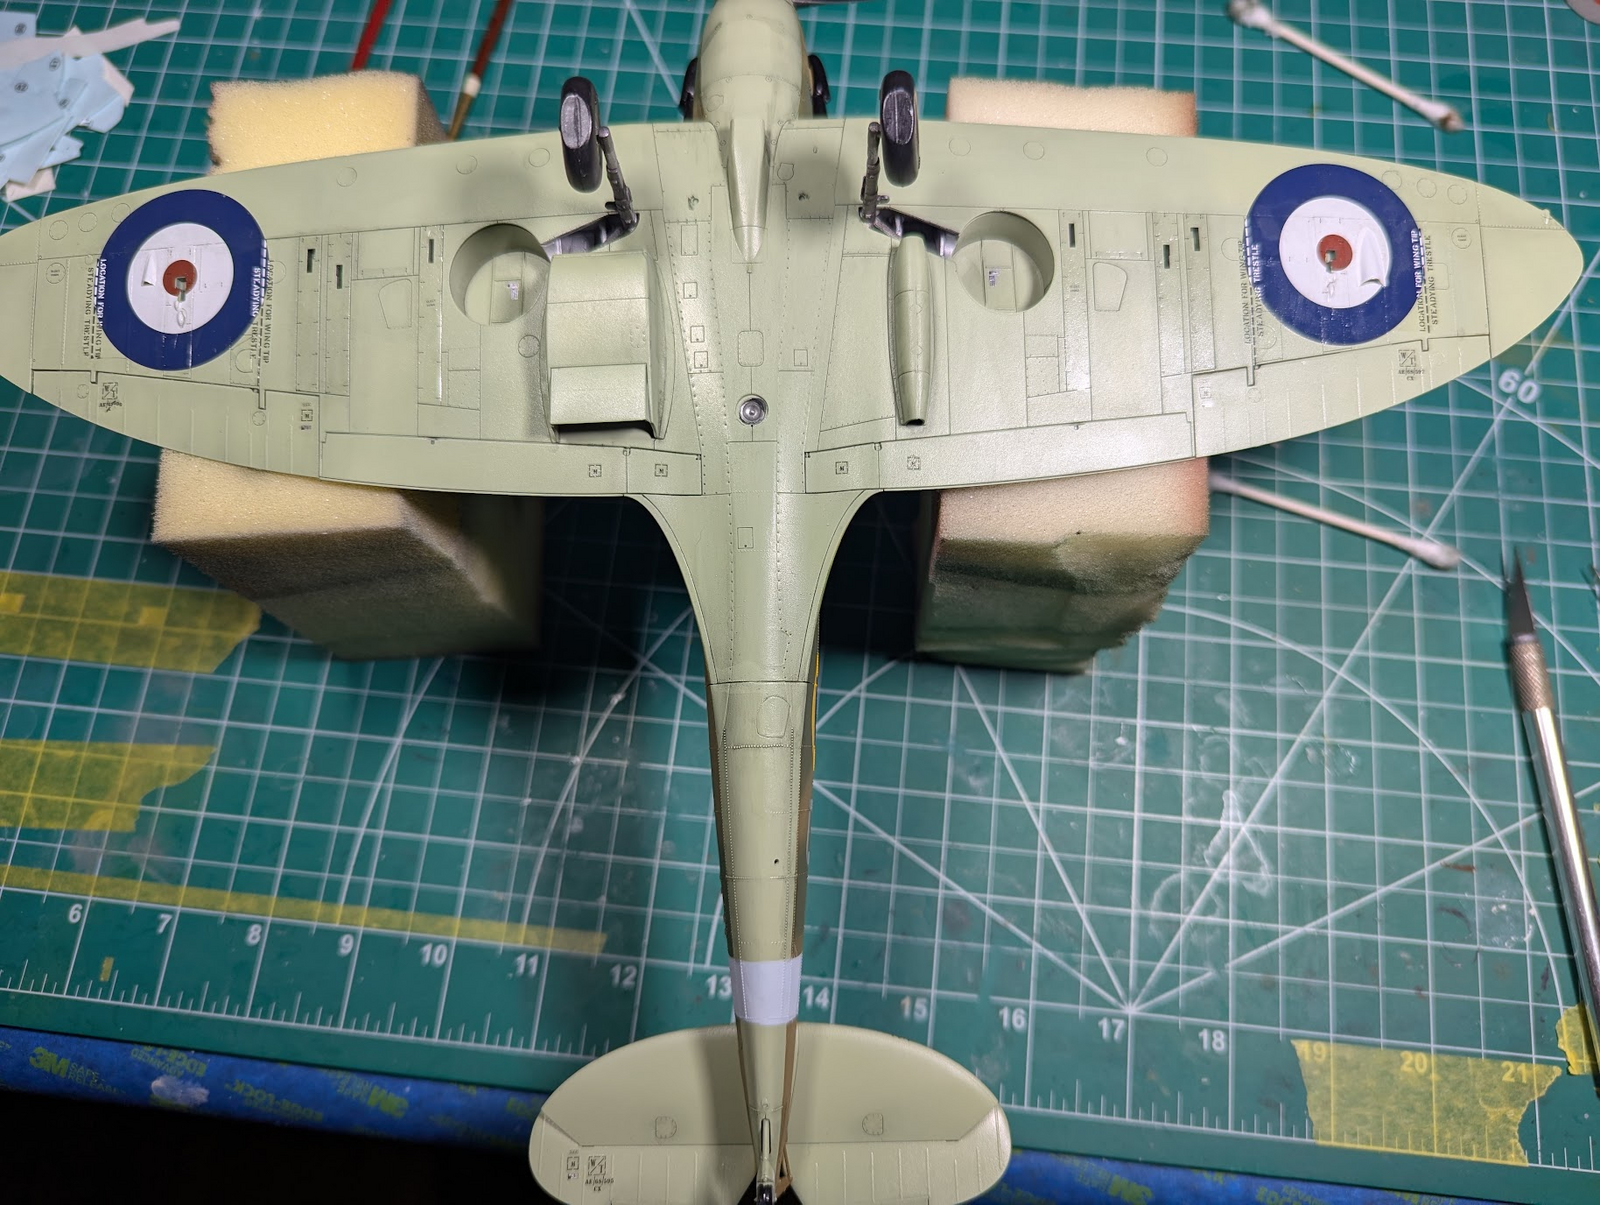
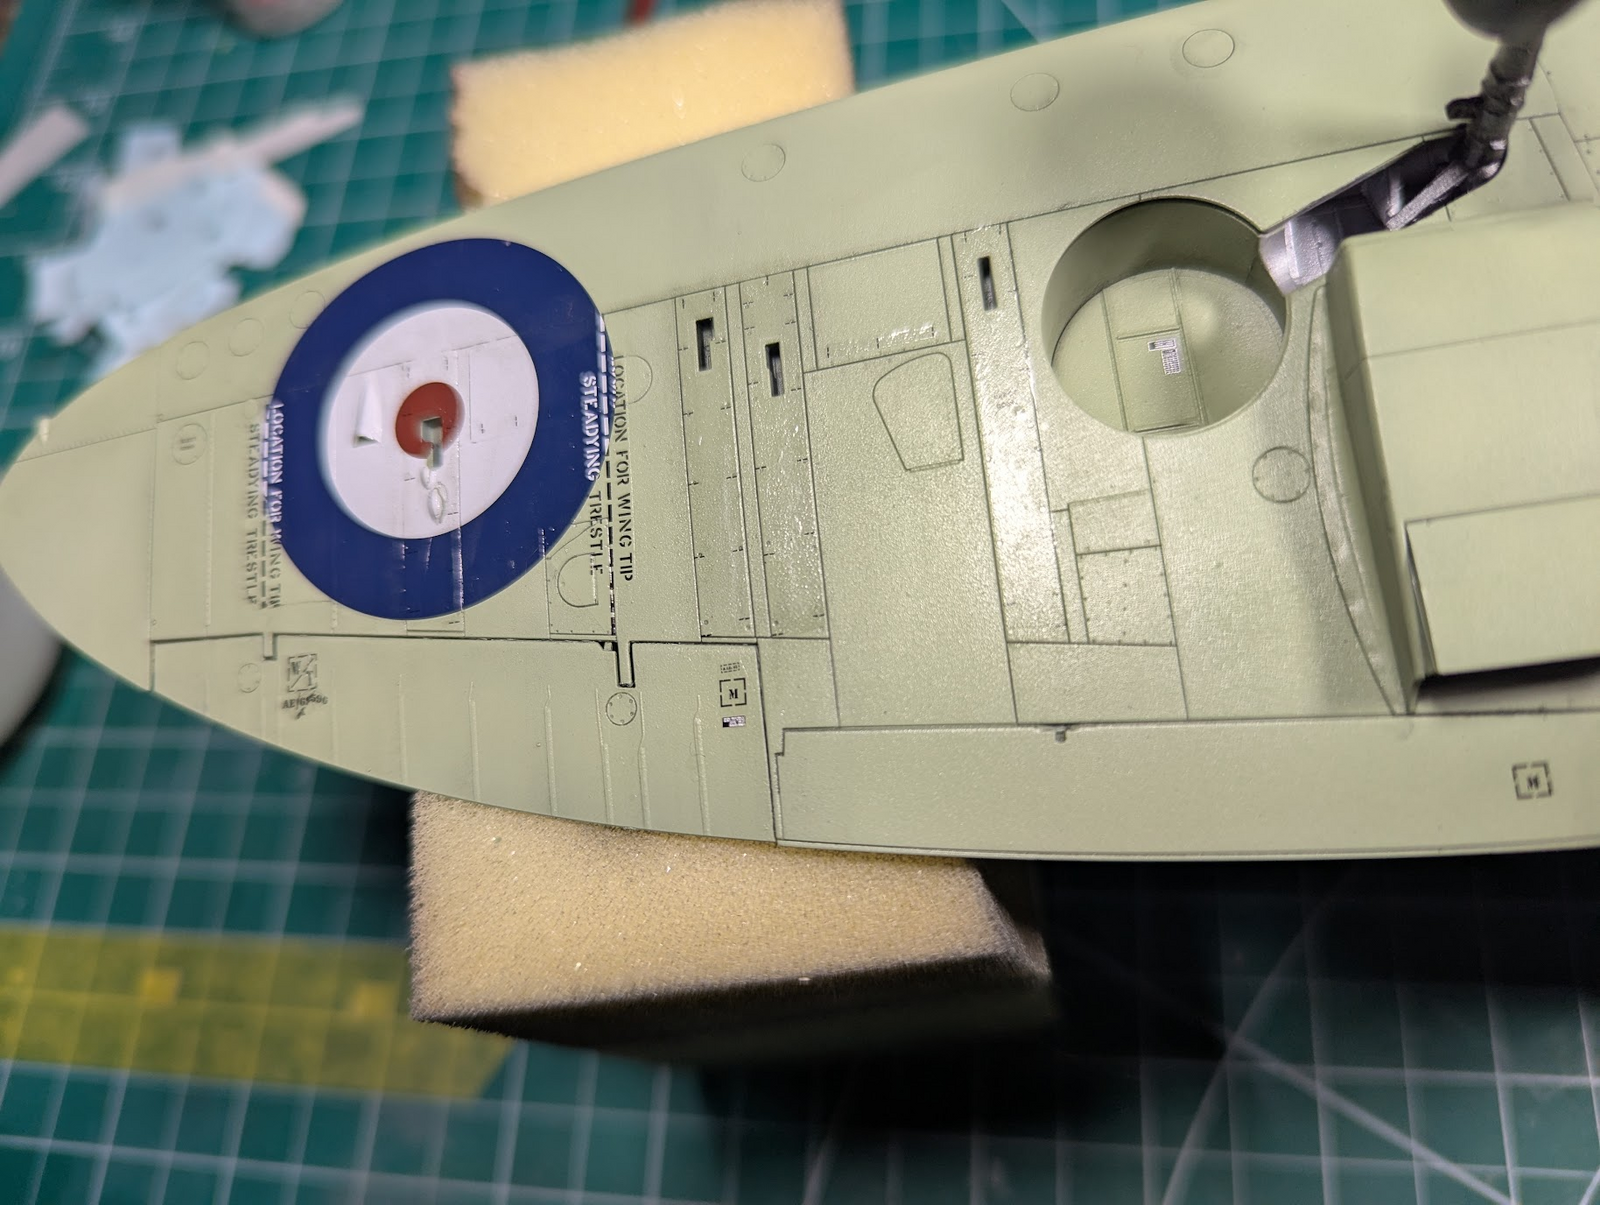
This picture is after panel lining but before stencils. It is a little hard to see but I wanted the large stickers to be down before panel lining so that I could have the shading on them.

1753653763190.png


1753653795454.png


You can see the gloss of the stickers in the detail shot.
 
HI Edbert what does the stencils say ?
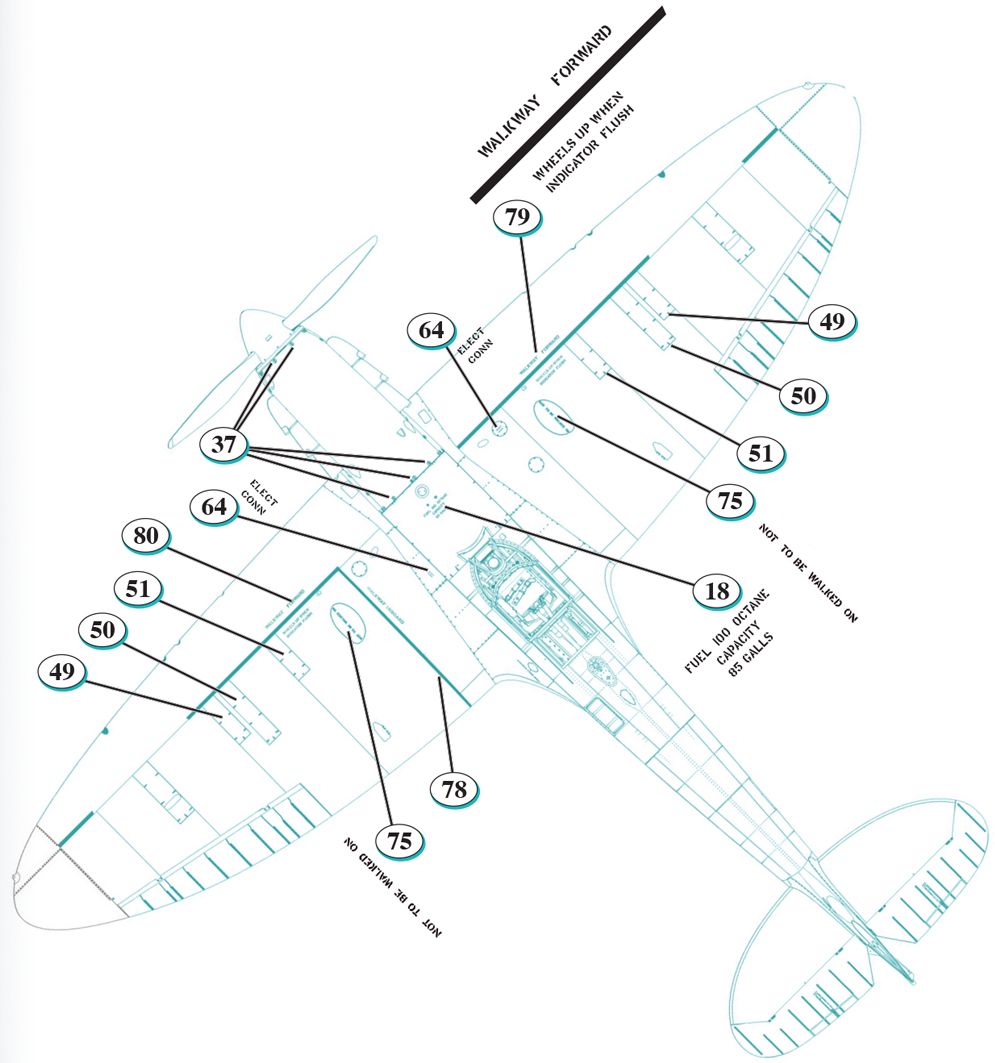
Many of them are markers for the fasteners on certain panels. The entire cowling has several dozen of them, white and black ones depending on background. They appear to be two small arrows of a sort, to show the mechanic were they are?

Some of them are single letter marks, I'm thinking a QA approval stamp, or like you get in your underwear an "inspected by #23" notation.

Others definitely have words.
1753707293403.jpeg


1753707328764.jpeg


"Jack here" "support here" "walk here" "electrical connection" etc.
 
I'm looking for advice. I made a mistake by trying to cut corners (will I ever/never learn?) and want some advice as to the best way to recover.

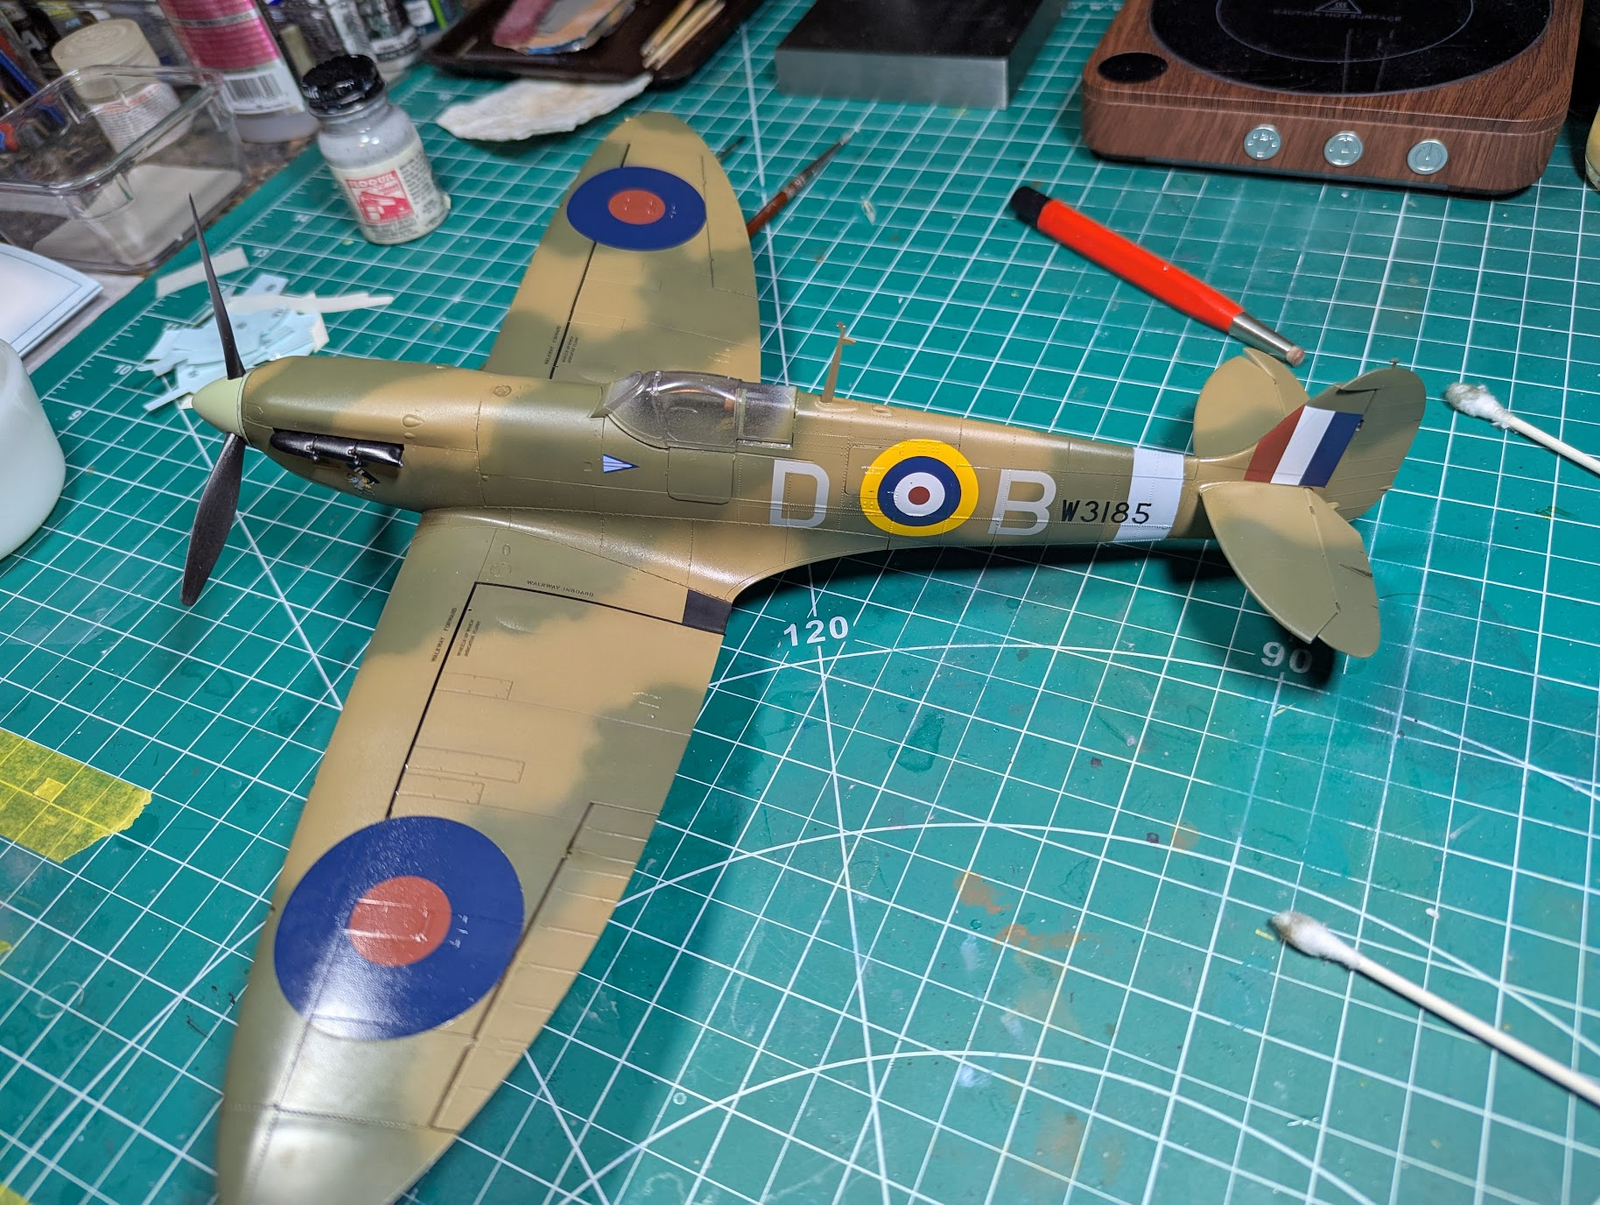
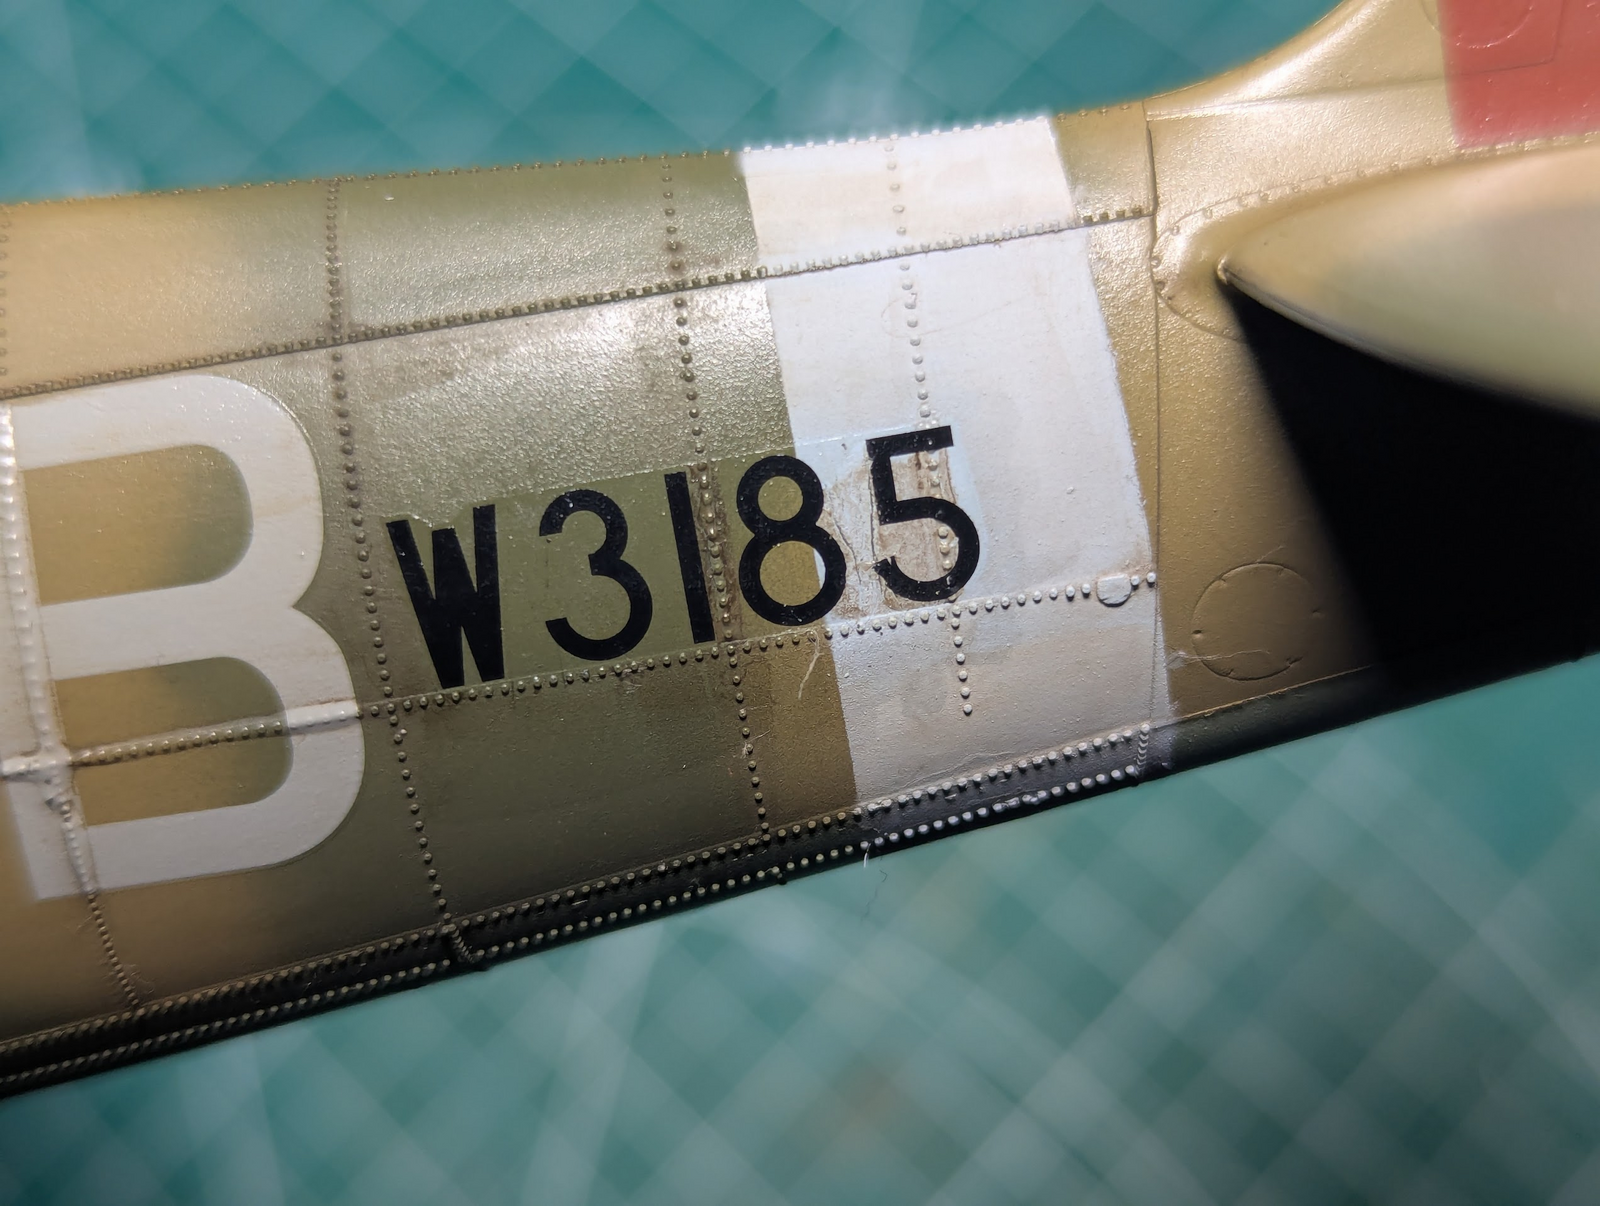
If you see the July 27th post above, where I have applied the sticker with the aircraft/tail number to the rear fuselage, it looks fine. What is not evident unless you are extremely observant, that vertical band of hyper-light-blue is matte, meaning not clear coated like the rest of the plane. This bit me when I started applying mild weathering. Here's what it looks like now.

1755381041862.png

Not too bad? Wait until you zoom in!

1755381084758.png

I've put it aside to think and consider options, but I do not have any good ideas, maybe just a few that do not suck as much as others, but no good answer I can see.
 
I'm looking for advice. I made a mistake by trying to cut corners (will I ever/never learn?) and want some advice as to the best way to recover.

If you see the July 27th post above, where I have applied the sticker with the aircraft/tail number to the rear fuselage, it looks fine. What is not evident unless you are extremely observant, that vertical band of hyper-light-blue is matte, meaning not clear coated like the rest of the plane. This bit me when I started applying mild weathering. Here's what it looks like now.

View attachment 155597
Not too bad? Wait until you zoom in!

View attachment 155598
I've put it aside to think and consider options, but I do not have any good ideas, maybe just a few that do not suck as much as others, but no good answer I can see.
RAF airfields of the time are turf. It rains a lot in England. Ergo, mud is … ubiquitous. You can apply mud streaking from the main landing gear to the aft part of the tail where the band is. That's about where it would hit.

Alternately, try to wash it off with whatever solvent you are using for the wash. "Dilution is the answer to pollution," at least in this case. By streaking it, you may be able to make it look like a muddy, streaked hand print, which is certainly a possibility.

I also noticed you have bubbles under the white "B" just forward of the number. This is an easy fix: cut the decal, get it to lay flat with clear coat, then paint over any resulting gaps with white. Fortunately, this is barely noticeable in the top picture. With care, the fix will be invisible to the naked eye … or even the naked camera …

"Patience! You must learn patience!" In my best Yoda voice. (Any resemblance to the actual muppet is entirely coincidental …):rolleyes:
 
I forgot to mention, the mystery of those big rivets...

It was discovered that raised rivets had a marginal effect on performance from the cockpit rearward. Since the cost and time needed to manufacture these birds with flush rivets was higher than the older more primitive method...Supermarine only used them on the front half.

Kotare, true to their reputation, included this "feature".
 
Alternately, try to wash it off with whatever solvent you are using for the wash.
I did, this was as good as I could get since the remaining brown is underneath the decal.

I considered pulling the decal off with tape and repainting the band, I could then use the number from a different plane. But it would not be Douglas'. I considered trying to use my mask cutter to make the correct numbers, but vinyl/tape will not get a seal on those rivets, no way.

I have seen early Spits that were quite filthy, as you said dirt, but also oil streaks. I was not going to do heavy weathering on this, but the idea of some mud splatters sounds like the best bet.

I think I'll continue weighing options for now, as you said...PATIENCE...or was that Yoda?
 
That's some really beautiful work. Fantastic build. You're a real trooper on those rivets. That's a serious pain to work with. I think I would've considered just sanding them off and then re-scribing them with a rivet tool. Sometimes you have to say accuracy be damned lol. I'm impressed what you did with them.

That really sucks with the staining on the tail band. Have you considered just touching it up with a detail brush?
 

Latest posts

Back
Top