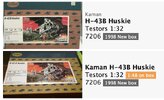
Testors 1/32 Kaman H-43B Huskie Helicopter

DavidsScaleModels

Well-Known Member
Joined
Sep 16, 2022
Messages
165
**************This was listed as 1/48 - Turns out the model is actually a 1/32 scale. Testors mis-printed their box as 1/48!********************
This build is using an old kit made by Testors. Testors was known for doing some of the unique subjects over the years. This is their 1/32 scale H-43B Huskie helicopter. It was originally released in 1961 and re-issued in 1967 to include Viet Nam parts. This version I am building is the final release of the kit in 1998. The Kaman Aircraft H-43B Huskie is a very distinctive helicopter. It uses twin main intermeshing rotors. These were counter-rotating so a tail rotor was not required. It was first flown in 1953 and was in service until the early 1970's. During the Viet Nam was it was utilized as an Air Rescue and Recovery helicopter which were part of the Pacific Air Rescue Center.

I started off working on the interior. The kit does not provide any details. I obtained a lot of reference photos online. The bulkhead between cockpit and crew area was the first part I started detailing. It required mold marks to be filled with putty first. Then using styrene sheets and some photo etch pieces from my spares drawer I added the center post and details to the crew side. I used cloth tape to replicate the padding on the cockpit side. The instrument panel and center console was assembled and detail painted. I used the kit decal for the instrument panel as it matched very well to the reference photos. Next I then test fit the interior to the fuselage and marked where everything lined up so I can detail the insides. The kit also does not include the roof for the crew cabin and the overhead console for the cockpit. I used some sheet styrene shaped for the roof then scribed the panel lines and rivet lines to add detail. The crew area also has an overhead light which I replicated by drilling a hole and installing a clear lens.

While measuring for the roof I realized the fuselage has two screened intakes molded in for the engine intakes. I cut these out and replaced them with some fine metal screening. There is also a section in the forward post that in the reference photos is open and the kit had these molded closed so I opened these up. Finally I worked on the cockpit seats. The rear of the seats was open so I used sheet styrene to make the backs. After painting them I then made the seatbelts from cloth tape and attached some photo etch buckles. Next I will be working on the overhead console for the cockpit and detailing the interior of the fuselage halves.


You can see all the photos and details from the start in the build log at: https://davidsscalemodels.com/build-log/1-32-kaman-h-43b-huskie-helicopter/


DSCN3523.jpg


DSCN3531.jpg


DSCN3534.jpg


DSCN3535.jpg


DSCN3536.jpg


DSCN3538.jpg


DSCN3539.jpg


DSCN3540.jpg


DSCN3541.jpg


DSCN3544.jpg
 
Last edited:
two screened intakes
... the screening makes such a huge difference!

To me, when a detail provides a proper affordance (it gives appropriate hints of its function), it seems so much more real!

A grill that air can actually flow through, a door handle that looks like it can be grasped and turned ( as opposed to molded on), a cleat that could have thread (scale rope) wrapped around it, a fire hose that has been folded and stacked.
I like seeing how you approach these details, because at scale, it often requires some ingenuity to replicate objects, given the physical properties and limitations of the materials we modelers have to work with.
 
The second week of the H-43B Huskie was spent starting the super detailing of the interior. After finishing the cockpit area and installing the screens on the fuselage I installed the kit interior. I then started detailing the crew area by using sheet styrene for the supports on the port side. I then used two paperclips to replicate the pipes that run along the side. I installed the top panel and used some putty to blend it to the kit section.

While waiting for the putty to cure I used some styrene square rods to detail the framework on the rear doors and a strip of sheet styrene for the lower braces.

I am working on the details between the supports and then need to detail the rear section benches and floor. Once these are done I can paint the port side and start adding the wiring that goes on the port side. I am hoping to start on the starboard side by the end of this coming week.

You can see all the photos and details from the start in the build log at: https://davidsscalemodels.com/build-log/1-32-kaman-h-43b-huskie-helicopter/


DSCN3545.jpg


DSCN3551.jpg


DSCN3553.jpg


DSCN3558.jpg


DSCN3562.jpg


DSCN3563.jpg
 
The third week of the Huskie I worked on detailing the aft section of the interior. First I panted the interior of the rear doors. The lower section is red and the upper section is the interior grey. Then using styrene square rods I framed the rear edge and drilled out the holes. The port side of the interior was also painted with the grey. The reference photo shows a cutout in the floor so using some sheet styrene I made the side extensions. There are two rows of seats along the rear sides with a cargo net type of back. I used some cloth tape to make the netting. I am now working on making the seat frames out of round styrene rods and will use cloth tape for the seats.

I still have more details to add to the port side but I needed to order some more sheet styrene for the shelves that need to be added and still make the wire cables. Then I can start on the starboard side details.

You can see all the photos and details from the start in the build log at: https://davidsscalemodels.com/build-log/1-32-kaman-h-43b-huskie-helicopter/


DSCN3564.jpg


DSCN3565.jpg


DSCN3567.jpg


DSCN3569.jpg


DSCN3575.jpg


DSCN3576.jpg
 
The fourth week of the H-43B Huskie I was able to finish detailing the interior in the crew area and assemble the fuselage halves. The seats were installed onto scratch built frames and then the seat belts were installed.

Moving over to the starboard side I added the supports and shelves. Installing these took a little time so that the floor and roof lined up correctly. The fuselage was then glued together. Only a few areas required putty. The starboards seats were then installed. I did a quick check on the rear doors on how they fit and aligned to the fuselage.

While the putty on the fuselage was drying I started working on the engine/rotor assembly. There is a large screen on the aft side of the assembly. I cut the plastic screening and installed a metal screen. The rotor shafts required a lot of filing and sanding to make them smooth and to install the gears that keep the rotors aligned.

I went to check the fit to see how the rotor assembly aligns to the fuselage and found out I have a huge problem. The gear assembly is huge! Since I added a roof there is no room for the rotor assembly to mount to the fuselage. The kit has the gears sit way down into the crew area! At this point I do not think there is enough room in the rotor assembly to re-design the gears and fit them inside. I will look it over this week but if all else fails the rotors will not spin.

This upcoming week I will look at the rotor assembly and then I need to scratch build the overhead console for the cockpit. I am hoping to have the tail assembly installed by the end of the week.

You can see all the photos and details from the start in the build log at: https://davidsscalemodels.com/build-log/1-32-kaman-h-43b-huskie-helicopter/


DSCN3578.jpg


DSCN3582.jpg


DSCN3584.jpg


DSCN3593.jpg


DSCN3599.jpg


DSCN3604.jpg


DSCN3605.jpg


DSCN3606.jpg


DSCN3607.jpg
 
Love those seats!

Cool how 'soft' detailing, as well as being interesting on it's own, adds veracity to the 'hard' elements of the actual airframe, by contrast, and in this case, by adding a very easily relatable 'human' element of webbed seating we might all have experienced, even if it was just a lawn chair in the 60s and 70s!
 
The fifth week of the Huskie Helicopter I started off by doing some cleanup on the fuselage and adding some of the minor details. The kit does not include the overhead console in the cockpit so using some styrene, photo etch, and cloth tape I scratch built the console assembly. For the knobs and switches I cut small pieces from thin styrene rods. There is a long lever on the front of the console. I used some styrene rod for the base and a piece of wire for the lever. I used some acrylic gel to for the knob on the end of the lever.

The overhead console was installed and I worked on the tails and booms. The tails had numerous mold marks that needed to be filled with putty. The exhaust tube was assembled and sanded smooth. I also sanded the exhaust end to thin out the plastic as it was way too thick. The tails were installed and required more putty on the outside surface.

Finally I worked on the landing gear. The struts required a lot of trimming due to a lot of flash. I removed the kit molded strut arms and replaced these with some photo etch versions. The landing struts were then mounted onto the fuselage. The landing gear wheels were cleaned up and painted and the skis had some deep mold marks which required putty.

The next week I am hoping to finish some more details and start the painting of the helicopter. I will be painting it in the typical South East Asia camouflage used during the Viet Nam war.

You can see all the photos and details from the start in the build log at: https://davidsscalemodels.com/build-log/1-32-kaman-h-43b-huskie-helicopter/


DSCN3608.jpg


DSCN3612.jpg


DSCN3615.jpg


DSCN3616.jpg


DSCN3621.jpg


DSCN3624.jpg
 
Fun to watch this build, as the last plastic kit I nearly finished as a pre-teen was the Huey.
Don't remember what came of it.
Interesting to see what you choose to fix, to enhance, or to replace with aftermarket and scratch.
 
The sixth week of the Huskie I finish up on the exhaust. It was painted with Vallejo Metal Jet Exhaust and Duraluminum then using grey and rust pastel chalk I weathered it to match the numerous reference photos. The landing gear was then painted and installed. The landing gear rear struts required some minor length adjustments so the helicopter could sit evenly. I then cleaned up the doors and used some 30 gauge wire to create the door handles.

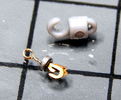
Moving forward I used some Vallejo Dark Green and Sienna Tan for the base coat of paint on the helicopter. The underside was painted with Light Grey. I used the early SEA camouflage scheme which only uses two colors. With the base coat of paint drying I reviewed the rotors. There are some huge sinks in the mold so I had to fill them with a few layers of putty. I then cleaned up the hoist frame. The hook that comes in the kit is too large and looks wrong. I used some wire, a small thick washer, and a spare photo etch hook. I then assembled the hoist frame. Once this had fully dried I used a 0.075mm drill to drill the hole for the hoist cable. For the hoist cable I am using some 6 lbs test fishing line.

I still need to correct the warp in the rotors as they are warped a lot. Then I can start applying the decals. The next week is a busy week so I do not know if I will finish it by next weekend or the week after but I am getting close to the completion.

You can see all the photos and details from the start in the build log at: https://davidsscalemodels.com/build-log/1-32-kaman-h-43b-huskie-helicopter/


DSCN3627.jpg


DSCN3631.jpg


DSCN3634.jpg


DSCN3636.jpg


DSCN3643.jpg


DSCN3644.jpg


DSCN3646.jpg


DSCN3647.jpg


DSCN3649.jpg


DSCN3651.jpg
 
The seventh week of the Huskie started off by correcting the warped rotor blades. The process I used was very simple. I used a thick 10" long steel ruler. I used some nylon zip ties to hold the rotor blade down and straight. The next step was to take a 2-cup measuring cup filled with water and micro waved it for 2 minutes to bring the water near boiling. Styrene plastic typically starts to soften at around 220 degrees (boiling point of water). I slowly poured the hot water across the ruler holding the rotor blade. It took about 30 to 40 seconds to pour the water. I waited another 30 seconds and then rinsed the blade under cold water. This worked perfectly to straighten the blade. I did this three more times to the rest of the rotor blades. I have used this method before to aid in removing warped wings and fuselages. One word of caution, when using it to correct fuselages you need to be careful not to tighten the zip ties too tight. Otherwise you will damage the fuselage.

Once the rotors were corrected I worked on the decals. I had to make decals for the tails. The kit decals do not include the U.S.A.F. decals for the tails. The instruction sheet shows them but they are not on the sheet. I also changed the aircraft tail numbers to match one of the Viet Nam versions I was using for reference. The rest of the kit decals were used and these worked very well. The kit decal sheet provides all the small placard decals however the instructions have no references on where they go. I used a few of the many reference photos to see where they go in the helicopter.

With the decals all applied I then sprayed the top coat of clear to seal them. The hoist frame and hook were installed and I then began working on the windows and windscreen. The cockpit upper windows were tinted green using Tamiya clear green. The side marker lights on the fuselage were cut off and I used acrylic gel to make the lenses then painted them with the Tamiya red and green. There is a brace that goes between the rotor shafts. This has a red navigation light. I cut off the molded light and used a piece of the clear styrene tree that was sanded down to a dome and painted with the clear red. The windows for all the doors were installed and the frame work on the front windscreen was painted then the windscreen was installed.

The exhaust tube was installed and the final detail I made was the red netting that goes on the rear of the fuselage. The reference photos show some of the helicopters with the rear doors removed and the netting across the back and others show the netting folded up on the starboard side when the doors are used. I made the netting out of the cloth glass tape and the ends I used styrene rods for the mounts. The netting was painted red and the poles were the same interior grey.

All that is left to do now is assemble, detail, and paint the rotors then install them. I did not have time last night to finish off the helicopter. I will finish the helicopter to night, clean up the bench, and then I can figure out what the next build will be. Stay tuned for the final photos of the completed Testors 1/32 Kaman H-43B Huskie Helicopter. I will also start the next build as well.

You can see all the photos and details from the start in the build log at: https://davidsscalemodels.com/build-log/1-32-kaman-h-43b-huskie-helicopter/


DSCN3654.jpg


DSCN3656.jpg


DSCN3658.jpg


DSCN3659.jpg


DSCN3663.jpg


DSCN3664.jpg


DSCN3668.jpg


DSCN3670.jpg


DSCN3672.jpg


DSCN3674.jpg


DSCN3676.jpg


DSCN3680.jpg
 
The sixth week of the Huskie I finish up on the exhaust. It was painted with Vallejo Metal Jet Exhaust and Duraluminum then using grey and rust pastel chalk I weathered it to match the numerous reference photos. The landing gear was then painted and installed. The landing gear rear struts required some minor length adjustments so the helicopter could sit evenly. I then cleaned up the doors and used some 30 gauge wire to create the door handles.

Moving forward I used some Vallejo Dark Green and Sienna Tan for the base coat of paint on the helicopter. The underside was painted with Light Grey. I used the early SEA camouflage scheme which only uses two colors. With the base coat of paint drying I reviewed the rotors. There are some huge sinks in the mold so I had to fill them with a few layers of putty. I then cleaned up the hoist frame. The hook that comes in the kit is too large and looks wrong. I used some wire, a small thick washer, and a spare photo etch hook. I then assembled the hoist frame. Once this had fully dried I used a 0.075mm drill to drill the hole for the hoist cable. For the hoist cable I am using some 6 lbs test fishing line.

I still need to correct the warp in the rotors as they are warped a lot. Then I can start applying the decals. The next week is a busy week so I do not know if I will finish it by next weekend or the week after but I am getting close to the completion.

You can see all the photos and details from the start in the build log at: https://davidsscalemodels.com/build-log/1-32-kaman-h-43b-huskie-helicopter/


DSCN3627.jpg


DSCN3631.jpg


DSCN3634.jpg


DSCN3636.jpg


DSCN3643.jpg


DSCN3644.jpg


DSCN3646.jpg


DSCN3647.jpg


DSCN3649.jpg


DSCN3651.jpg
I think this is AI. Ask questions no answer. So no more questions barley cuz you'll never get an answer from this guy
 
It looks like he's more interested in writing about how he built the model than in responding to questions about just that :(


Write your reply...

Latest posts

Back
Top