Boatmans 1/32 scale phantom F4E

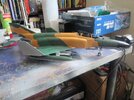
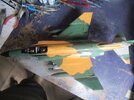
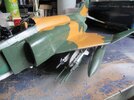
I think what I'm seeing online is not what your eyes are seeing. In the photo, as it appears on my monitor the right wingtip, center fuselage, left wing, tail fuselage, and left stabilizer browns are all slightly different. The wing and stabilizer brown-tan looks about as I would expect. Since this is in daylight, the color difference is likely an electronics issue: camera to computer to internet to computer. I'd say if it looks right to you, it probably is.
HI Again yes it does look right to me as the tan is from the same timlet an its been wel stired up so i can now press on an fit the cock pits an for a start they will be closed an ungluded bu i hope to have the canopys open an got the crew members
chrees marten for you reply sir
chrisb
 
the color difference is likely an electronics issue: camera to computer to internet to computer
More accurately: probably an issue with colour profiles being stripped somewhere along the way, or simply ignored, and differences in how screens are calibrated, or even how high their brightness is turned up.

No photo is exactly like the real colours, and ones on a computer screen of any kind are especially likely to be off.
 
I think it is the lighting.

I use fairly intense LEDs ay my indoor bench as well as my garage spraying area.

Lighting totally matters, Will Patterson is delusional about LEDs.
 
If you want accurate colours on your model, you should paint them under the same kind of lights as under which you will be displaying them. That is, if you put them in your living room that has incandescent bulbs behind pink lampshades, you should really put that same lighting in your hobby room so that you can choose or mix paints that in that light look like the colour they're supposed to be.

Of course, this is not always practicable, especially if you intend to display your models in different places, like at model shows around whichever country you live in, or if you also want to take photographs of them to show on forums or even have printed in magazines.
 
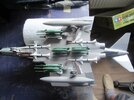
HI GUYS well its been a few days since i last posted any pics on this phantom reasons well for the firts thing the bombs were a hard job to get reasonably right an i may have made some mistake as these instructs are crap an its took so long studying them insrucs so way go the time but i think ive got it reasonably right so some pics an it will soon be finished just the canopys an poilots to fit an decals an wow she carried a heck of a weapons load if ive got it right that is IMG_0943.JPG
 
Hey boat man! Great job on this. I've enjoyed following this build. Are you sure you hand painted everything? Looks better after you changing the colors. And I hear you about the weapons loadout. I've built one of those before and if I remember correctly it almost took me longer to put together and paint all the missiles with all the tiny stencils than it took me to build the plane.
 
Hey boat man! Great job on this. I've enjoyed following this build. Are you sure you hand painted everything? Looks better after you changing the colors. And I hear you about the weapons loadout. I've built one of those before and if I remember correctly it almost took me longer to put together and paint all the missiles with all the tiny stencils than it took me to build the plane.
HI Rob yes every thing hand painted bar the bottom which was rattlecan sprayed an yes this was an still is a very hard kit to build as yes you are right about the bombs an such took me days to paint an get them to fit as they were terrible fits but got them done in the end jus a bit more to do then its fin cheers Rob for your reply
chrisb
 
I knew you'd do it mate - crack on!
Steve
HI Steve well you must be able to see in the future if you knew i would be able to build this kit as boy it took some doin an i can see why you dint finish it but thanks for the start you gave me just now to fit the canopys an decals just got to hope they dont splinter as had one do it so far
chrisb
I didn't finish it Chris because (a) I was too lazy, and (b) I don't have the space to display it (plus, in retrospect) I knew I wouldn't do it justice!
Steve
 
I didn't finish it Chris because (a) I was too lazy, and (b) I don't have the space to display it (plus, in retrospect) I knew I wouldn't do it justice!
Steve
HI Steve thats a pity as its was hard work building this kit but in some ways ive enjoyed doin it an lighting it up to go with my big super tomcat an super hornet an the challenge of doin a big phantom as never done one before an yes its easy to go down the lazy route as that near happened to me over last xmas untill some kind persons sent me both kits an that got my mojo back lol
And CHEERS for you in doin so as ive now got these other kits to build so got to force myself to get buildin an then im happy ATB Chrisb
 
Looks great Chris with her weapons.Good on you for persevering with it.Colours look good to my eyes.Decals next?
Richard
 
HI RICH THANKS yes she's comin on an yes ive ben fittin on some decals today but some slintered but i managed to get them on ok
chrisb
 
Hey boat man! Great job on this. I've enjoyed following this build. Are you sure you hand painted everything? Looks better after you changing the colors. And I hear you about the weapons loadout. I've built one of those before and if I remember correctly it almost took me longer to put together and paint all the missiles with all the tiny stencils than it took me to build the plane.
HI ROB any chance of a couple of pics of your phantom on here as id love to see what you made of this very hard kit ?
chrisb
 
HI GUYS well she's finished an this was the hardest build ive ever done as hardly anything fitted so a lot of filelin down the parts to get them to fit an the worst were the canopyies but made them fit with my mini dremel an grind stone an she turned out not to bad as im fairly pleased with the end result now ive taken loads of finshed pics but as im only allowed to post 10 pics i'll show what i deem the best hope you guys like her IMG_0963.JPG


Write your reply...

Latest posts

Back
Top